Objective
You have a given WebLogic Resource properties file stored in a Git repository. This properties file will define several data sources we want to deploy to a WebLogic server. The WebLogic servers we will be using in this tutorial are running Oracle SOA Suite, but this tutorial can be used for all WebLogic servers, regardless of installed technology. The goal of the tutorial is to automate the deployment of the configuration across multiple environments. This automation will include:- Cloning the properties from a Git repository
- Deploying the configuration to multiple environments
- Utilizing property replacement to adjust environment-specific passwords as deployments progress through the environments
Checklist
Checklist | Description |
|---|---|
WebLogic Admin User | Admin user name for WebLogic server. |
WebLogic Admin Password | Weblogic Admin User password for WebLogic server. |
Oracle WebLogic Home (WL_HOME) | WebLogic Home Directory. (e.g. /u01/oracle/products/fmw/wlserver) |
WebLogic Domain Name | WebLogic Domain Name. |
WebLogic Admin Listener Address | The listener address of the WLS admin server. (e.g. localhost) |
WebLogic Application Name | The name of the application (EAR or WAR) to be deployed. |
WebLogic Server or Cluster Name(s) | WebLogic Server or Cluster name to deploy application. |
WebLogic Domain Directory | Weblogic Domain Directory. (e.g. /u01/oracle/config/domains/soa_domain) |
WebLogic Node Manager Host | The host for Node Manager connection. |
WebLogic Node Manager Port | The port for the WLS Node Manager. |
WebLogic Node Manager User | The user id for the WLS Node Manager. |
WebLogic Node Manager Password | The password for the user id of WLS Node Manager. |
Hostname for WebLogic Admin Server | The hostname for WebLogic Admin Server |
User Id which runs Admins Server (e.g. Oracle) | FlexDeploy will connect to target server using this user. |
Password for user Id | |
JDK Home for Admin Server Node | Recommended JDK used by Oracle WebLogic. |
Base Directory (working directory with at least 4GB space) | Minimum of 4GB space on each WebLogic node. Avoid /tmp and /var/tmp as Linux processes may clean up files automatically and conflict with FlexDeploy. |
Create WebLogic Project using Blueprint
The assumption is that you have FlexDeploy installed and ready for use. After logging in to FlexDeploy, click on the + icon on the top and click Create Project.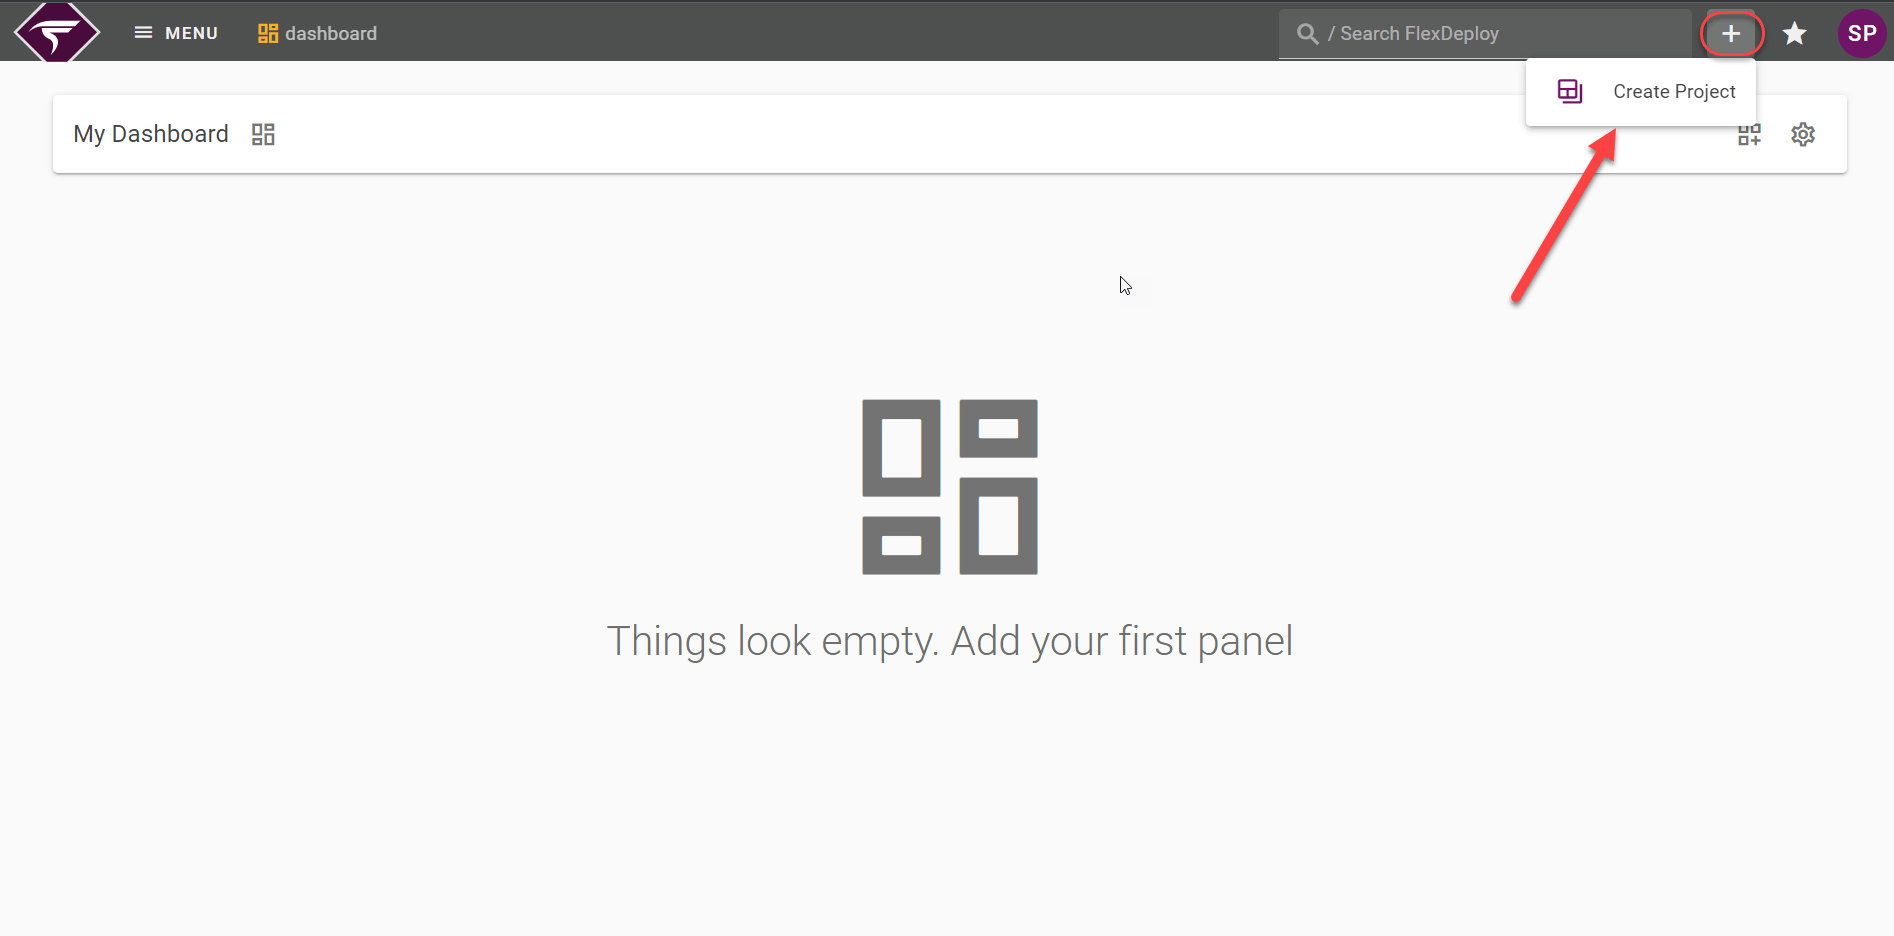
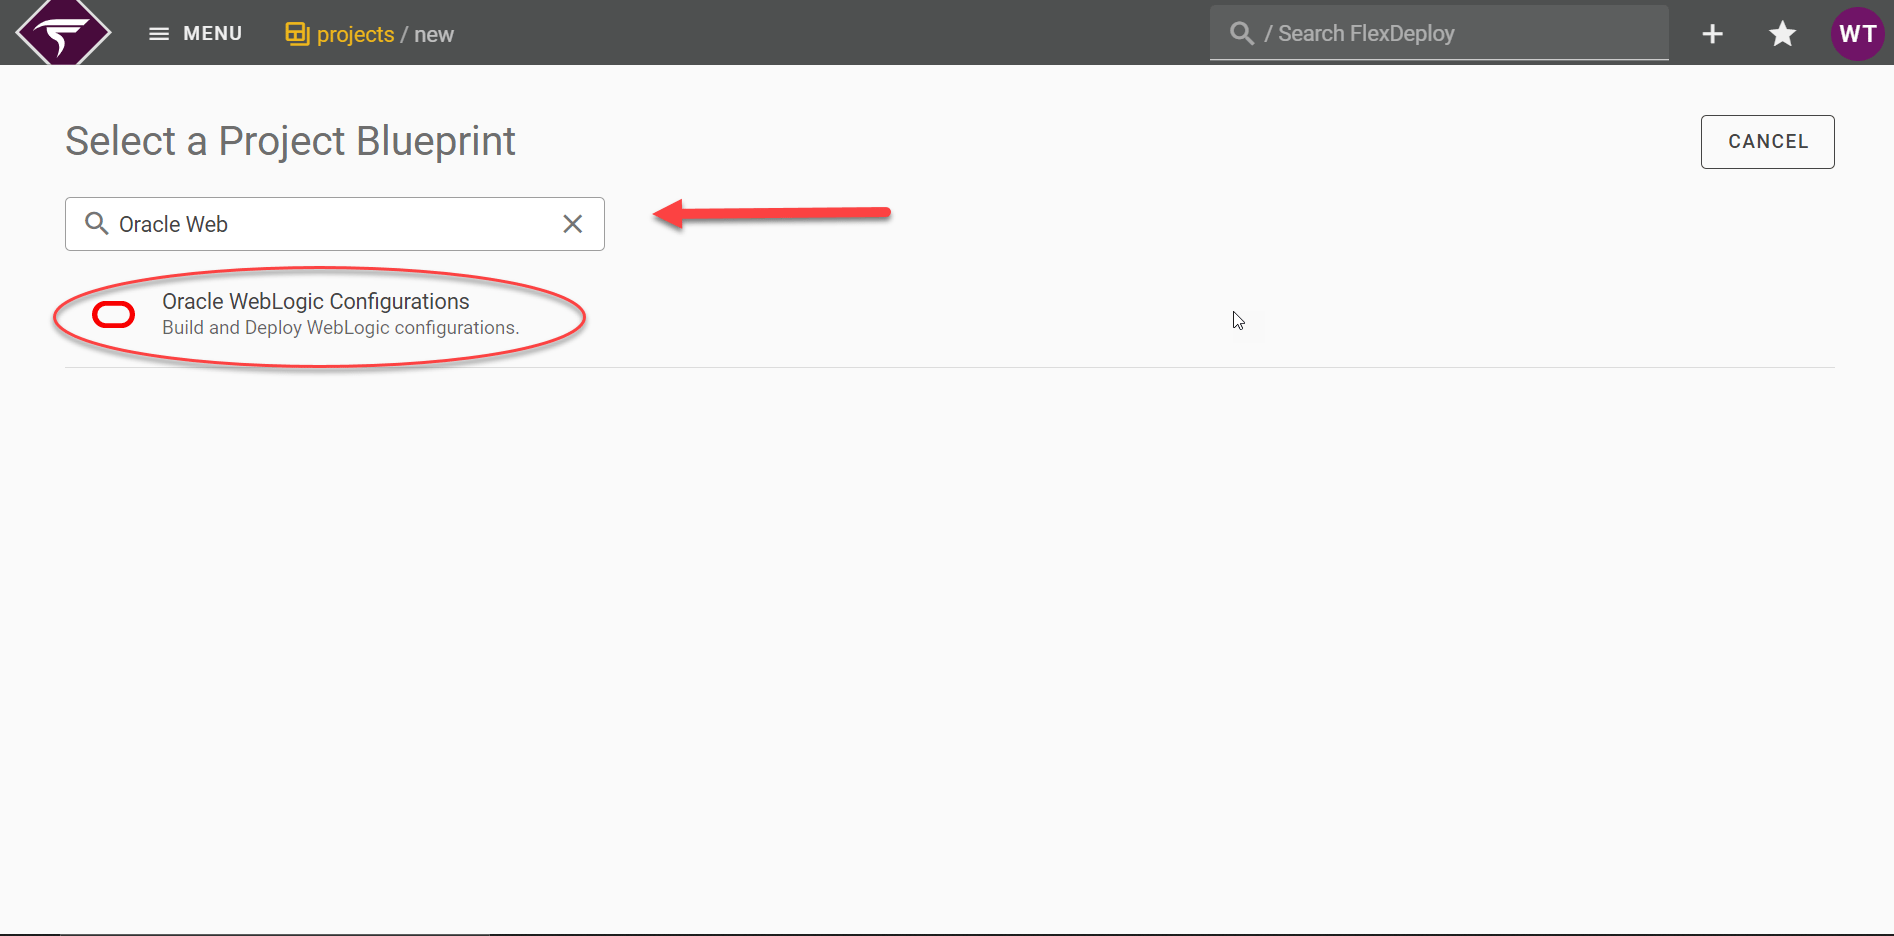
General Configuration
Scroll through this guide to fill in the blueprint properties. Name the Project well to describe what configurations you are managing.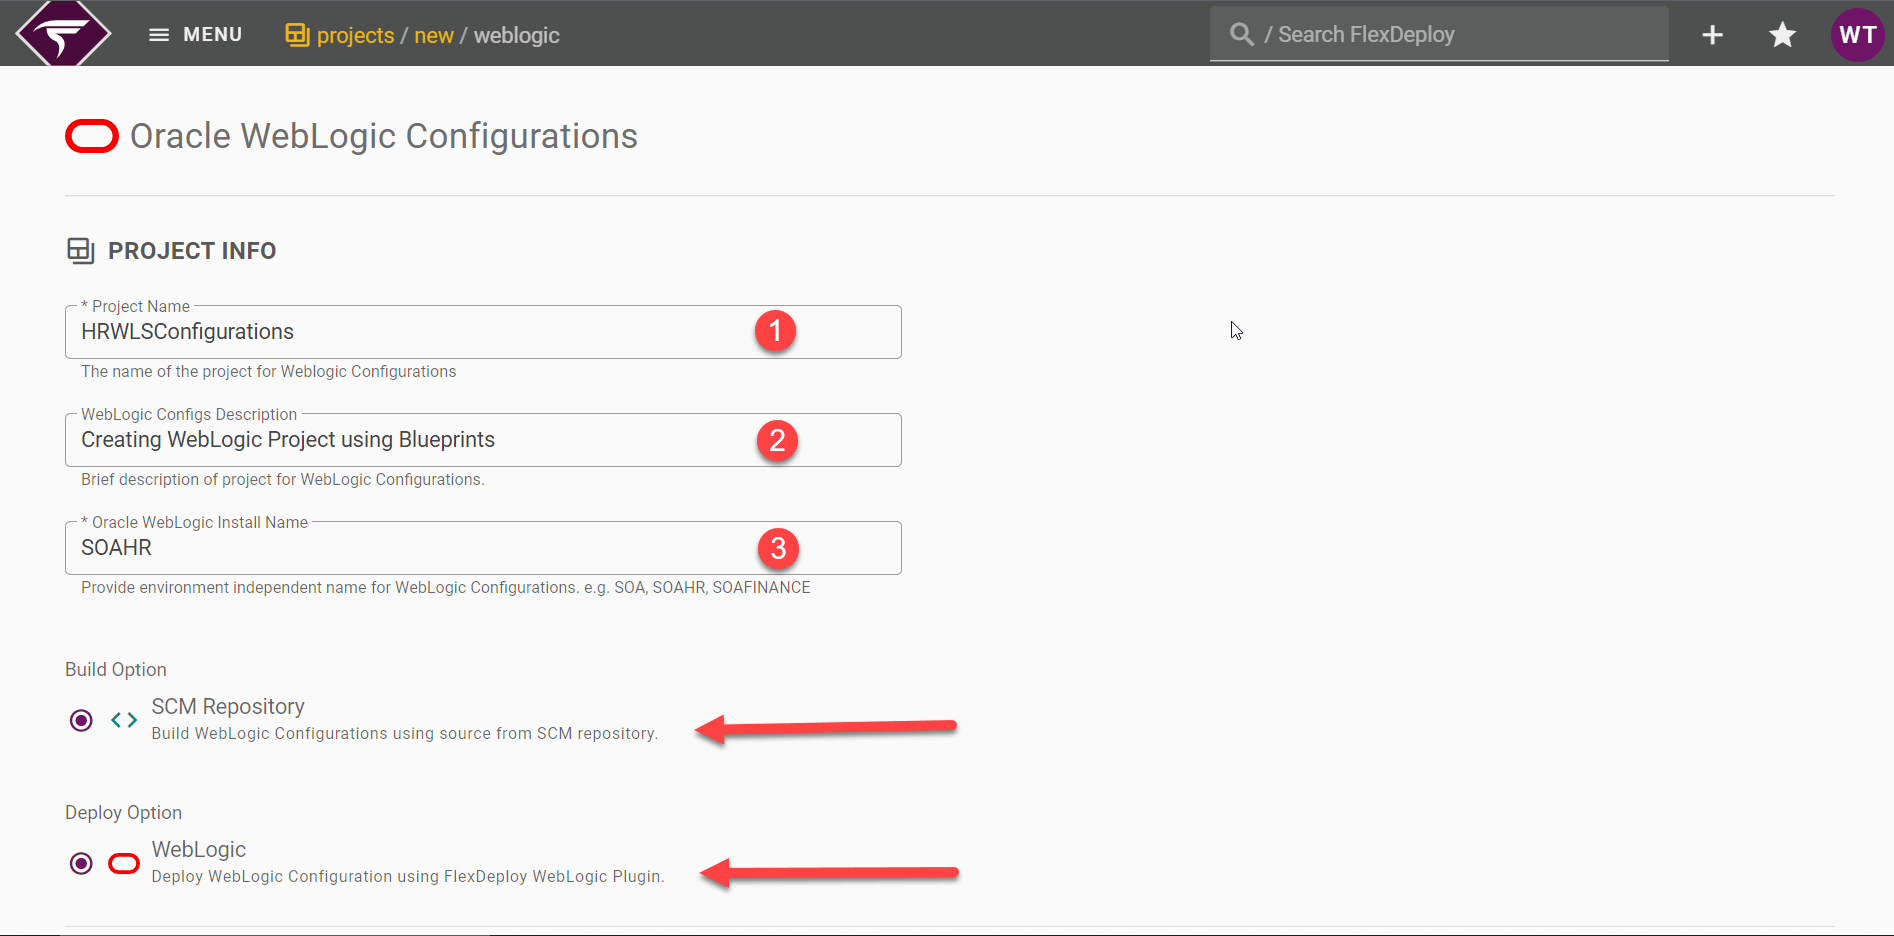
Project Info
Property Name | Value for this tutorial | Description |
|---|---|---|
Project Name | HRWLSConfigurations | The name of the project for WebLogic Configurations. |
WebLogic Configs Description | Order | Brief description of the project for WebLogic Configurations. |
Oracle WebLogic Install Name | SOAHR | This value will provide an environment independent name for SOA install (eg. SOA, SOAHR ). |
Source Control
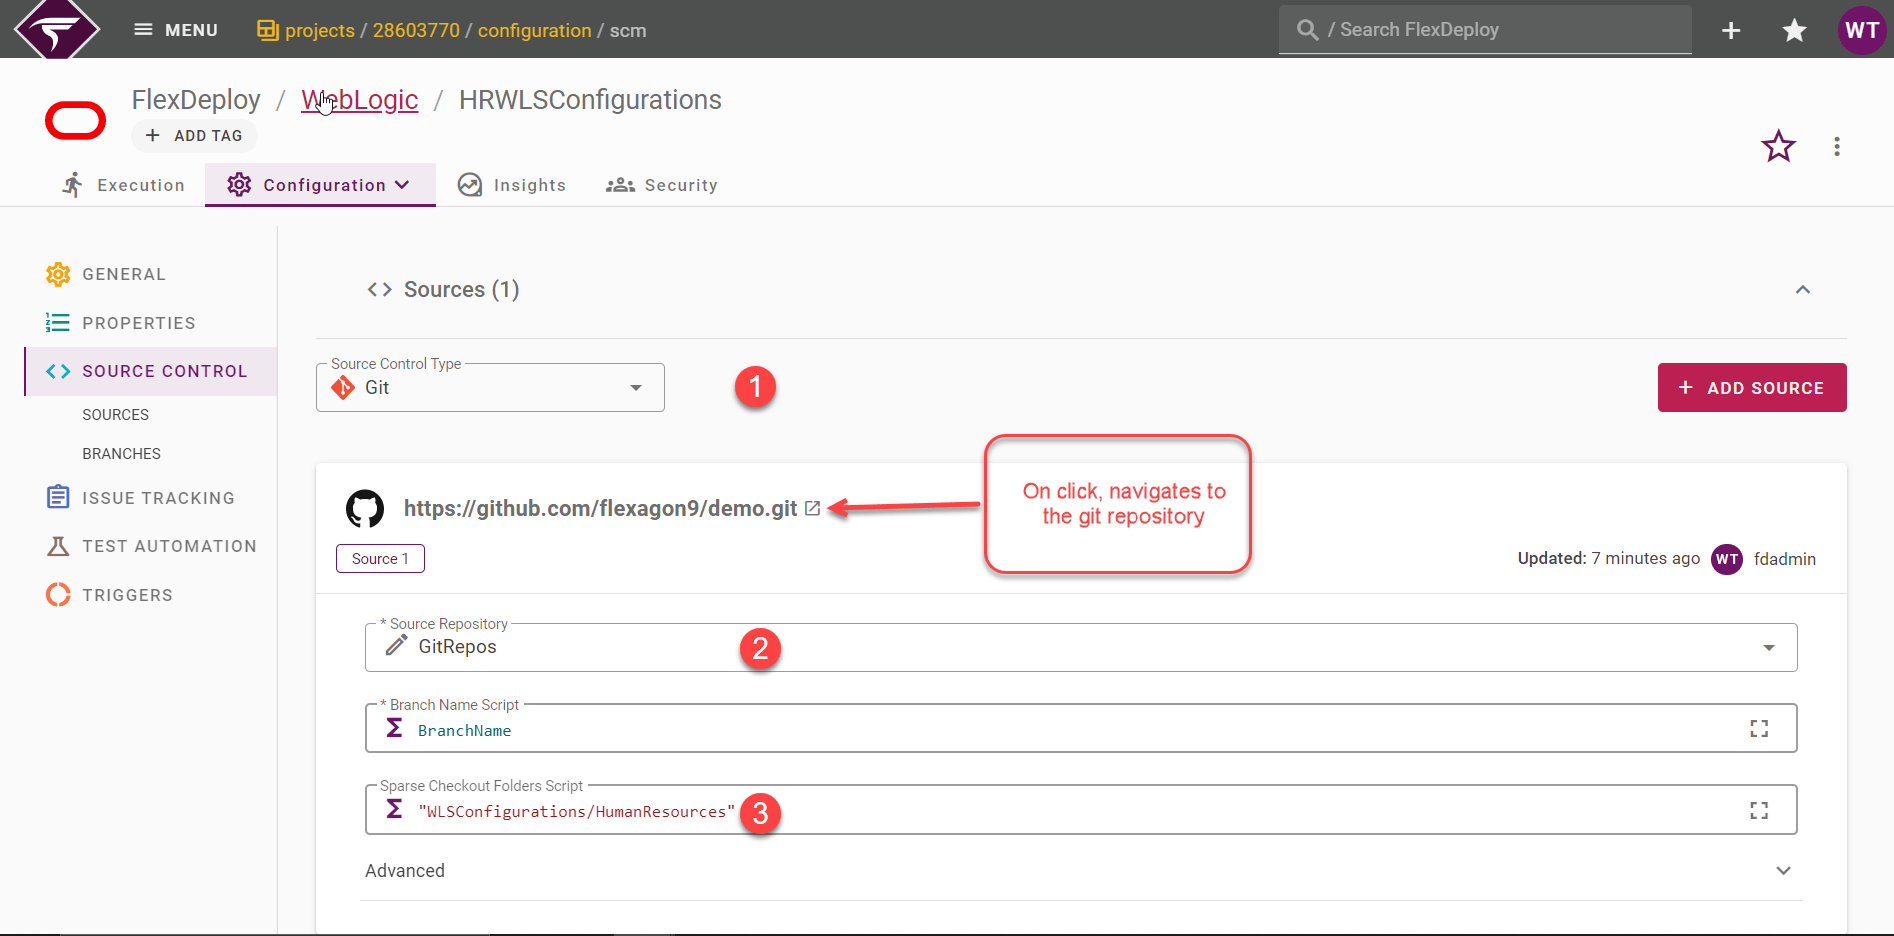
Click on the source repository dropdown. If you have already created a connection to your source code repository, select it from the list.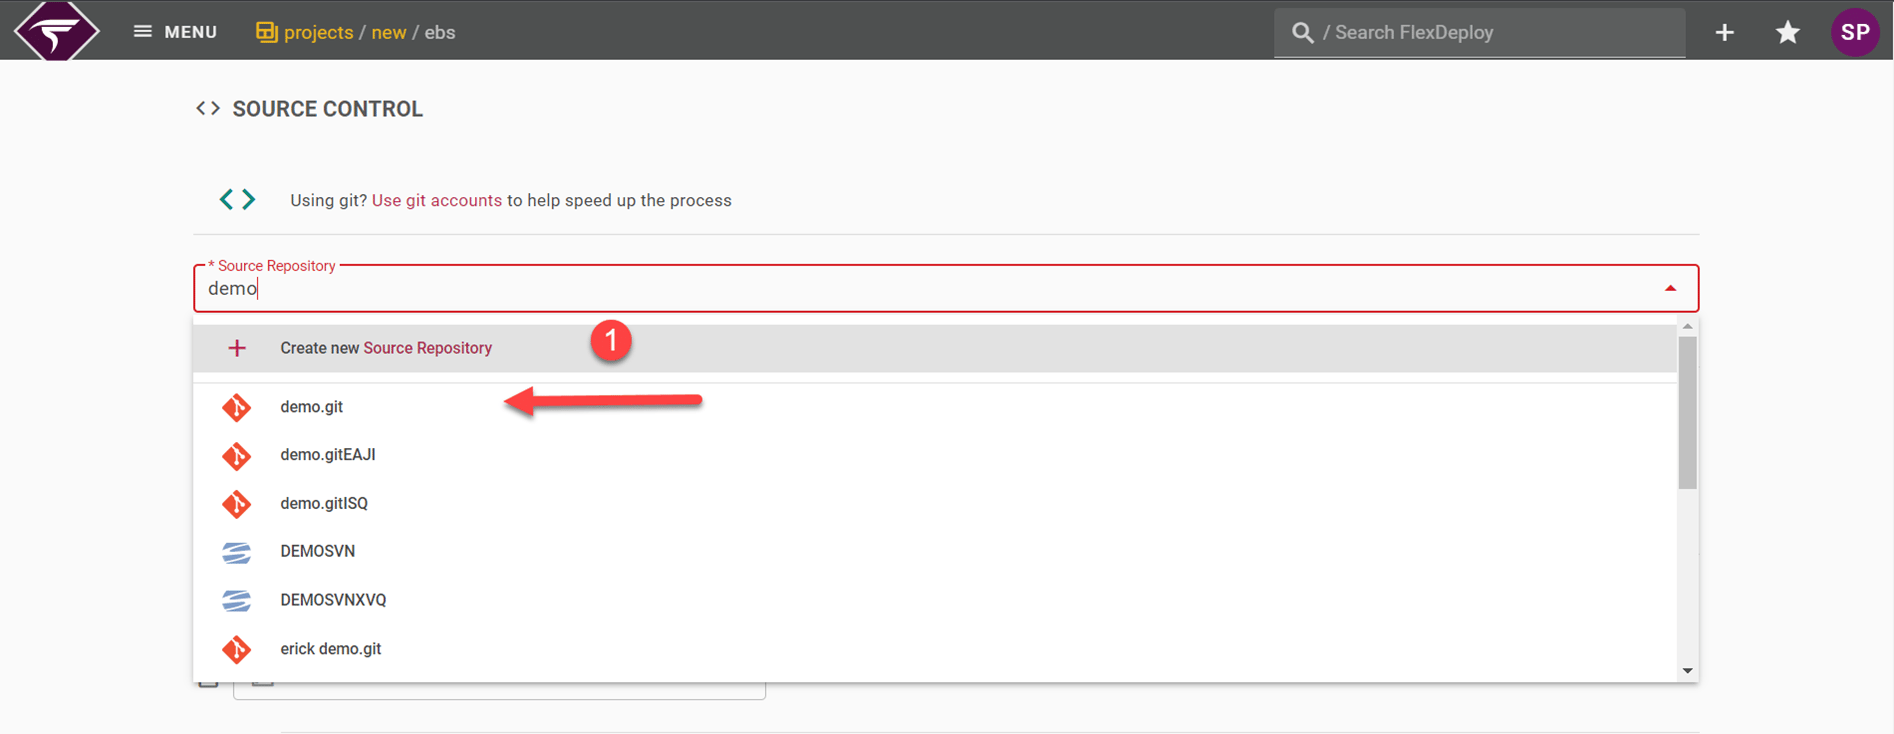
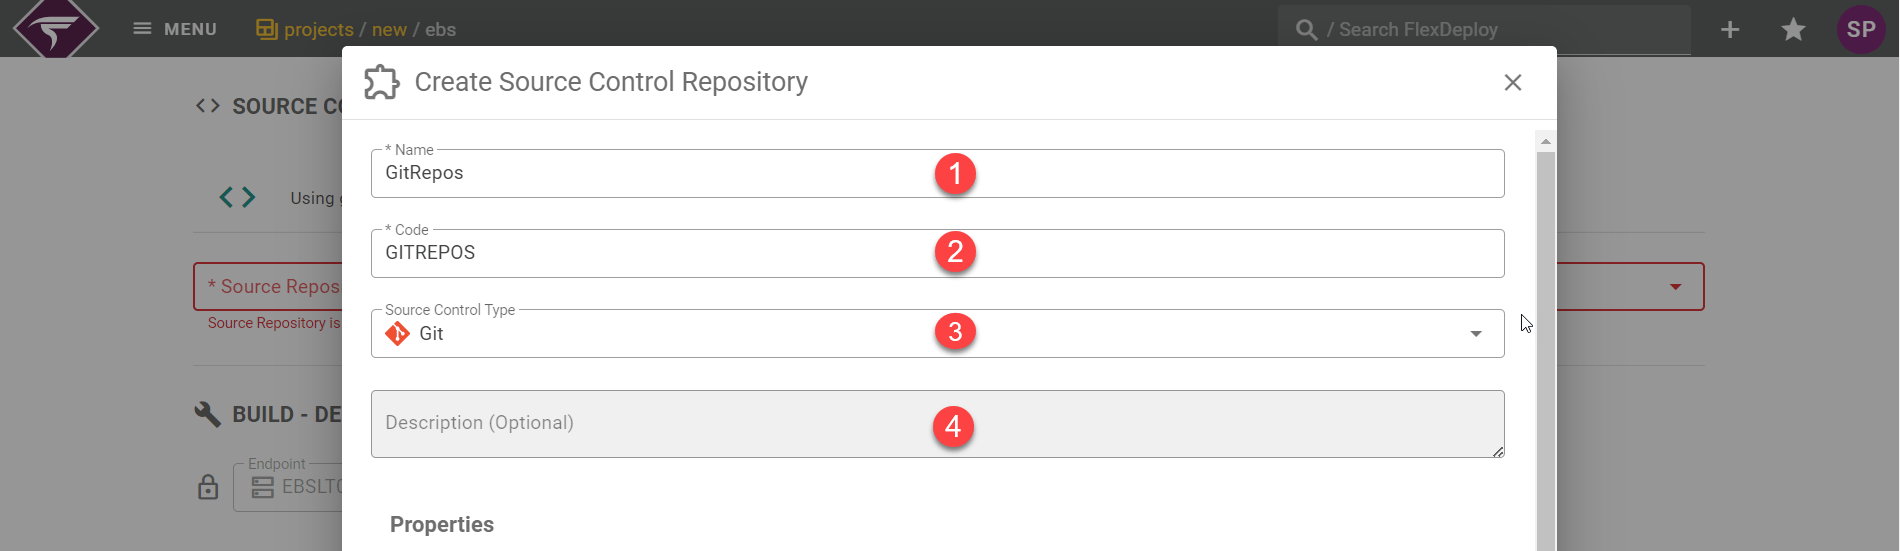
Inputs Info
Field | Required | Description |
|---|---|---|
Name | Yes | A descriptive name for this SCM instance. |
Code | Yes | A technical code for the instance, without any spaces. The codes are available as variables to shell and Groovy scripts, and therefore need to comply with limitations. |
Source Control Type | Yes | Type of source control management system. We will use Git for this tutorial. Supported source control management systems are:
|
Description | No |
|
SCM Properties | Yes | The remaining properties are specific to the selected SCM. For Git:
|
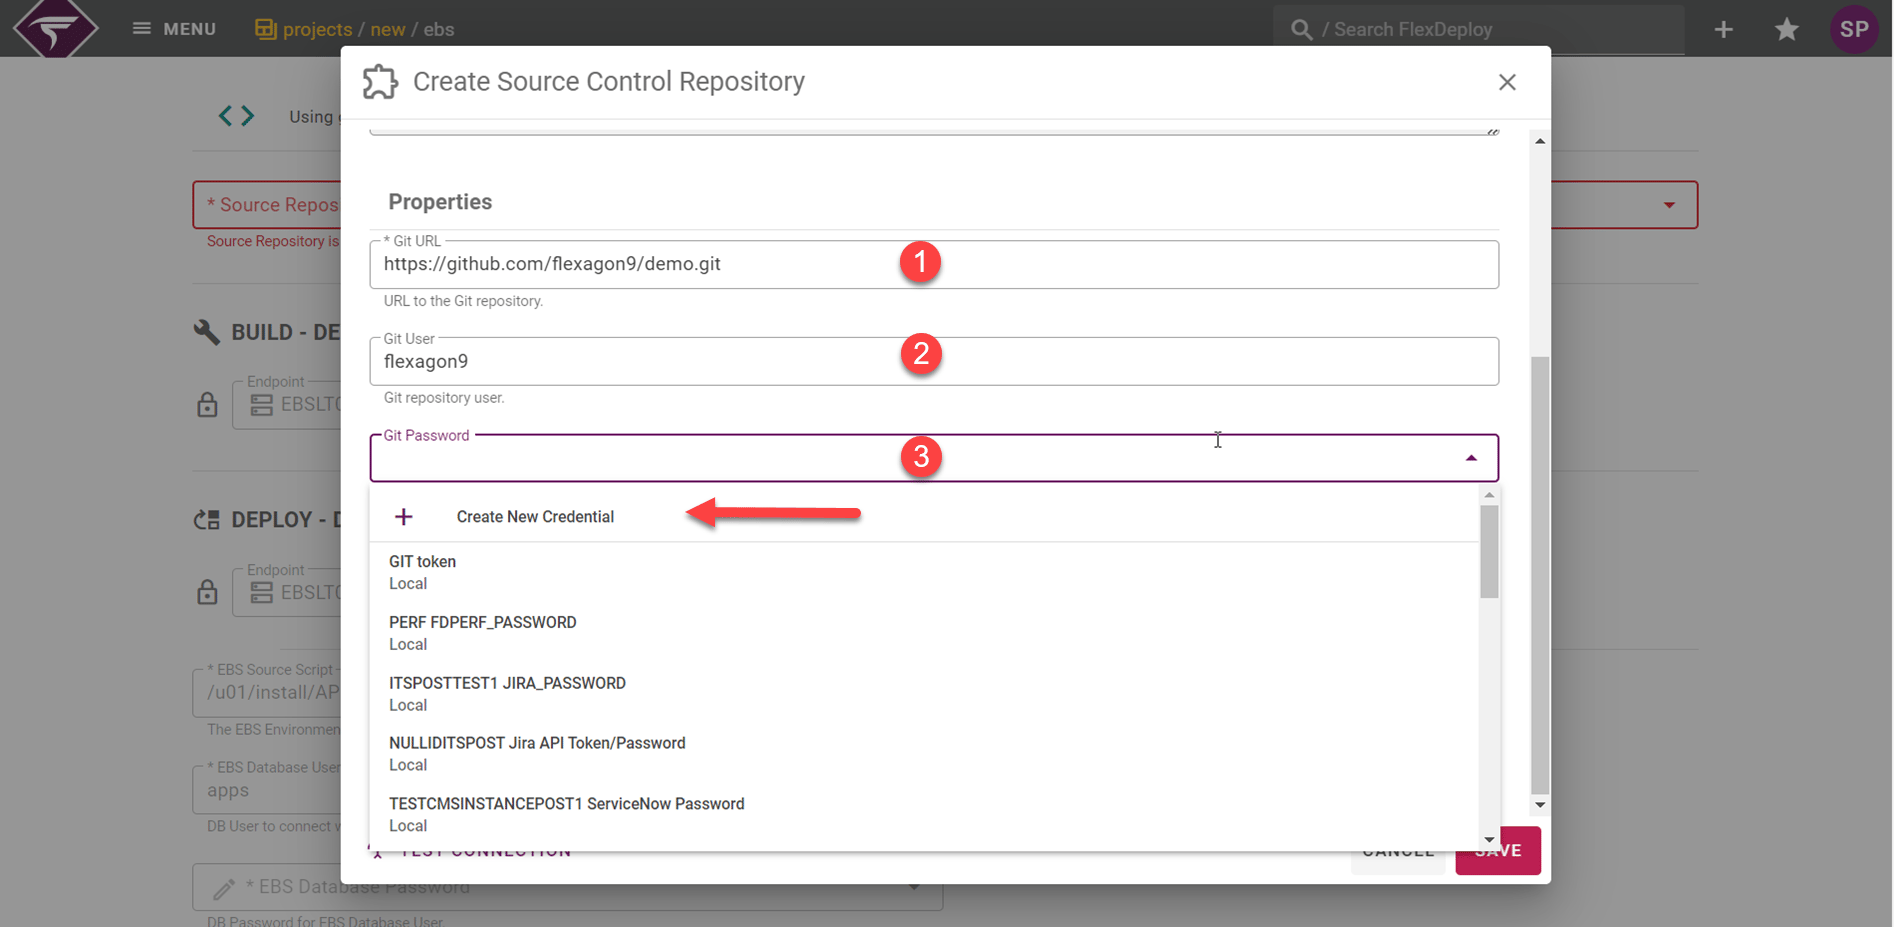
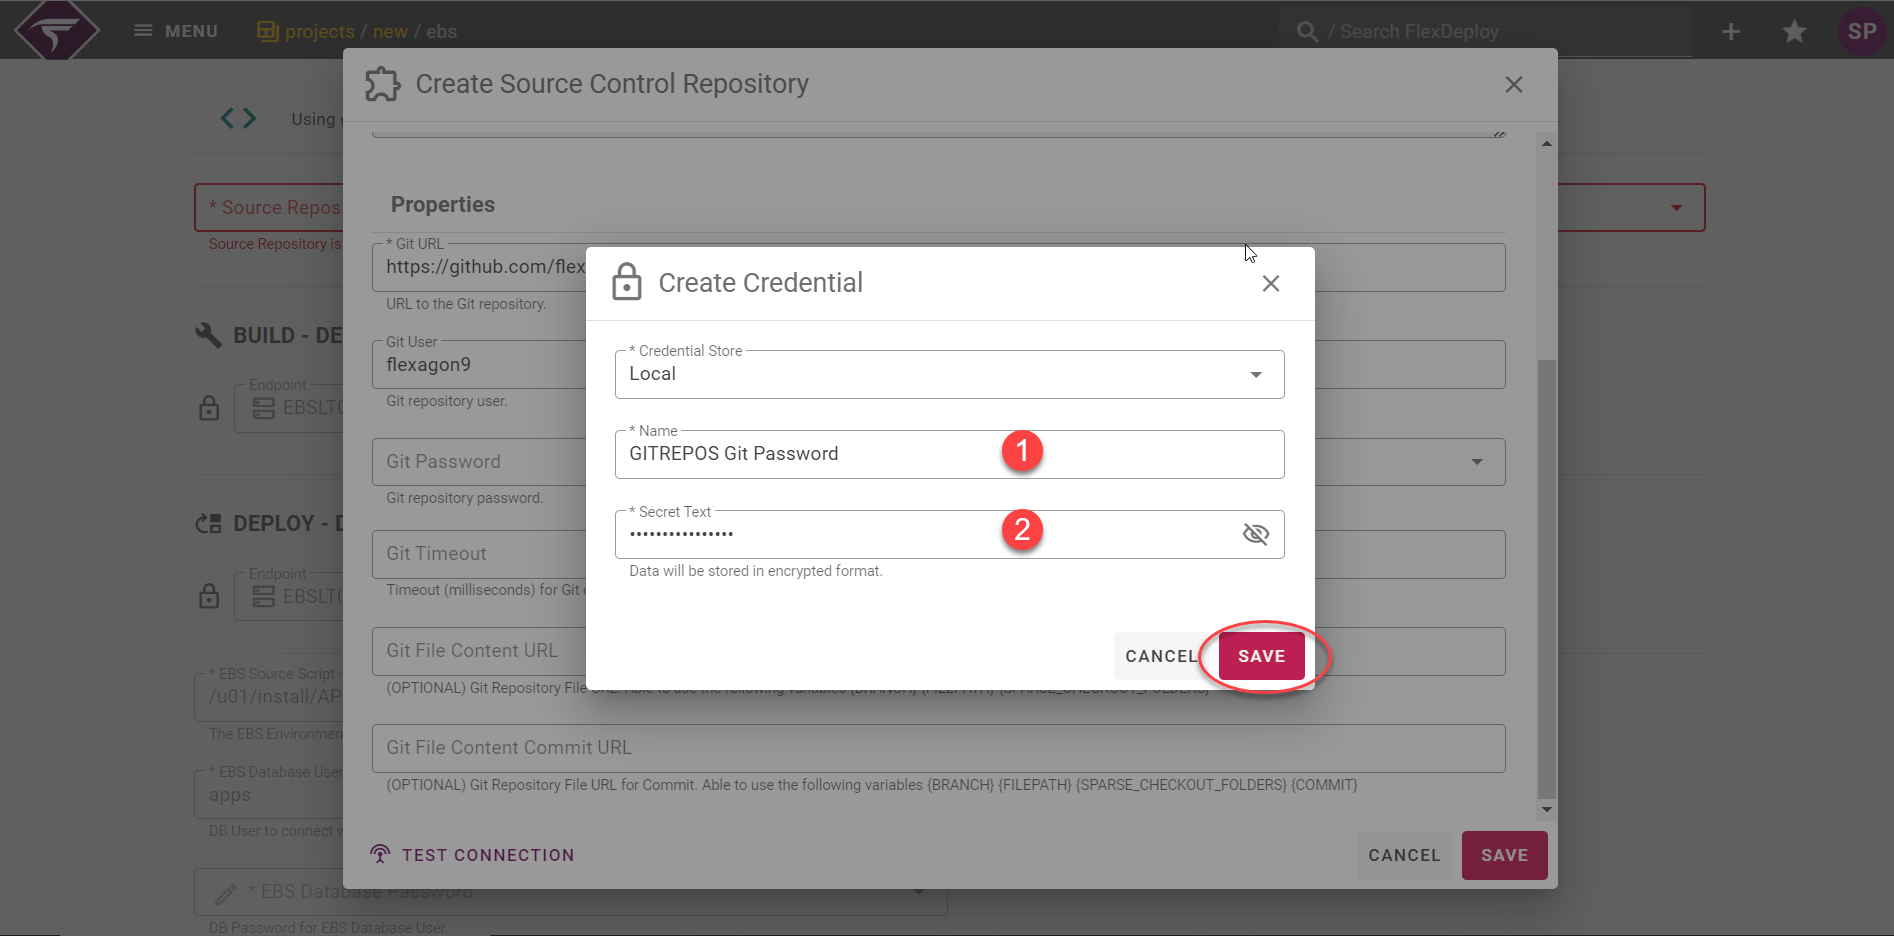
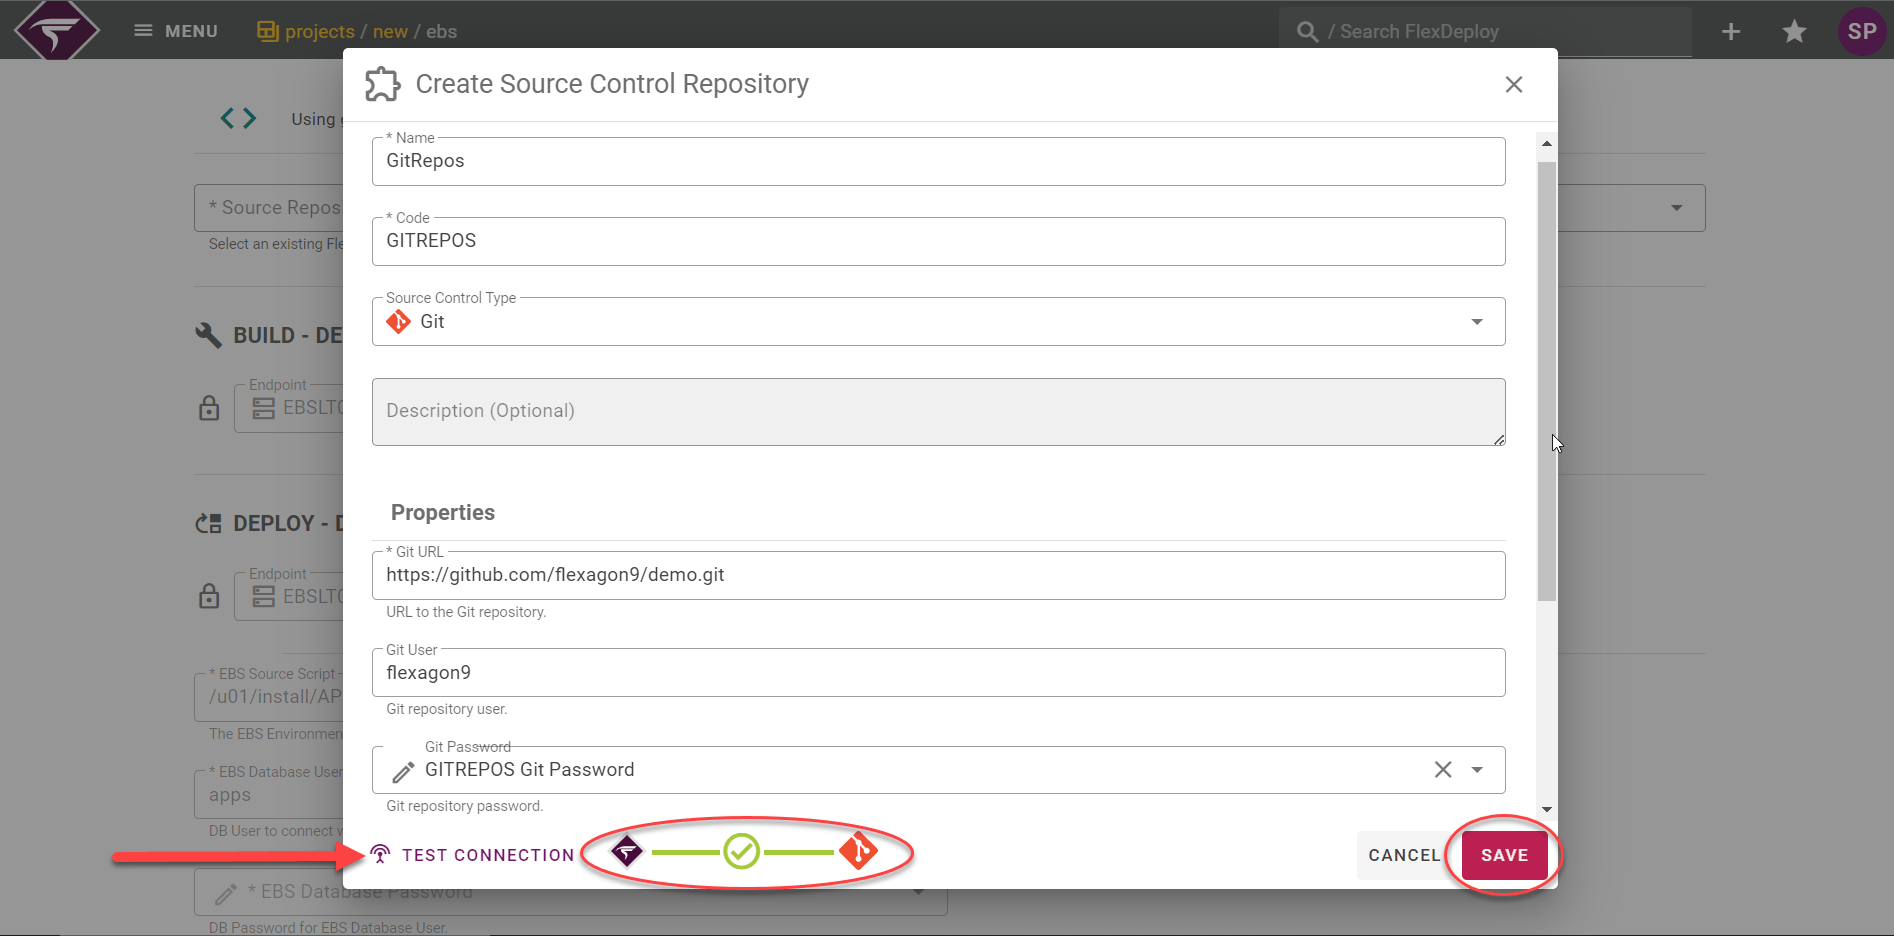
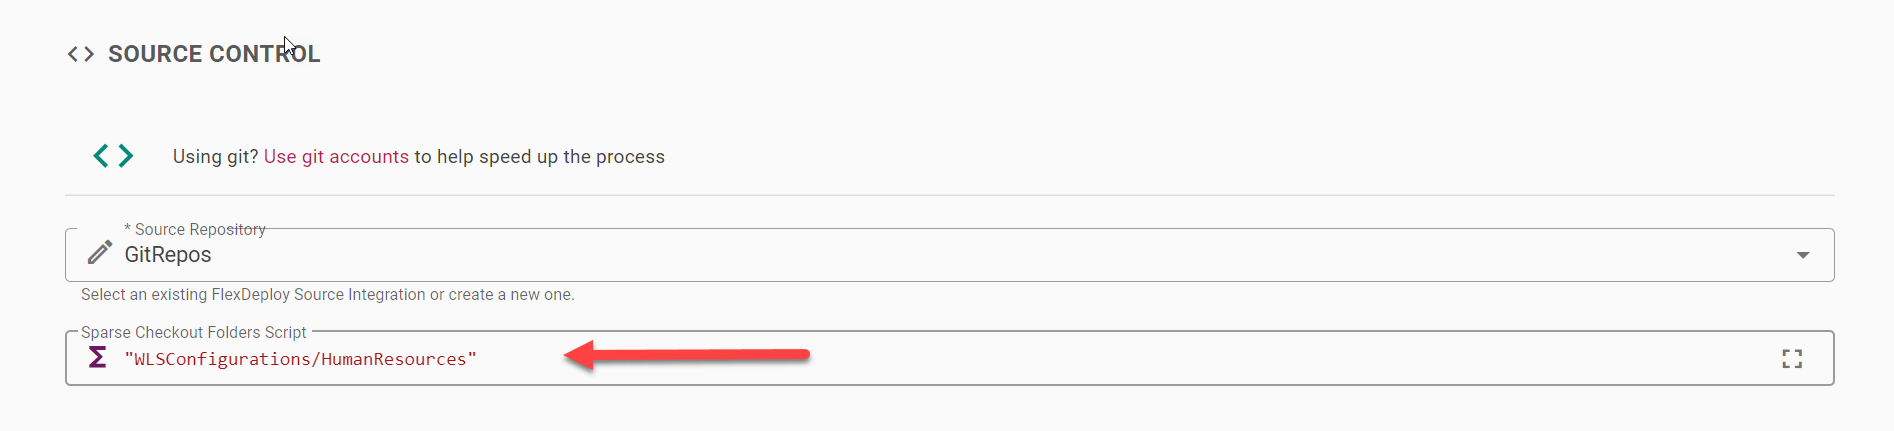
Gather Build and Deployment Information
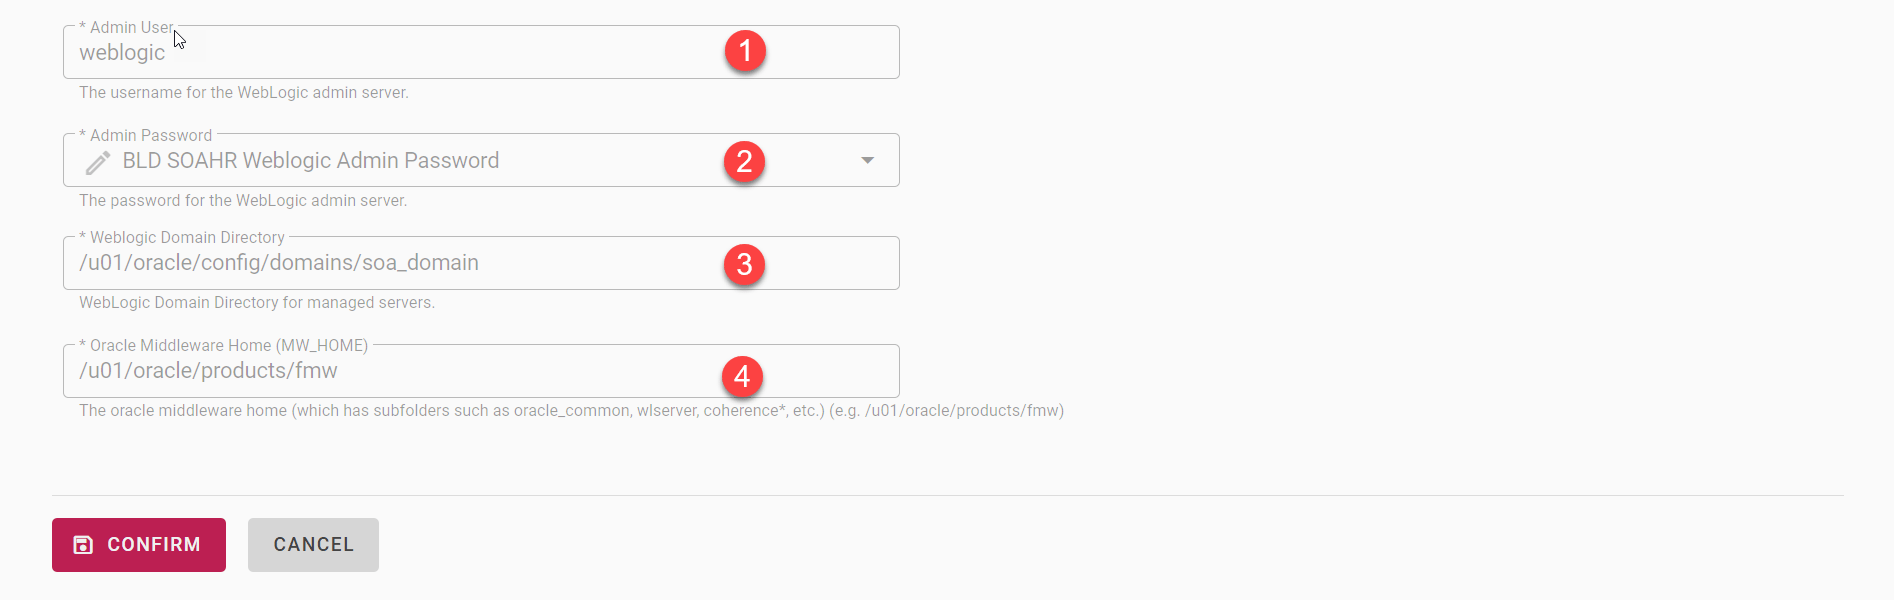
Enter values for any workflow properties which are required for the build and deploy. No properties are required for this build. Select the target endpoint that the build and deploy should execute on. Click Confirm.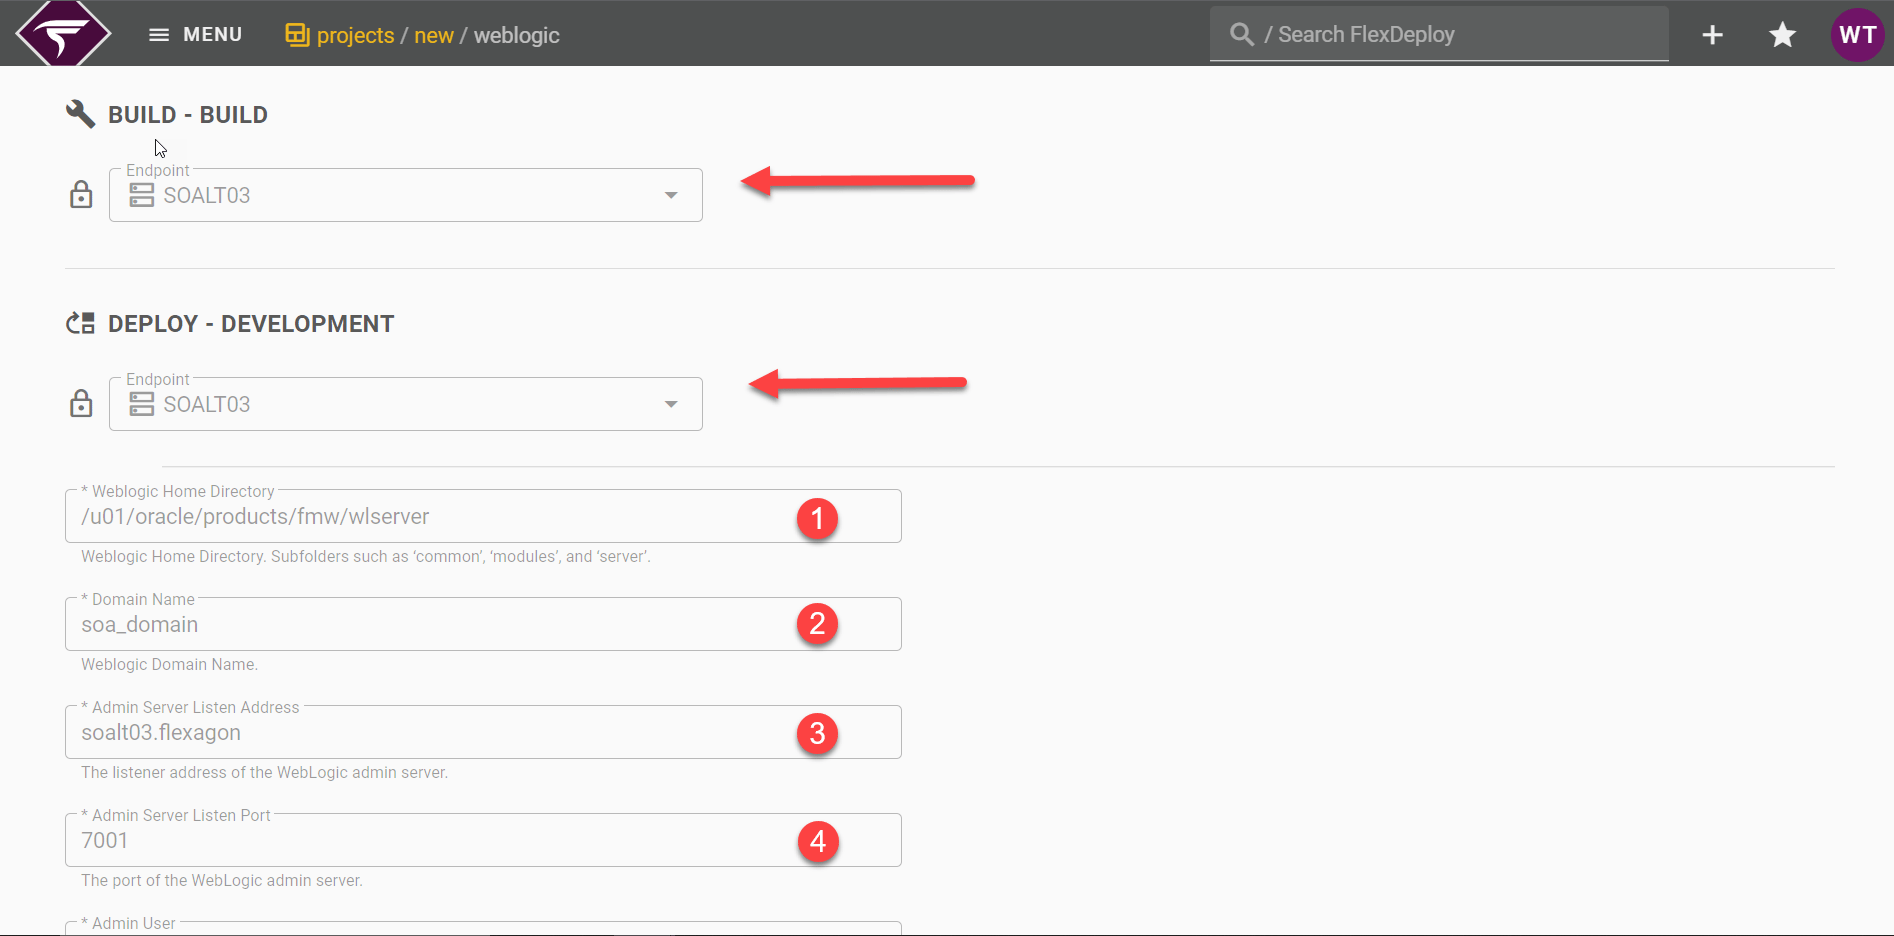
Target Properties
Property Name | Values for this Tutorial | Description |
|---|---|---|
WebLogic Domain Directory | /u01/oracle/config/domains/soa_domain | The WebLogic Domain Directory for managed servers. |
WebLogic Home Directory | /u01/oracle/products/fmw/wlserver | Weblogic Home Directory. Subfolders such as ‘common’, ‘modules’, and ‘server’. |
Domain Name | soa_domain | The WebLogic Domain Name. |
Oracle MiddleWare Home (MW_HOME) | /u01/oracle/products/fmw | The oracle middleware home (which has subfolders such as oracle_common, wlserver, coherence*, etc.) |
Admin Server Listen Address | soalt03.flexagon | The listener address for the WLS Admin Server. |
Admin Server Listen Port | 7001 | The port for the WLS Admin Server. |
Admin User | weblogic | The admin username for the WLS Admin Server. |
Admin Password | locate this value from your WLS admin server. | The admin password for the WLS Admin Server. |
Confirmation Popup
The Project name is HRWLSConfigurations. The Folder path is auto-updated to FlexDeploy/WebLogic, but can be adjusted as needed. Click Create.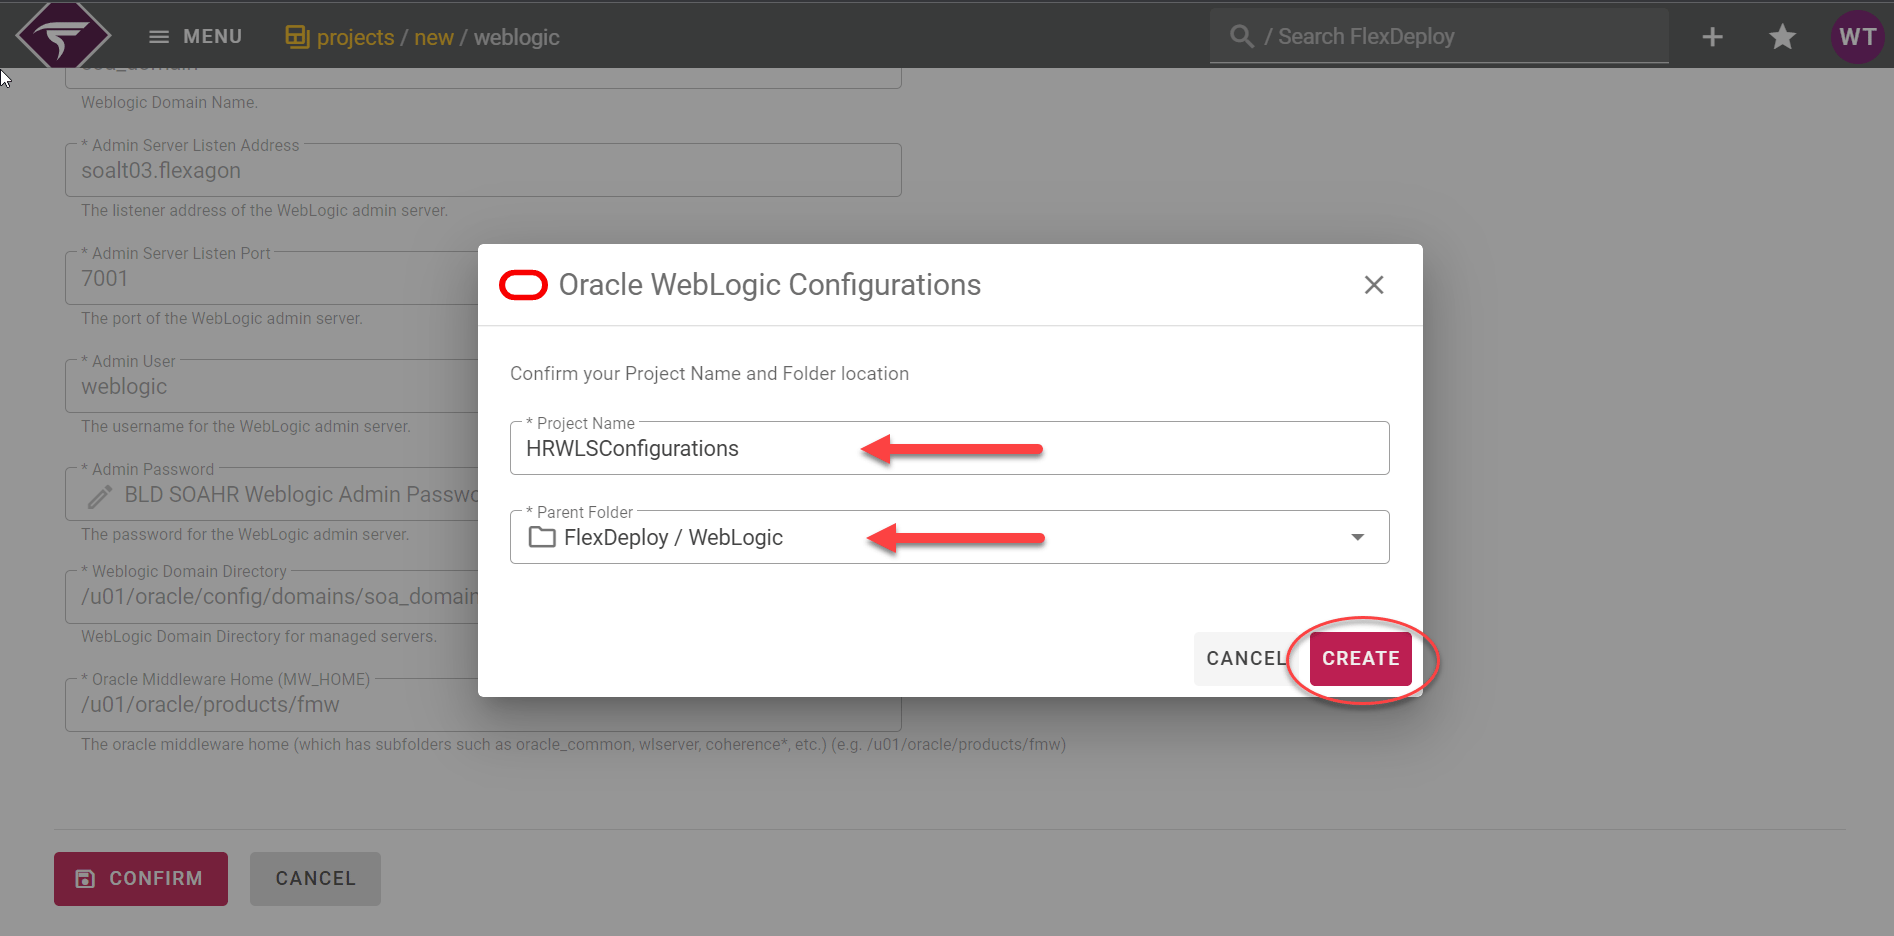
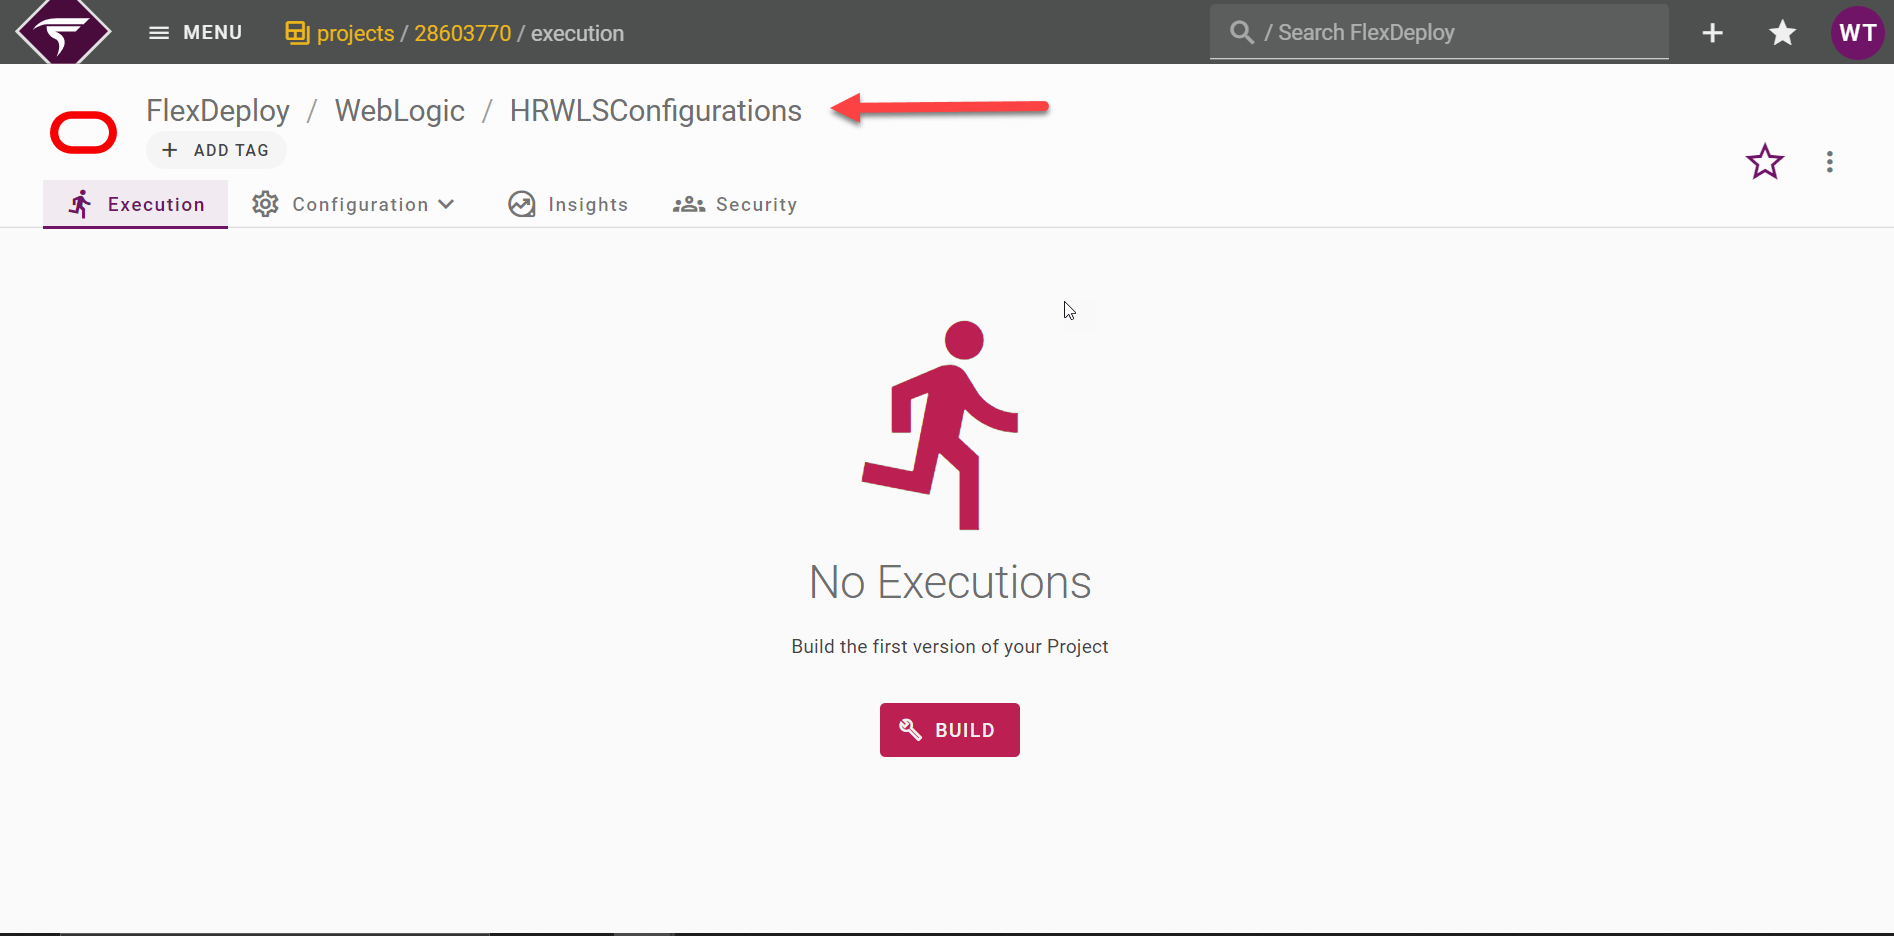
Summary
Review all Project details below and adjust as necessary.General Configuration
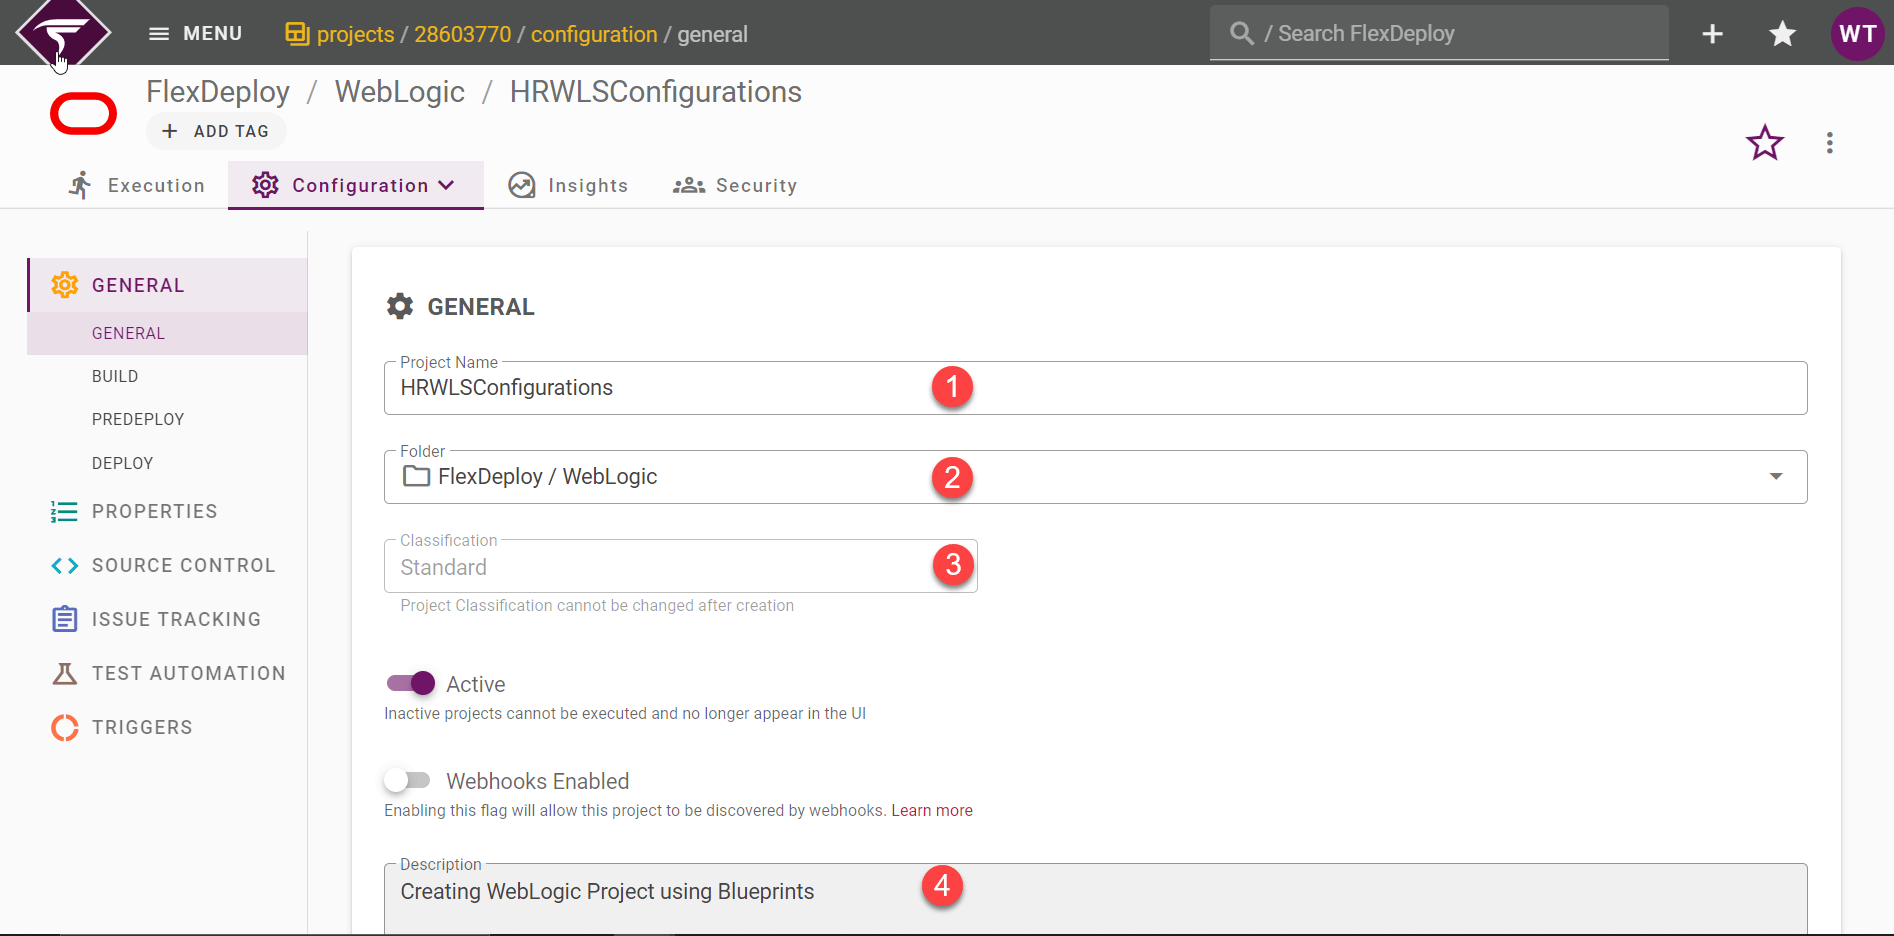
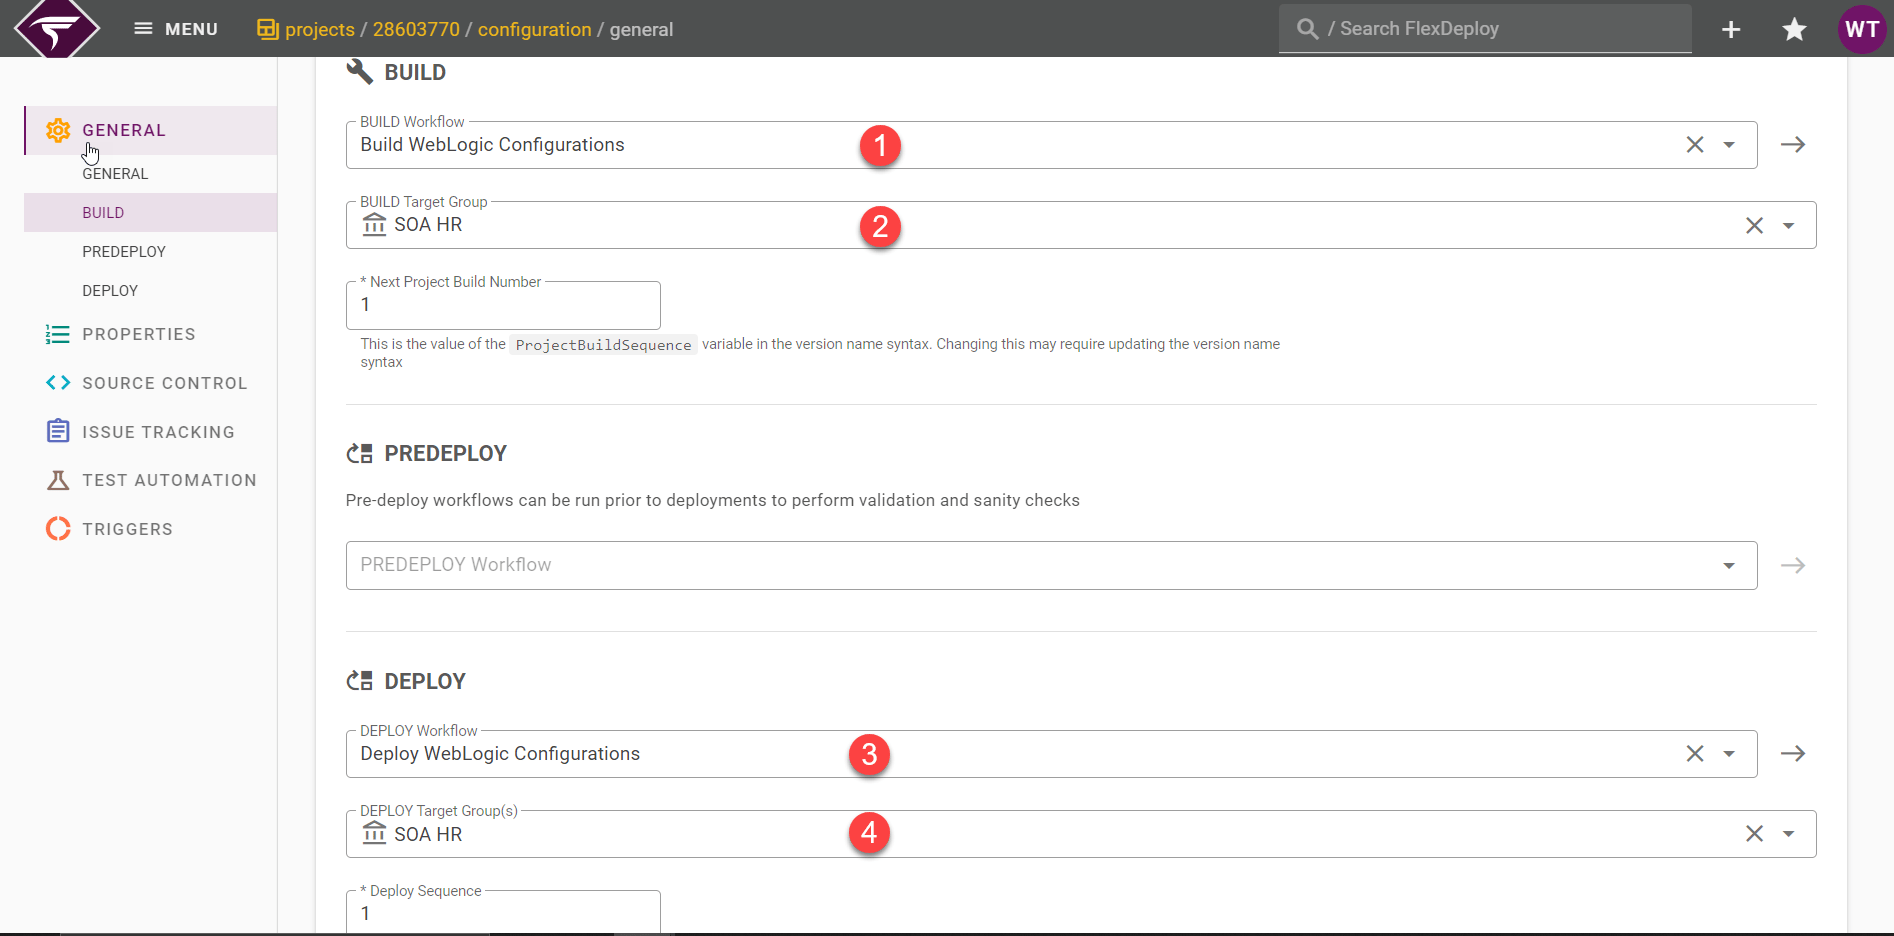
Build and Deploy Workflows
Source Control
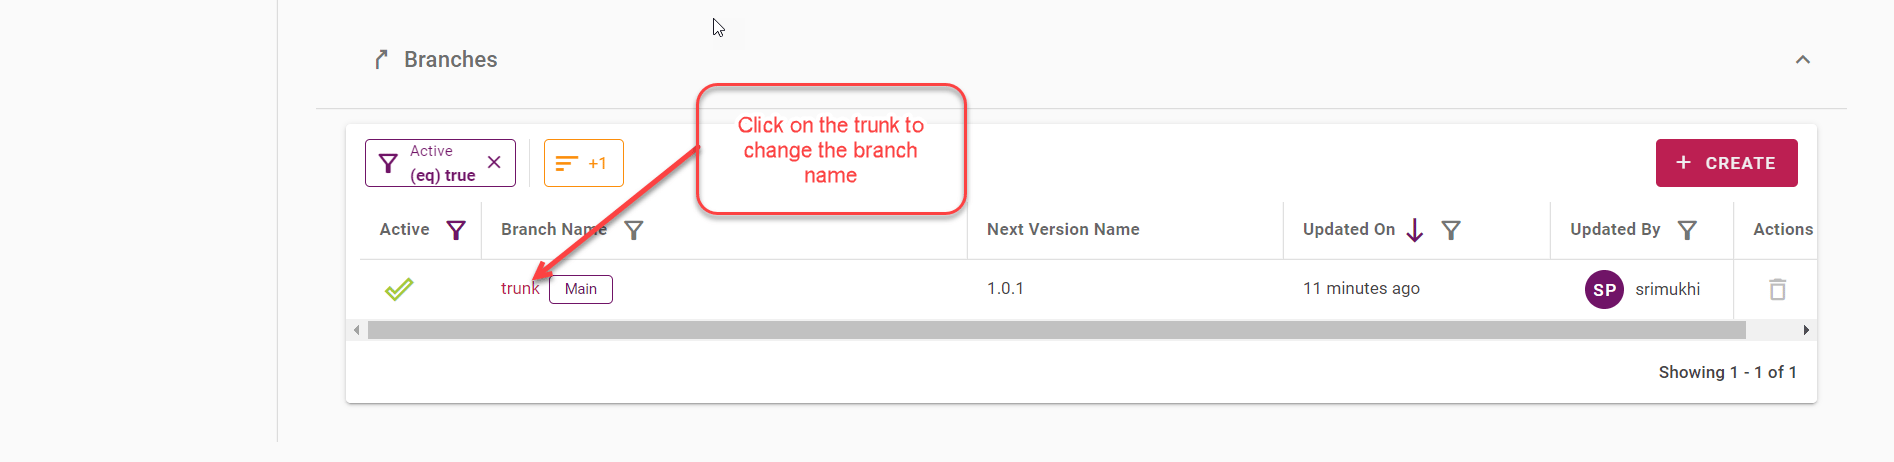
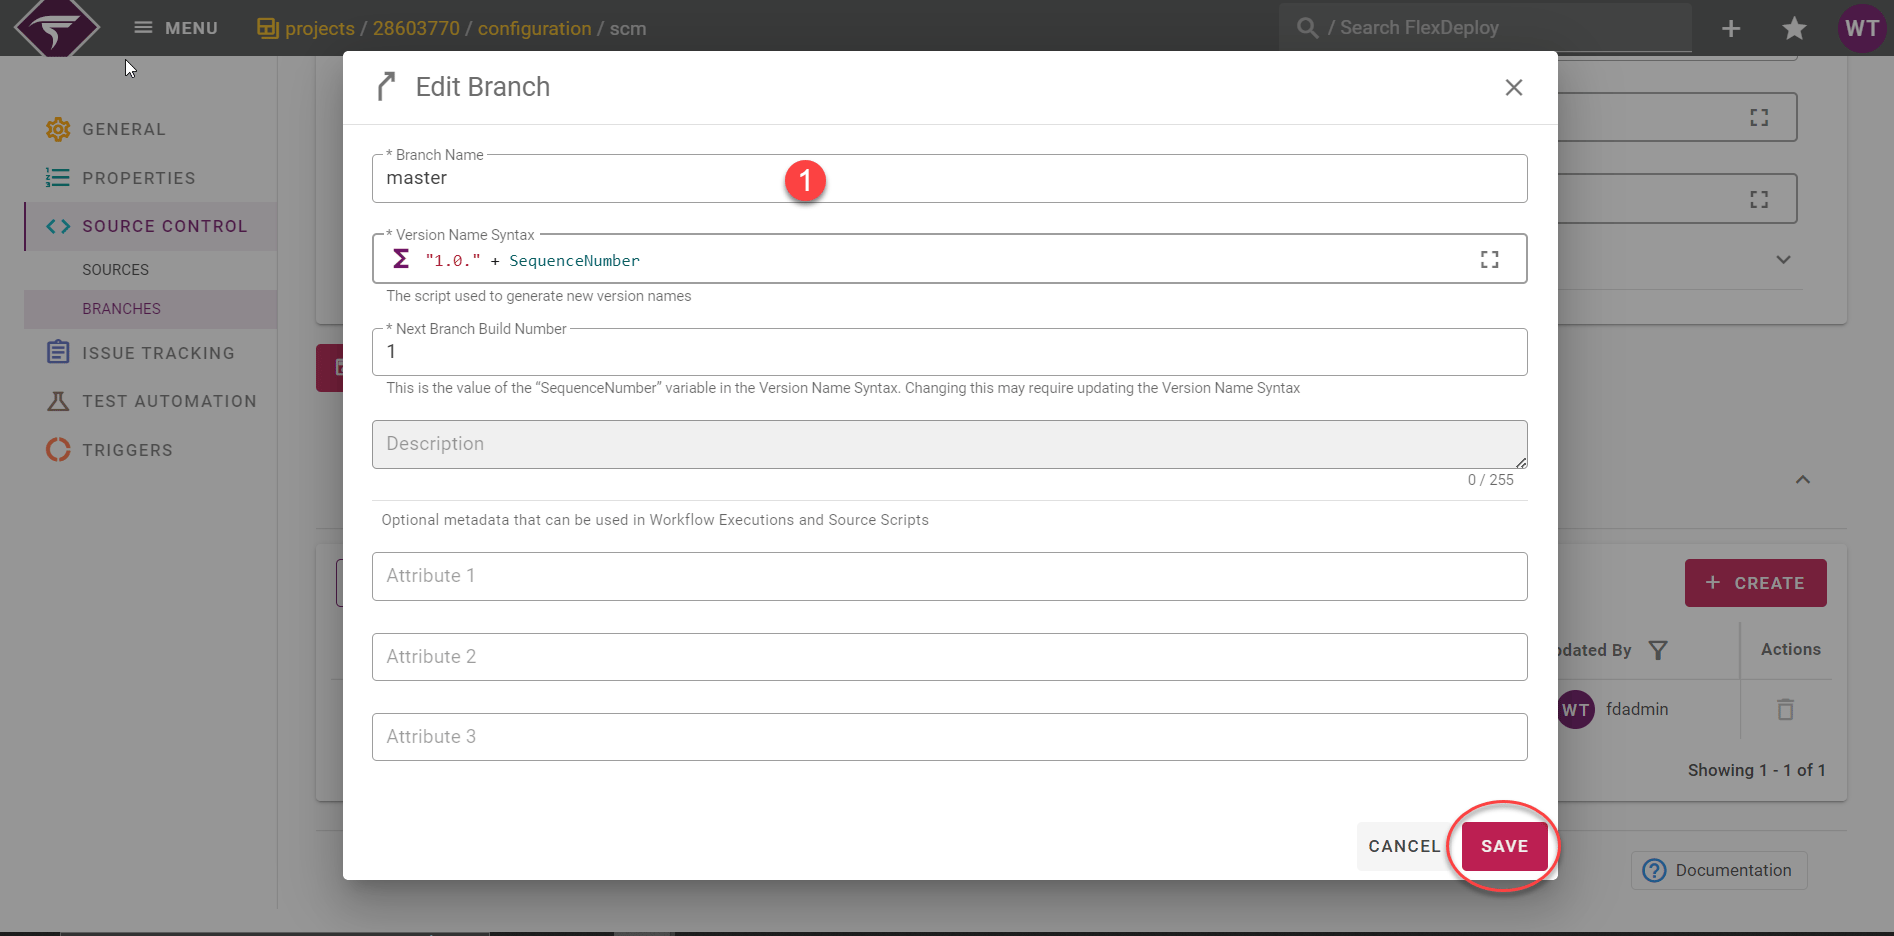
Branch Name
Target Properties
Select Topology from the menu and choose a Target Group on the left. You will see a list of Environments on the right with colored circles representing each Target.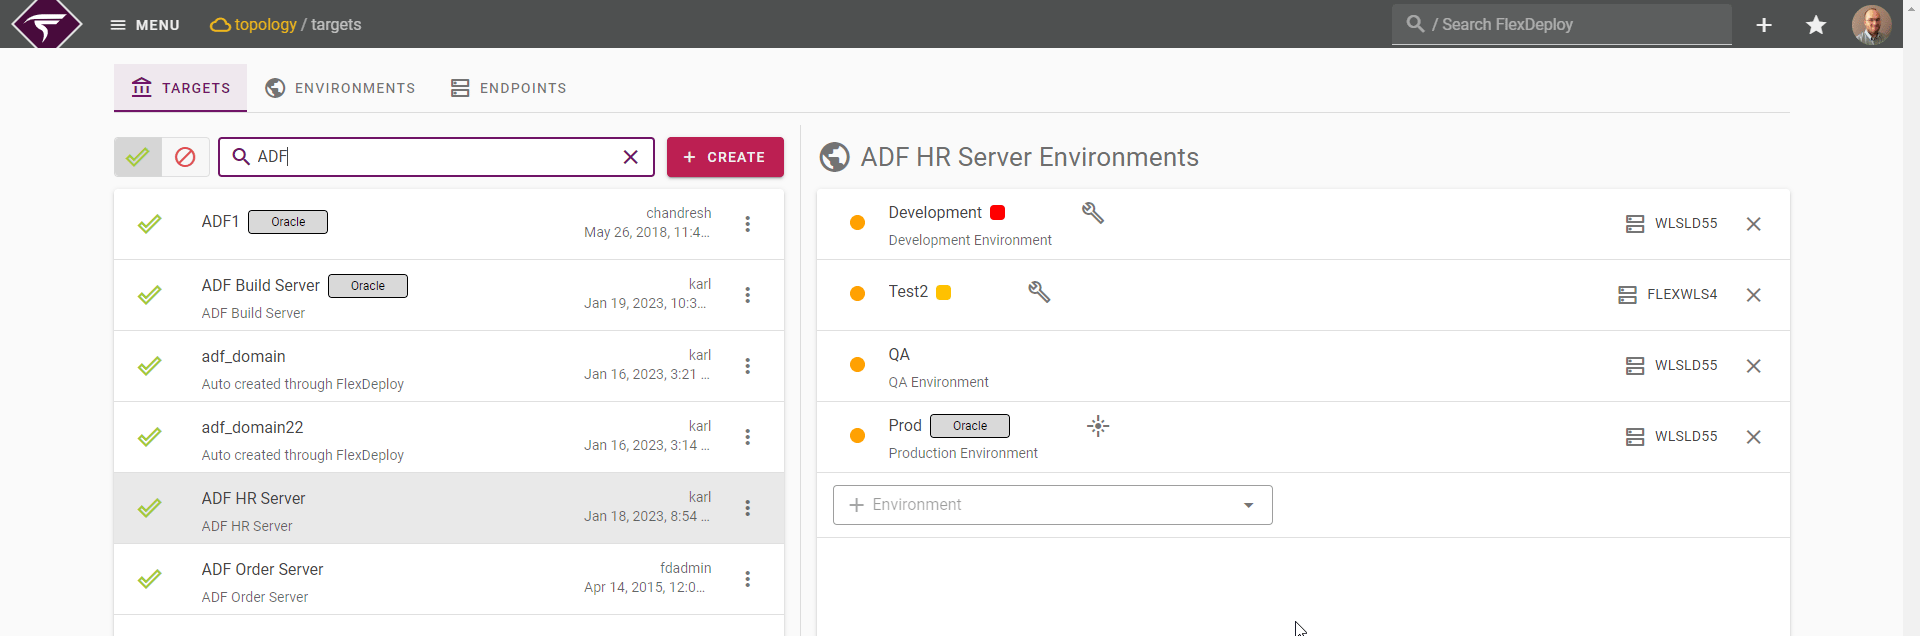
- RED - The Endpoint is not configured
- YELLOW - some of the required properties are not set
- GREEN - all required properties are set and the Endpoint is configured
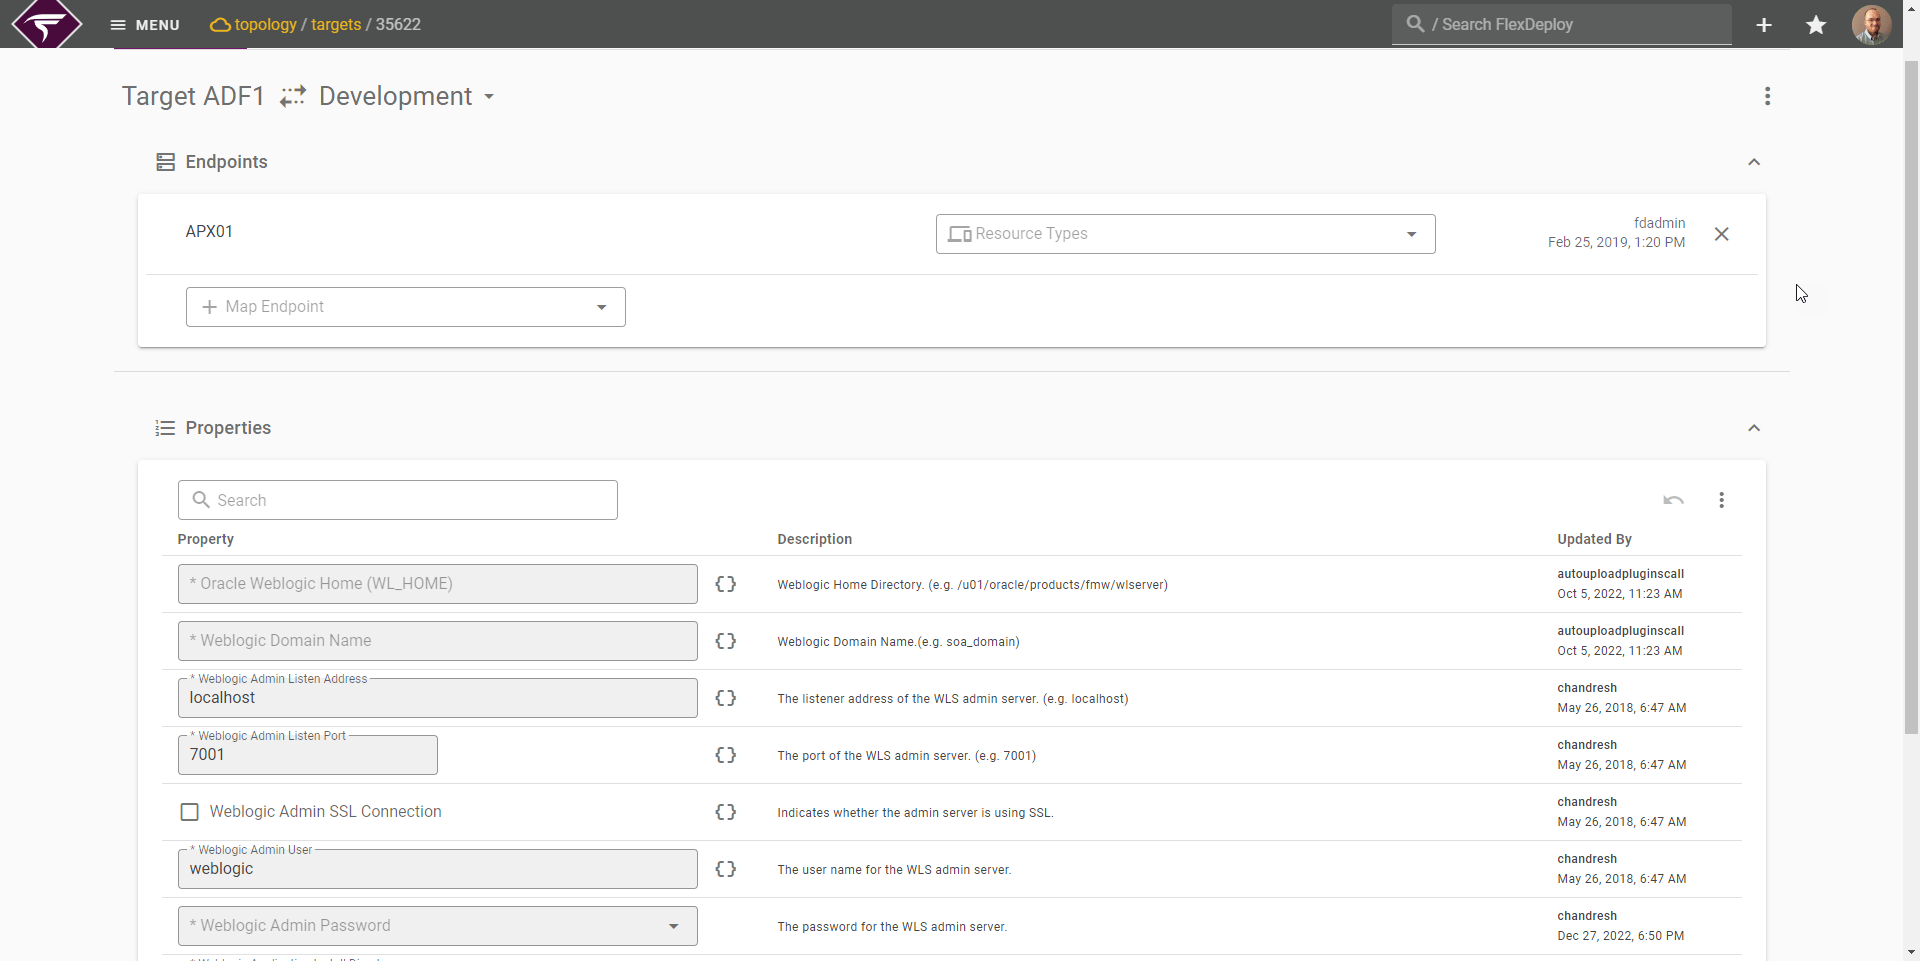
Build Execution
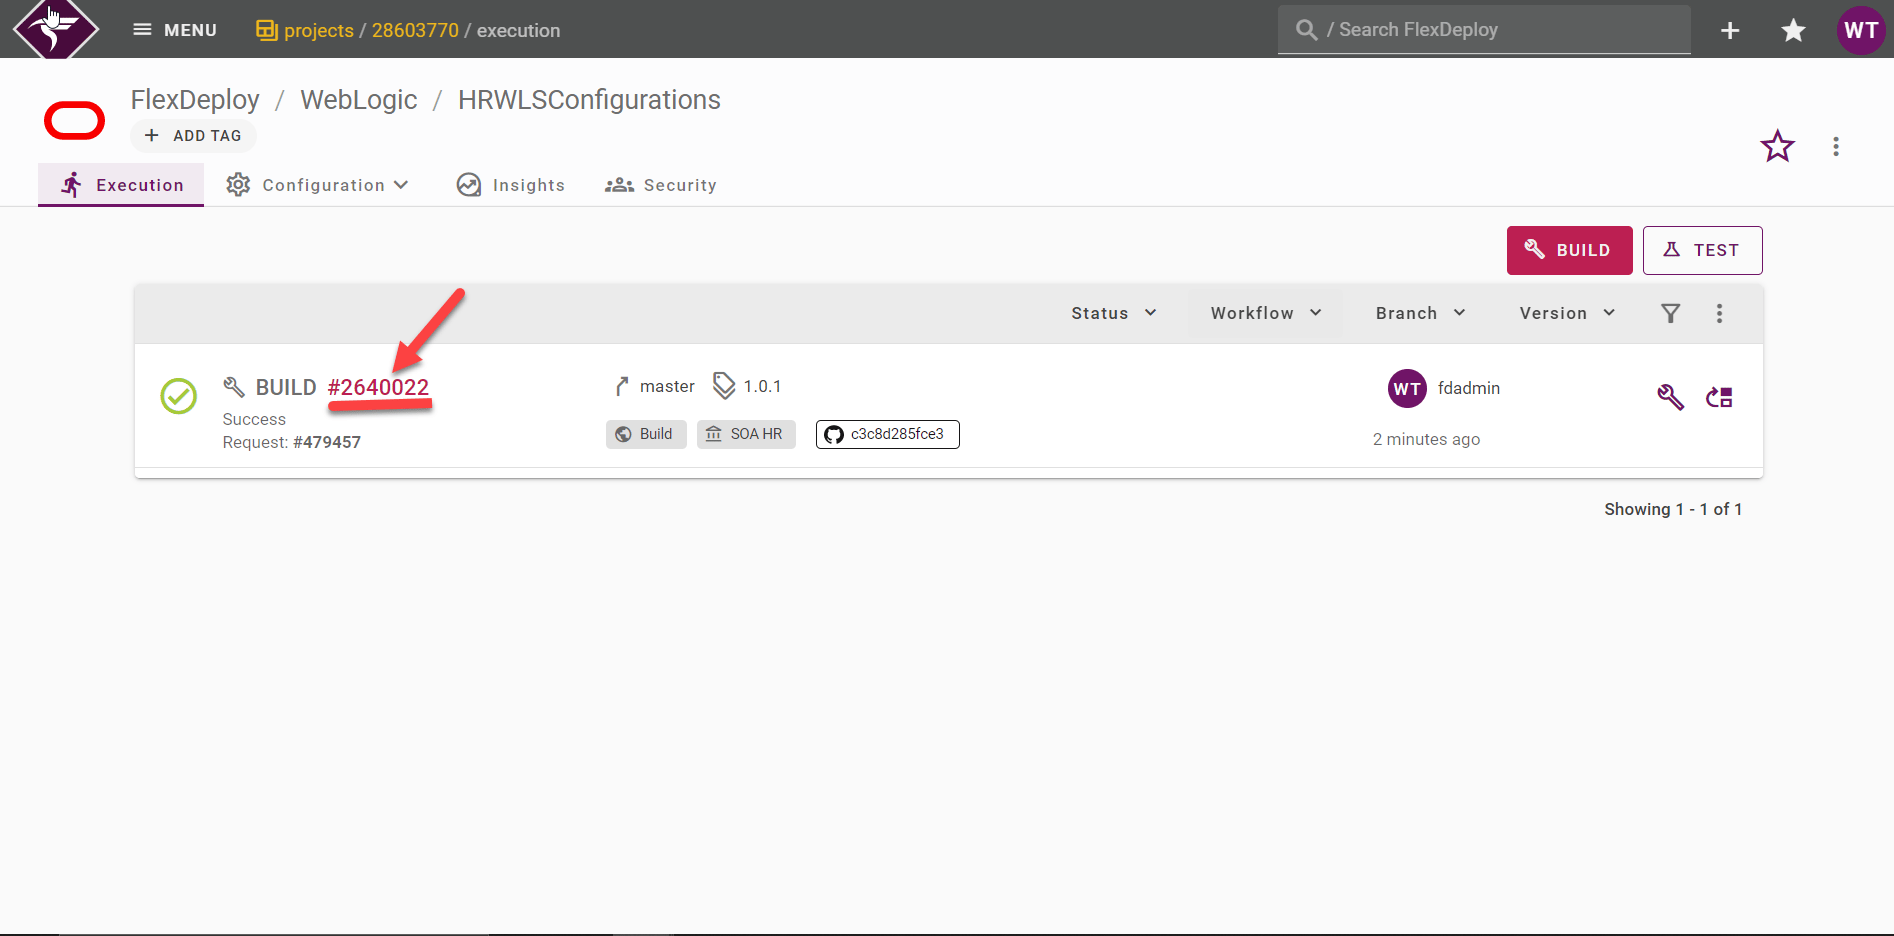
FlexDeploy is configured with everything that is required to execute a build and deploy request for the ADF application, so we can now execute the first build. On the Project, select the Execution tab and select the Build button.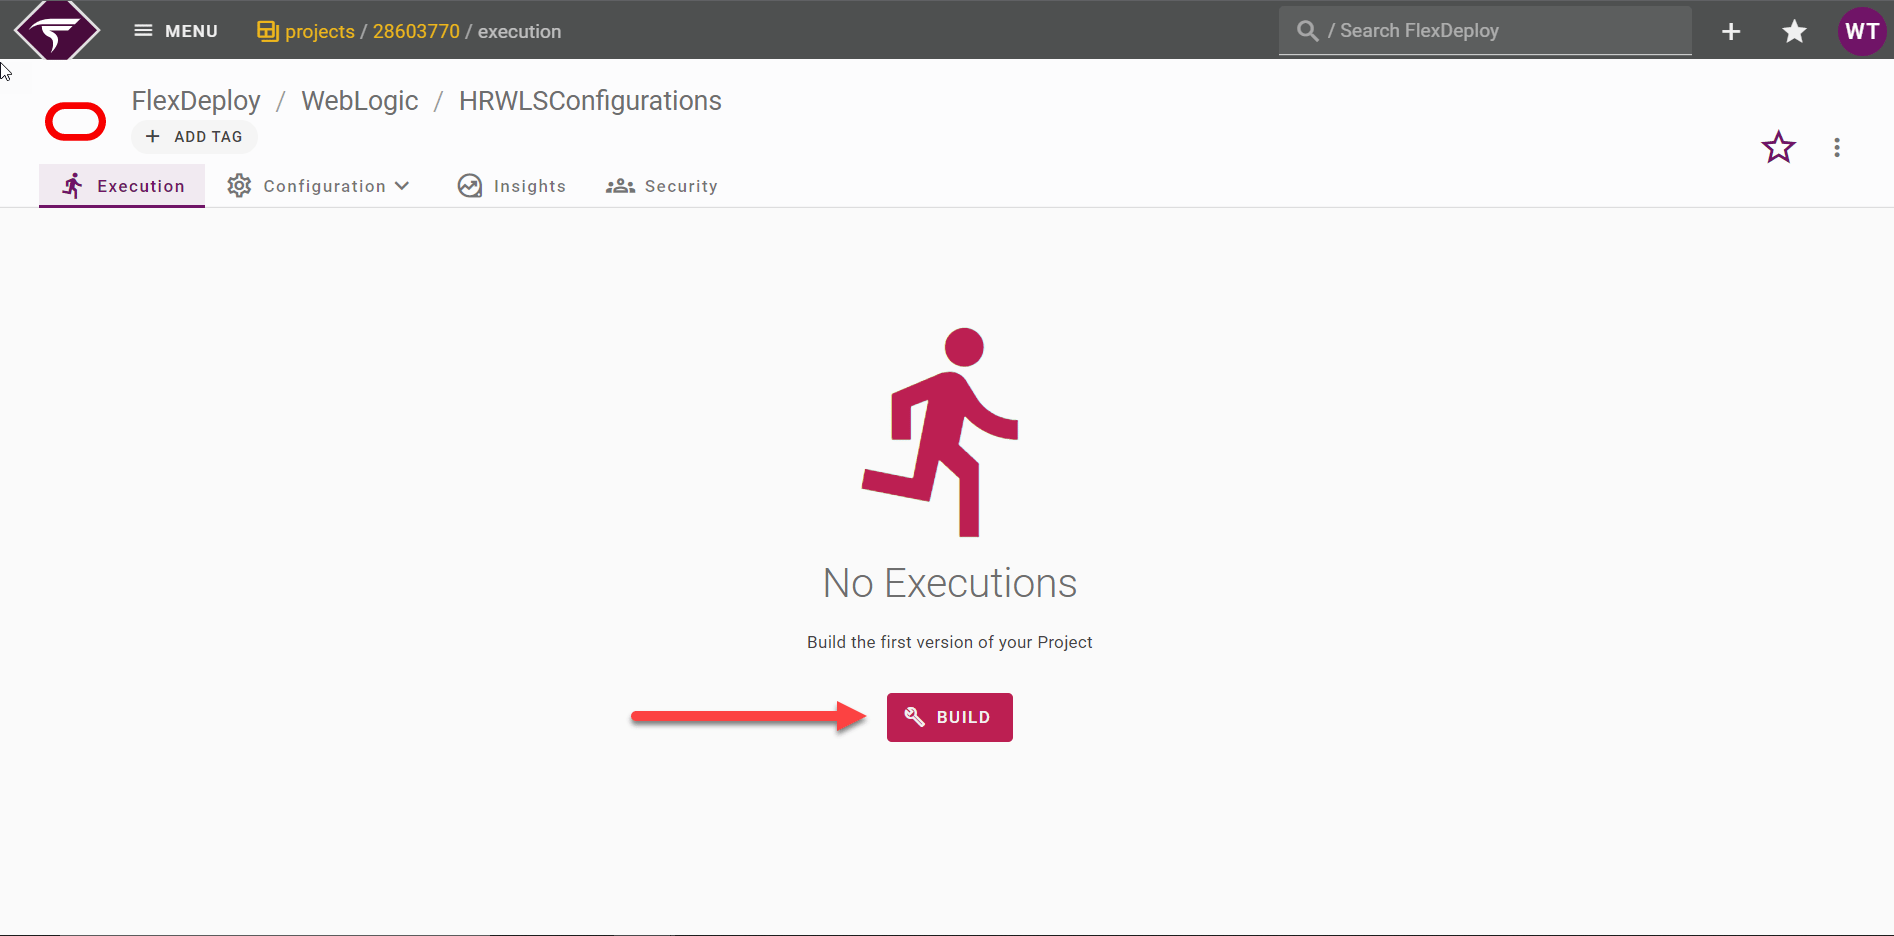
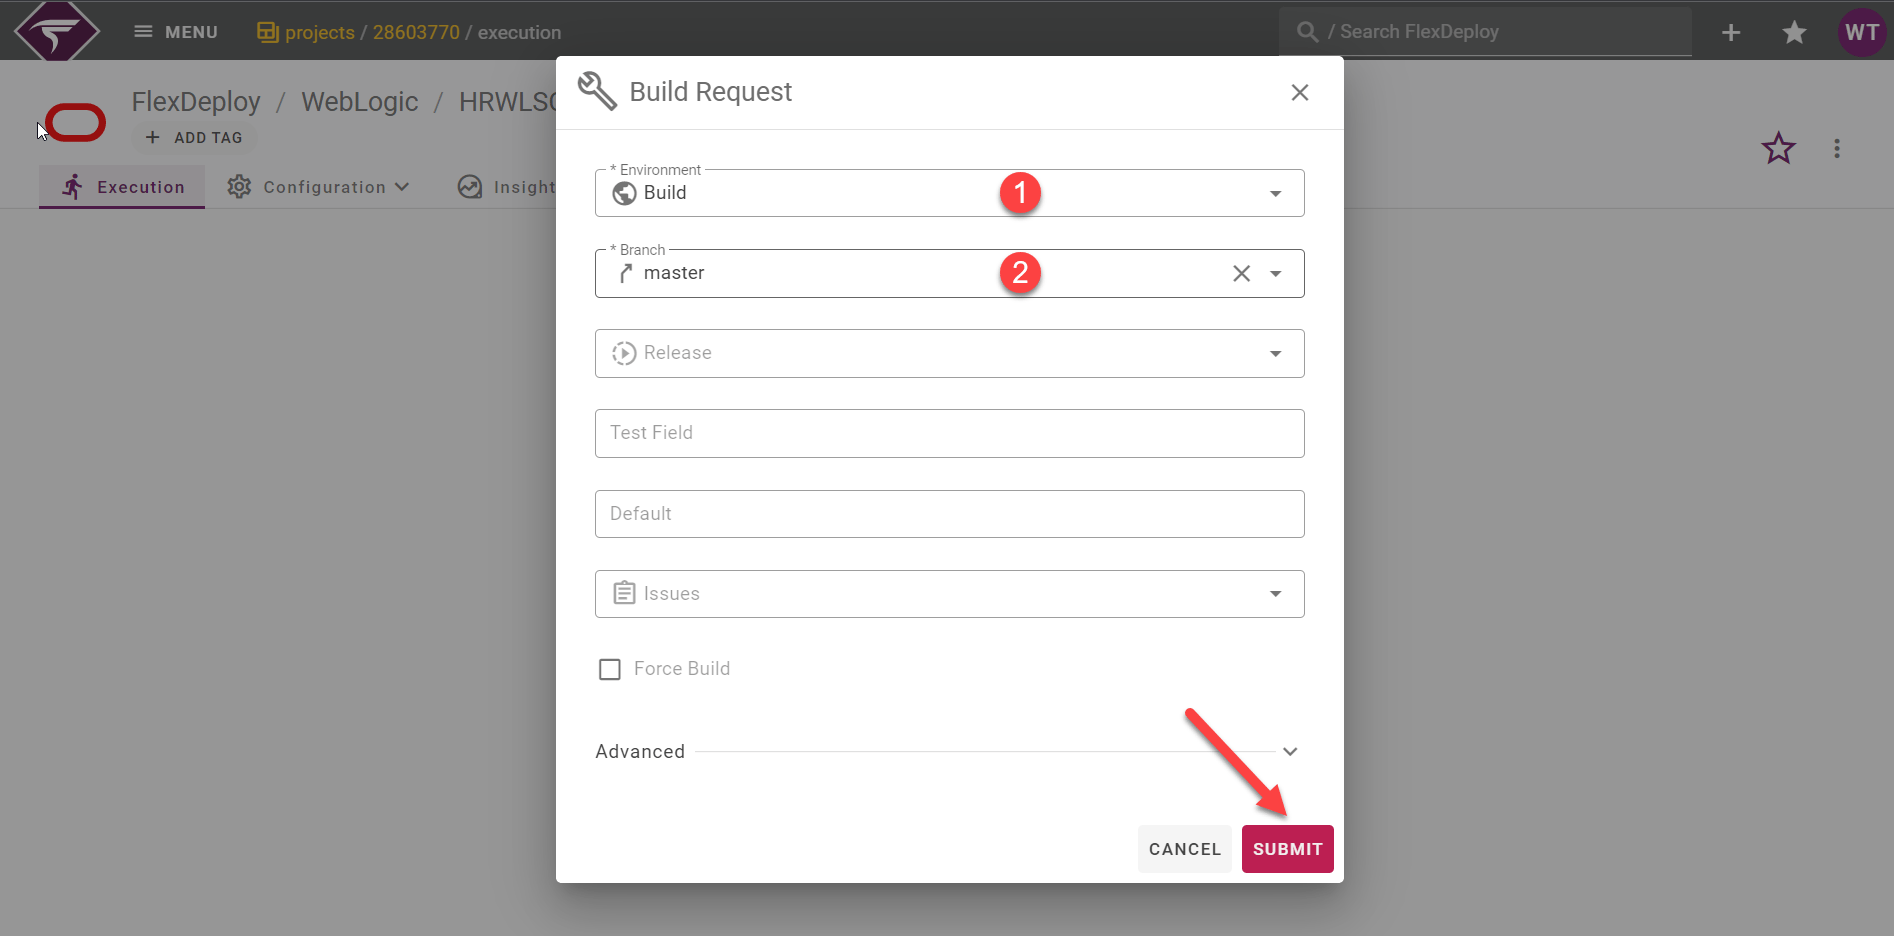
- Select the Environment we want to build the application in. All active environments that have been marked as build Environments will appear in the dropdown.
- Select the SCM branch that was configured on the project. This will be defaulted to the main branch.
- Submit the request. This will initiate the Build WebLogic Configurations workflow.
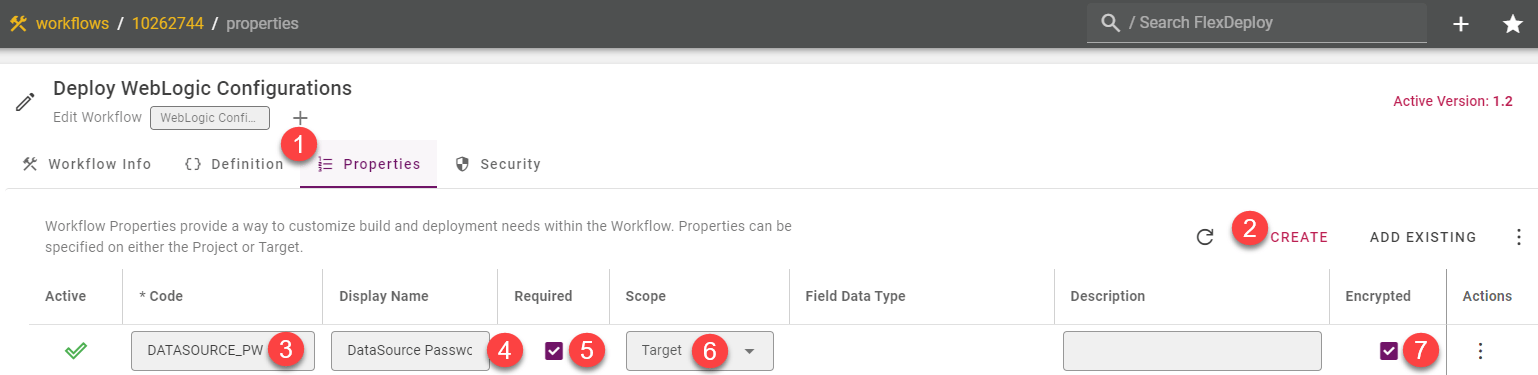
- Go back to the Properties tab of the Workflow
- Click the Create button to add a new property
- Provide a unique code for the new property
- Provide a name for the property. A property display name does not have to be unique and can contain spaces
- Mark the property as required
- Select the property scope. This defines where the property will be configured. We’re using Target because this property will be different for each environment
- This property is a password, so we’ll check encrypted. This will store the property value in encrypted format and keep the value hidden from screens and logs

Setting the Newly Added Target Properties
Select Topology from the menu and then find and select your deploy Target Group. Select the DEV Environment to configure the deploy target. Provide values for the newly added properties - DataSource Password and SOA Target.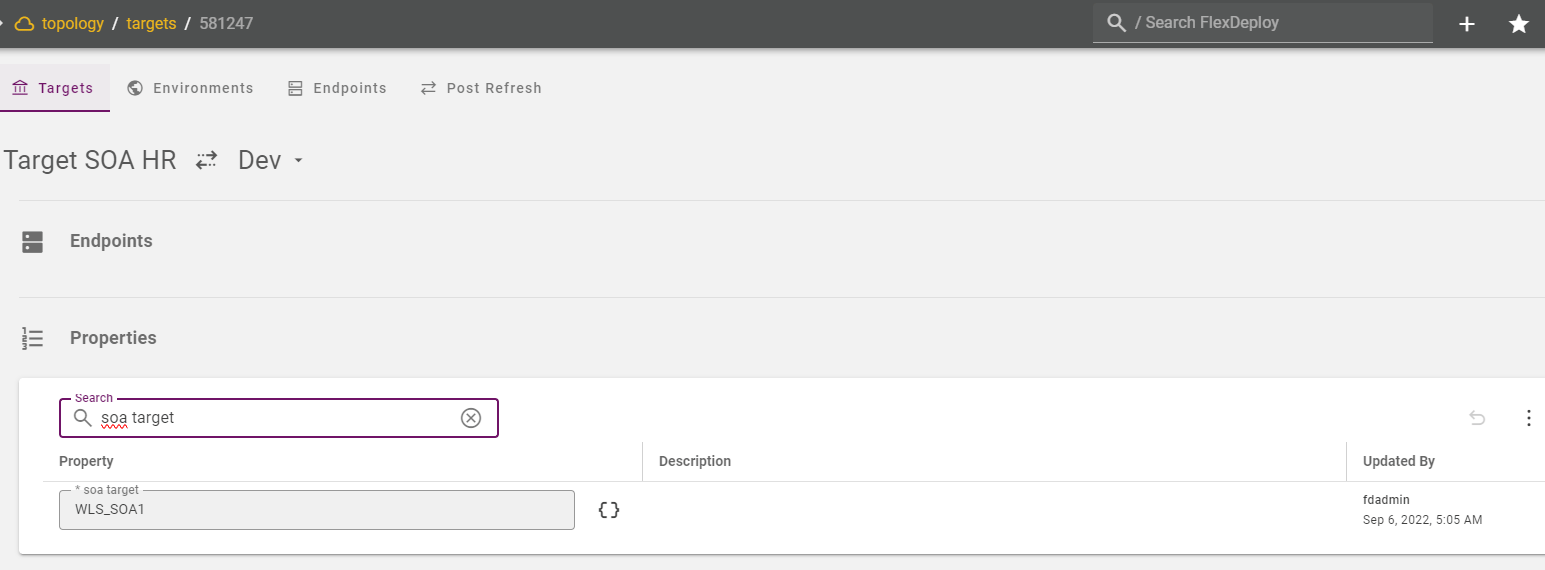
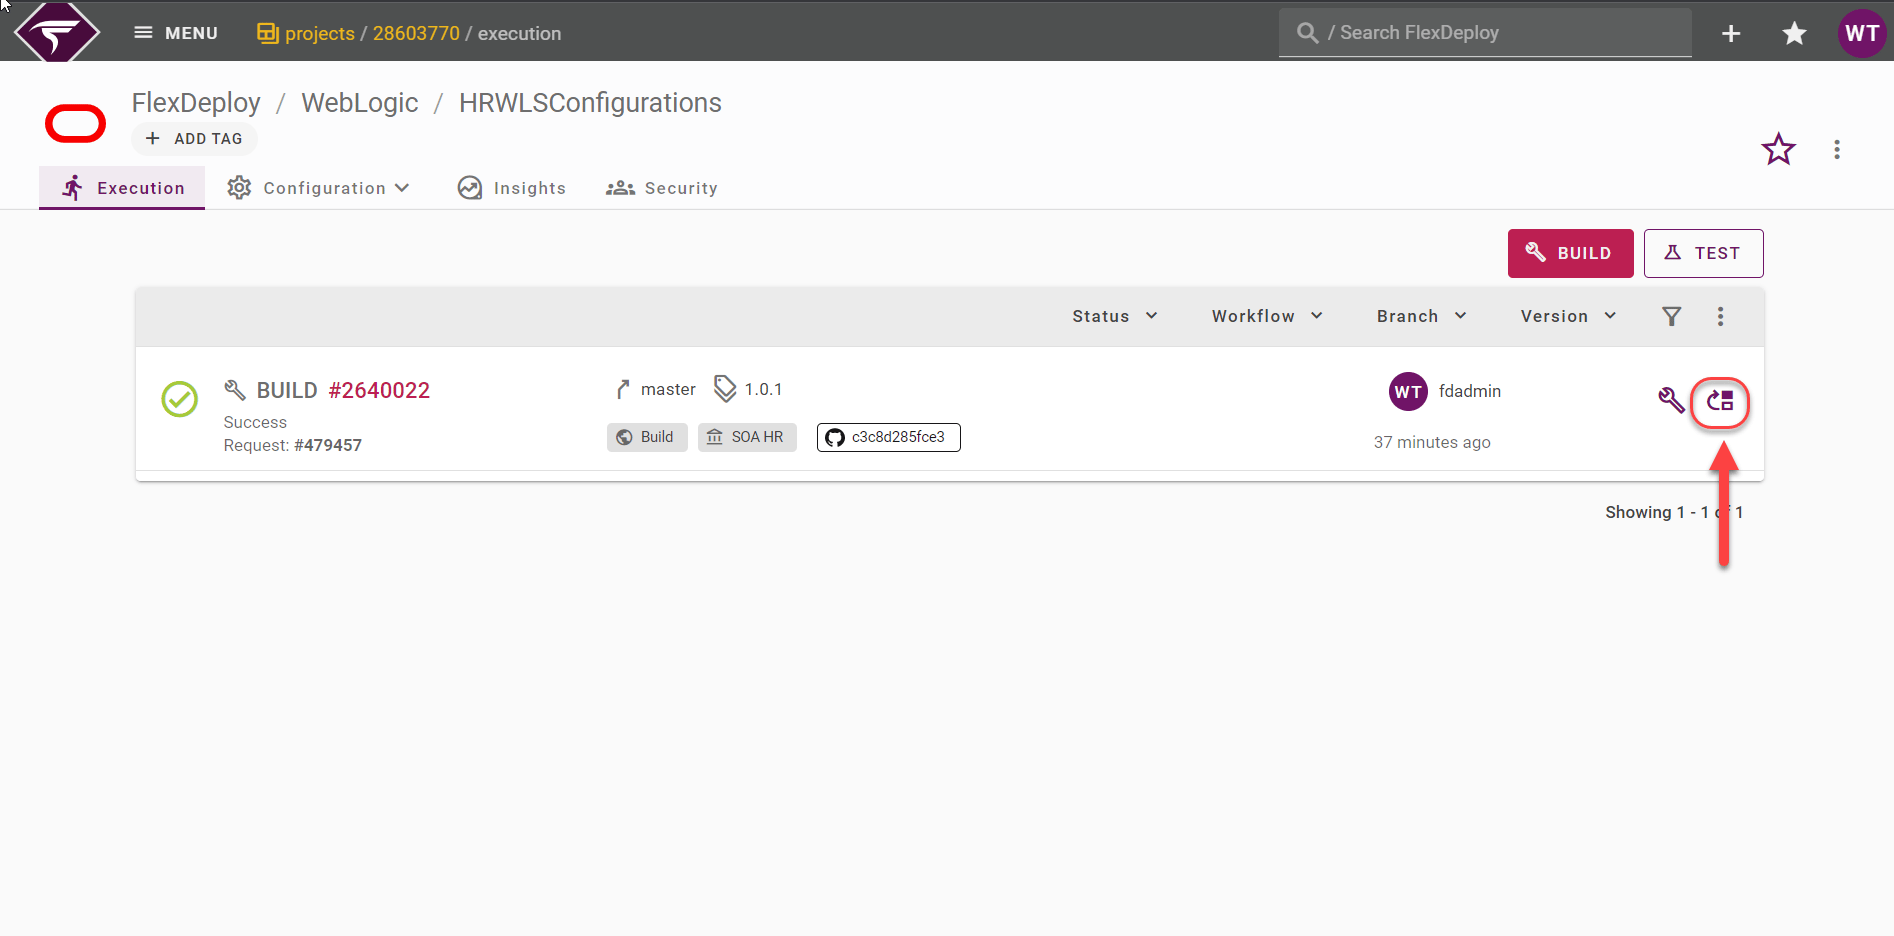
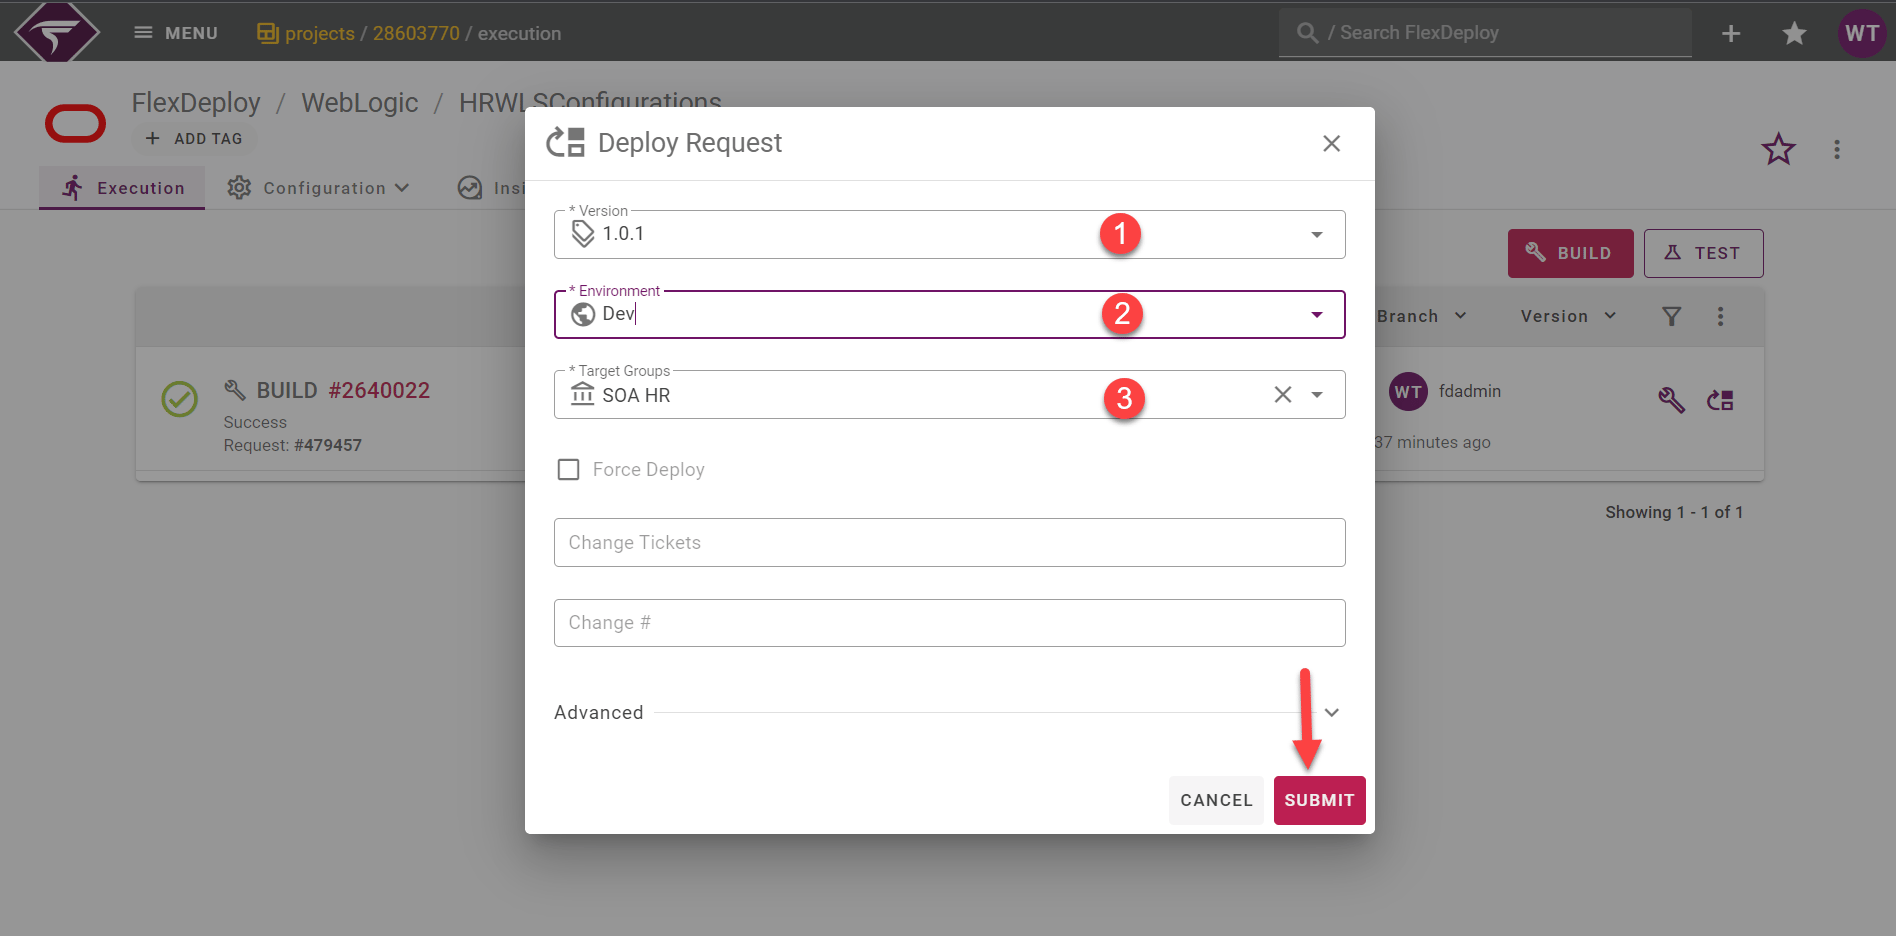
- Select the Project Version. The form will default to the latest Project Version but the dropdown will contain all previously created Project Versions.
- Select the Environment that the deployment will be executed in.
- Select the Deploy Target Group(s). Deployments can happen on multiple Target Groups.
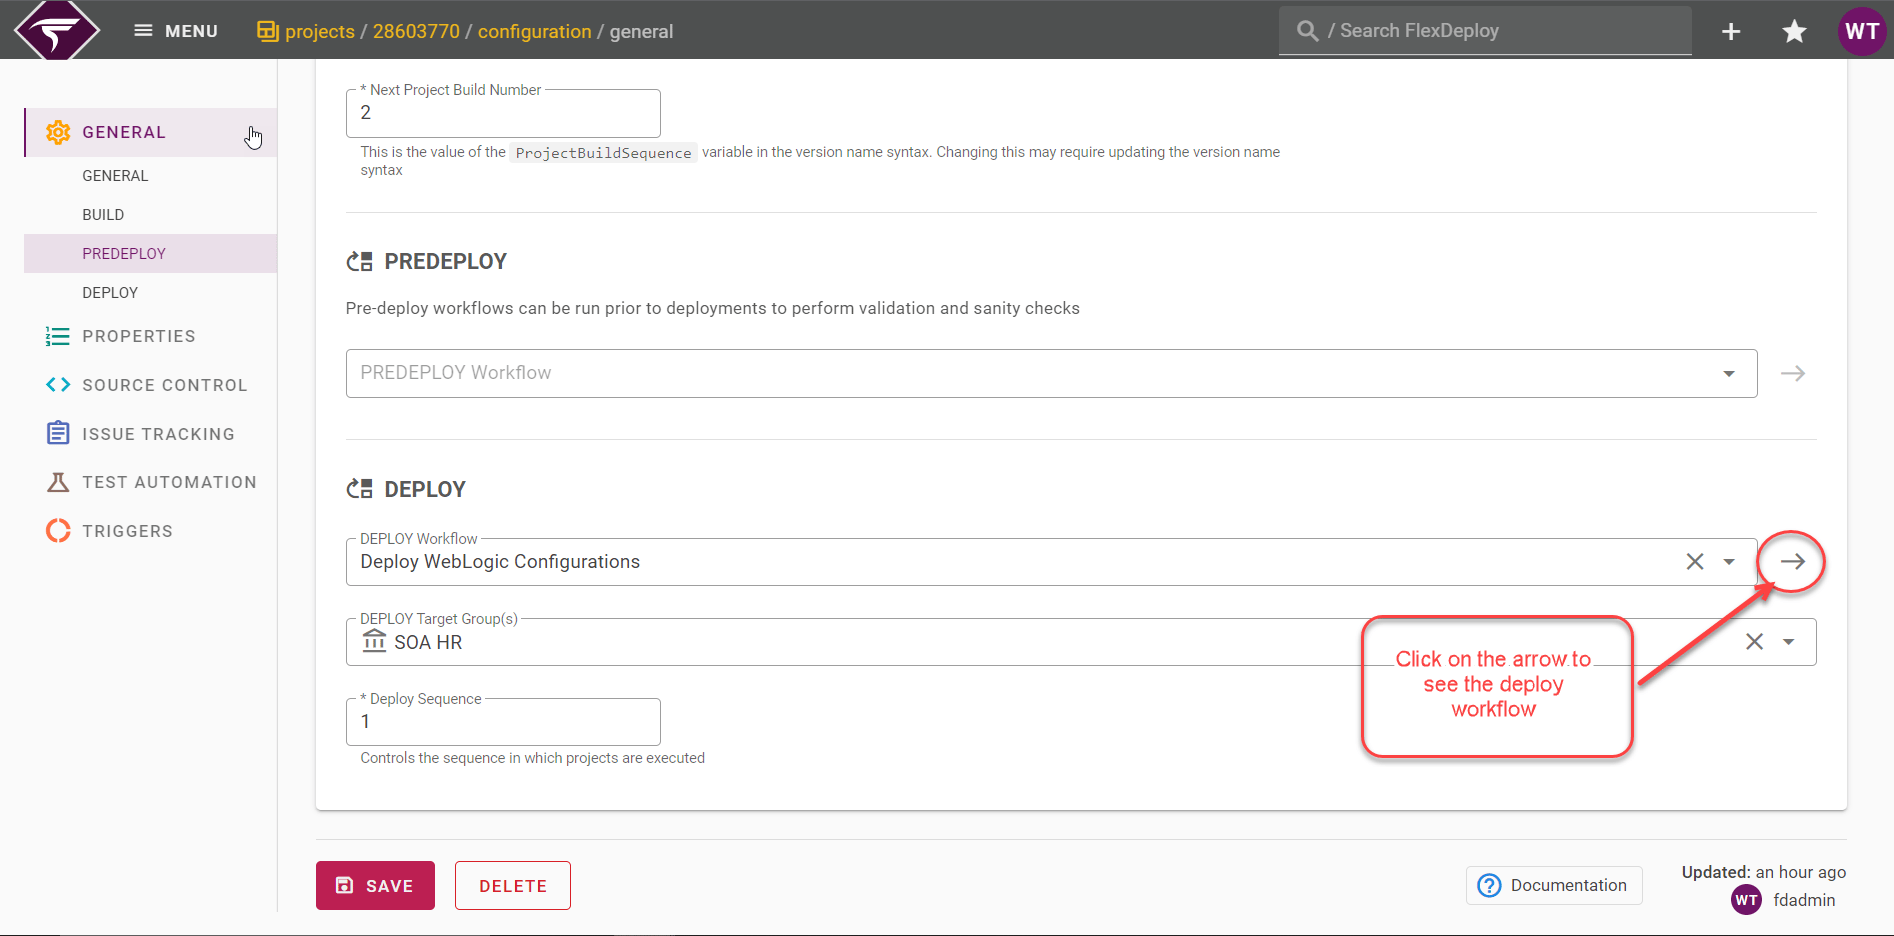
- Submit the request, which will initiate the Deploy Config Configurations workflow.
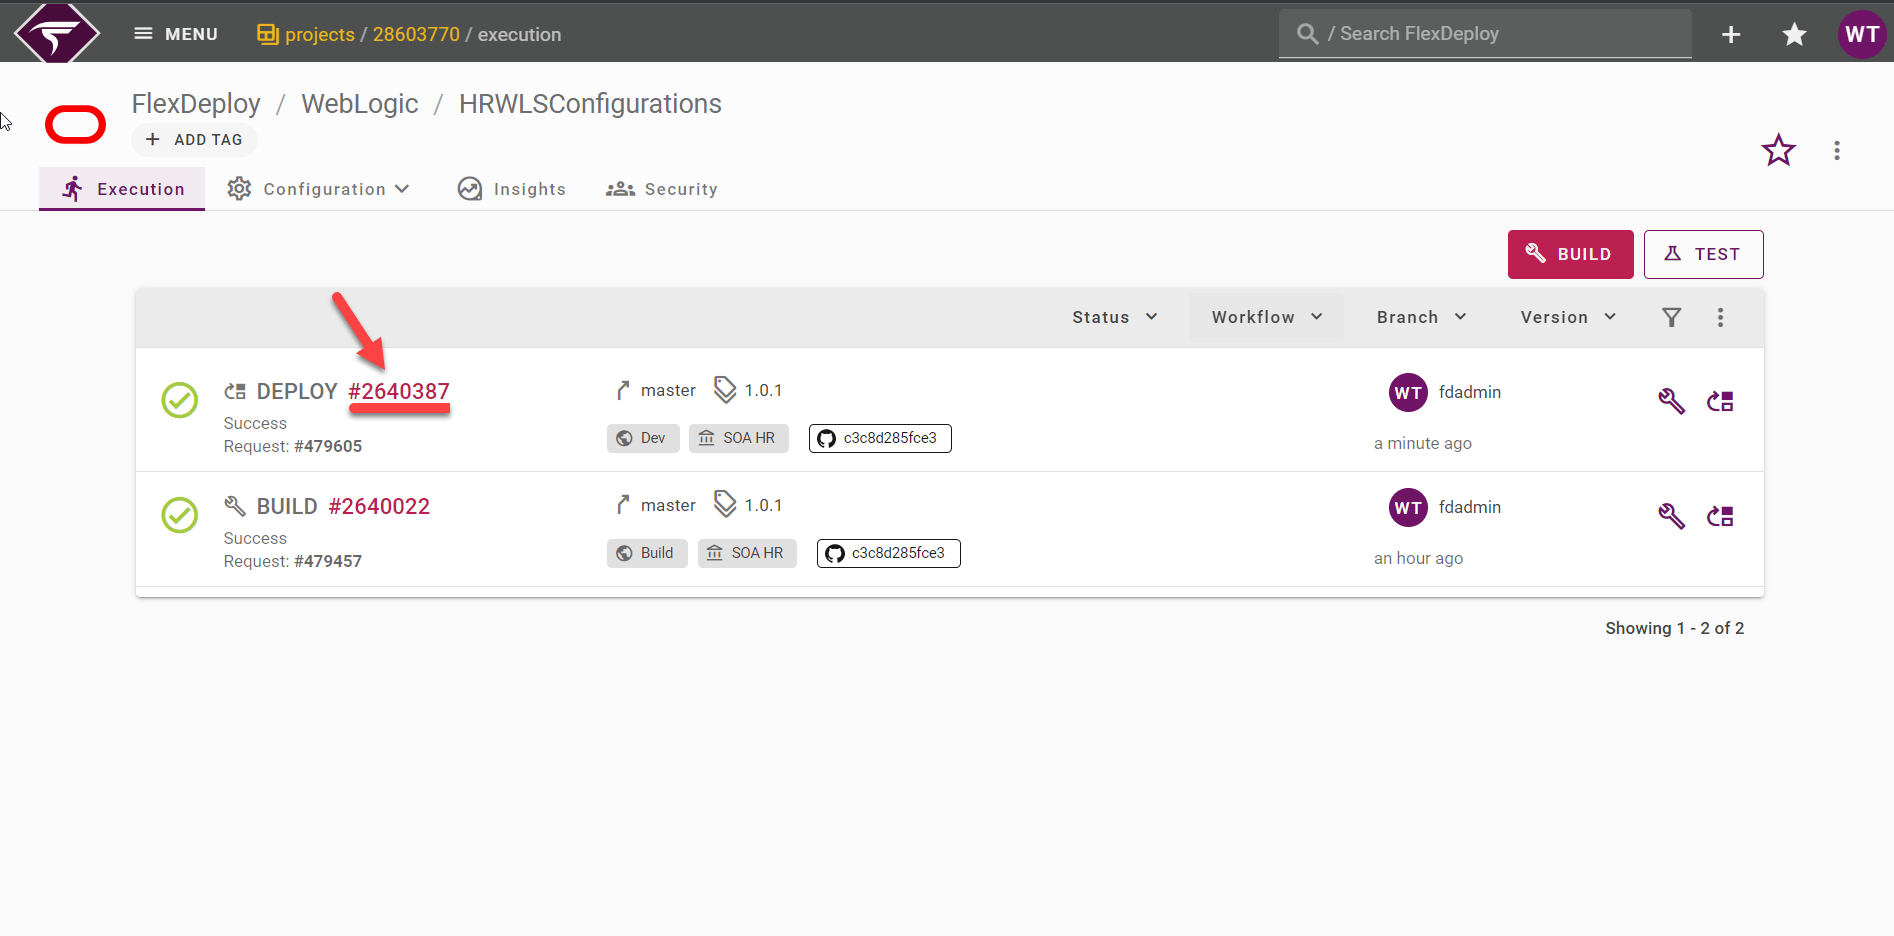
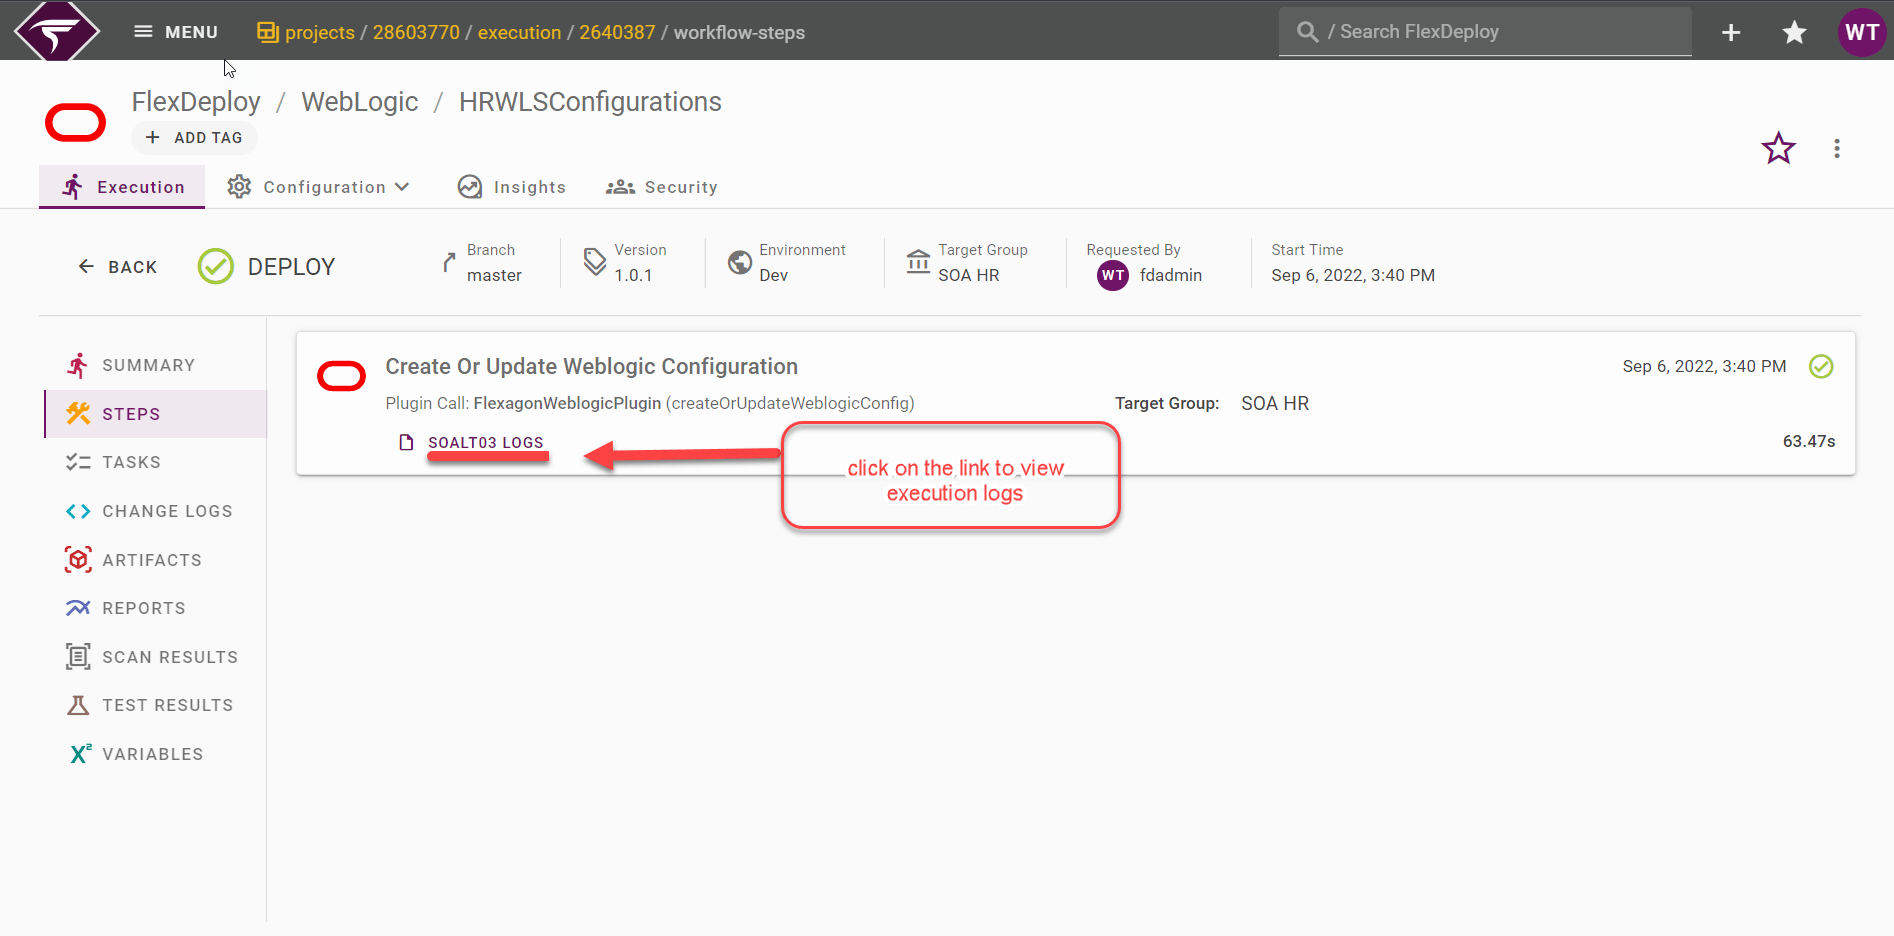
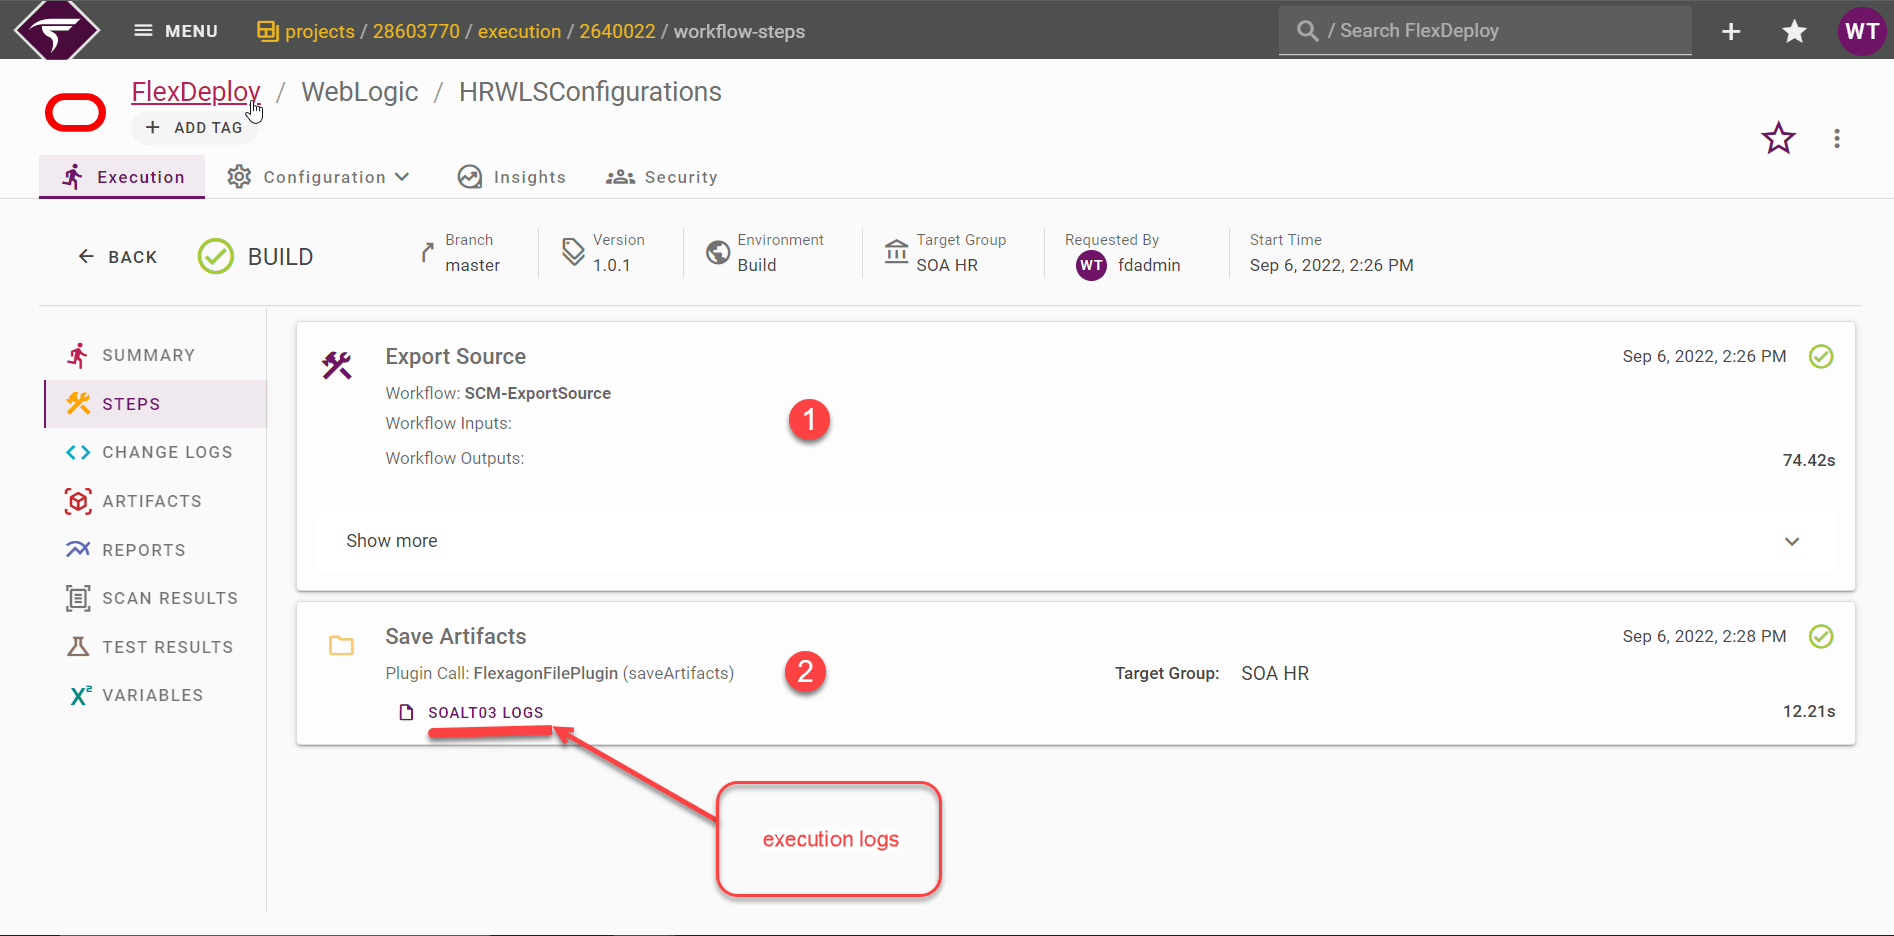
- The workflow execution steps
- The logs for each workflow step
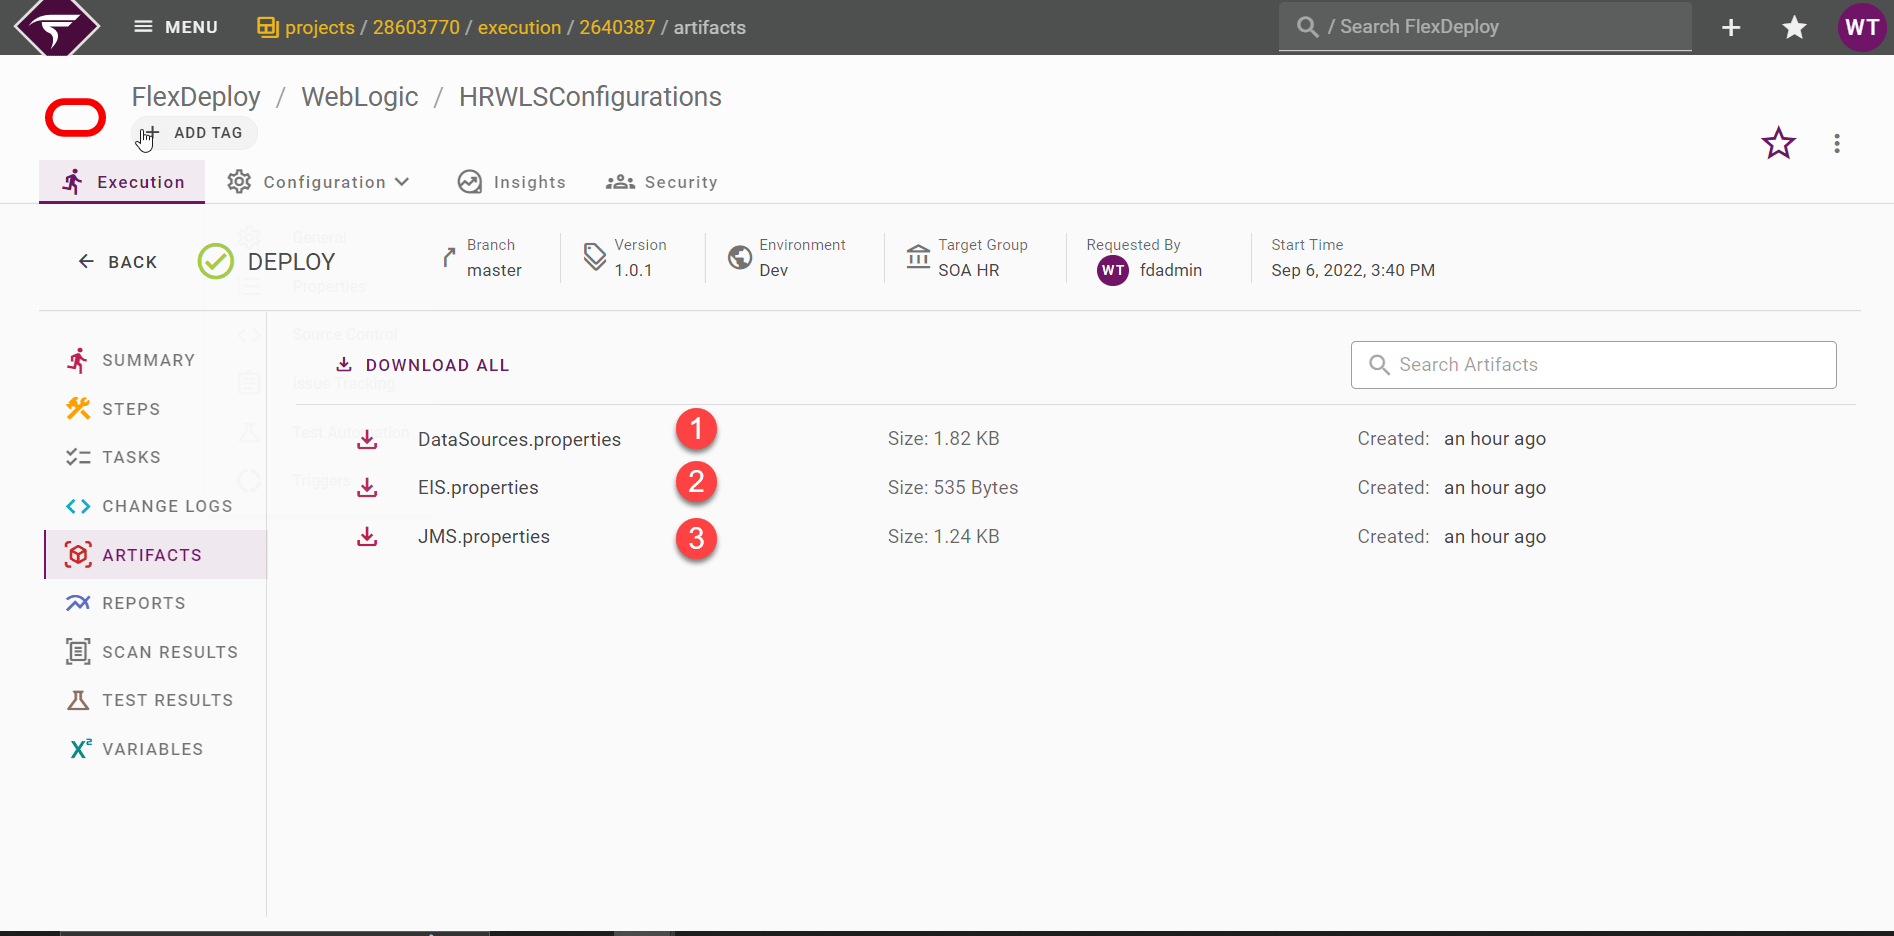
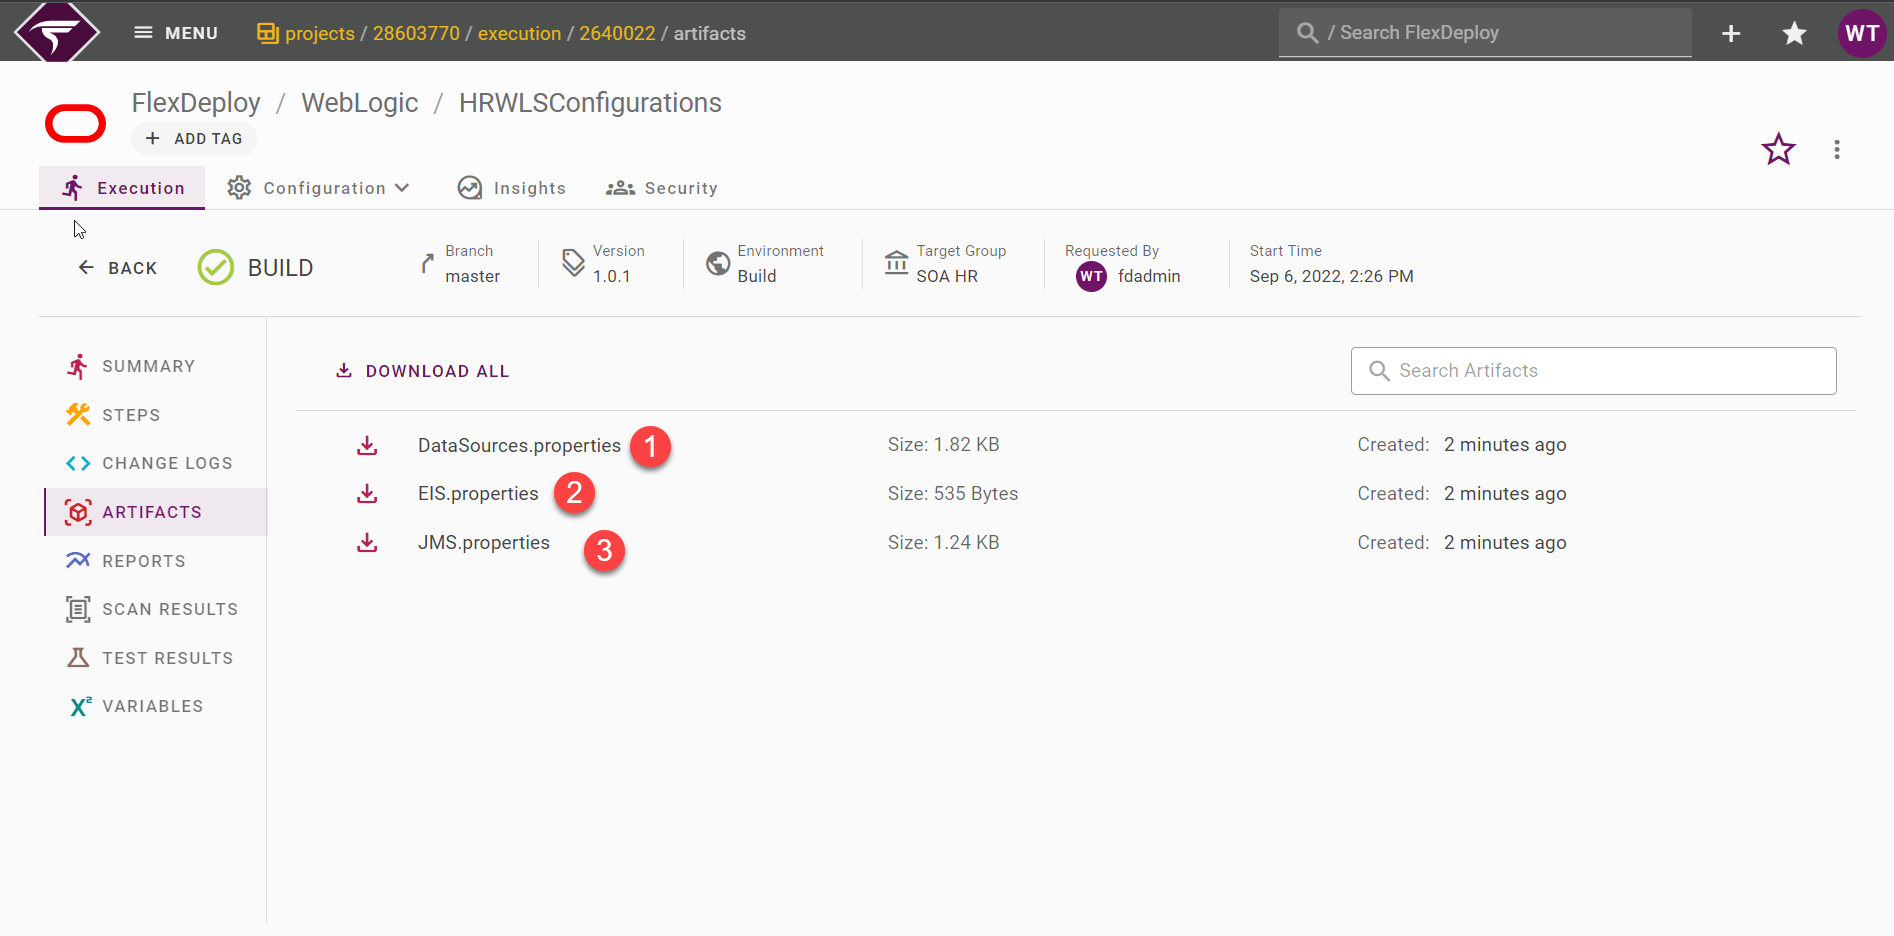
- The artifact, which can be downloaded
- The Project and Target property values at the time of execution