Objective
The goal of this tutorial is to deploy an Apache HTTP Server using Helm Chart on an Azure Kubernetes Service (AKS) cluster through FlexDeploy using the Helm Plugin. For this tutorial, we will be setting up an automated deployment of an Apache HTTP Server using the Helm Chart which is present in this chart repository (https://charts.bitnami.com/bitnami) . The steps will include:- Configuring properties e.g. config file path, cloud account, and CLI path
- Deploying the Apache HTTP Server to an AKS cluster
- Verifying the application is successfully created on the AKS cluster
Checklist
Checklist | Description |
Azure Tenant Id | Azure Tenant Id for the company |
Azure Subscription Id | Azure Subscription where the AKS cluster exists |
Azure Client ID | Client ID to connect to desired Azure Subscription |
Azure Client Key | Password for the Client ID |
Azure Client ID permission | The Client ID must have relevant access in AKS cluster to do the deployment |
Azure CLI installation | Azure CLI needs to be installed where the plugin operation will run (e.g. FlexDeploy server) |
Azure CLI in class path | Azure CLI should be added to class path on the FlexDeploy Server. Else the path can also be set under FlexDeploy environment level property |
AKS Setup | AKS cluster should be created in Azure and a kubeconfig file should be present with the context of the cluster |
Configure Cloud Account
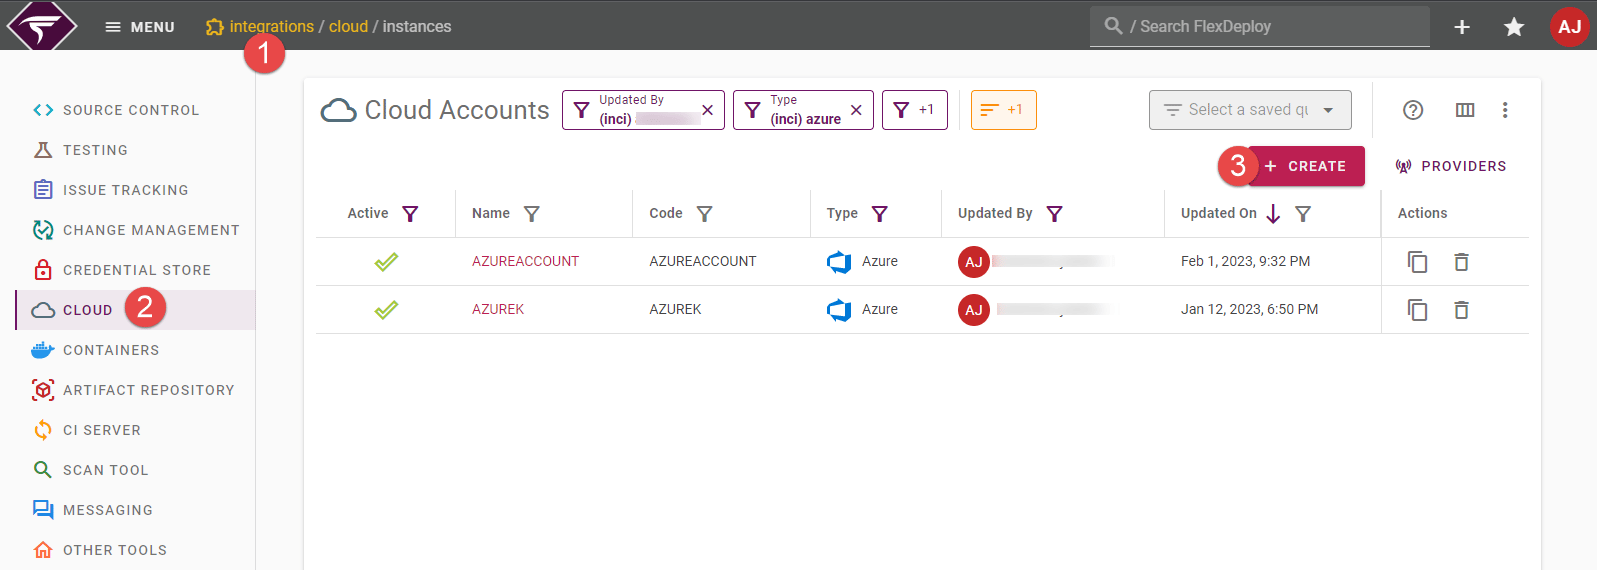
To connect with AKS cluster, we required to configure Cloud account, with credentials details. Configure Azure Cloud Account under Integration. FlexDeploy will connect to the AKS cluster and deploy the Apache HTTP Server.- Navigate to the Integrations
- Select Cloud from the left-hand pane
- Create a new Cloud account with the “+” button. Create a new Cloud account of provider type “Azure”
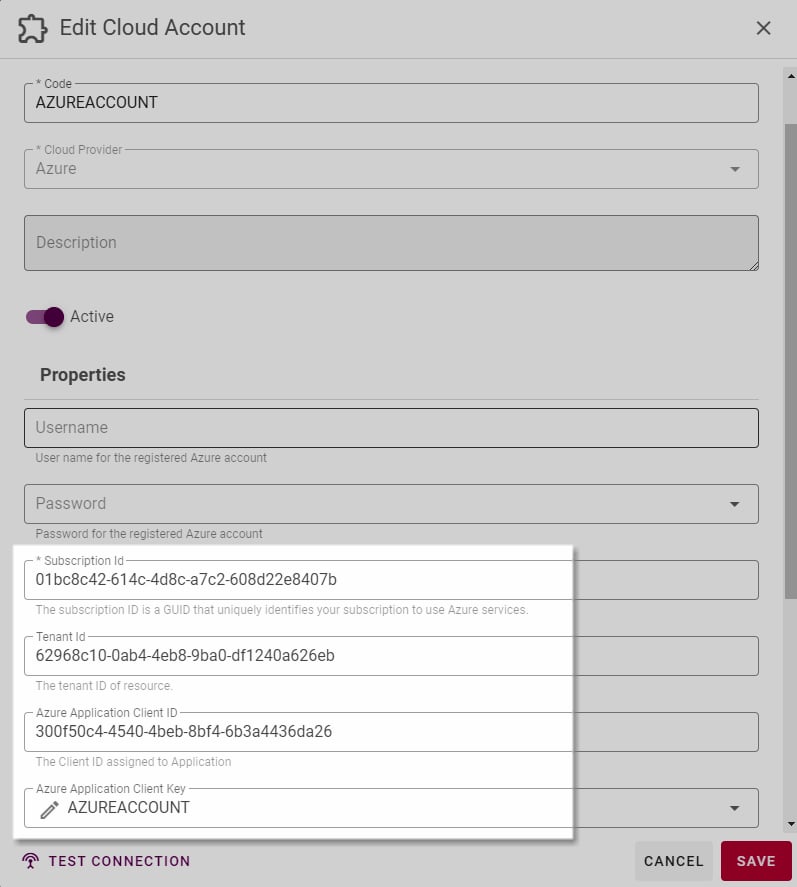
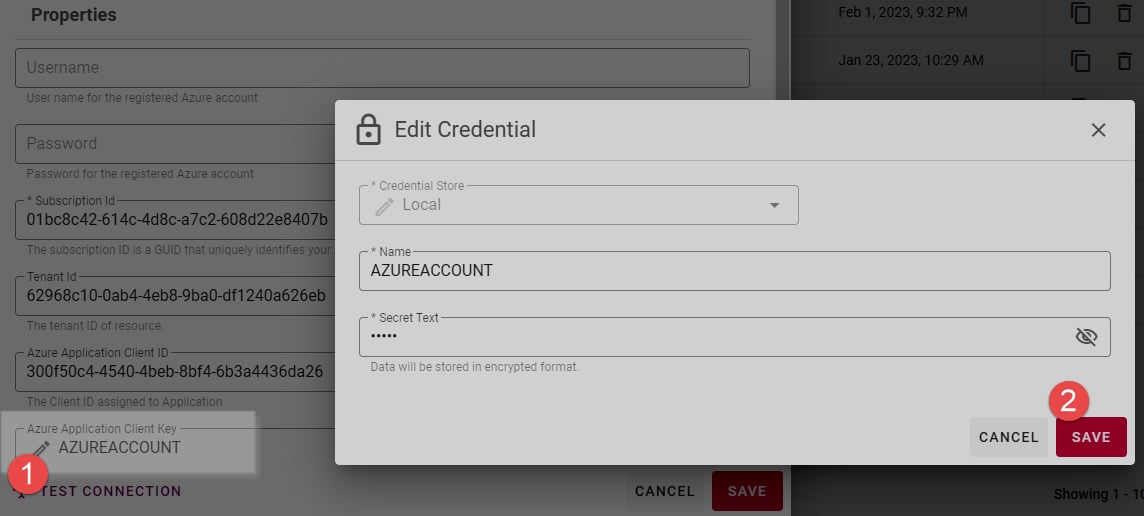
- Client Key is a password field and hence needs to be kept hidden. To update the same click on the pencil icon as shown below
- Update the Client Key value under Secret Text. This is to make sure no one else can retrieve the password
Pre-requisite
Configure Service Principal
To access the AKS cluster, we need a Service Principal( Client ID and Client Key). Created a Service Principal and corresponding secret (e.g. aksudpatesp)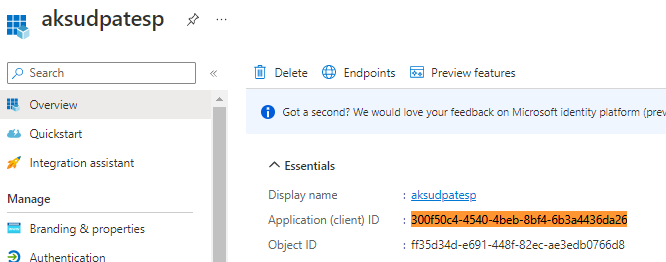

Configure kubeconfig File
A Kubeconfig is a YAML file with the details to connect to Kubernetes Cluster using certificate/secret tokens to authenticate the cluster. This is essential for Helm Plugin to connect to target AKS cluster. If you need to generate a new kubeconfig file, you can find the generated file path in the output when running the first command here: https://learn.microsoft.com/en-us/azure/aks/learn/quick-kubernetes-deploy-portal?tabs=azure-cli#connect-to-the-cluster. Why Change in kubeconfig Normally with earlier version of kubectl, the structure of config file was as given below.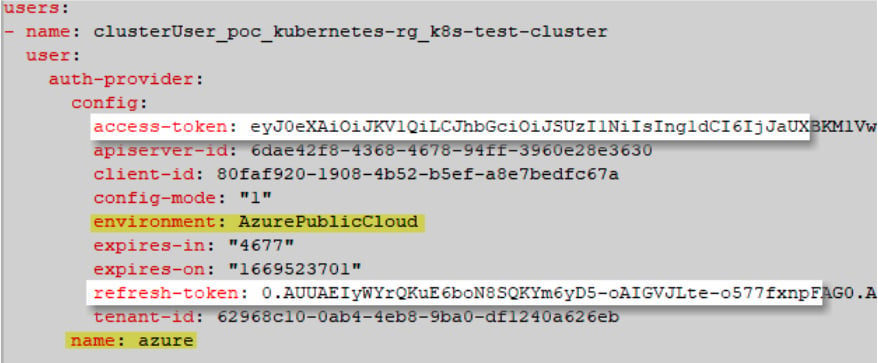
- This is because kubectl currently supports various vendor specific login.
- The logic used by the Azure auth provider is embedded in the kubectl binary, which is why you can authenticate and connect to the cluster without having to install anything else.
- Going forward this approach is going to change. It’s not going to support vendor specific authentication protocols.
- The authentication plugins are being moved out of the kubectl binary into separate binaries, maintained by the Cloud providers and distributed independently.
- Ref:
- To overcome this issue, all Cloud providers have extended the client-go credential plugin to have custom Cloud specific authentication methods.
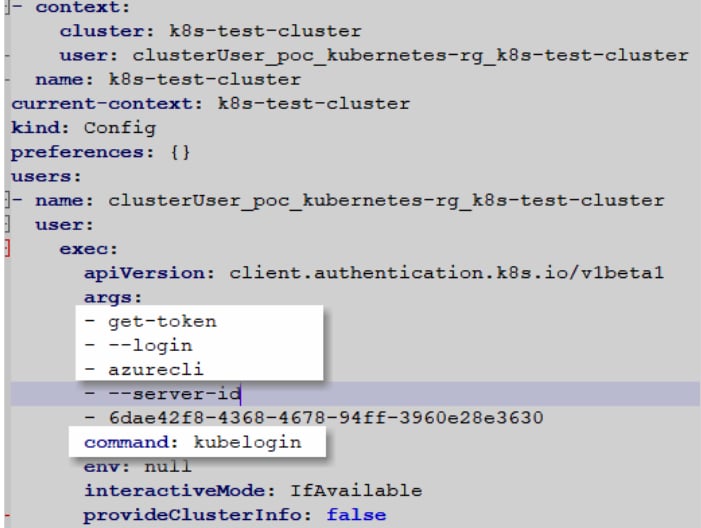
- Kubelogin is a client-go credential plugin that implements Azure AD authentication. This is the direction for AKS.
- Execute below command to use azurecli as kubelogin option to retrieve access token. With this changes kubelogin will internally generate the token. No update required in kubeconfig file going forward.
CLI Installation
- Azure CLI should be installed in the m/c where the plugin is to be executed. Preferably add Azure CLI path in m/c classpath.
- Install/copy kubelogin on the system . Add kubelogin in m/c path variable.
Deploy Workflows
Deploy Workflow Navigate to Workflows and create a workflow using the :Create_Button: button as highlighted below.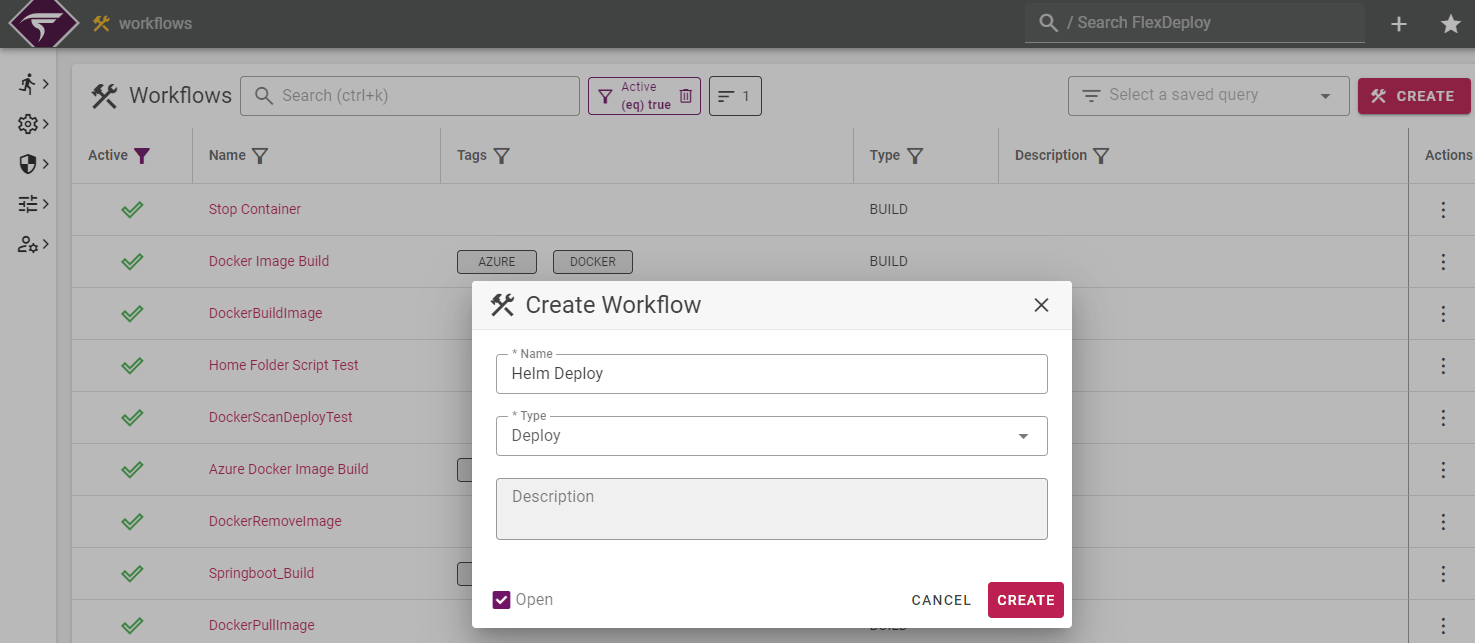
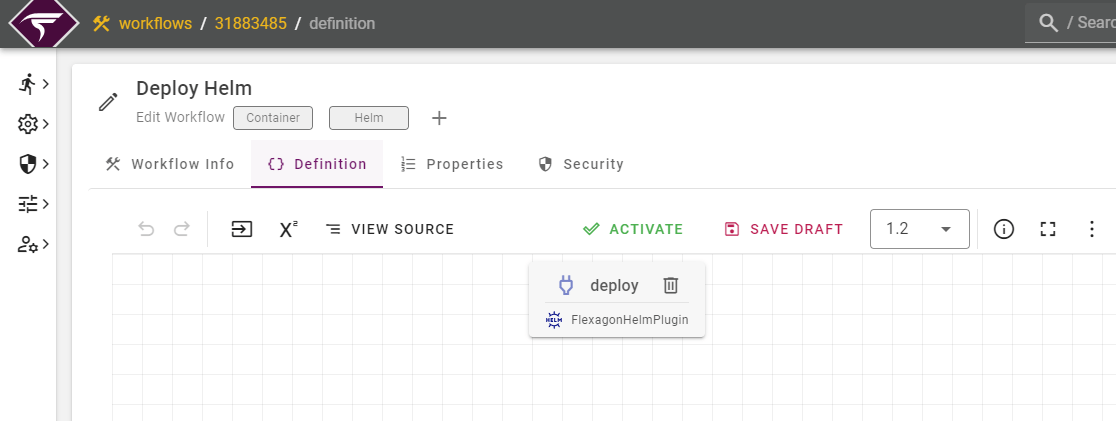
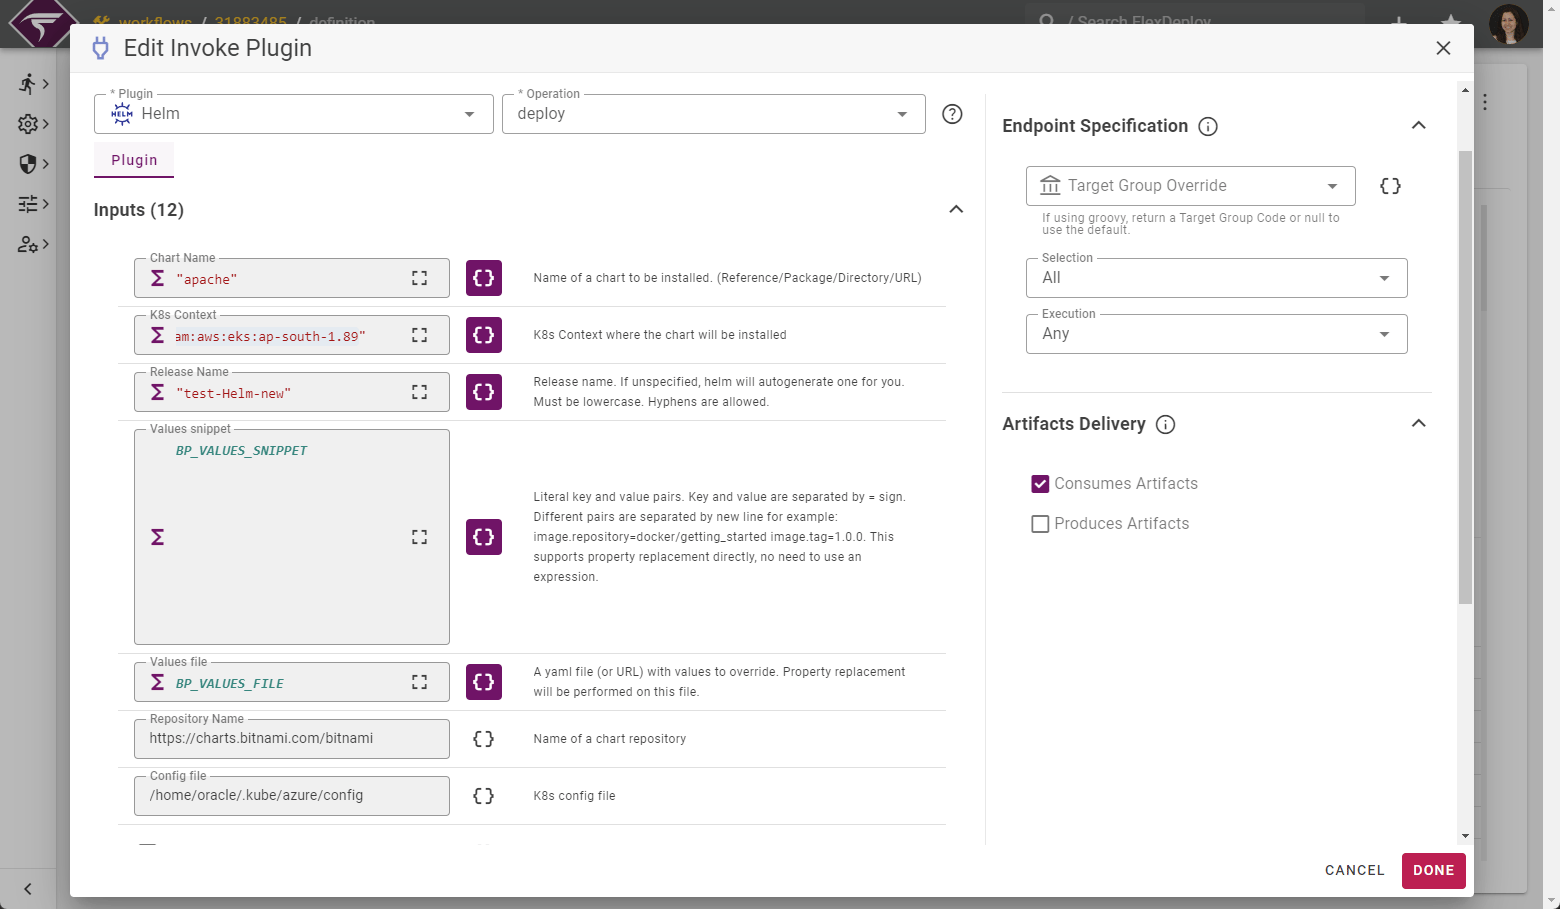
Input Name | Input Value | Description |
|---|---|---|
Chart Name | apache | Name of a chart to be installed. (Reference/Package/Directory/URL). If empty takes the chart name from the project configuration. |
K8s Context | k8s-test-cluster | K8s Context where the chart will be installed |
Release Name | test-helm-new | Release name. If empty takes the chart name from the project configuration. If unspecified, it will autogenerate one for you |
Repository Name | Name of a chart repository | |
Config file | /home/oracle/.kube/azure/config | K8s config file |
Project configuration
Navigate to the Project tab and create a Project with a logical name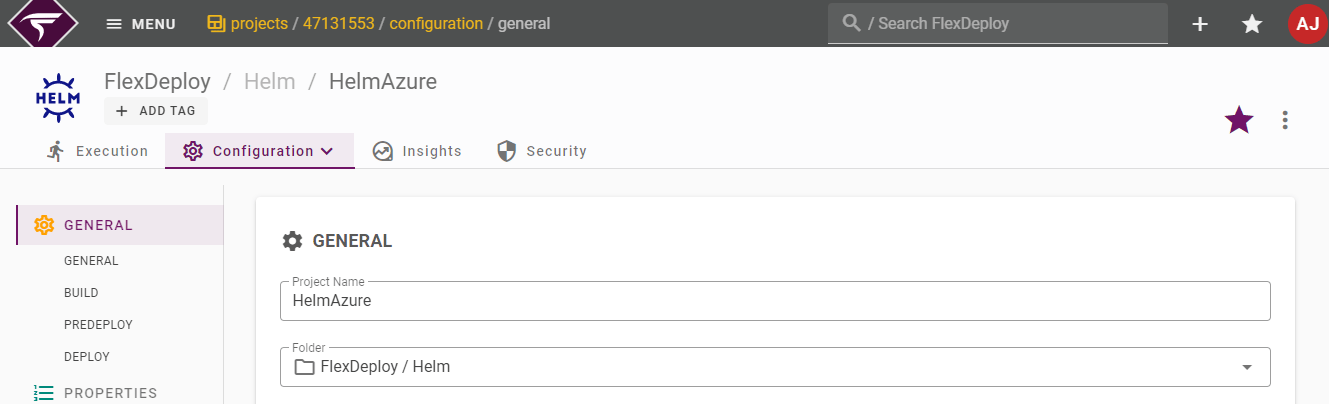
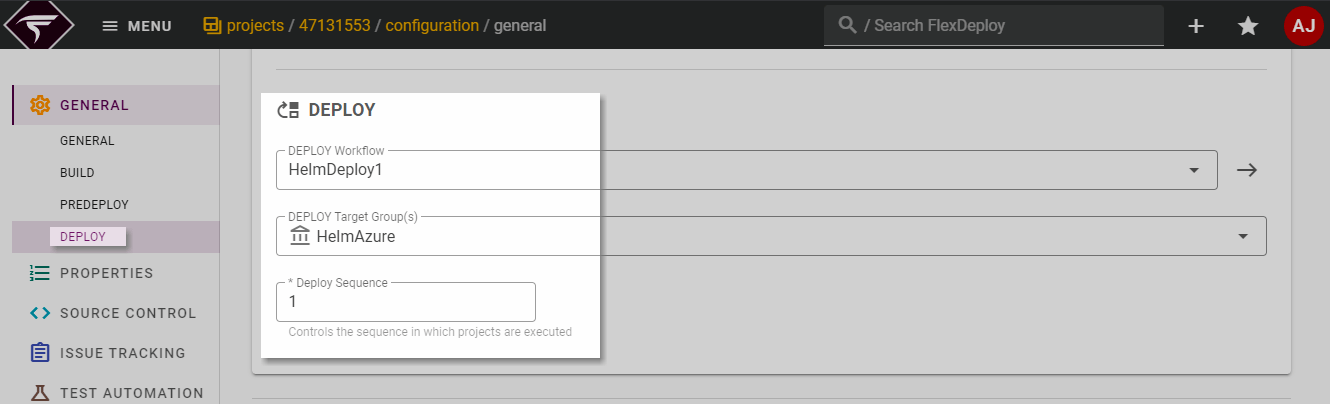
Target Properties
Select Topology from the menu and then select Targets from menu. Select the target group and environment, provide the properties detail, according to the description.Properties | Mandatory field | Description |
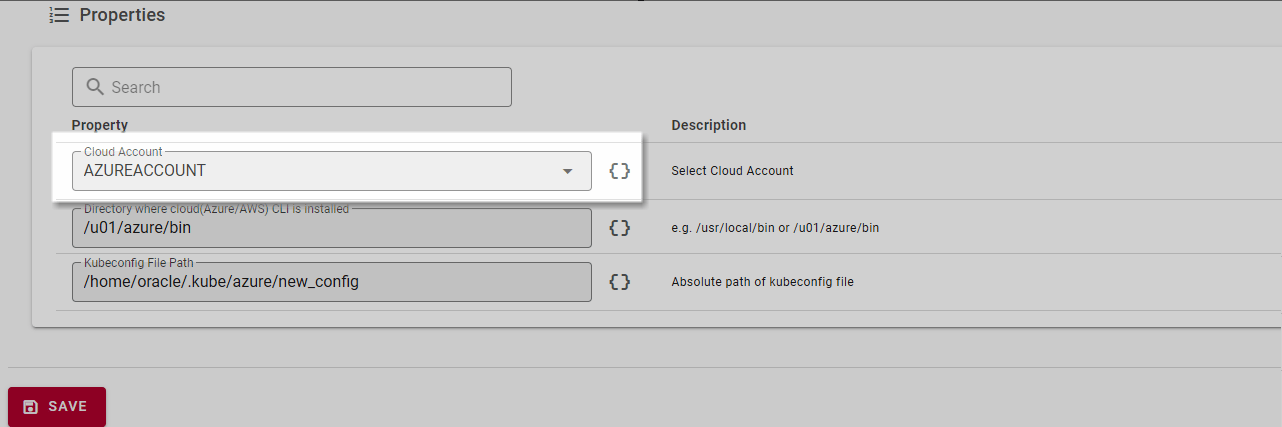
Cloud Account | Optional | Select the Cloud Account to connect cluster. |
CLI Path | Optional | Directory where Cloud CLI is installed. |
Kubeconfig File Path | Optional | Absolute path of kubeconfig file |
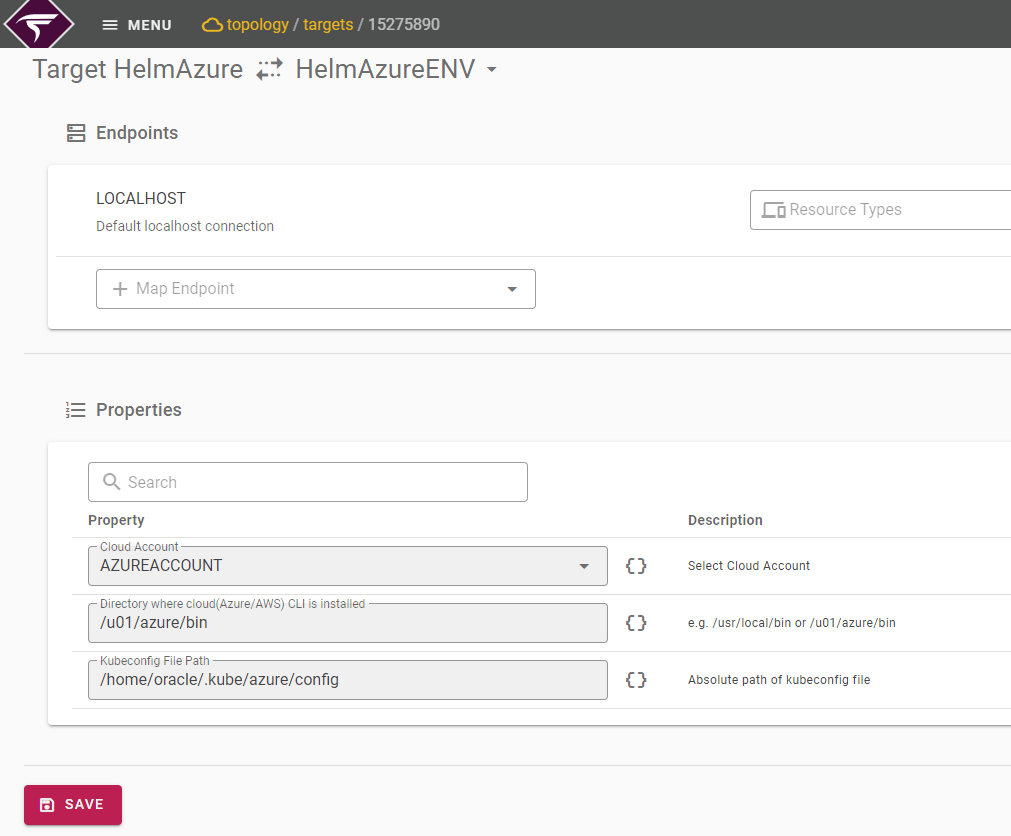
Cloud Account
The Azure Cloud account needs to be set here from the drop-down. It will show all Cloud Accounts configured under Topology, which we have already mentioned earlier.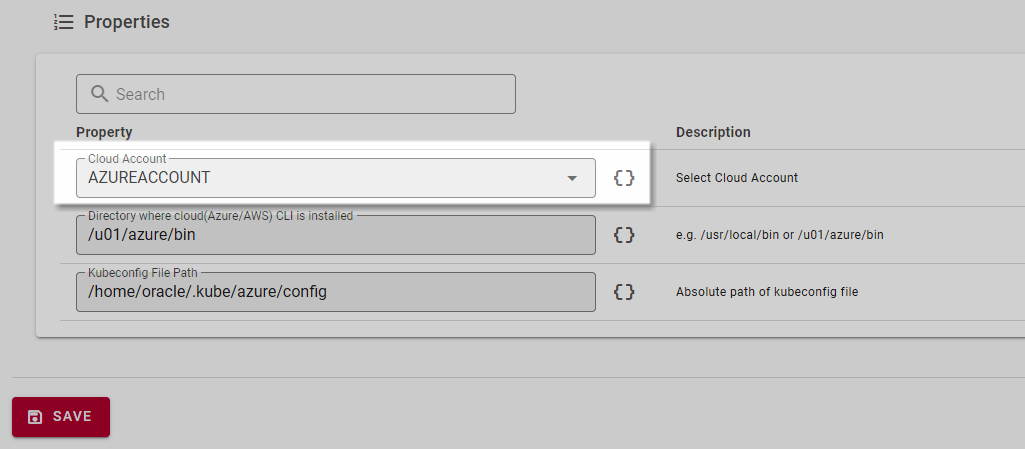
Kubeconfig file path
Absolute path of config file can be set as environment property, if path is not set then by default plugin look for config file in user directory.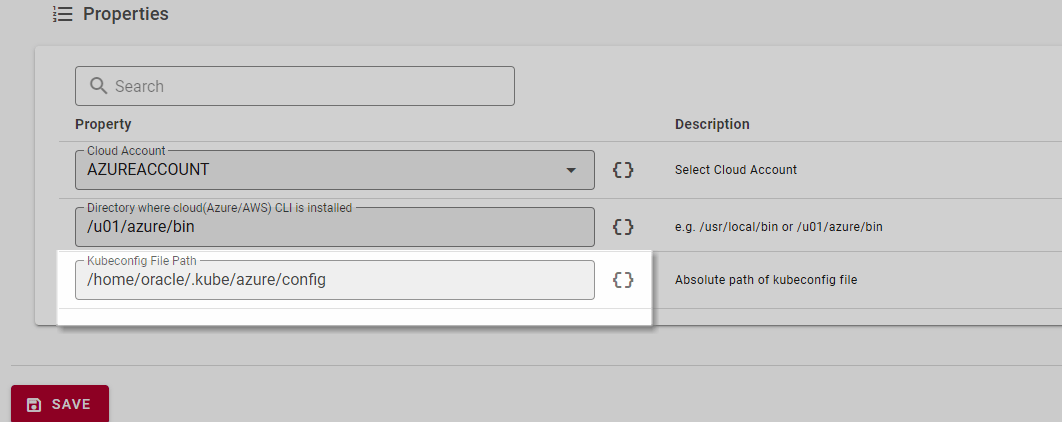
CLI path
Azure CLI path can be set as environment property, if it’s not set then by default plugin use classpath.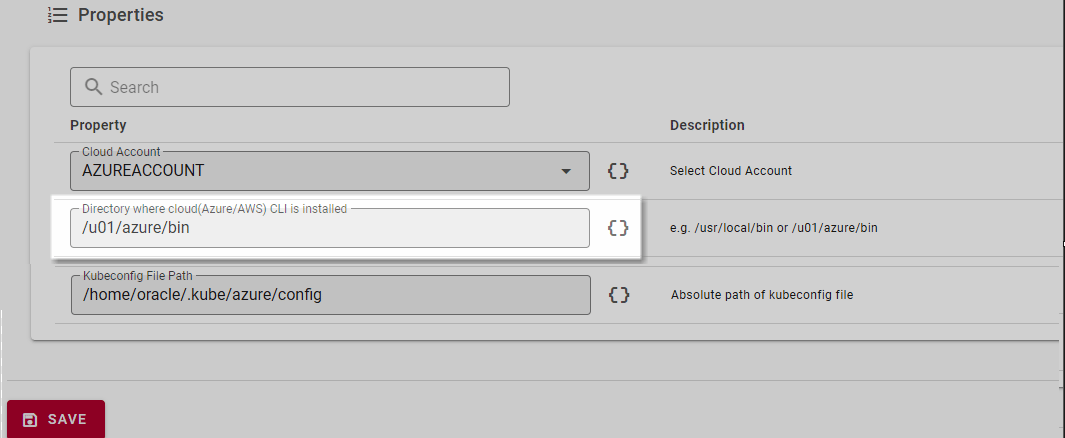
Override properties at Project level
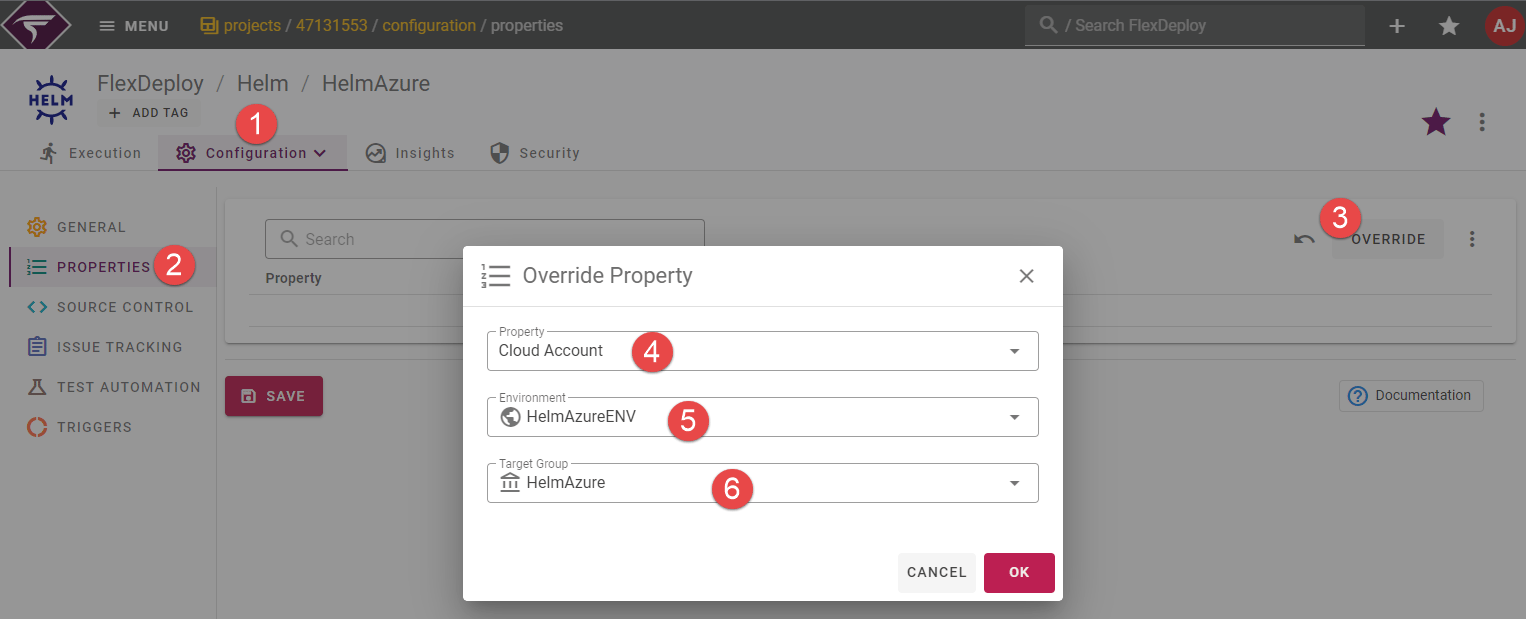
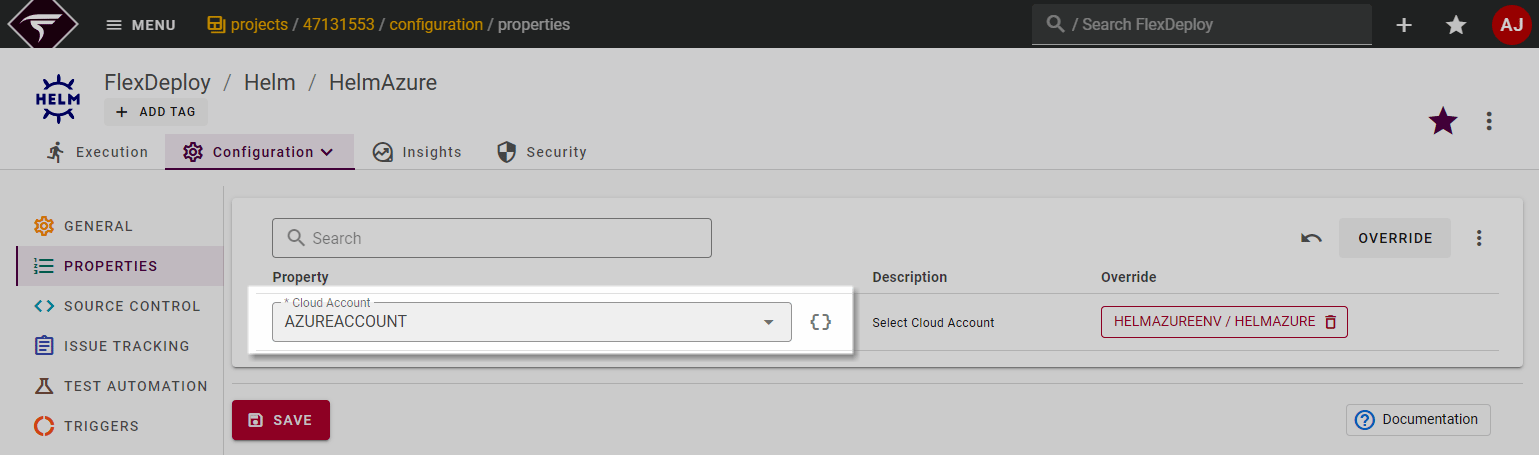
Let assume a scenario, where we want to change Cloud account for any specific project. Apart from setting at environment level, it can also be set at project properties by using Override Property. Please check below mentioned steps.- Navigate to the Project Configuration tab as shown above.
- Next, select the PROPERTIES option from the left-hand pane.
- Click on the OVERRIDE option.
- Select the Cloud Account option from Property.
- Select the Environment from the drop down list.
- Select the Target Group from the drop down list.
Build Execution
For detailed steps on how to initiate deploy operation using Helm plugin, please refer to Deploy through FlexDeploy using Helm pluginPost deployment
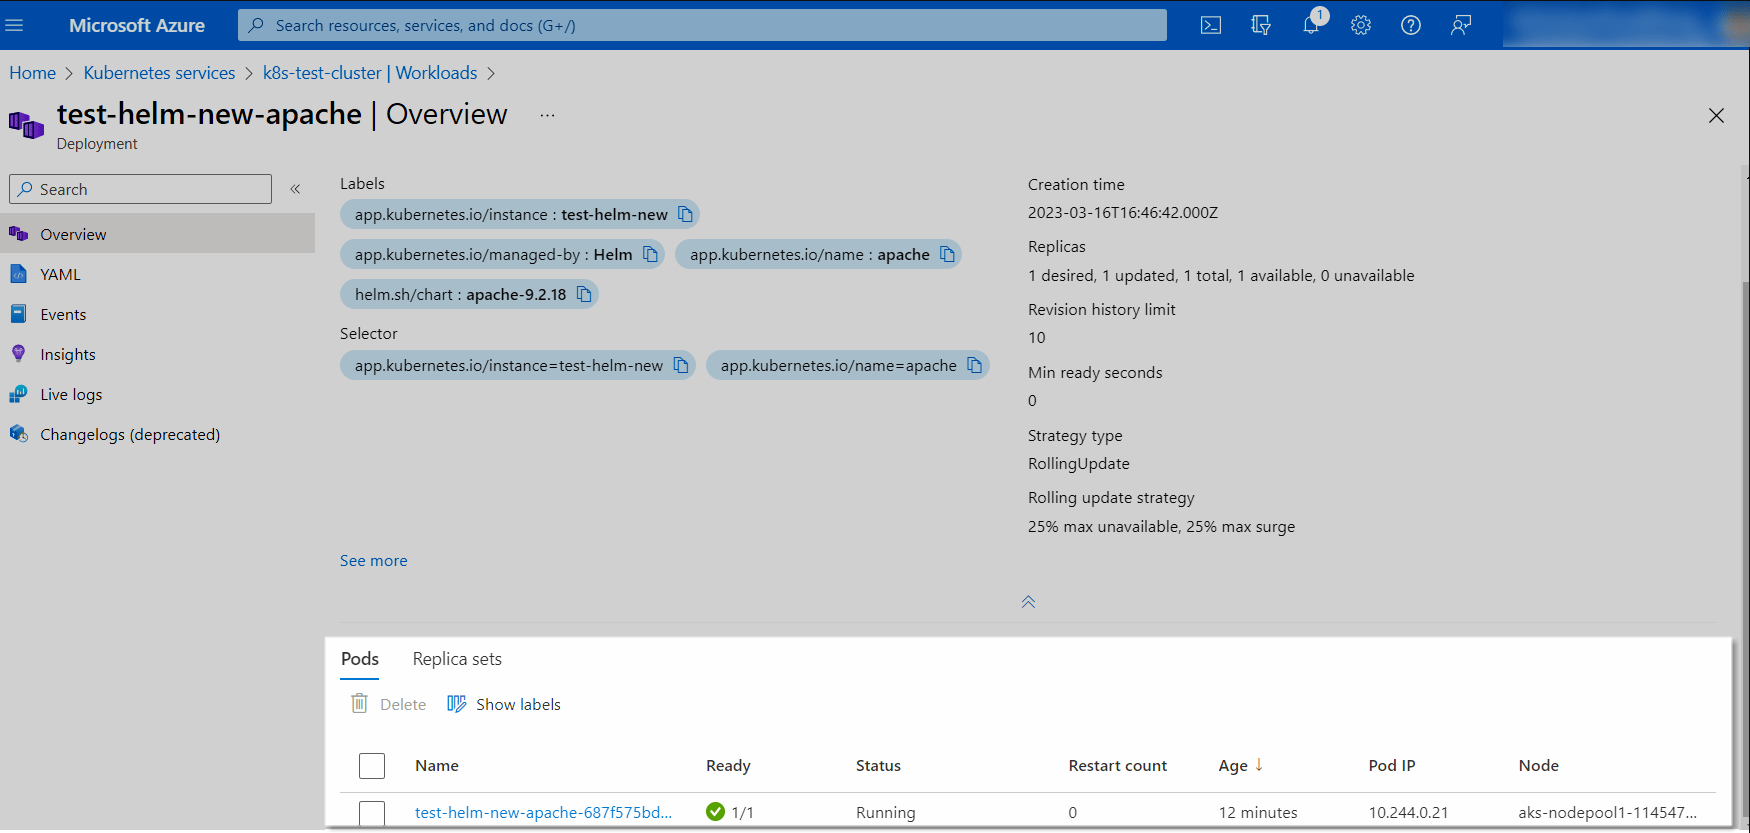
Post deployment success from plugin it can take a little while for the deployment and running. Once deployment successfully completed, we can see the related details on AKS cluster by using Azure console.