
Upload and Activate Plugins using UI
The FlexDeploy installation comes with plugins which are automatically loaded on startup. To install additional plugins or plugin versions, select Integrations-> Plugins from the menu.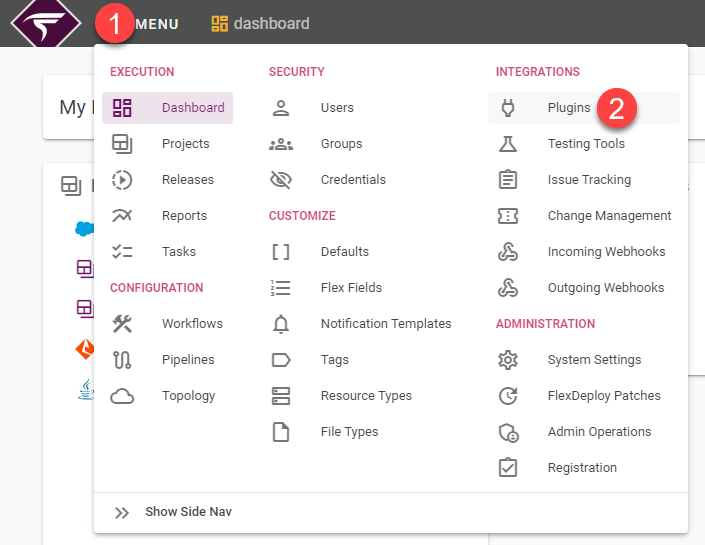
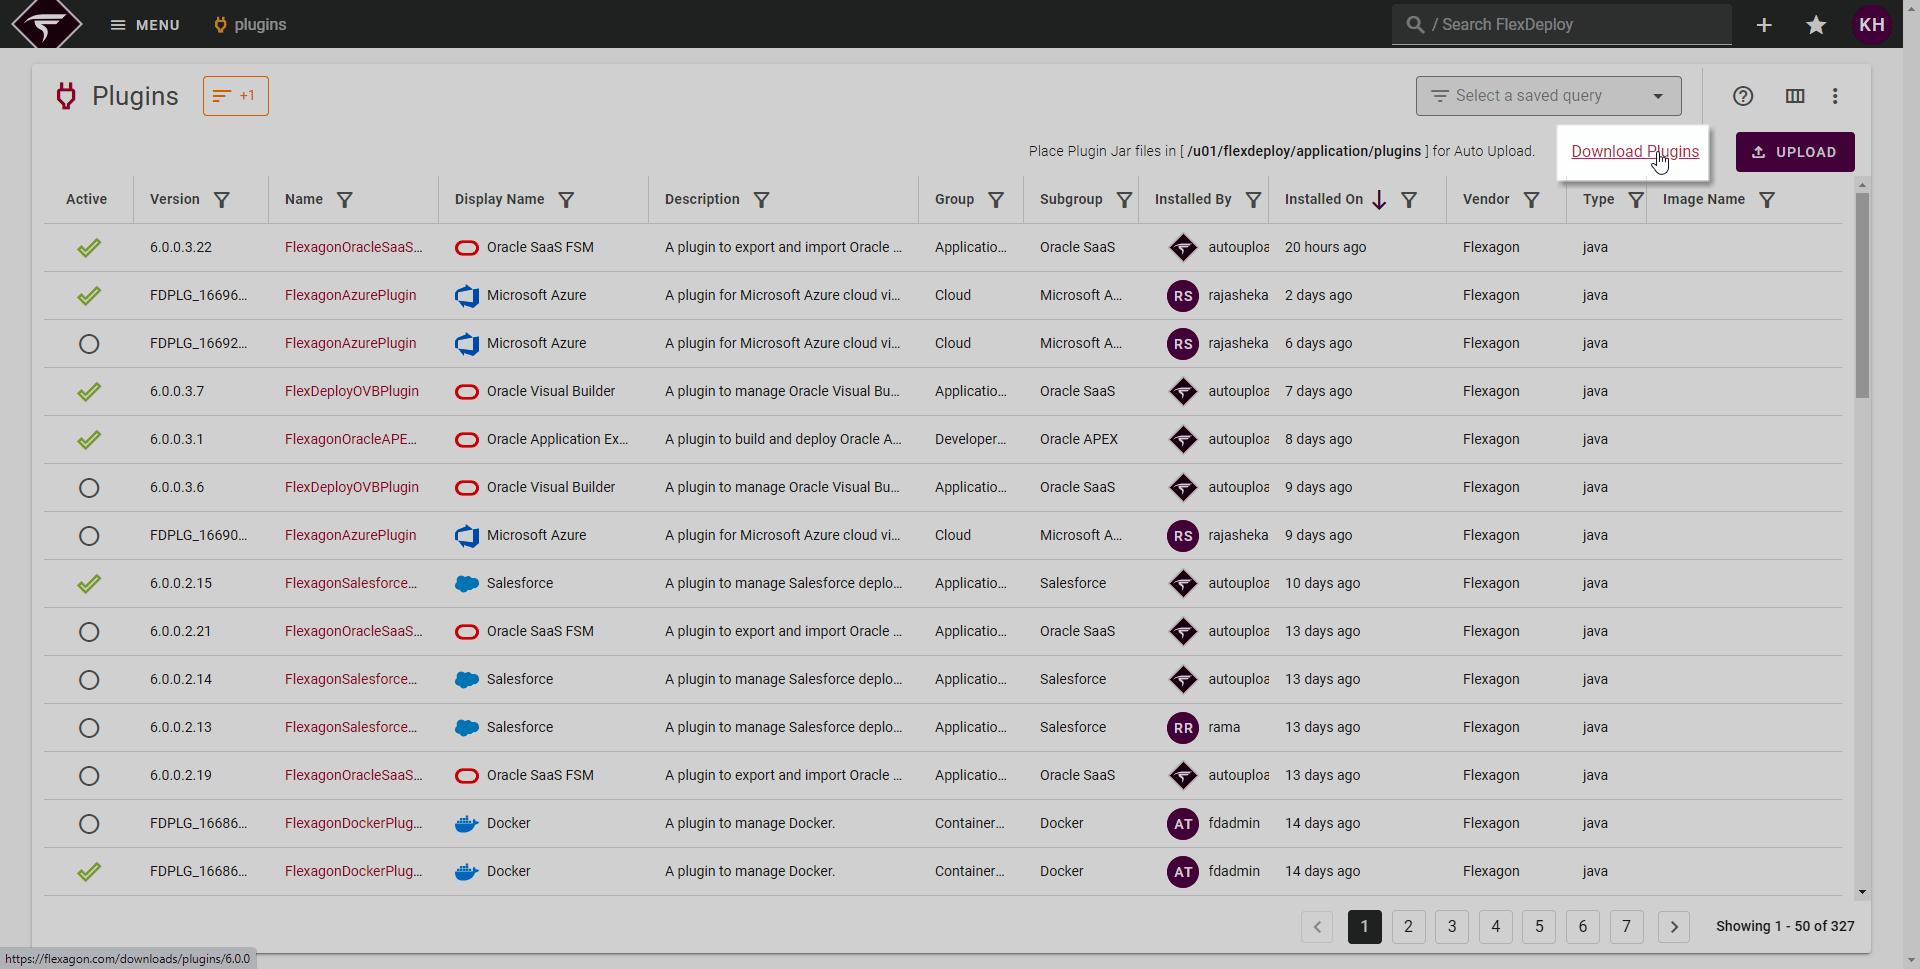
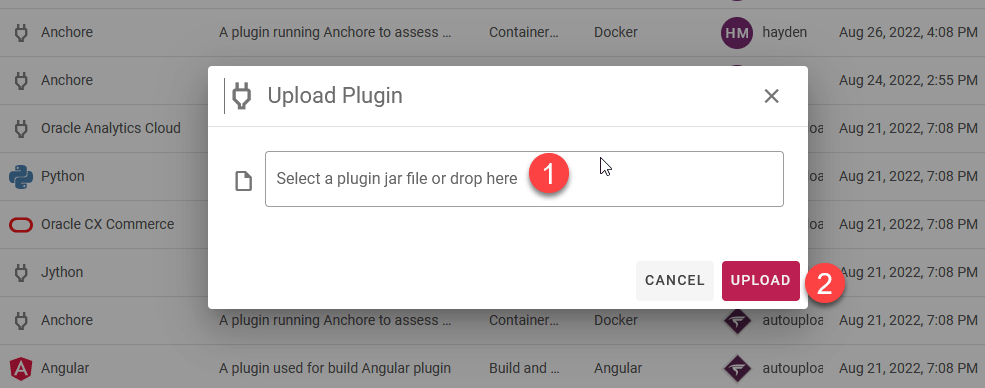

One version of each plugin is active for use in FlexDeploy at a time. This process does not require any restart.
Uninstall Plugin Versions
@Since 11.2.0.0 You can uninstall inactive plugin versions from Administration > Plugins. Uninstall requires Plugin Upload permission. The active version cannot be uninstalled. Uninstall is available from the plugins list and from a plugin version detail page. After uninstalling from the detail page, you return to the plugins list. Uninstalling an inactive version removes it from Administration > Plugins and deletes that version’s folder on the server. Plugin property sets and the remaining active version are not changed.Auto Upload Plugins
This is useful when you are upgrading FlexDeploy, as there may be many new plugins or versions available as part of new FlexDeploy release. This option can also be used for one single plugin version upload as well.- Locate flexagon.fd.install.root folder for your FlexDeploy installation. This is specified on Java command line. For example, -Dflexagon.fd.install.root=c:/temp/flexdeploy/application.
- Create plugins folder, if it does not exist under this folder.
- Download new plugins from Flexagon support site and save in plugins folder.
- Start FlexDeploy, and all plugin jar files from plugins folder will be uploaded and files will be moved to uploadedplugins folder.
- Now go to Administration - Plugins in FlexDeploy and activate plugin versions as necessary.