
- A Tomcat 9 server with required libraries, and base configurations
- The Https Agent WAR
Step 1. Ensure Java is installed on the server.
The HTTPS Agent supports Java versions 8 through 25. Select a supported Java version based on your environment. Setting JAVA_HOME in the configuration will be done later. This Java will be used to run the Tomcat server. A different Java version can be specified on the endpoint configuration in FlexDeploy and those will be used to actually execute plugins.Step 2. Prepare software
Download and unzip the HTTPS Agent software using wget, curl, or manually from the Flexagon Support Portal.Step 3. Configure authentication
You must configure the user to have the role ‘FlexDeployHTTPSAgent’
Basic Auth
To configure basic auth, use the username and password being stored in tomcat-users.xml. For basic configuration only, the password needs to be configured in the given HTTPS_AGENT_HOME/apache-tomcat-flexdeploy-https-agent/conf/tomcat-users.xml file. Here’s what that will look like:Active Directory/LDAP
For LDAP use we will need to change the HTTPS_AGENT_HOME/apache-tomcat-flexdeploy-https-agent/conf/server.xml file. By default it is configured to use a UserDatabase realm instead of the JNDI realm we are looking for. Start by commenting out the existing UserDatabase realm. Then let’s uncomment the included JNDI realm, that should look like the following:FlexDeployHTTPSAgent role or they will not be able to connect.
If you are using Active Directory, the pre-windows 2000 username will be used. See what that looks like in Active Directory below.
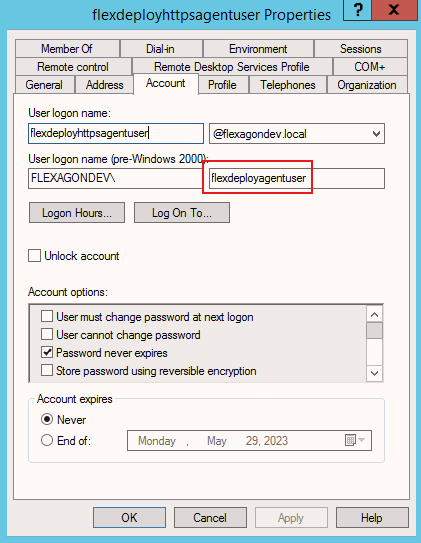
Step 4. Configure SSL
The use of SSL is required. Steps will be listed for self signing, as well as importing an existing certificate. It is highly recommended you read the Tomcat Documentation for more details.Self Signed
Run the following command and generate the self signed certificate in the HTTPS_AGENT_HOME/config directory.Existing Certificate
First generate your certificate using whatever method you would usually use. Next convert the certificate to pk12 format.Configure Tomcat and Import Public Key
Next configure the keystore password (and the location of the file if not generated in the config directory). Open up the HTTPS_AGENT_HOME/apache-tomcat-flexdeploy-https-agent/conf/server.xml file. Find the SSL connector (by default set for port 8444) and add the keystore password like this: If you made the alias tomcat, this will be enough. Otherwise, add keyecho "$JAVA_HOME" to find that out.
If it’s not set in setenvoverride.sh or the environment run this command to find the path used dirname $(dirname $(readlink -f $(which javac)))
Then run the following command on the server.