- Salesforce No-Code, Low-Code, pro programming, and hybrid App Dev deployments
- Data Deployments
- All Metadata deployments across Salesforce Orgs
- Partial deployment of objects using Subcomponents
- Org to Org Deployments and SCM to Org Deployments
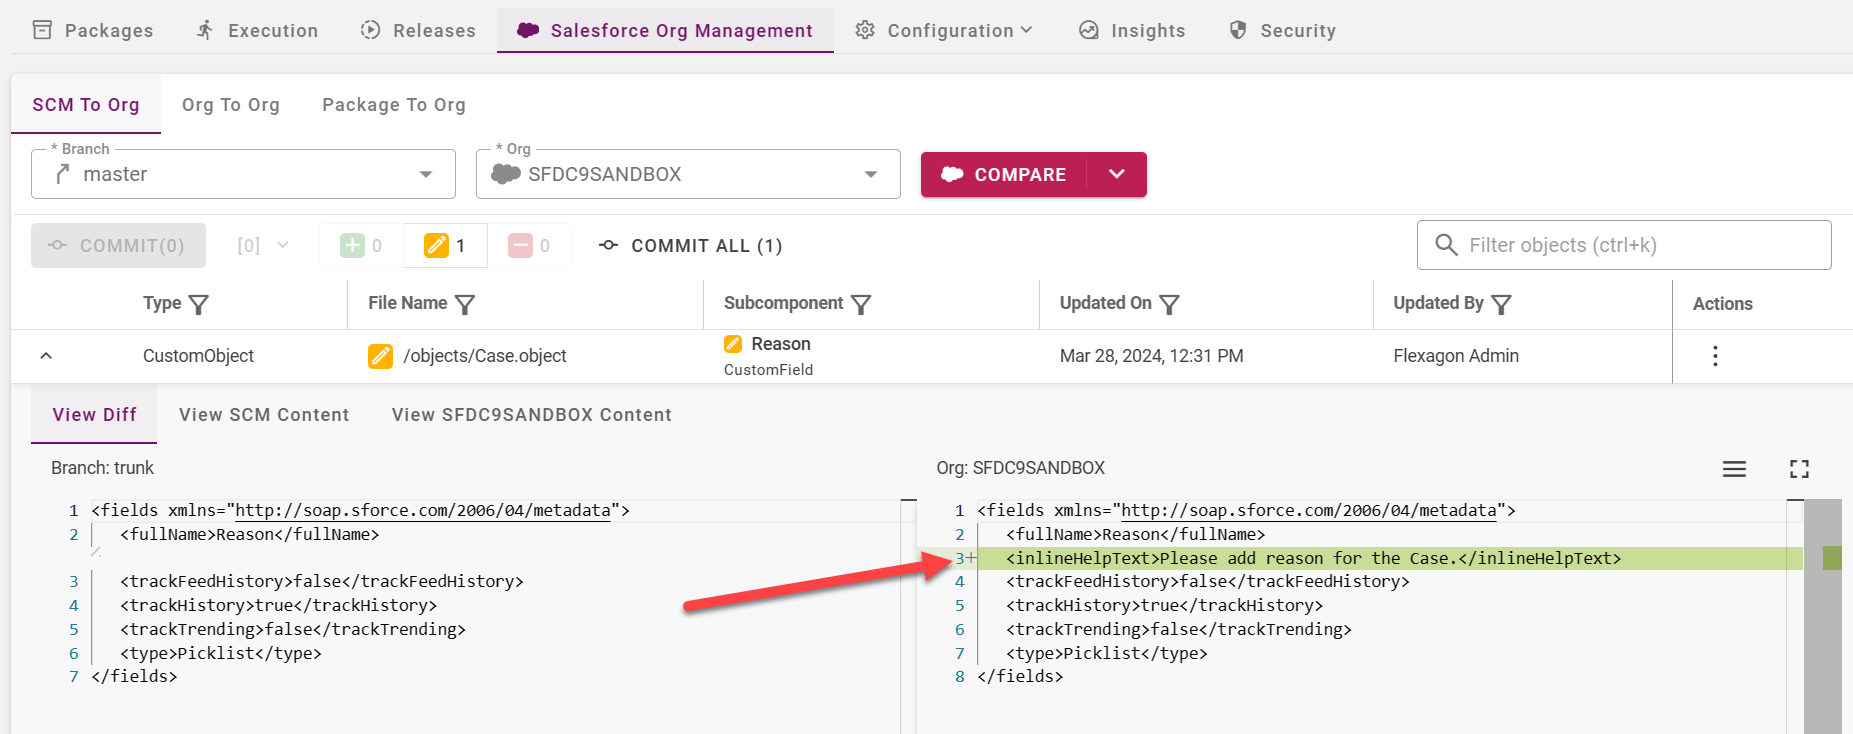
- Rich Comparison - Org to Org, Git repository to Org, and FlexDeploy Package to Org. It supports full comparison, by object type, and specific object-level comparisons
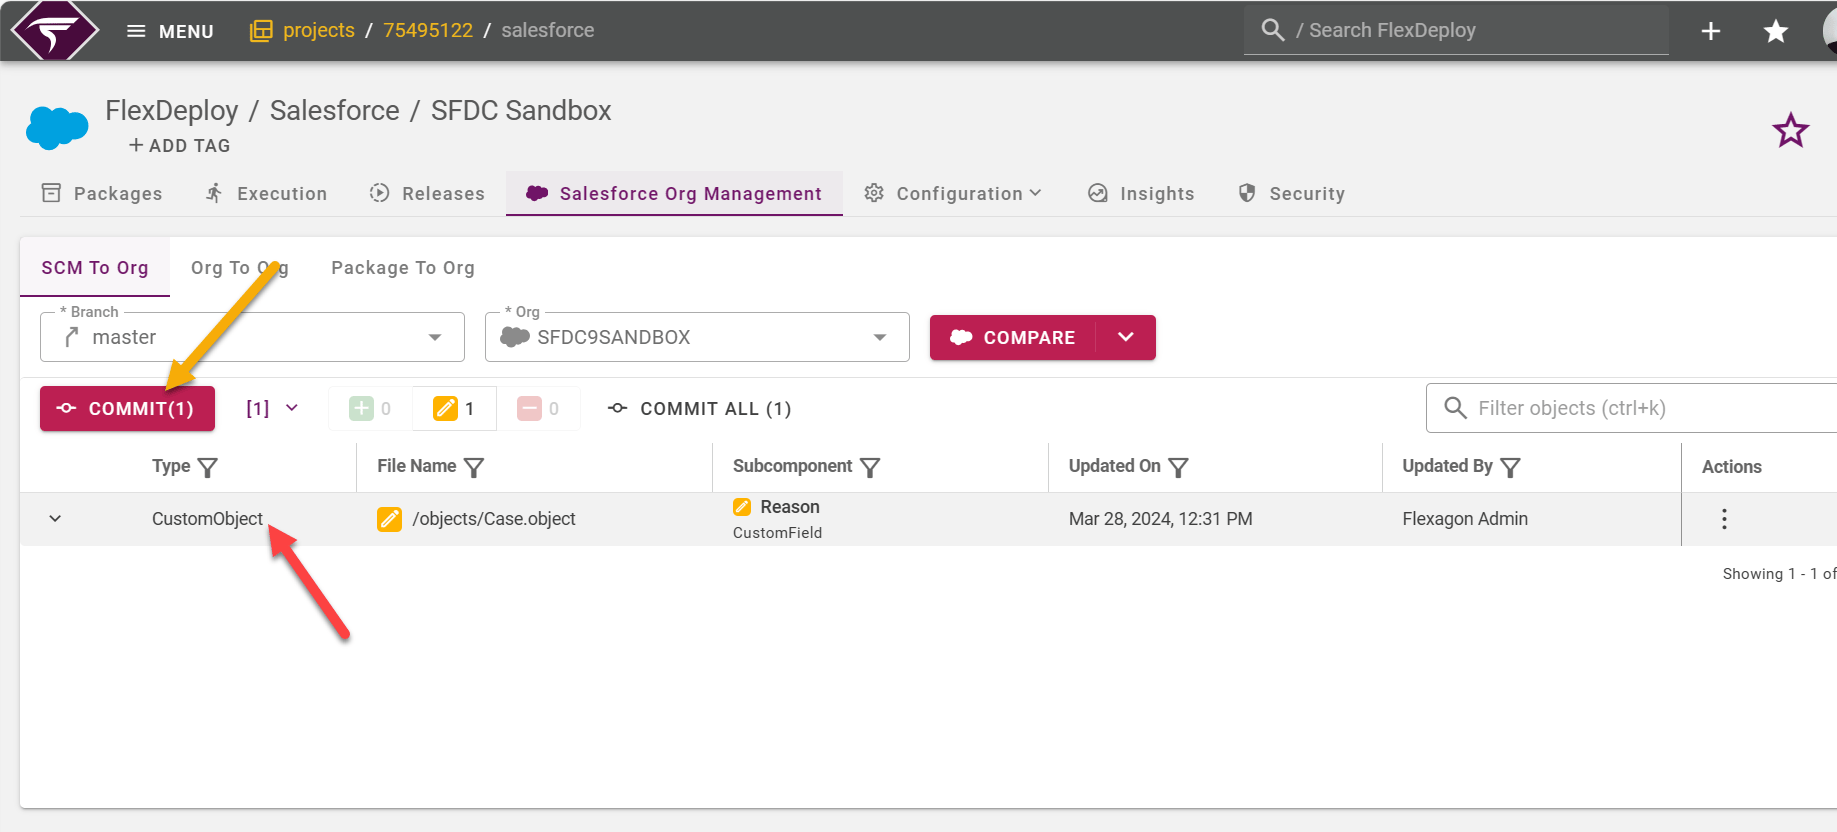
- Identifying and committing changes to the Git repository
- Continuous Integration from Sandbox to Git repository, Git repository to Sandbox, Dev, and Production Orgs
- Migration of Profile Permissions specific to components using Subcomponents.
- Unit Test Automation
- Notifications and built-in approvals, external approval delegation to change management systems like ServiceNow
- Fully automated Pipelines and Release management
- Test automation with tools like Selenium, Tosca, HP UFT, Automation Anywhere, and more
- Code Scanning capabilities with PMD and Checkmarx
- Identifying all the Profiles for the objects that are in the package and adding the profiles automatically to your package
- Dependency analysis
- Easy rollbacks
- Salesforce DX Ready
- Automatically replacing environment-specific values / properties using FlexDeploy Replacements before deploying
- SSO with Salesforce
Objective
The goal of the tutorial is to automate the deployment of Salesforce metadata customizations from one Salesforce Org (Sandbox or Development) to another Salesforce Org. This automation will include:- Identifying the Changes performed on the Salesforce Org and pushing changes to a Git Repository
- Building a package from a Git repository or Salesforce Org
- Deploying the changes to other Salesforce Orgs
Checklist
Checklist Items | Description |
|---|---|
FlexDeploy | FlexDeploy installation completed |
Salesforce Orgs | Connectivity details for Salesforce Orgs
|
GIT Repository (Optional) | Git repository information, if you would like to commit or sync your sandbox to a Git repository If you have user changes in Salesforce Orgs and developers committing to Git from their IDEs, FlexDeploy supports the hybrid development model and allows you to migrate changes together or sequentially.
|
Create Salesforce Project using Blueprint
The assumption is that you have FlexDeploy installed and ready for use. When logged into FlexDeploy, you will see the home page. Click on the + icon on the top right and click Create Project to create a new project.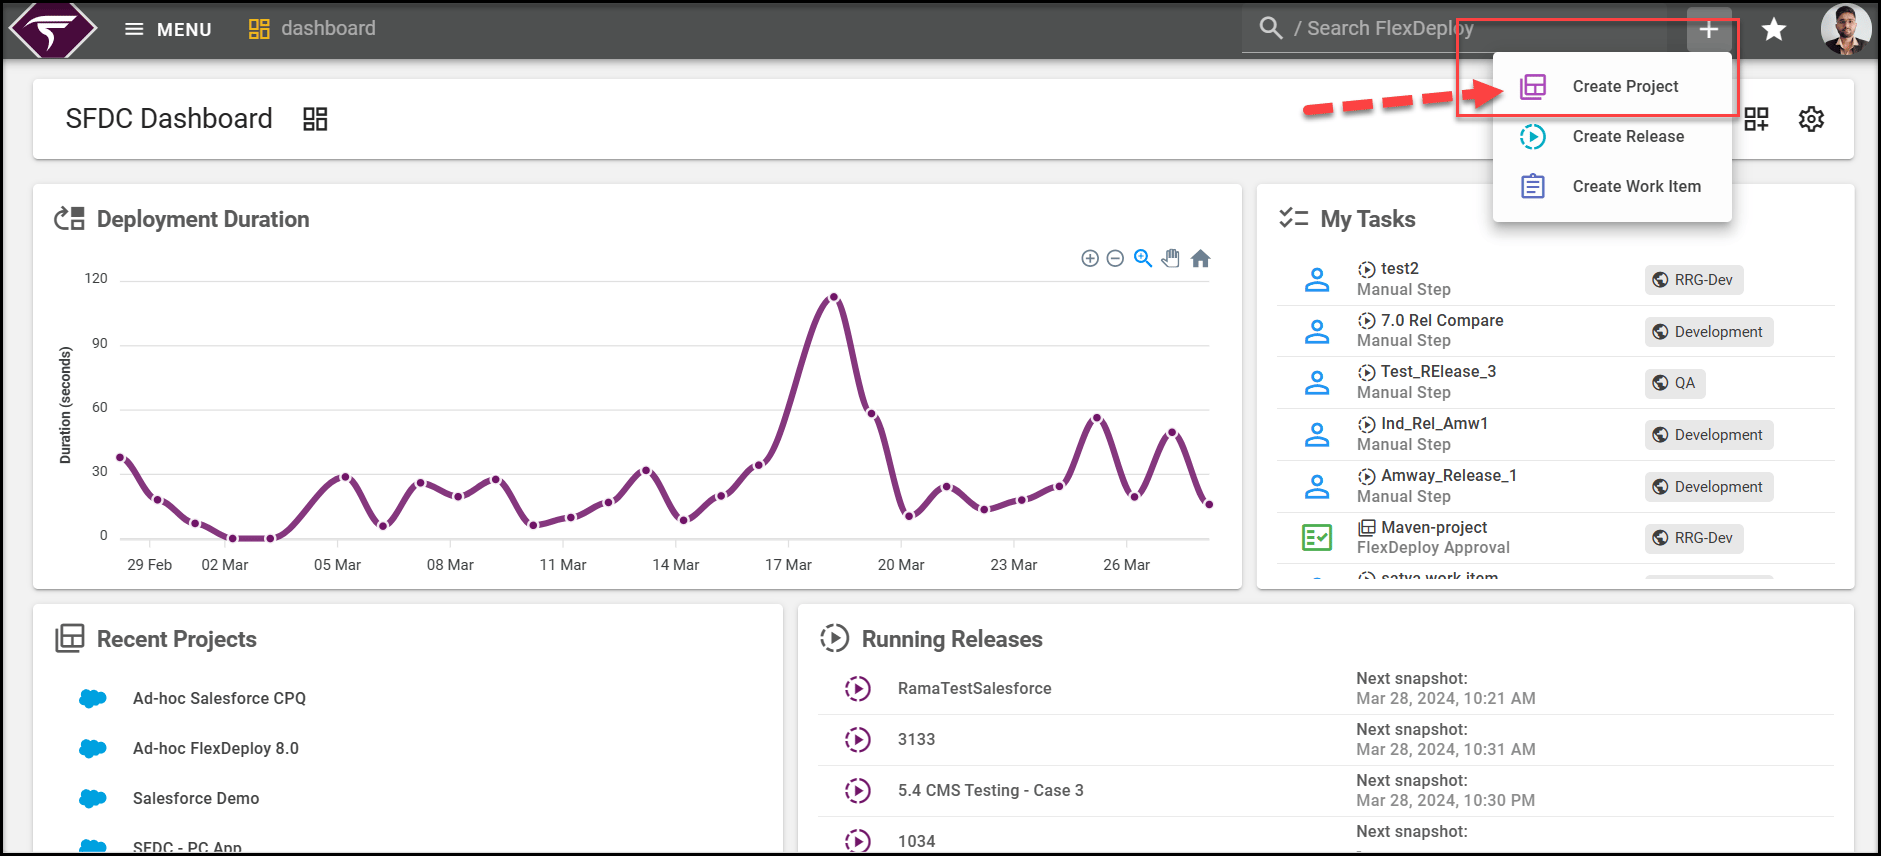
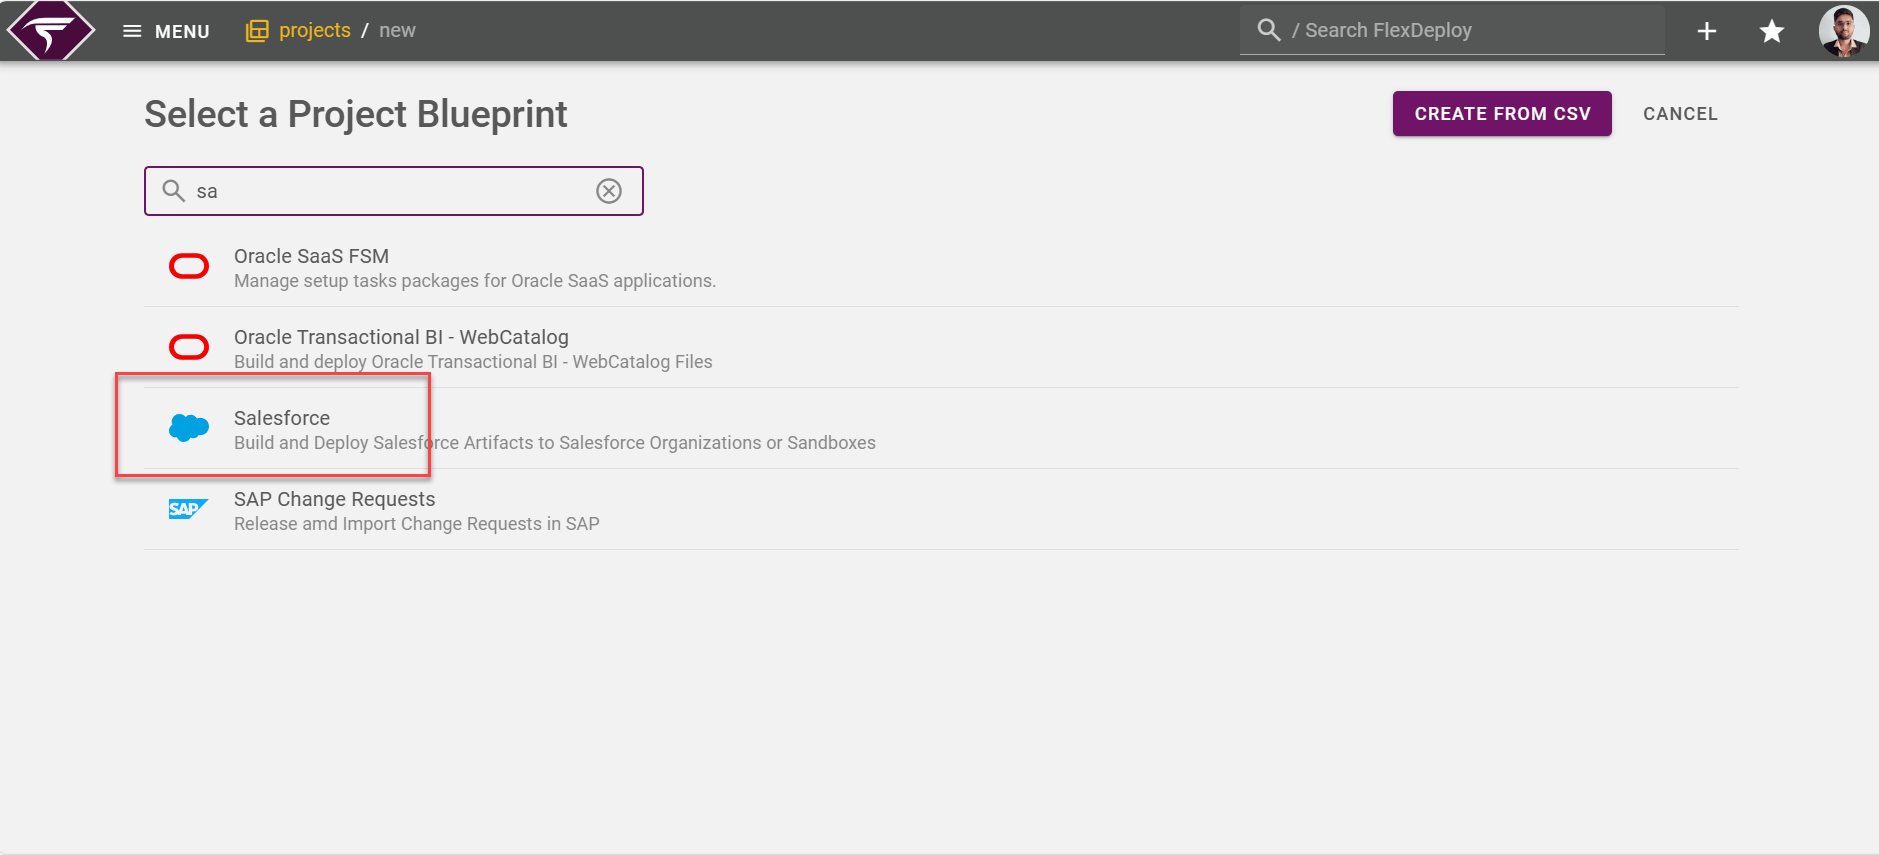
General Configuration
Fill in the values to create a new Salesforce project and click Confirm. We will walk through each property in the below sections.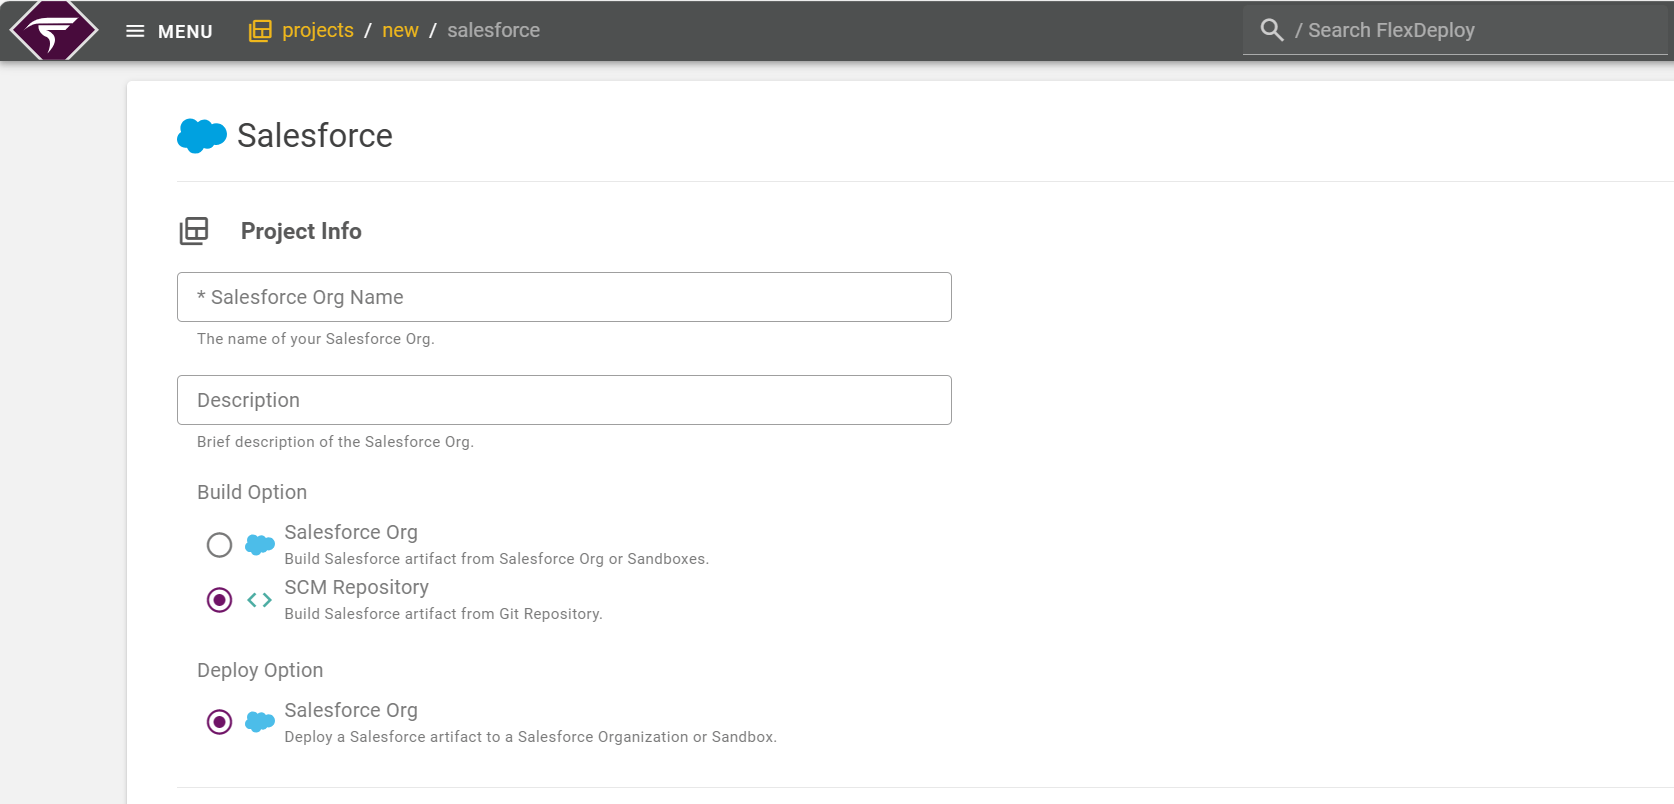
Project Info
Property Name | Value for this Tutorial | Description |
Salesforce Org Name | Tutorial01 | The name of the Salesforce Org. This is normally your company name or application name if you have multiple Salesforce Orgs in your company. We will use this for Project Name in FlexDeploy. |
Description | Tutorial01 | Brief description of the Salesforce Org |
Build Options
Select one of the build options based on how you would like to source the content of files for the package creation.Property Name | Value for this Tutorial | Description |
Salesforce Org | Not Selected | Select, if sourcing directly from Salesforce Org (Normally Sandbox or Develop). |
SCM Repository | Selected | Select, if sourcing from Git repository. |
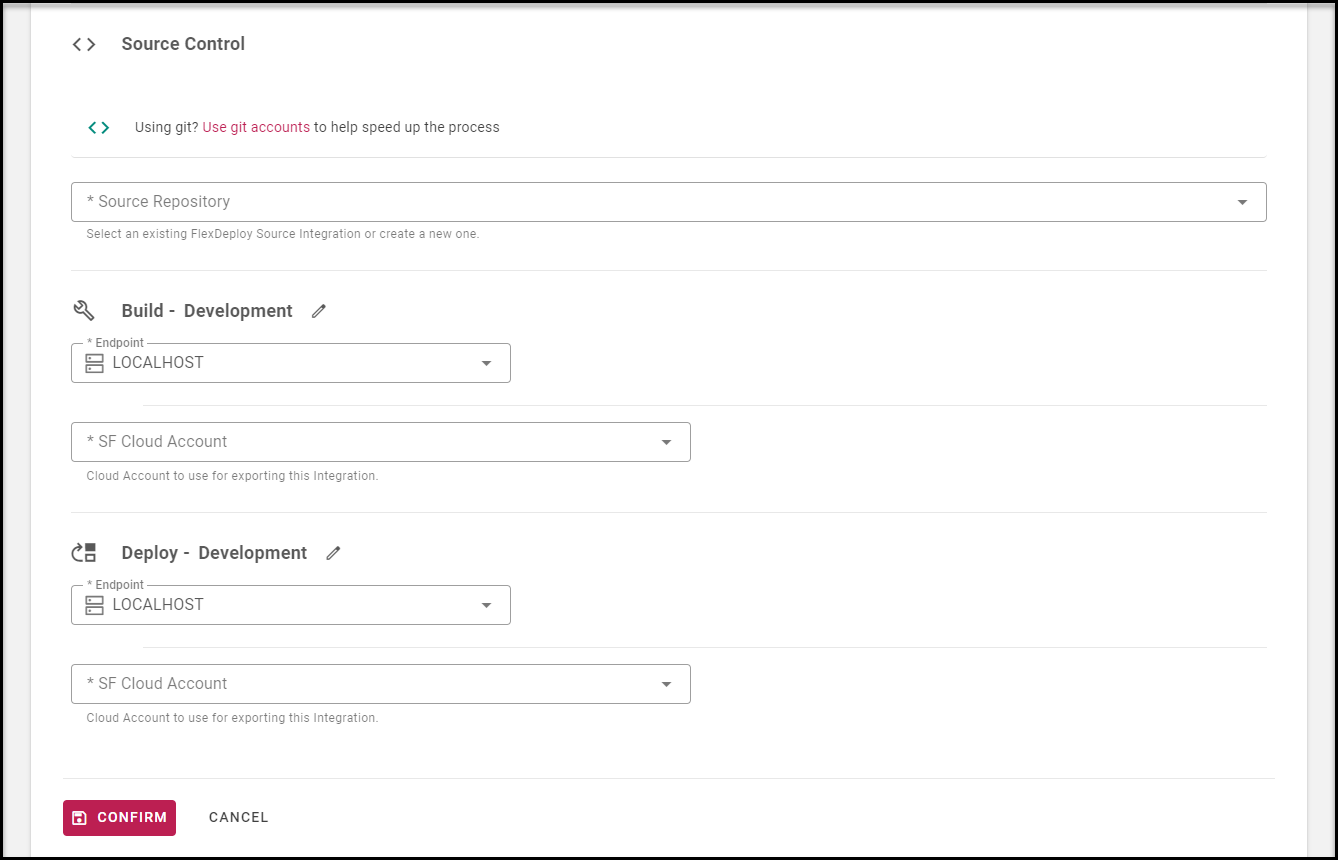
Source Control
This section is only applicable if you selected SCM Repository for build**.** Click on the Source Repository dropdown. If you have already created a connection to your source code repository, select it from the list. Enter the sparse checkout folder, if any. Otherwise, add one by clicking on Create New Source Repository.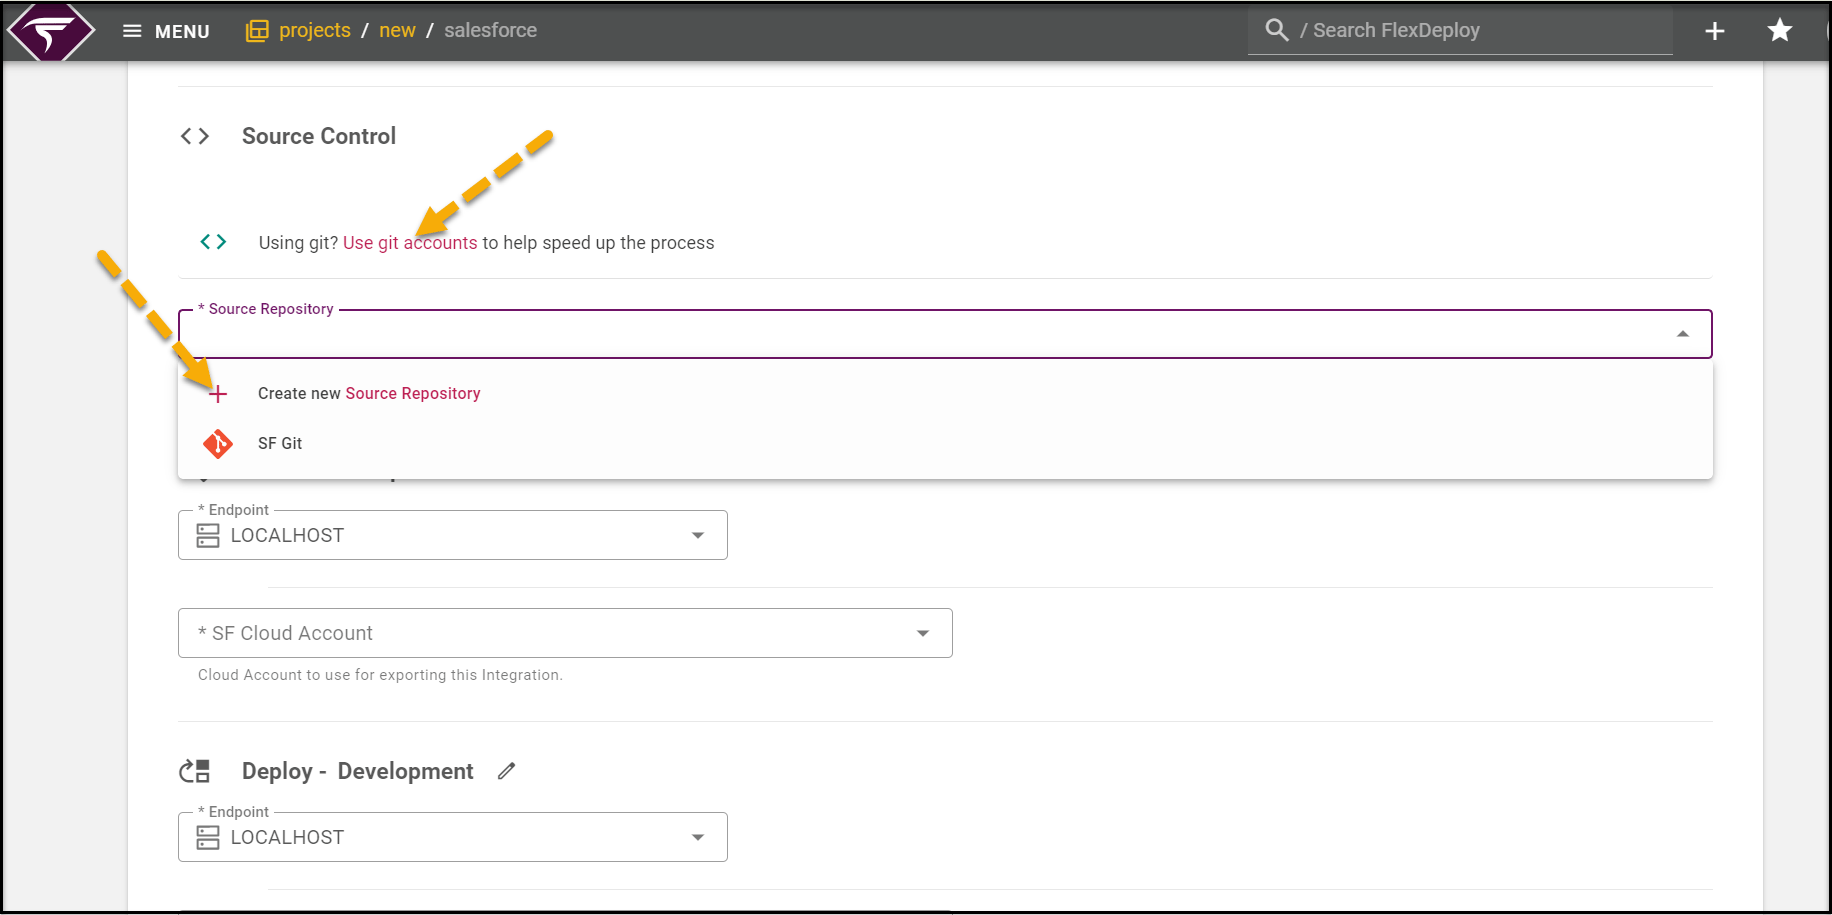
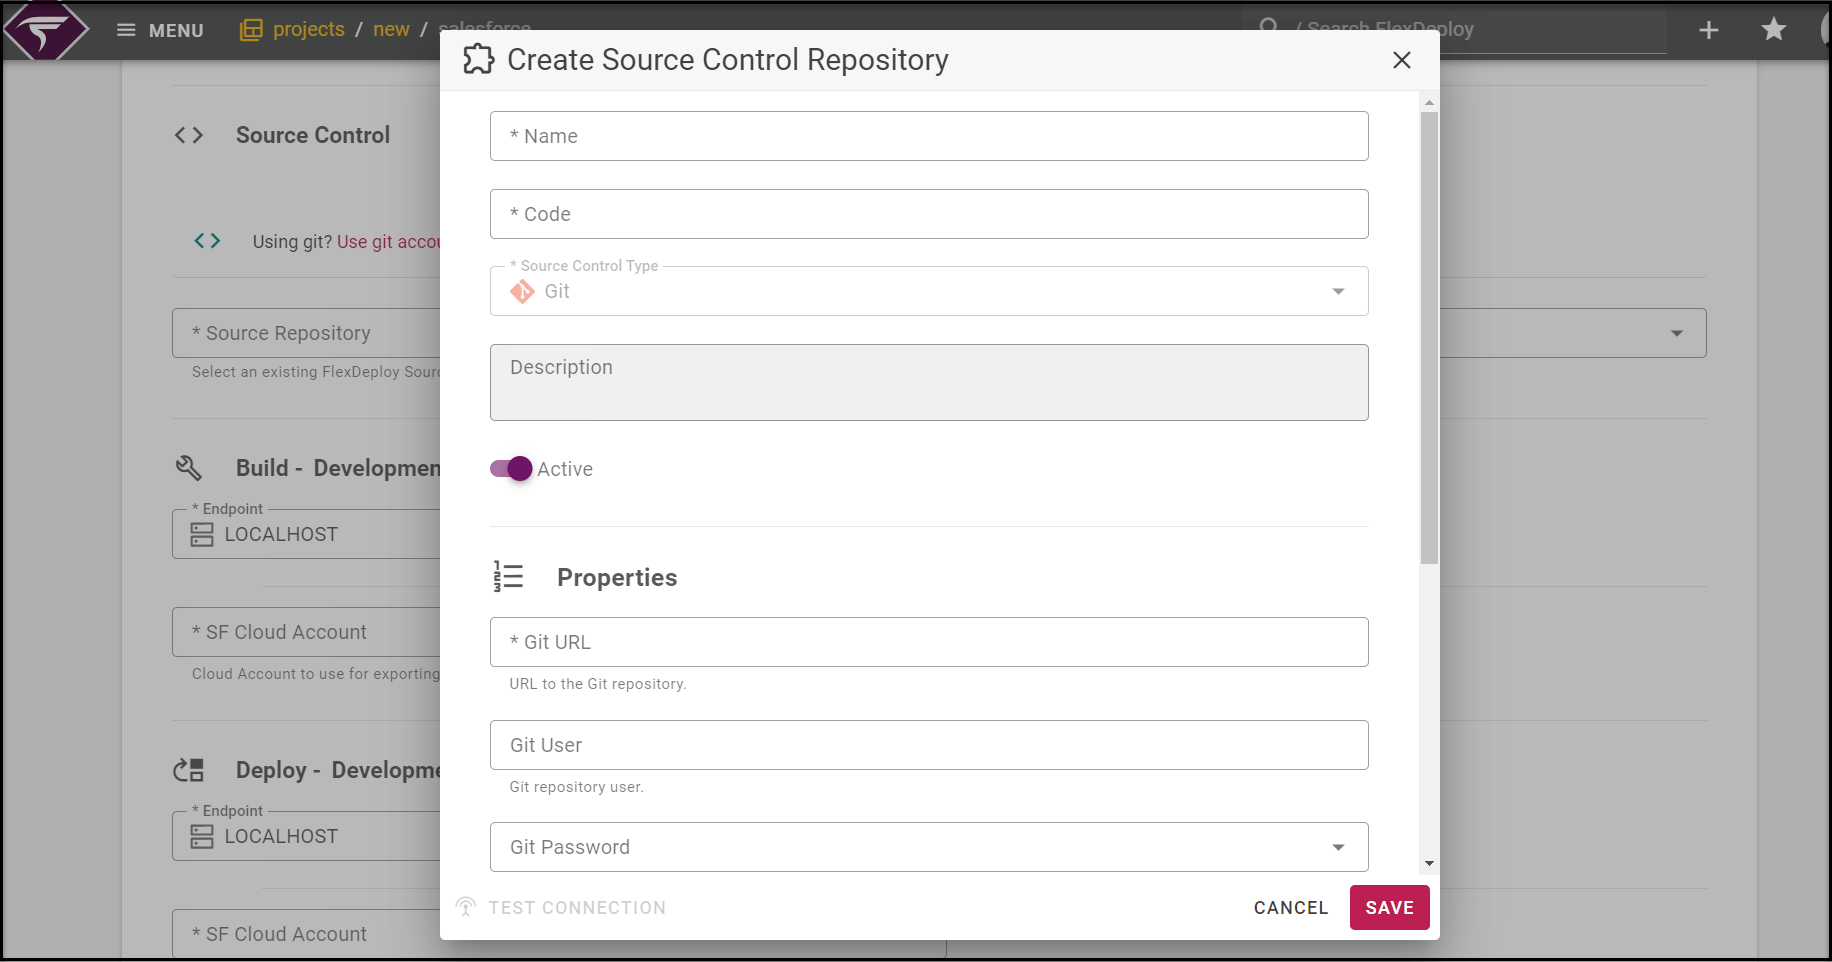
Field | Required | Description |
Name | Yes | Give a name to this SCM instance to refer in FlexDeploy. Used to display in FlexDeploy |
Code | Yes | Give a technical code for the instance, without any spaces. The codes are available as variables to shell and Groovy scripts in FlexDeploy, and therefore needs to comply with their limitations. |
Source Control Type | Yes | Type of Source Control Management System. We will use Git for this tutorial. |
Description | No |
|
SCM Properties | Yes | The remaining properties are specific to the selected SCM. Provide these as per your Git repository For Git:
|
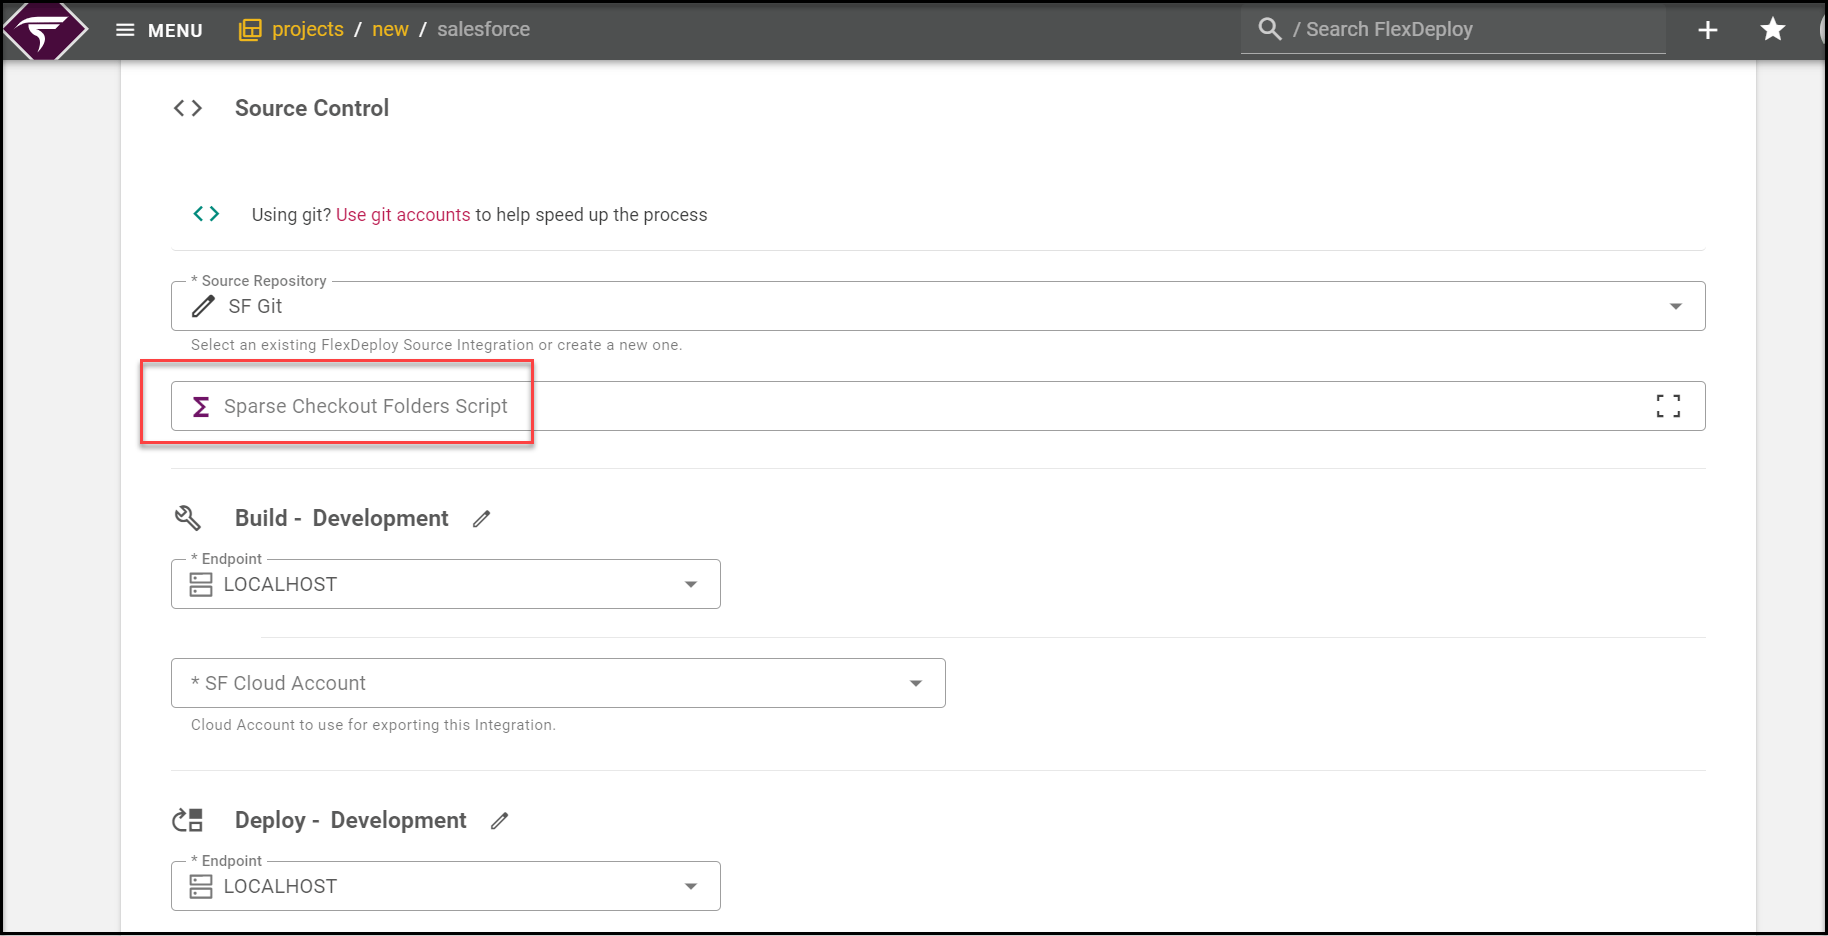
Build and Deployment Information
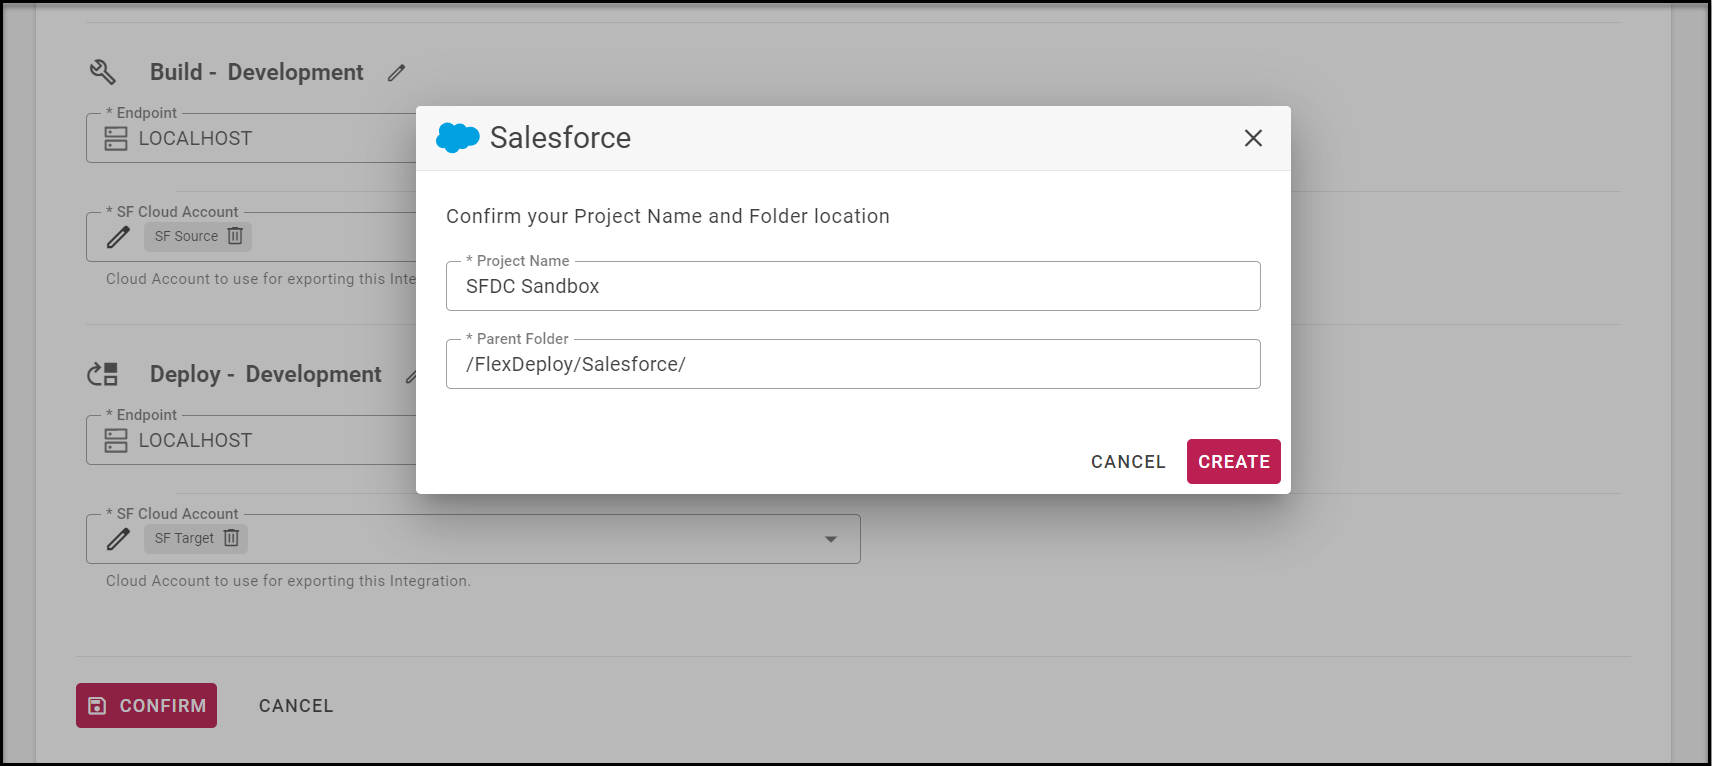
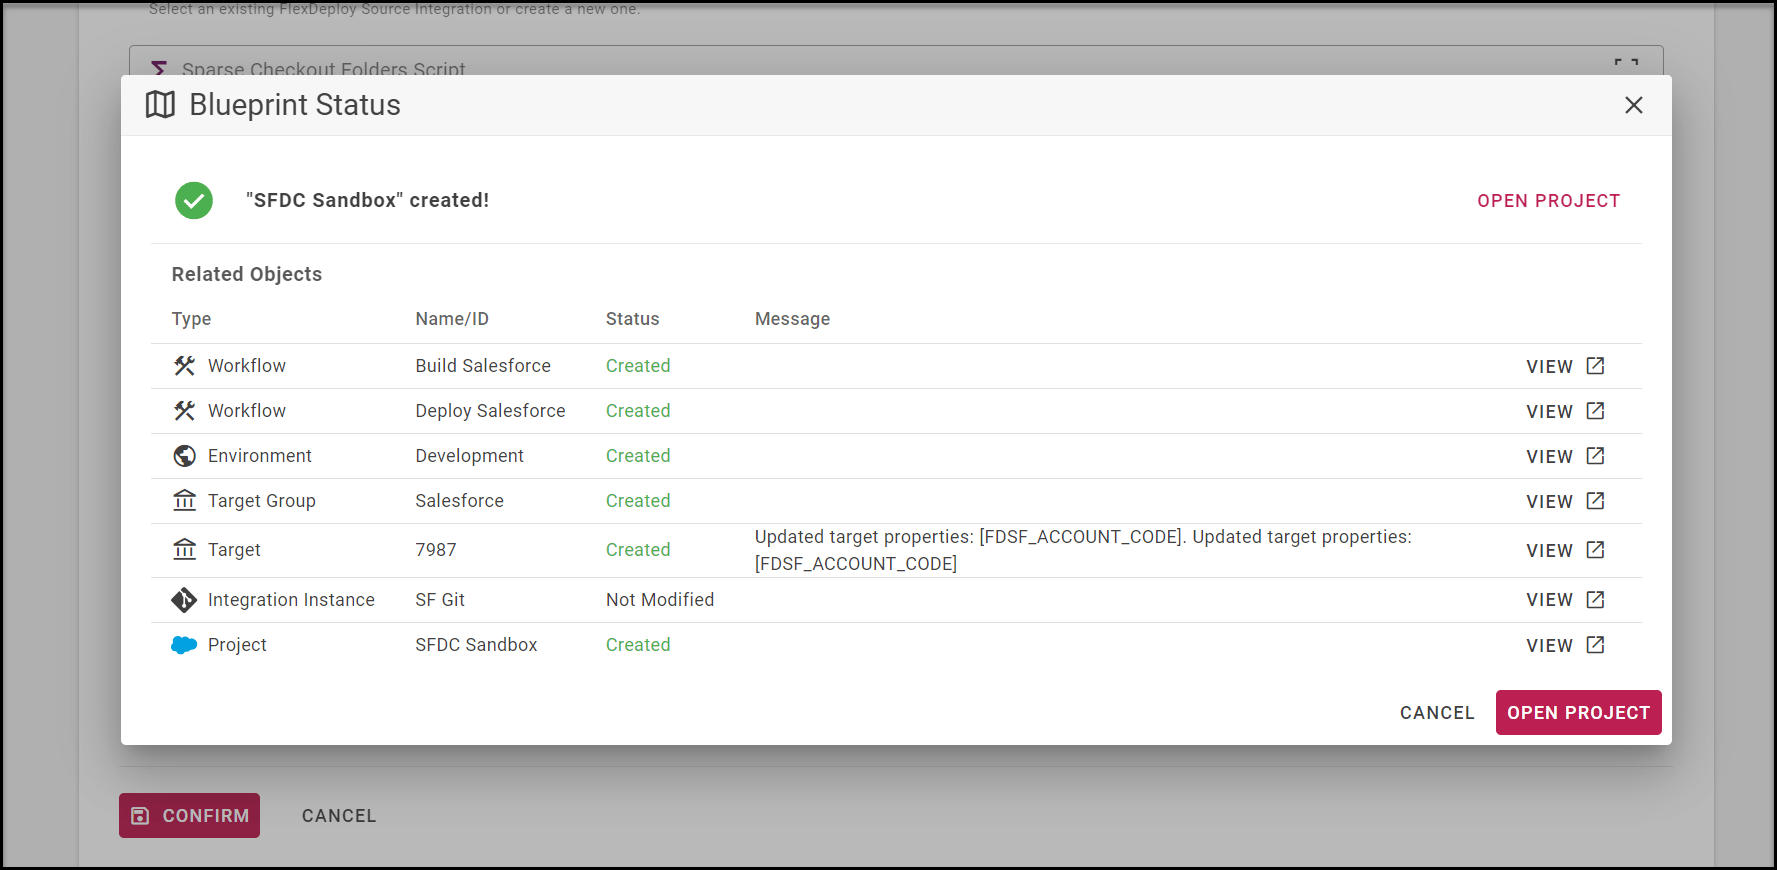
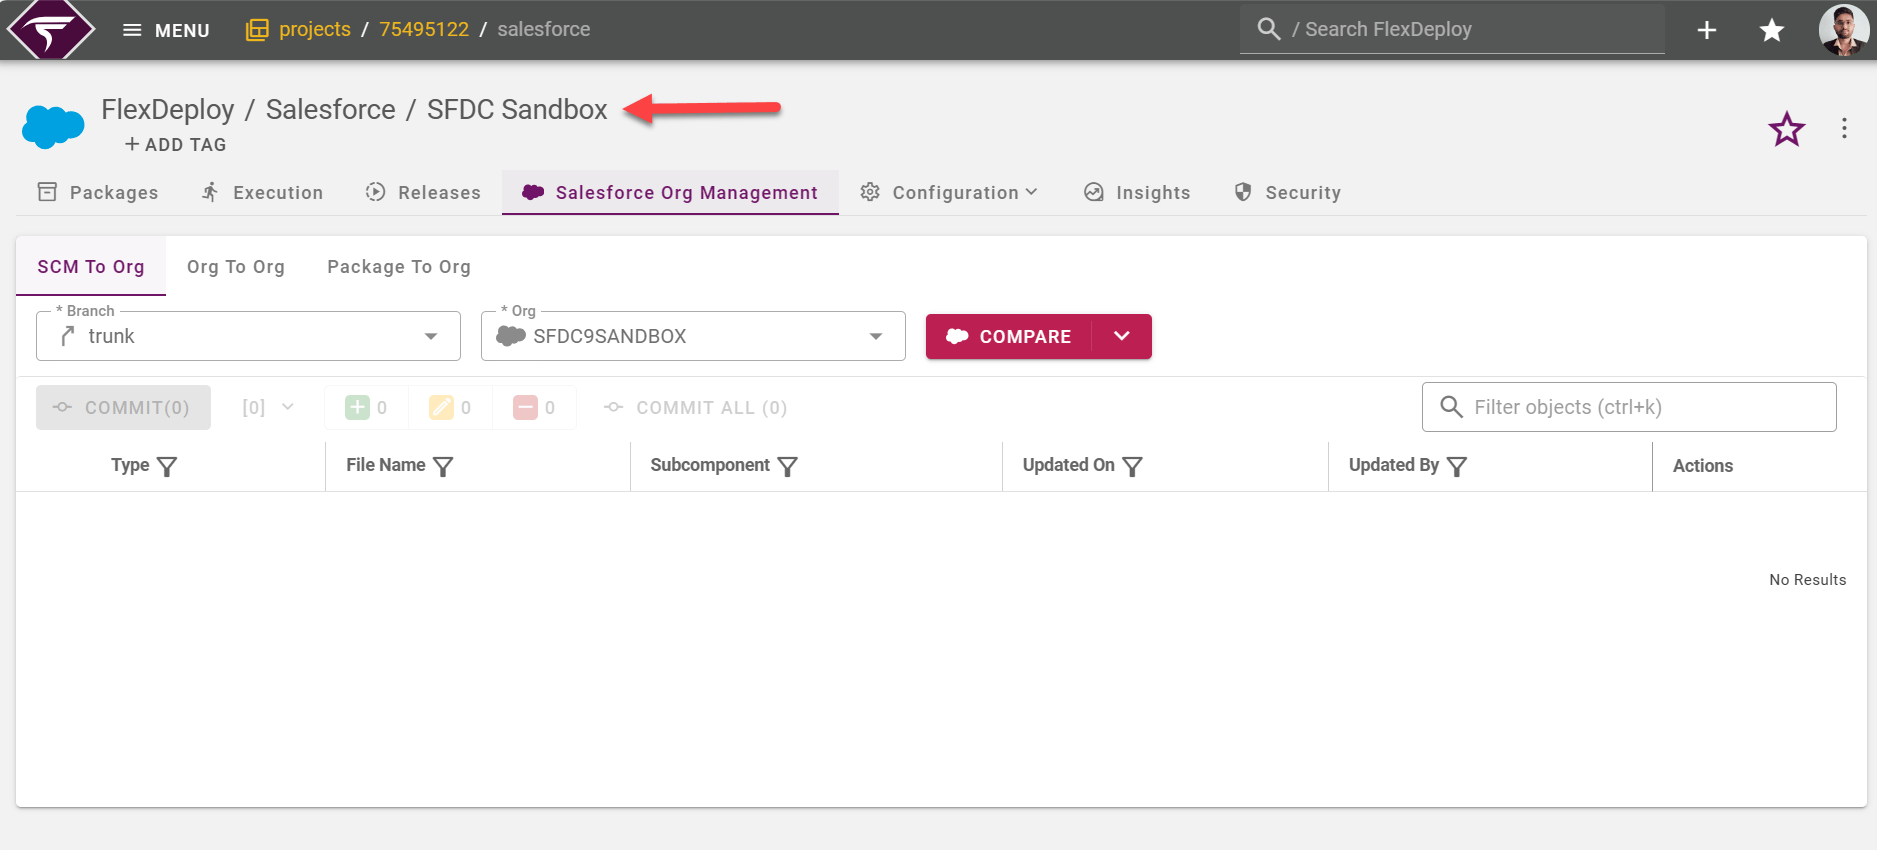
Leave the Endpoint selection as LOCALHOST as we will be executing the build and deploy operations on the same server as FlexDeploy. If you are creating a project for the first time, you will not have any SF Cloud Accounts. You can create one. Click on Confirm. Set the appropriate Parent Folder path, then click on Create followed by Open Project.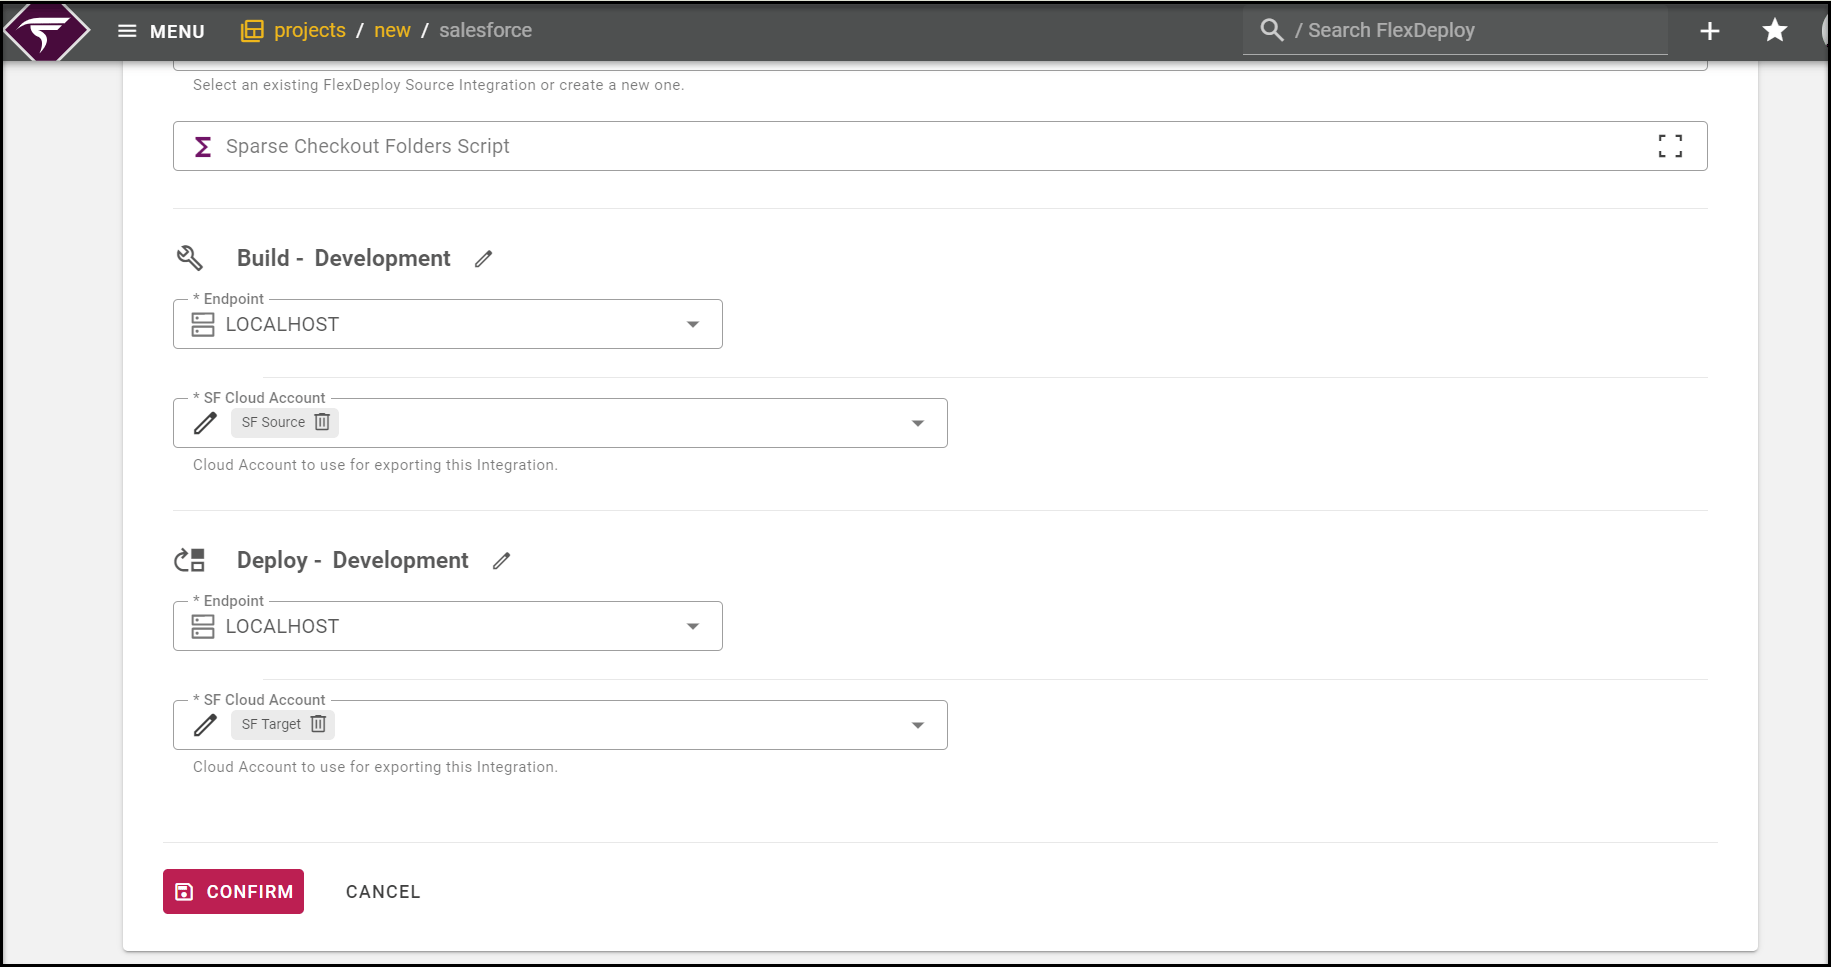
Review Configurations
At this point, we need to review and adjust configurations for the Topology Overview, Project, and Cloud Account.- Topology
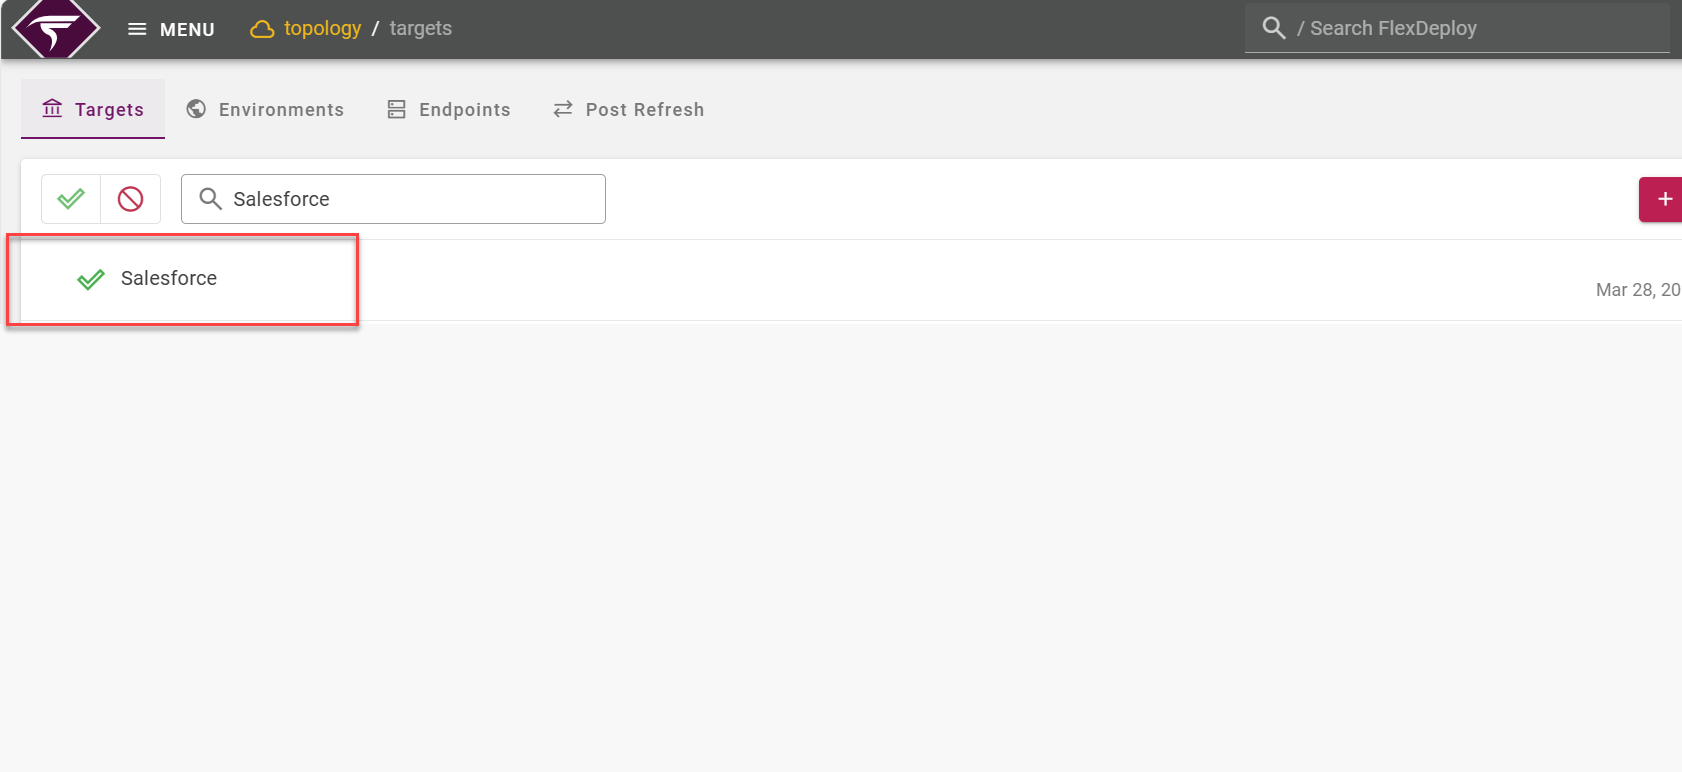
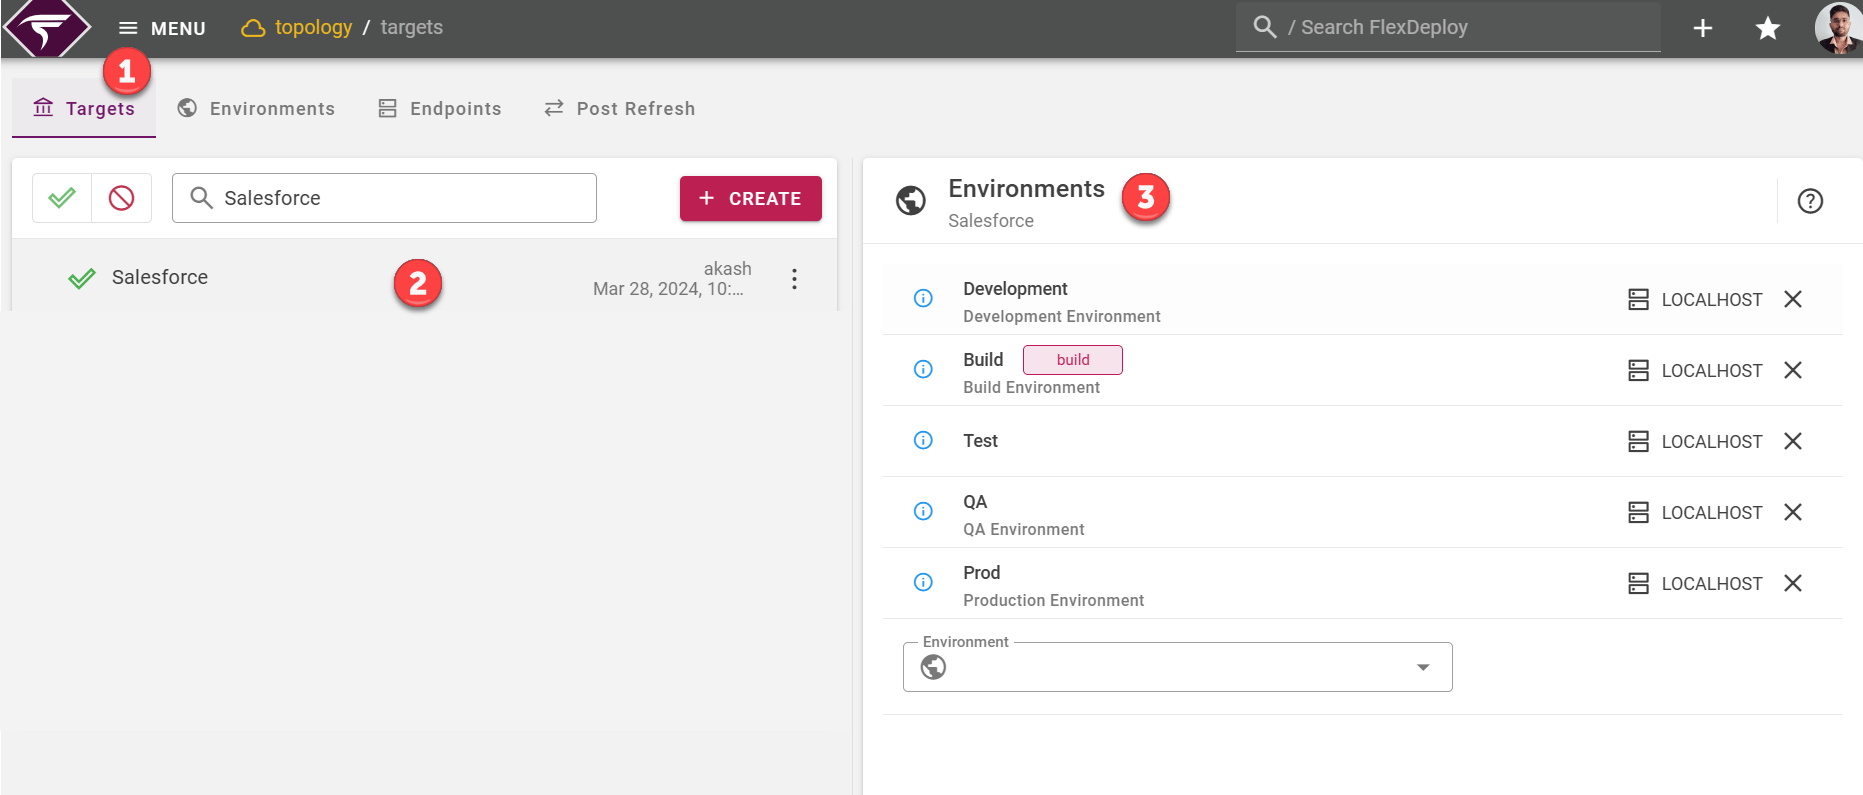
Navigate to Topology from the Menu. The Page with the Target Groups, Environments and Endpoints sections will be displayed. Choose a Target Group on the left. You will see a list of Environments on the right with colored circles representing each Target.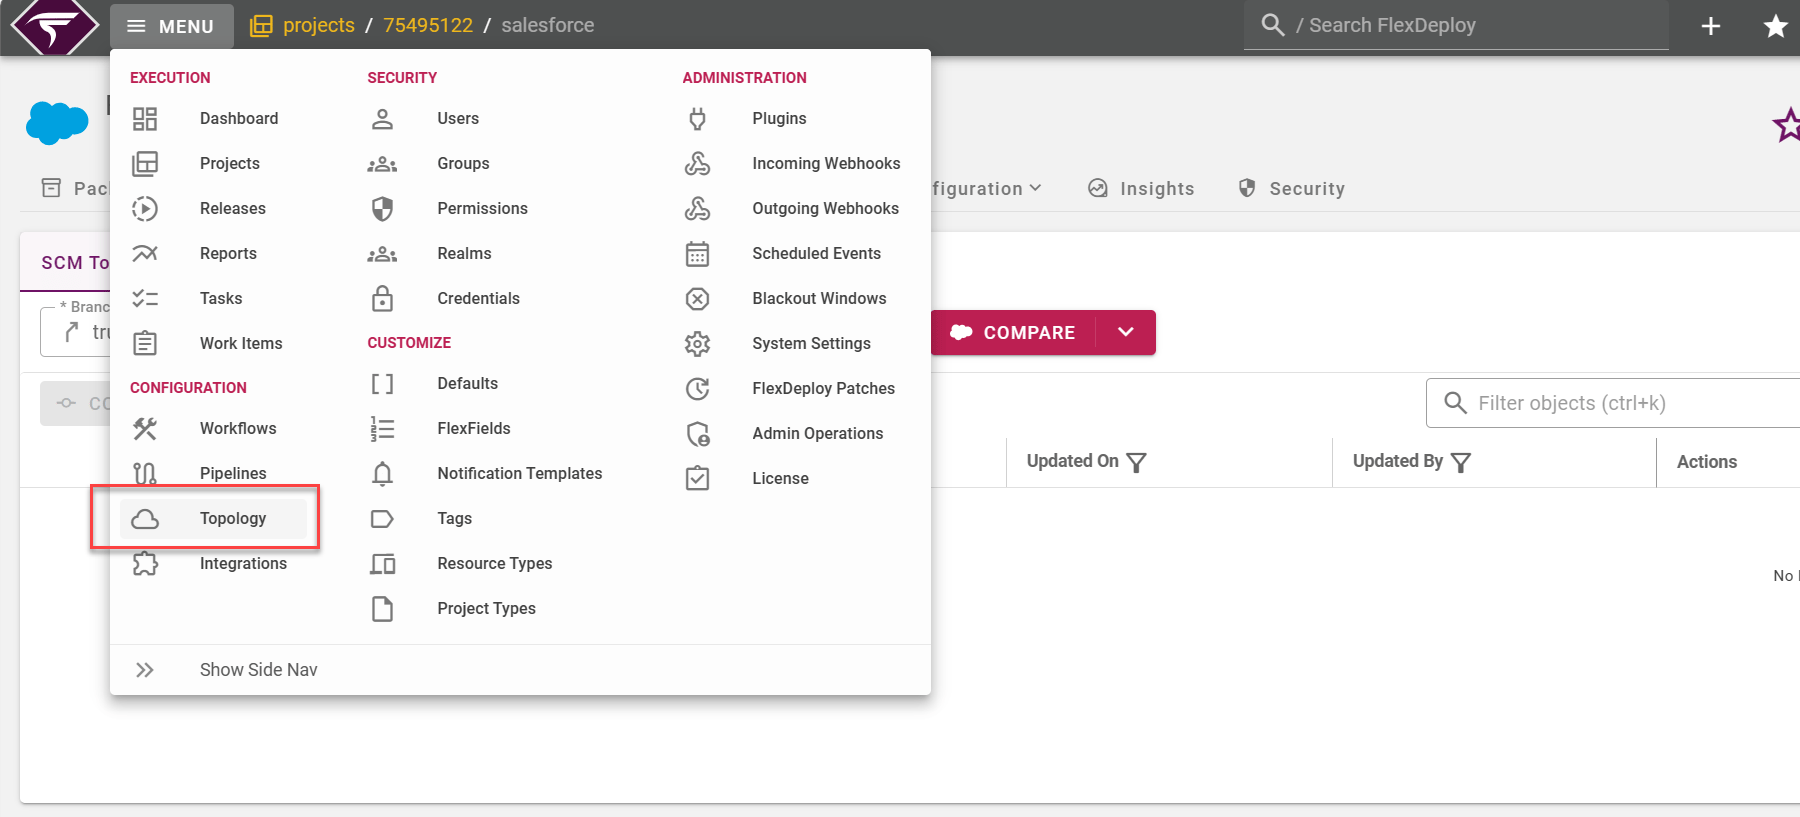
- Target Properties
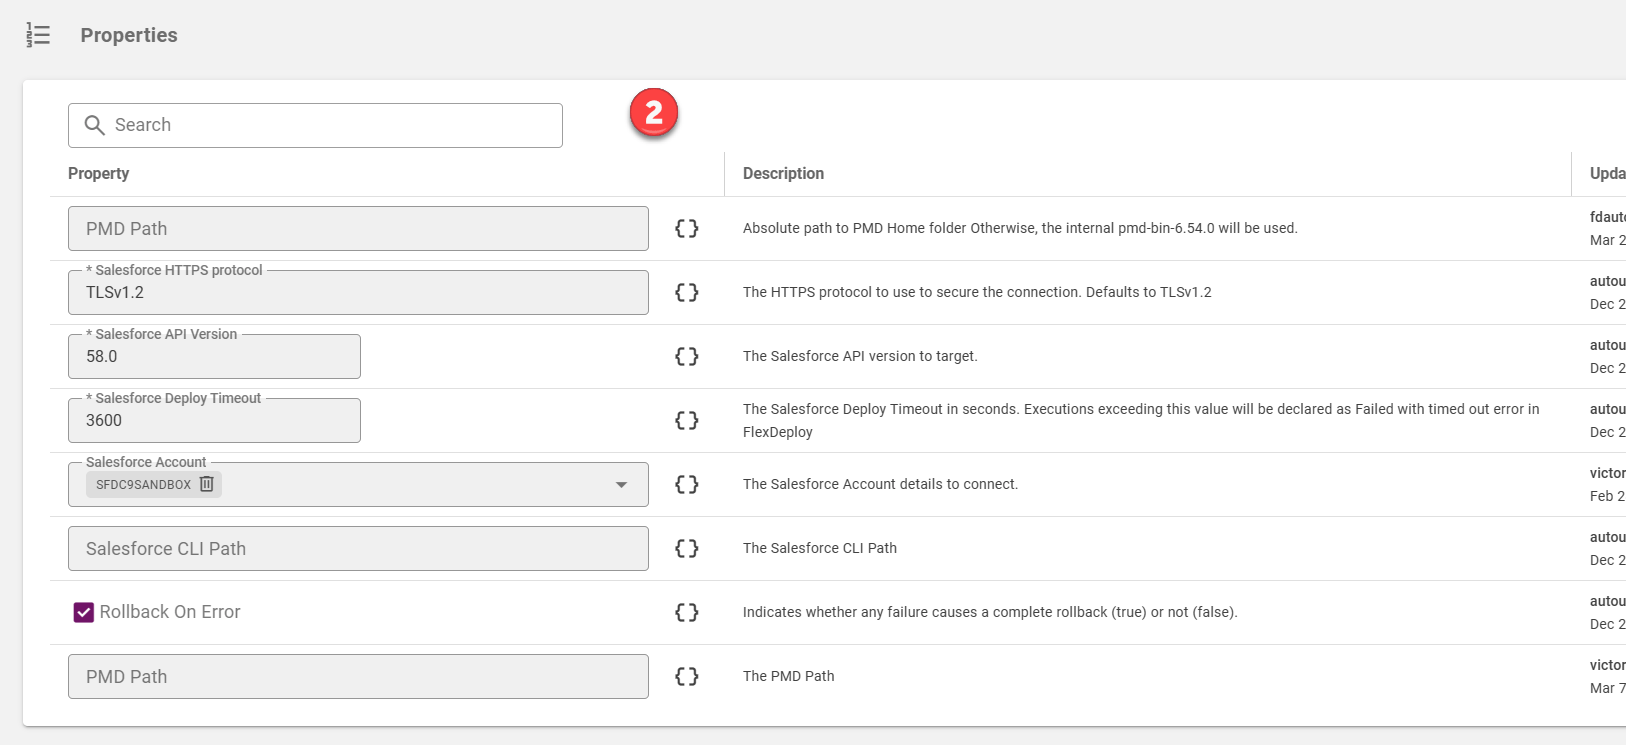
Clicking the environment row for Development allows modifying the Endpoint and properties.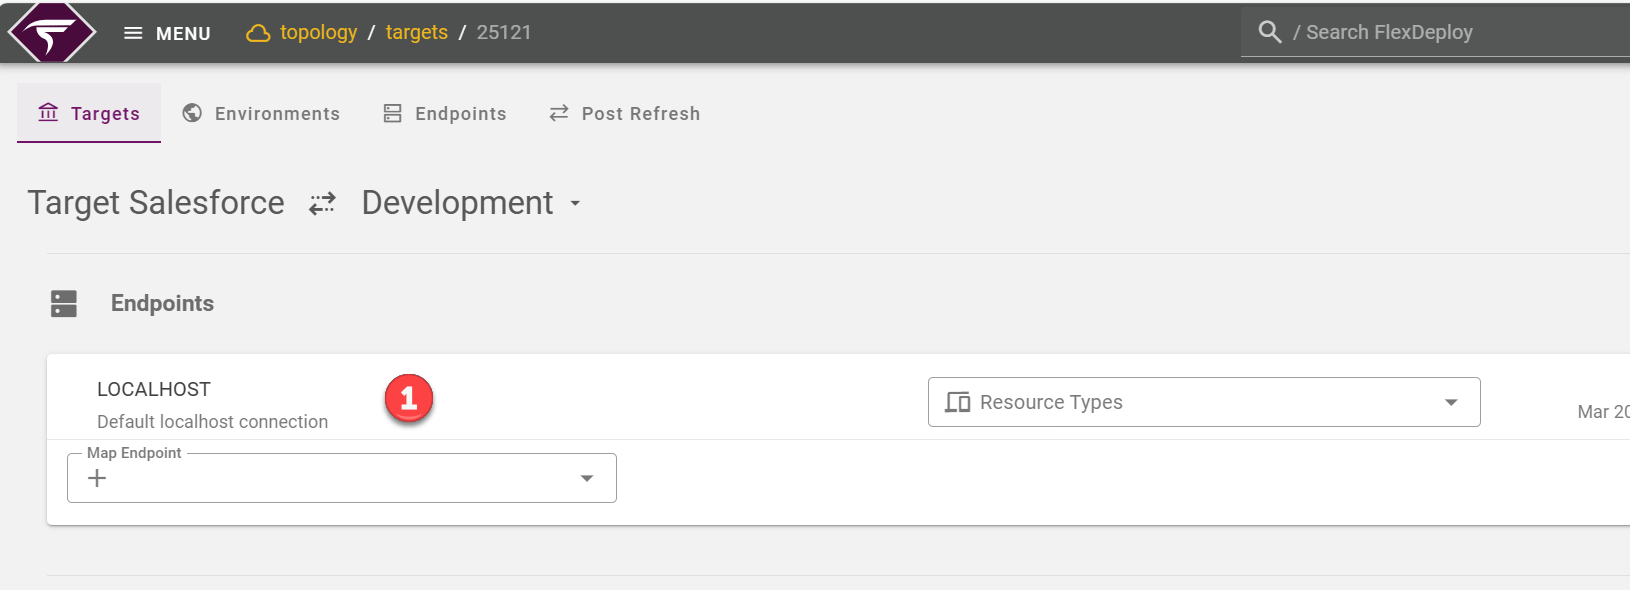
- Cloud Accounts
Click on the Integrations under Topology and then Cloud. Add all the Salesforce Orgs and go back to Topology Overview and map the Salesforce Account for the environment. You would need the User Name, Password, and API Security Token to start with. All other information is optional. Refer to Cloud Accounts documentation for more information on configuring Cloud Accounts.- Project Configuration
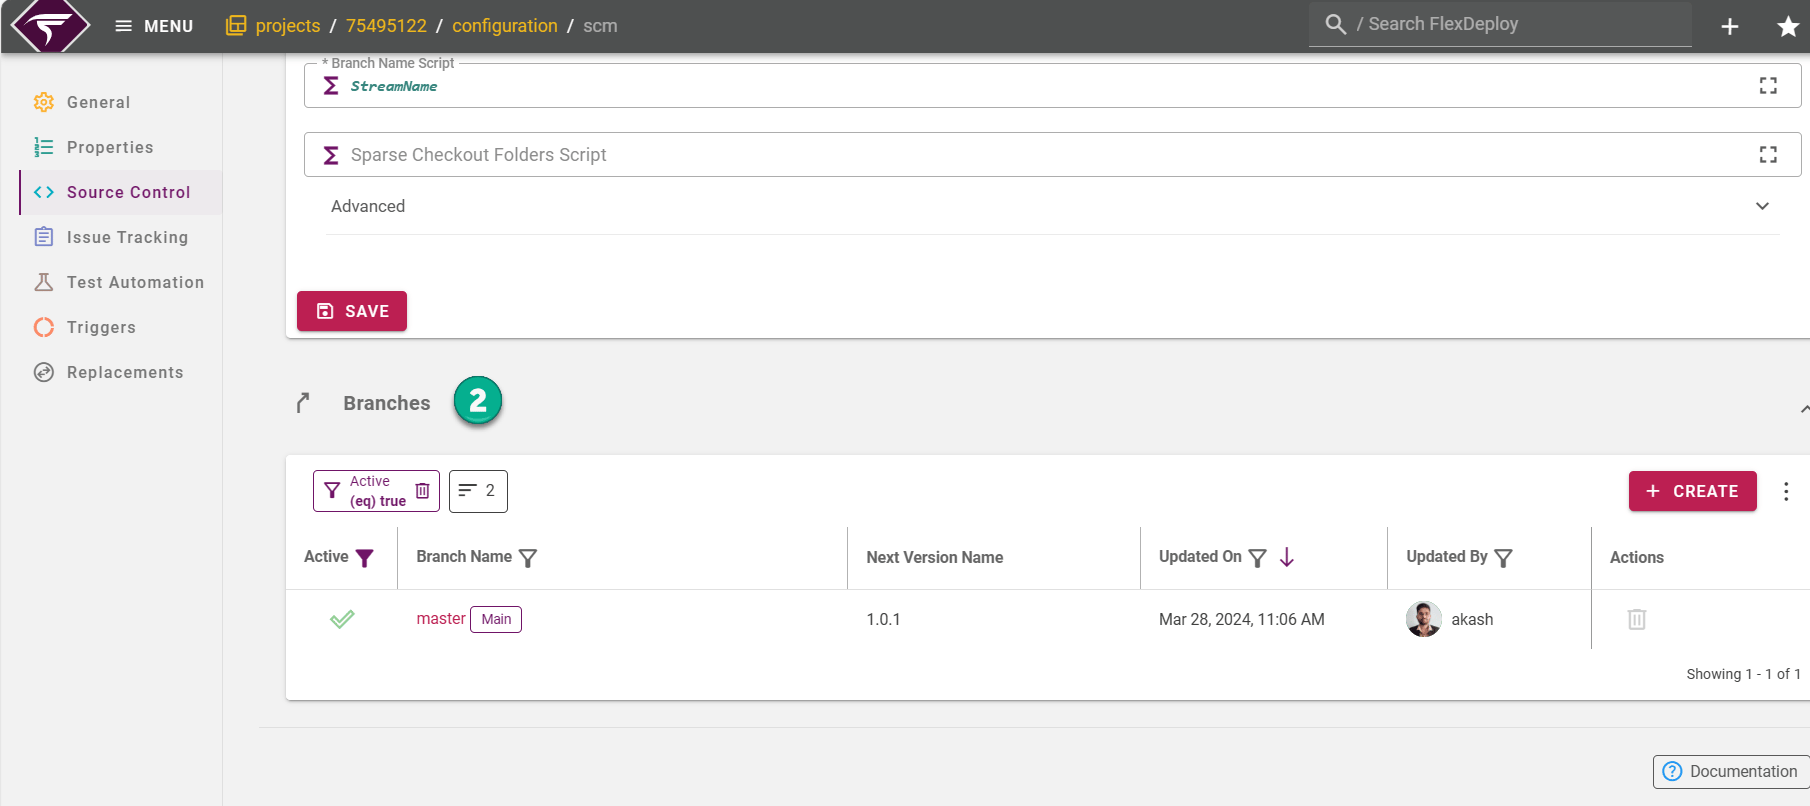
Go back to the Projects Menu and click on the Configuration tab to review each section and update as needed. In most cases, no need to update any of these. If you have multiple SCM branches, you need to add them under Source Control and Branches.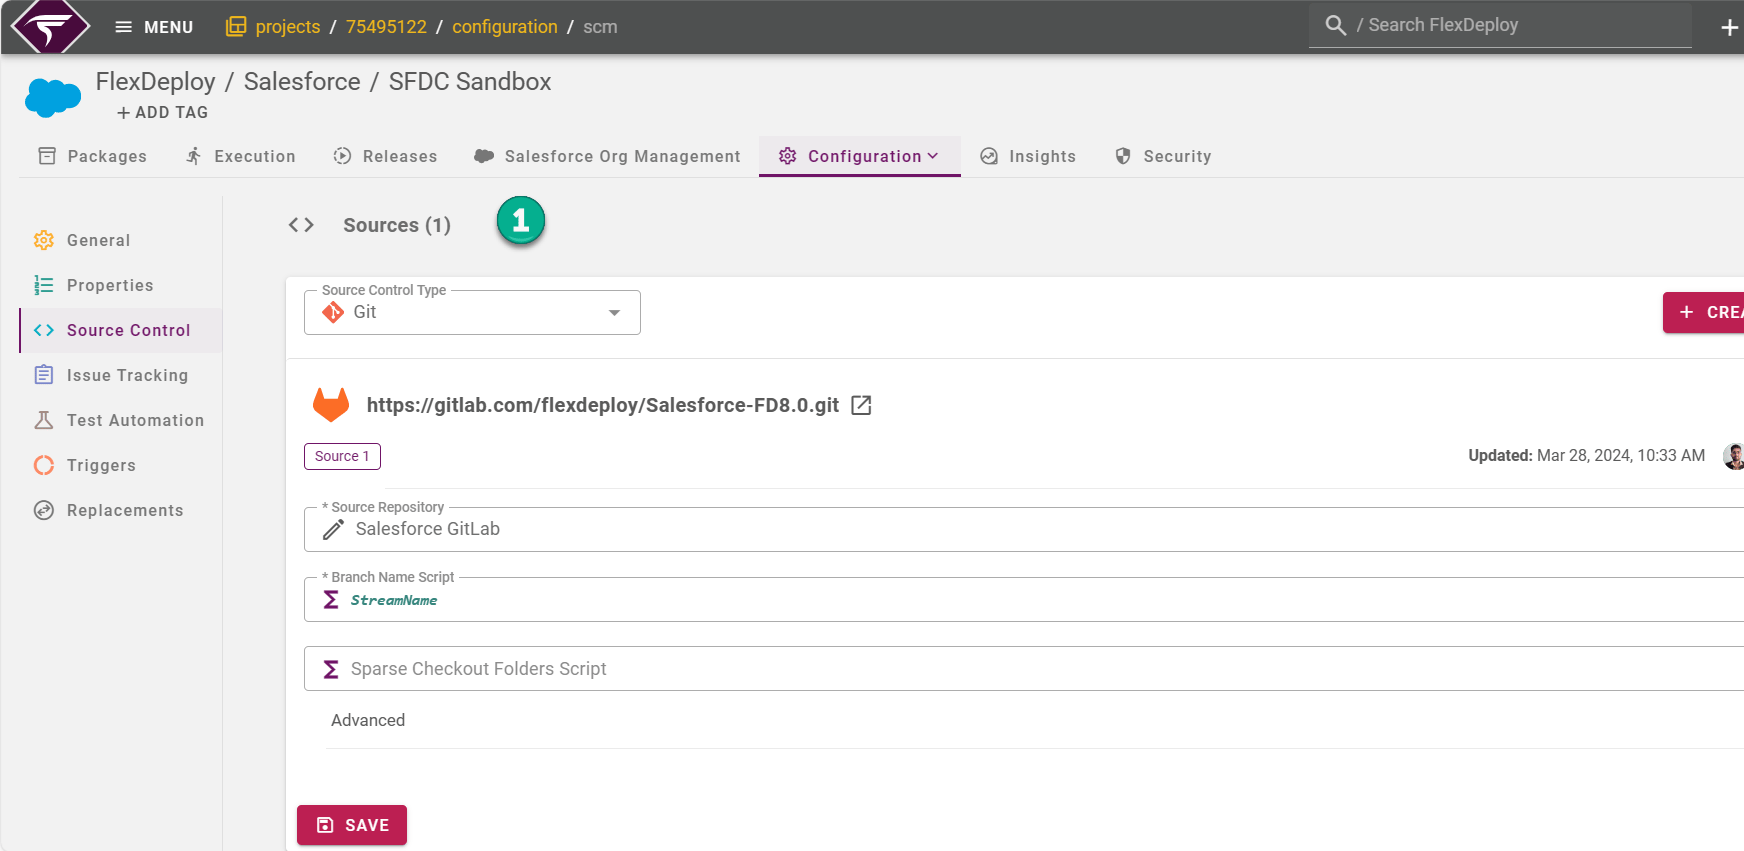
Execution
This section explains how to Identify and Review Changes by comparing the Salesforce Orgs, Creating a Package, and then Deploying the Package to other environments. These can be completely automated using CI and CD pipelines in FlexDeploy if needed.Identify and Review Changes
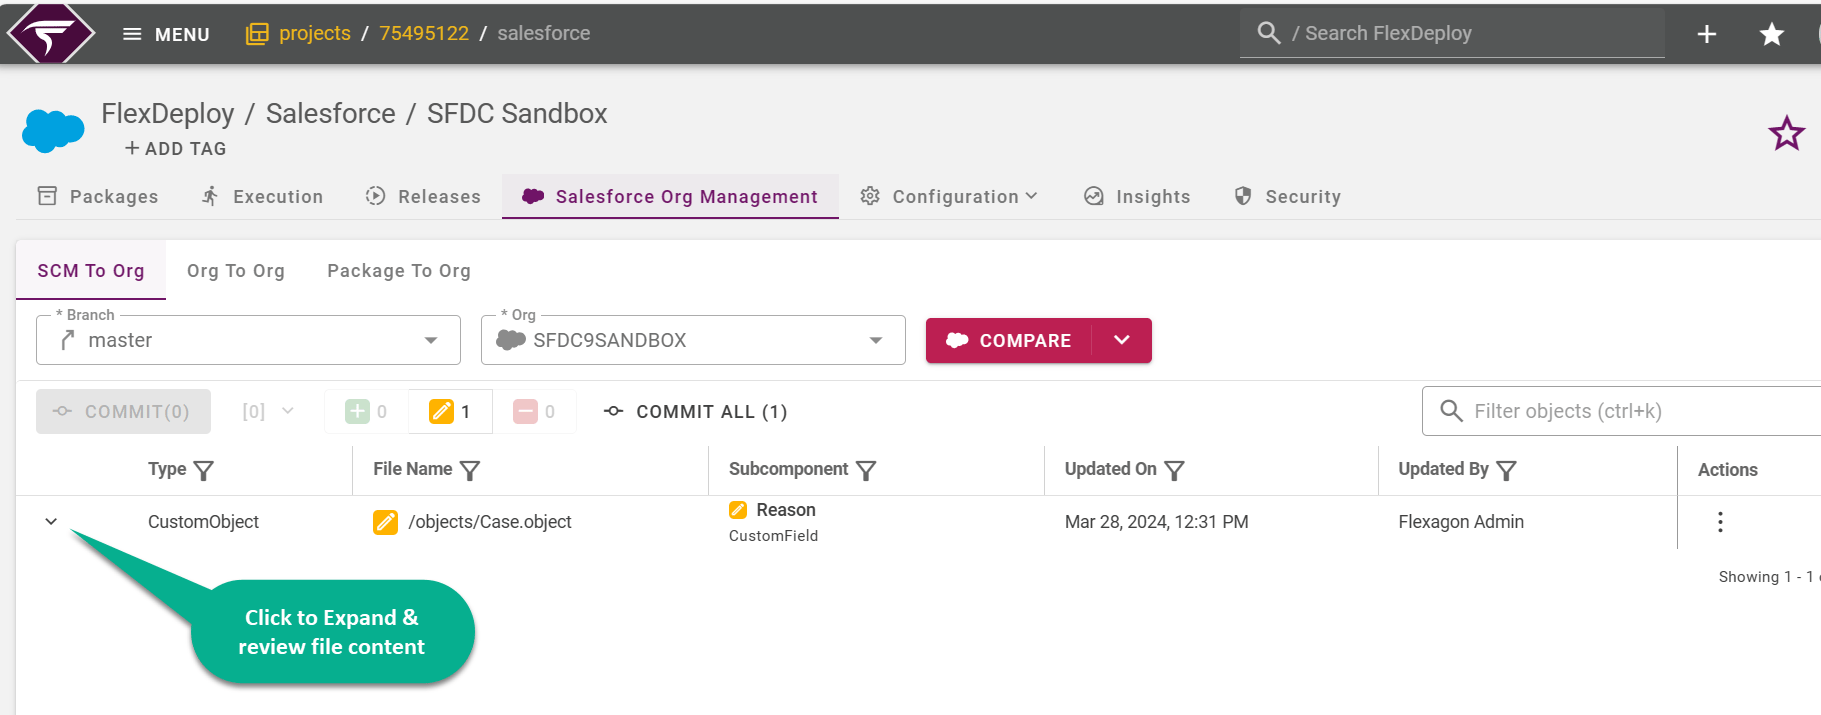
Click on the Salesforce Org Management tab. There are three sub-tabs.- SCM to Org (Only available if SCM-based project)
- Org to Org
- Package to Org
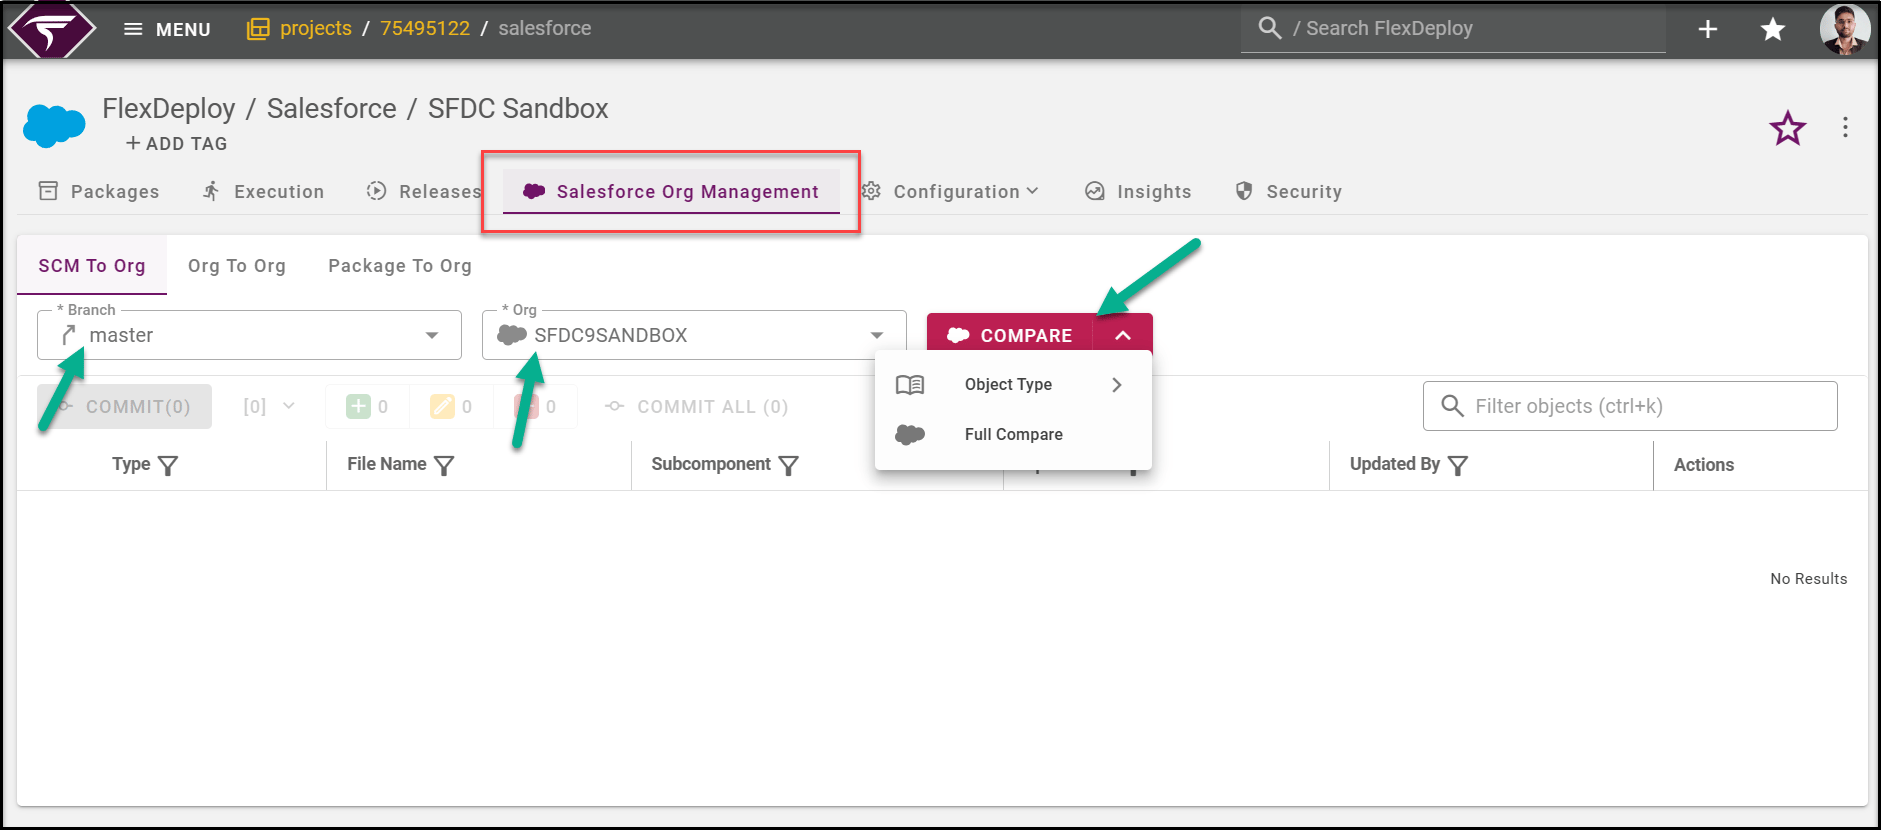
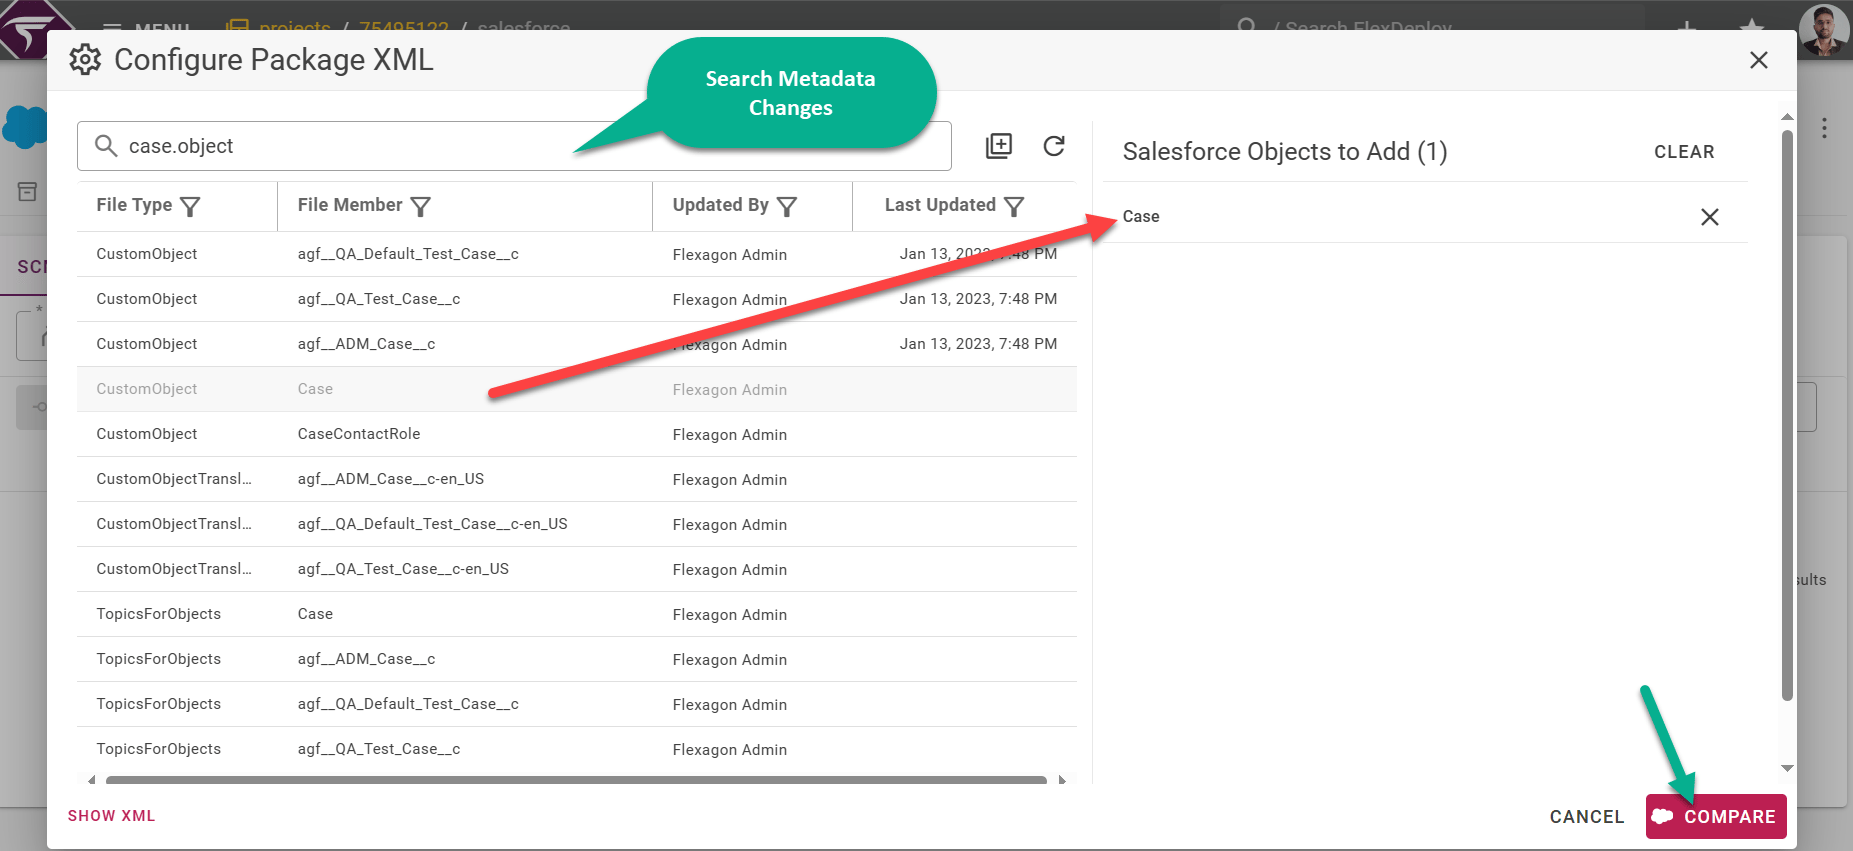
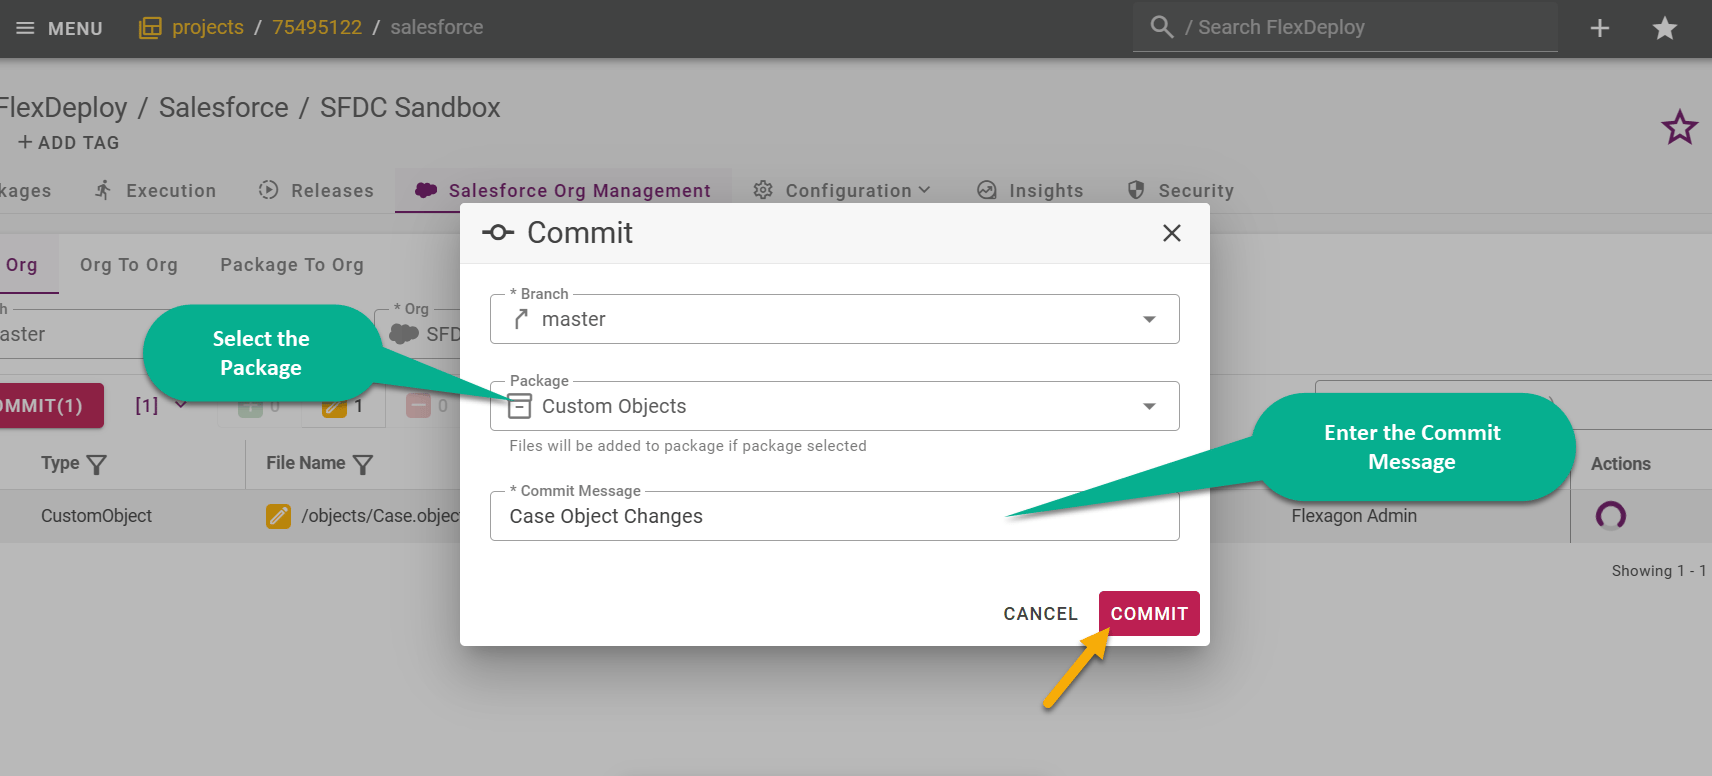
- Click on the Compare button itself to list all the files and pick one or many files to compare.
-
Click on Object Type to select and quickly compare based on the Object types like Apex Class, Custom Object, etc.
- You can also compare multiple object types by selecting the Compare Multiple Object Types option and then choosing the specific object types you wish to compare.
- Click on Full Compare to do a full comparison of your Git repo and your Salesforce Og.
Create a Package
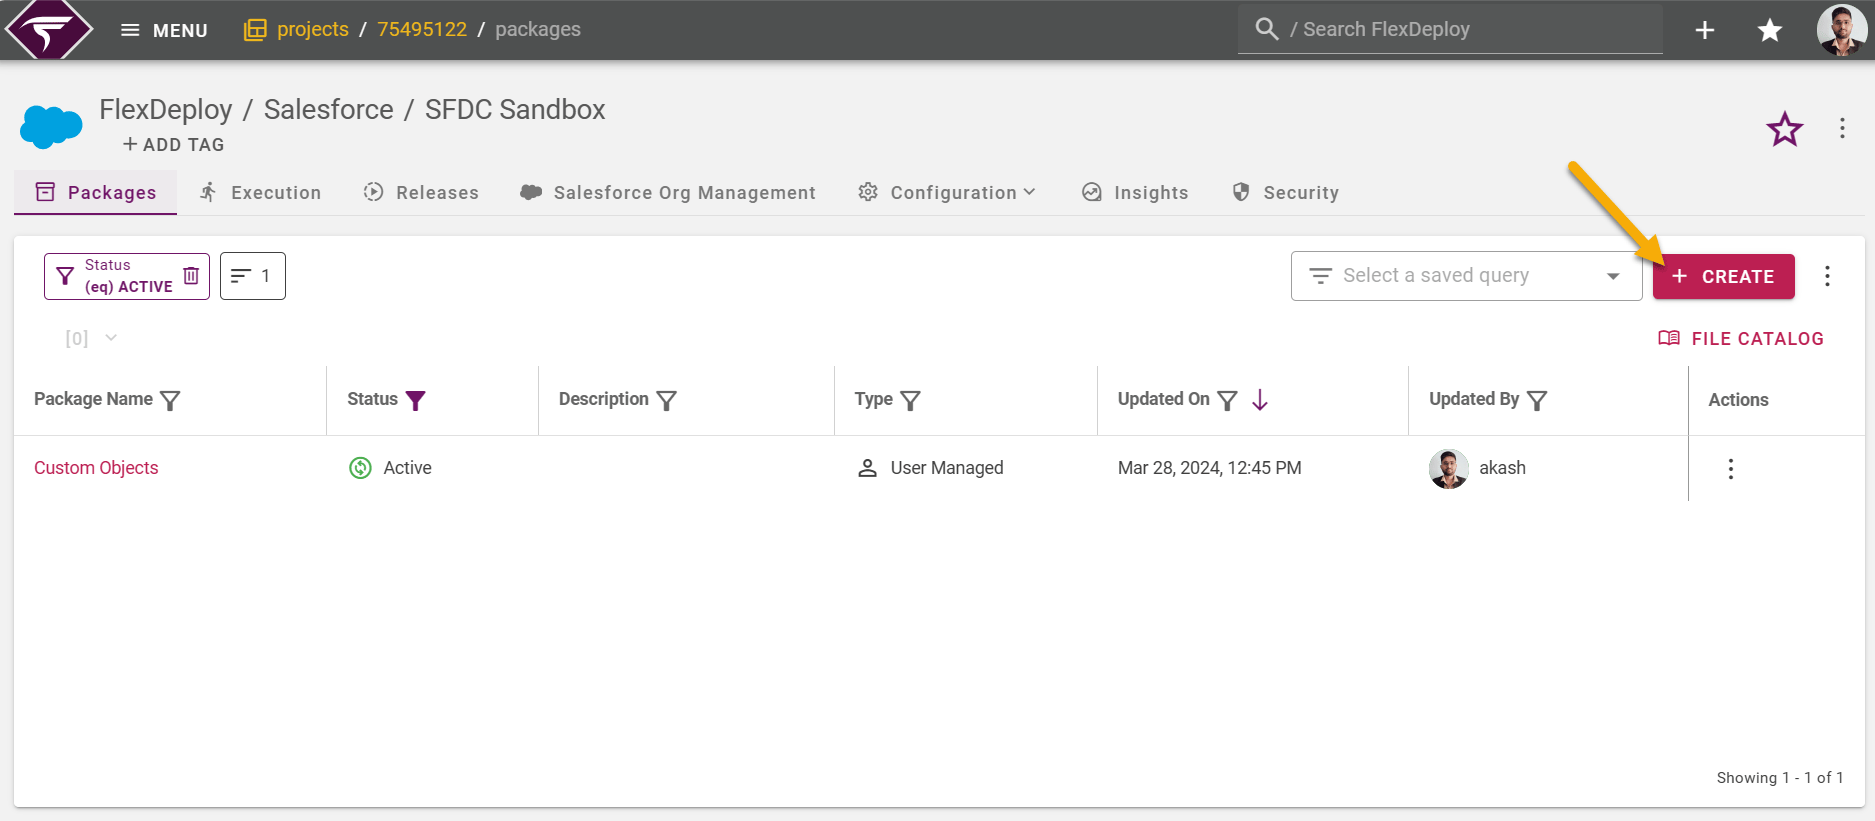
On the package screen, click on Create button to create a new package.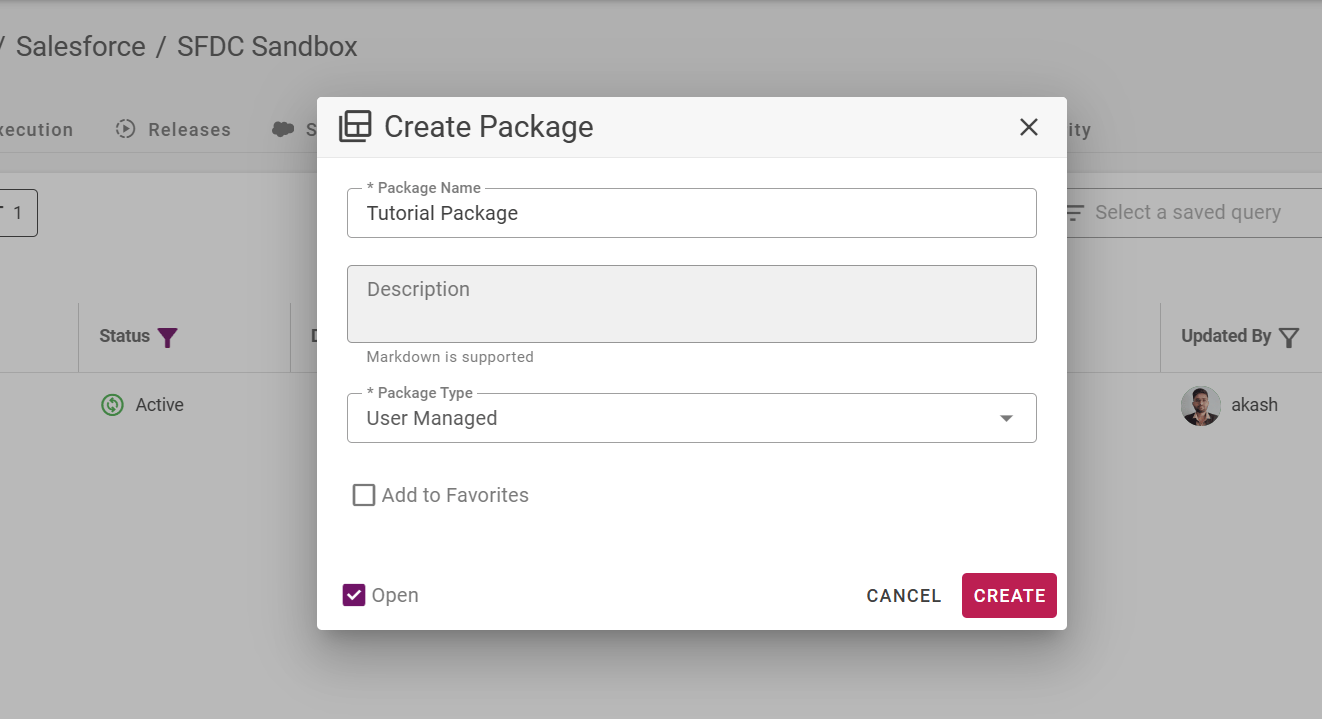
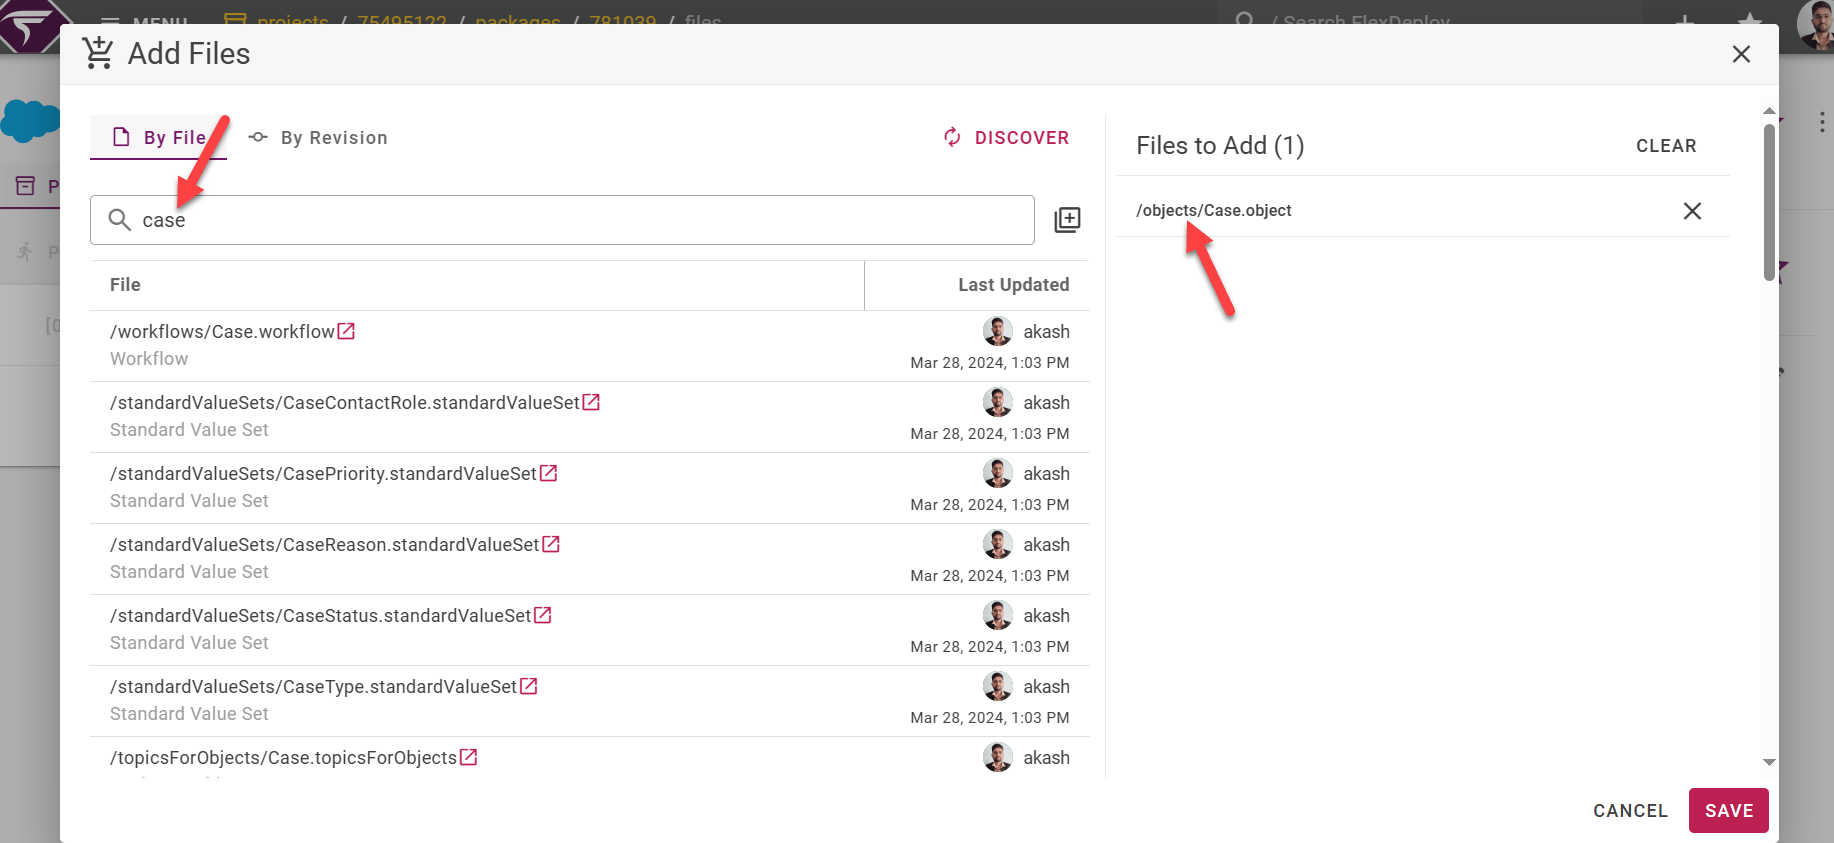
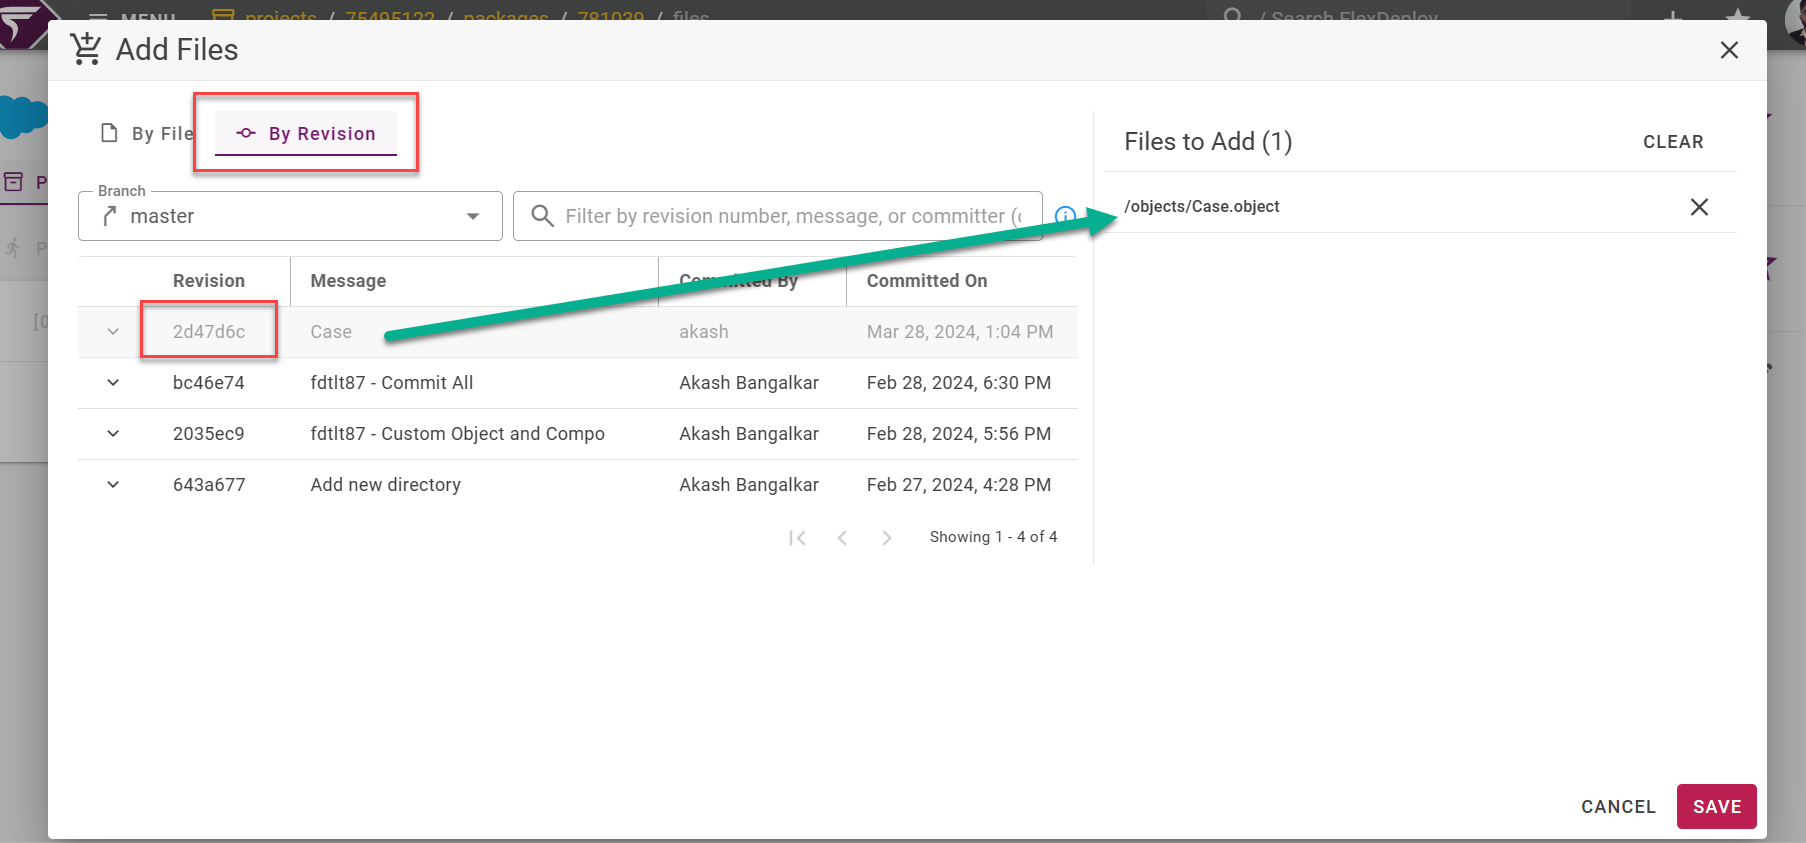
Add Profiles and Permissions
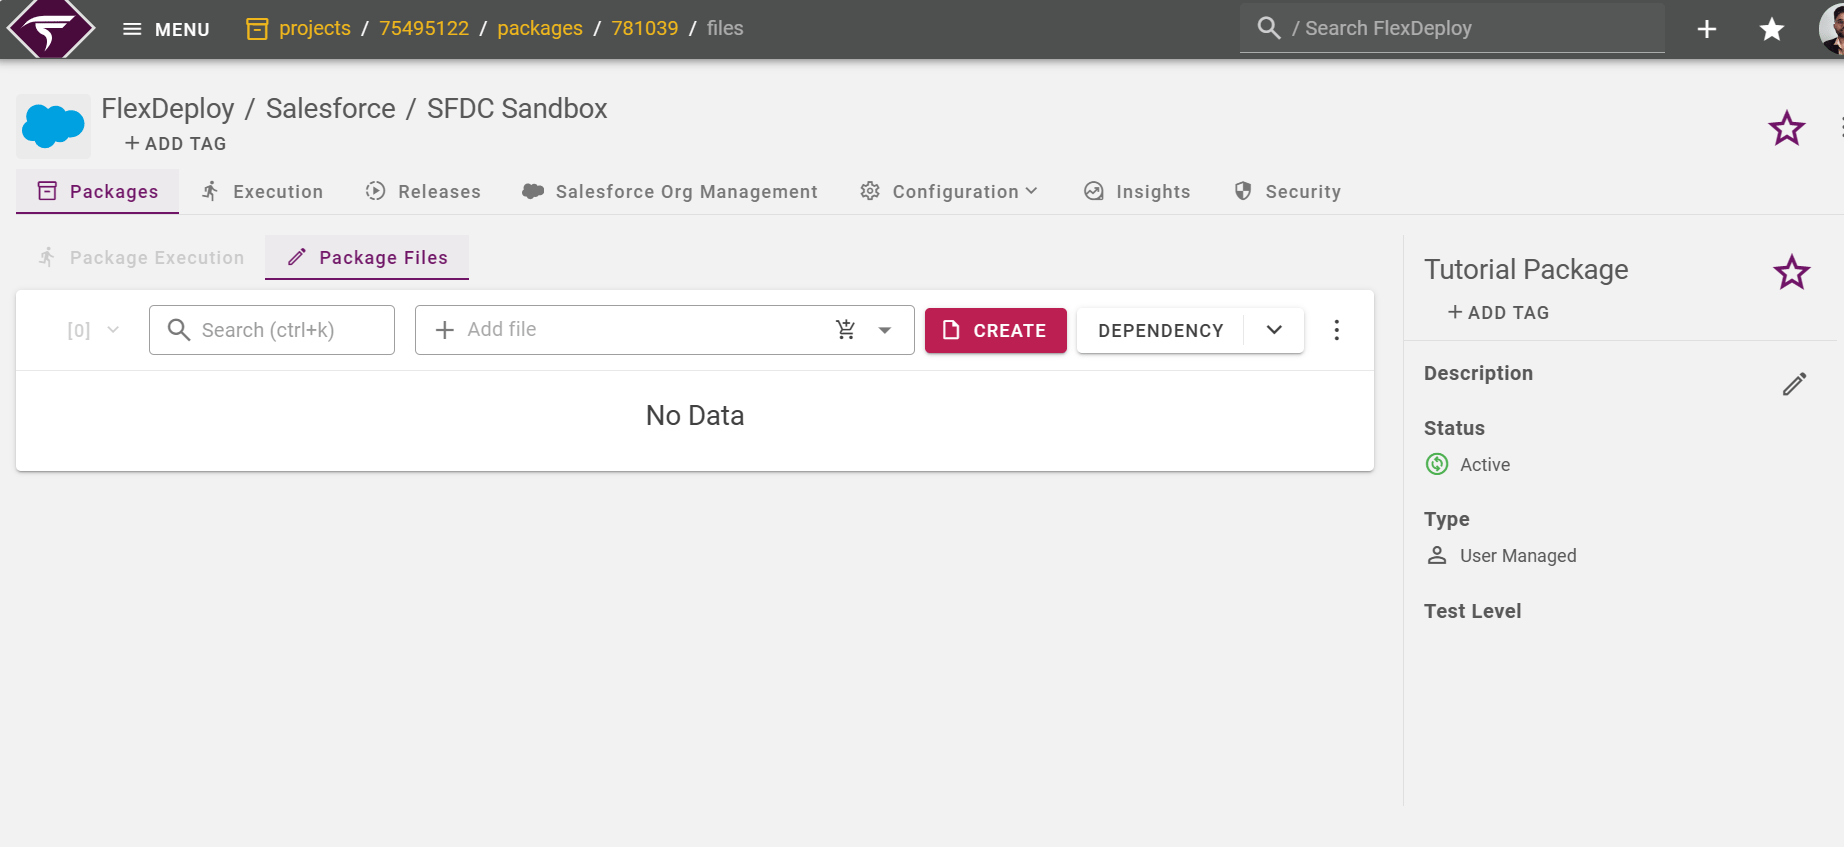
FlexDeploy simplifies the deployment of Salesforce Profiles and Permissions, treating them like any other Salesforce Object type. It allows you to choose specific portions of the Profile or Permission and migrate them to different organizations using Subcomponents. Taking it a step further, FlexDeploy offers a straightforward method to identify all associated changes in Profiles and Permissions. With a simple button click, you can add these changes to your package by clicking on the Dependency >> Add Profiles and Permissions and selecting desired Branch to your package.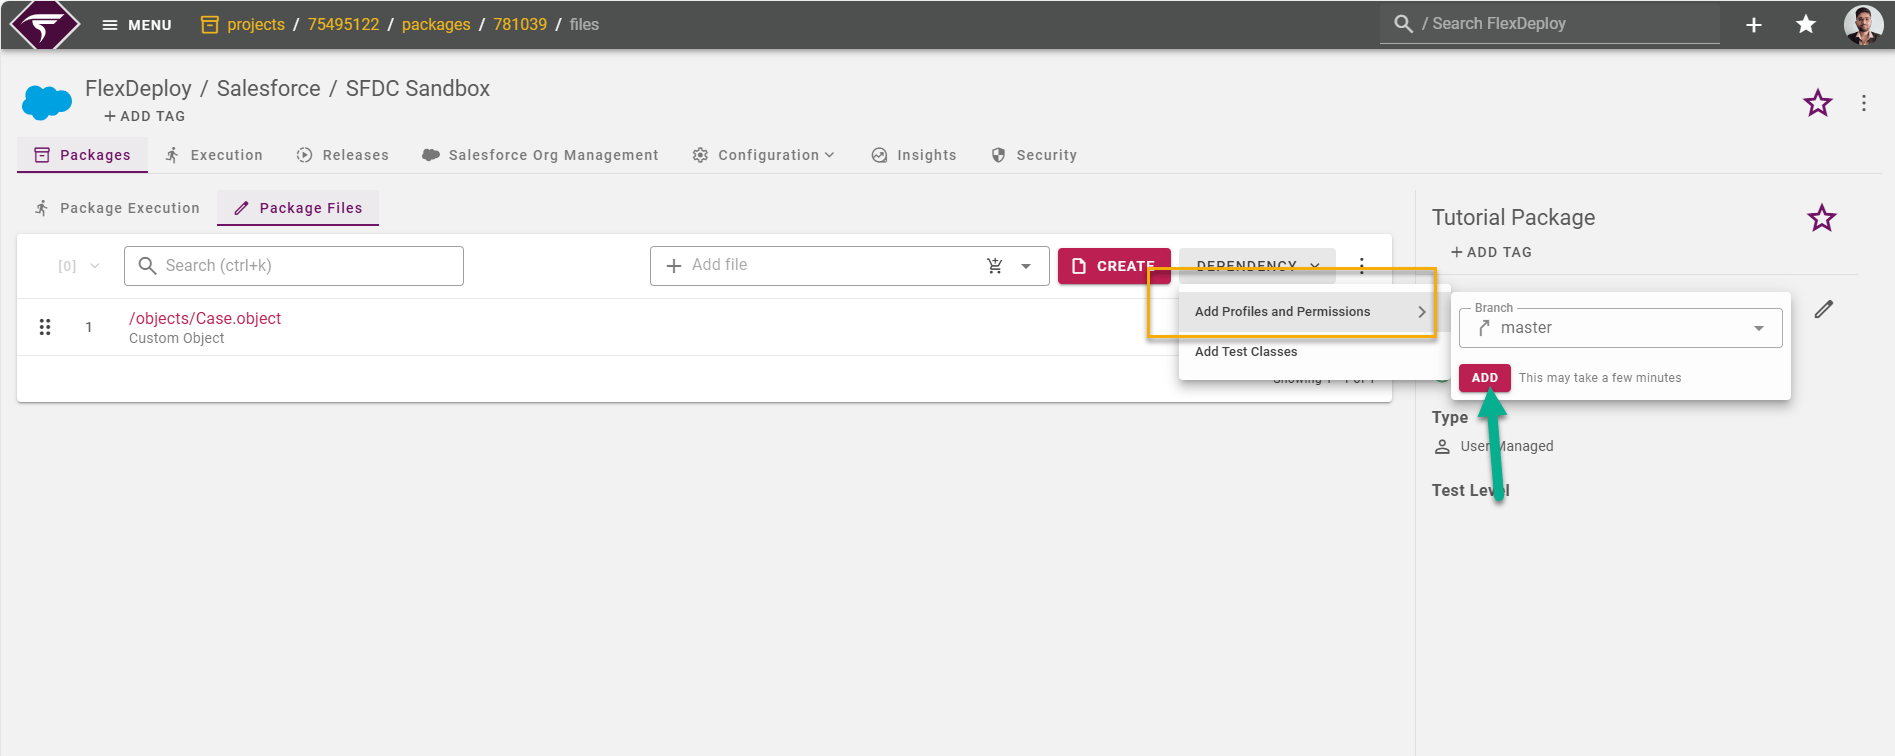
Add Test Classes
Another notable feature is automatically recognizing Test Cases associated with files in your packages and seamlessly incorporating them into your deployment process. This functionality involves identifying all the Test Classes related to the Apex Classes within your package and including them as part of your deployment package. This streamlined approach ensures that your test cases are effortlessly integrated into the deployment workflow, enhancing the efficiency of your development process.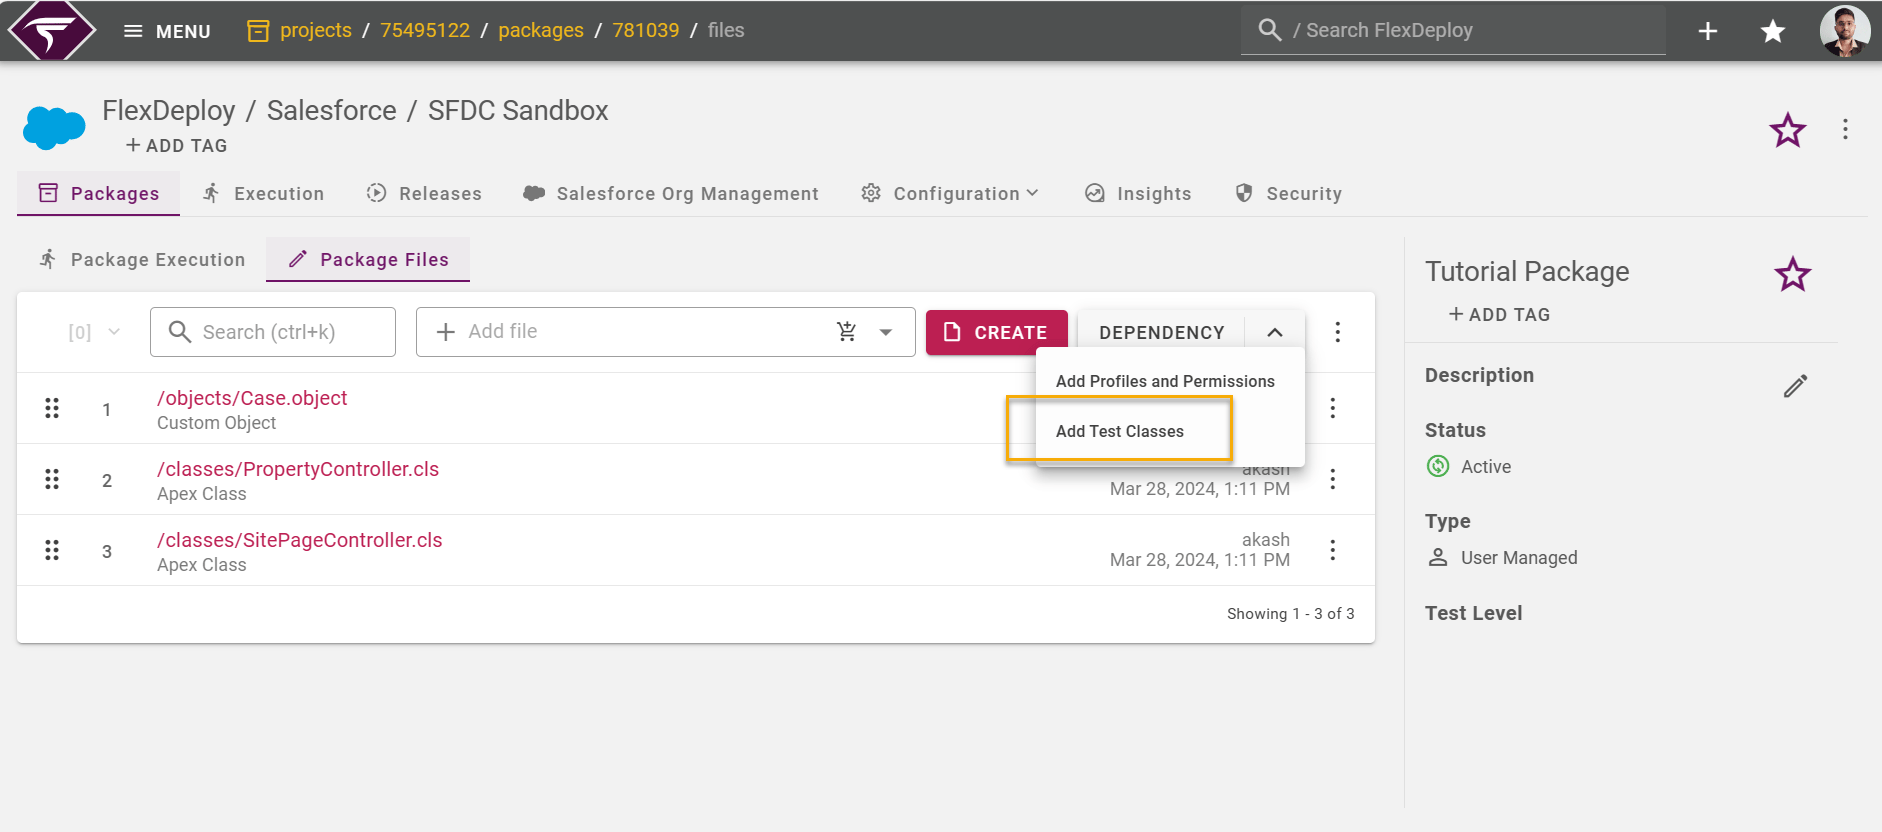
Deploy Subcomponents
One of the most useful features of FlexDeploy for Salesforce is deploying part of the object. Like migrating a single Alert in a Workflow instead of migrating a complete Workflow object. You will see an additional Add Subcomponents option for file types that support subcomponents. When you click the Add Subcomponents option, FlexDeploy will find all supported subcomponents for the selected file. This allows users to migrate only certain parts of a specific file. From this popup, you can preview and select any subcomponents to add to your package.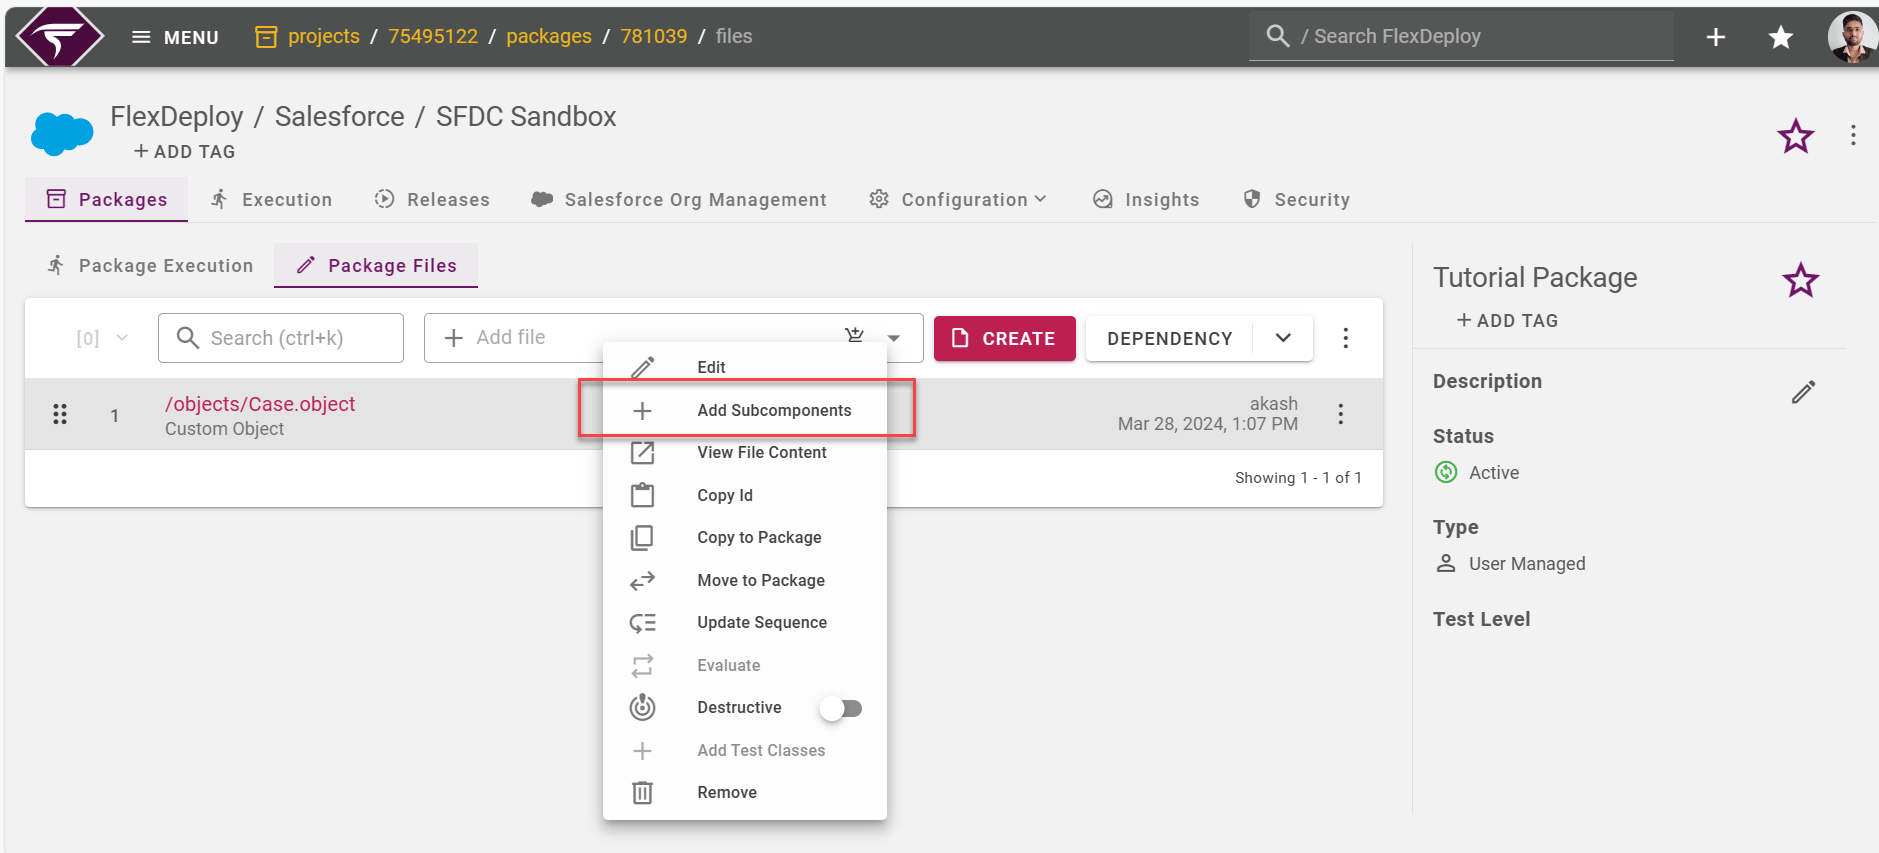
Base Subcomponent Deployment
In addition to subcomponent deployment, FlexDeploy supports the deployment of the base components for objects, such as Custom Objects and Profiles, even when the complete component is not already present in the target org. This feature allows users to deploy the base structure of an object, bypassing the need to migrate the entire object, even when the object itself is new and not previously existing in the target environment. This is particularly beneficial when users wish to deploy only specific aspects of an object. For example, if a Custom Object in a Sandbox environment contains over 100 fields that are not required in the UAT or Production environments, users can opt to deploy only the essential fields or components instead of the entire object. This approach allows for a more tailored and efficient deployment process.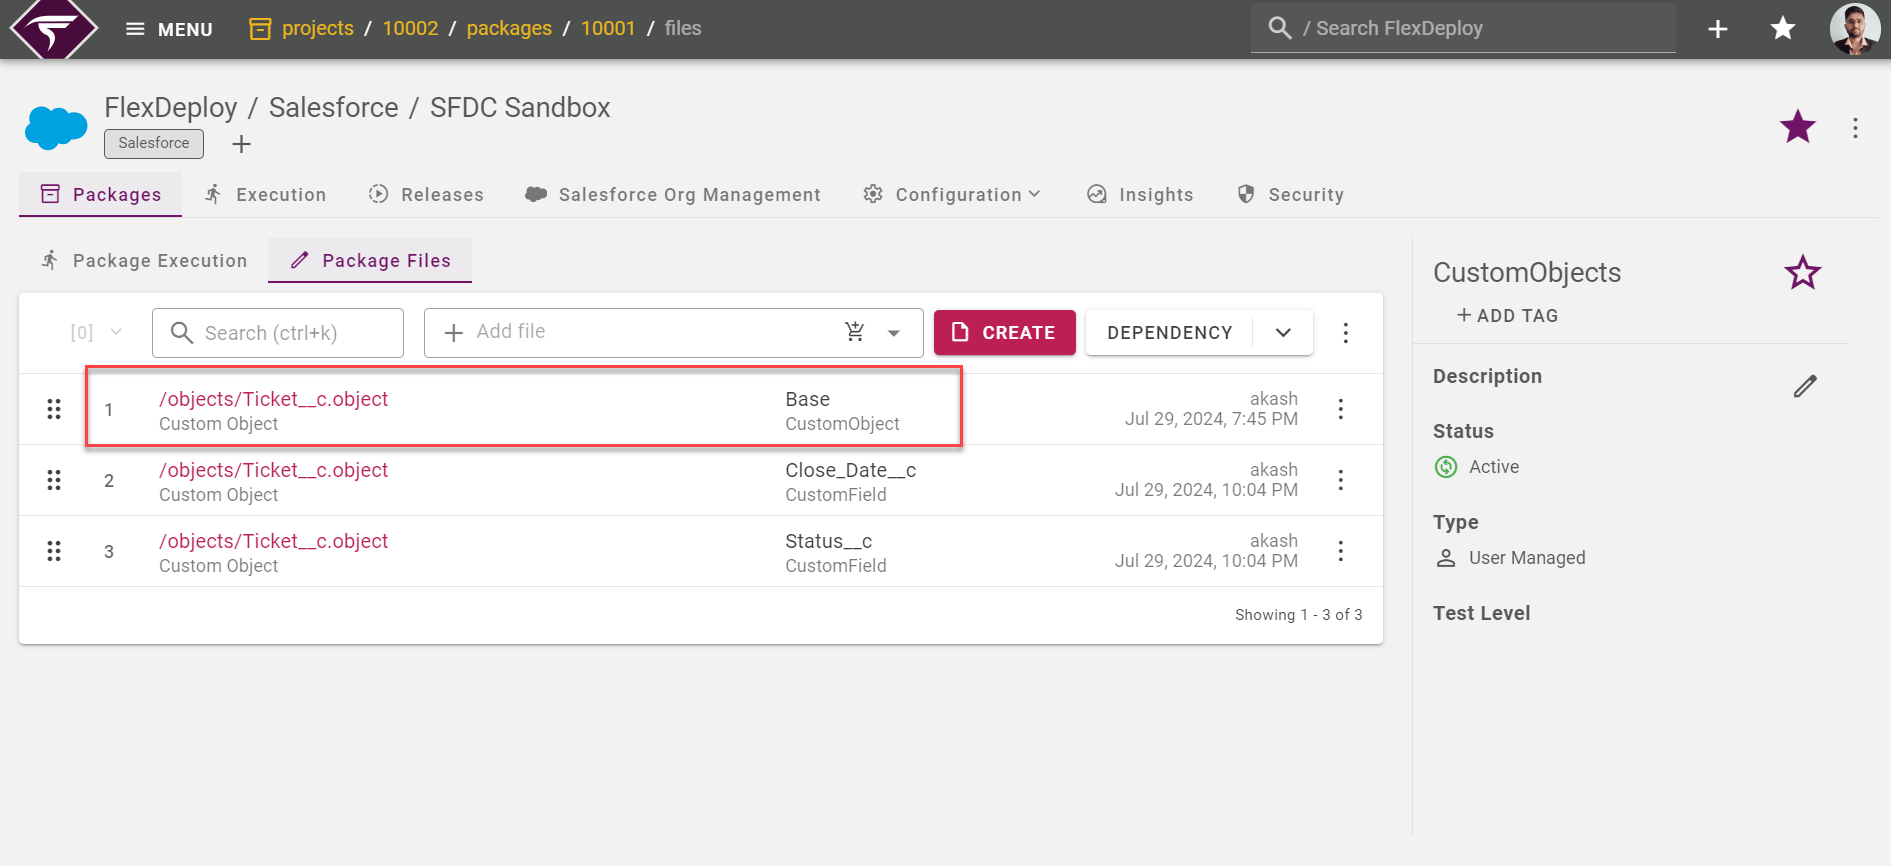
Support of Destructive Packages
This functionality aids in maintaining the cleanliness of your Org by facilitating the removal of retired or unnecessary components. With FlexDeploy, this process is remarkably straightforward. You can effortlessly mark one or multiple files in any package as destructive, prompting their deletion from the Org. The migration of these deletions involves appropriate approvals, ensuring visibility and auditability. To mark a file as destructive, simply right-click on it within your package and select the Destructive option. FlexDeploy will then automatically generate a destructive package for the marked files, streamlining the entire process.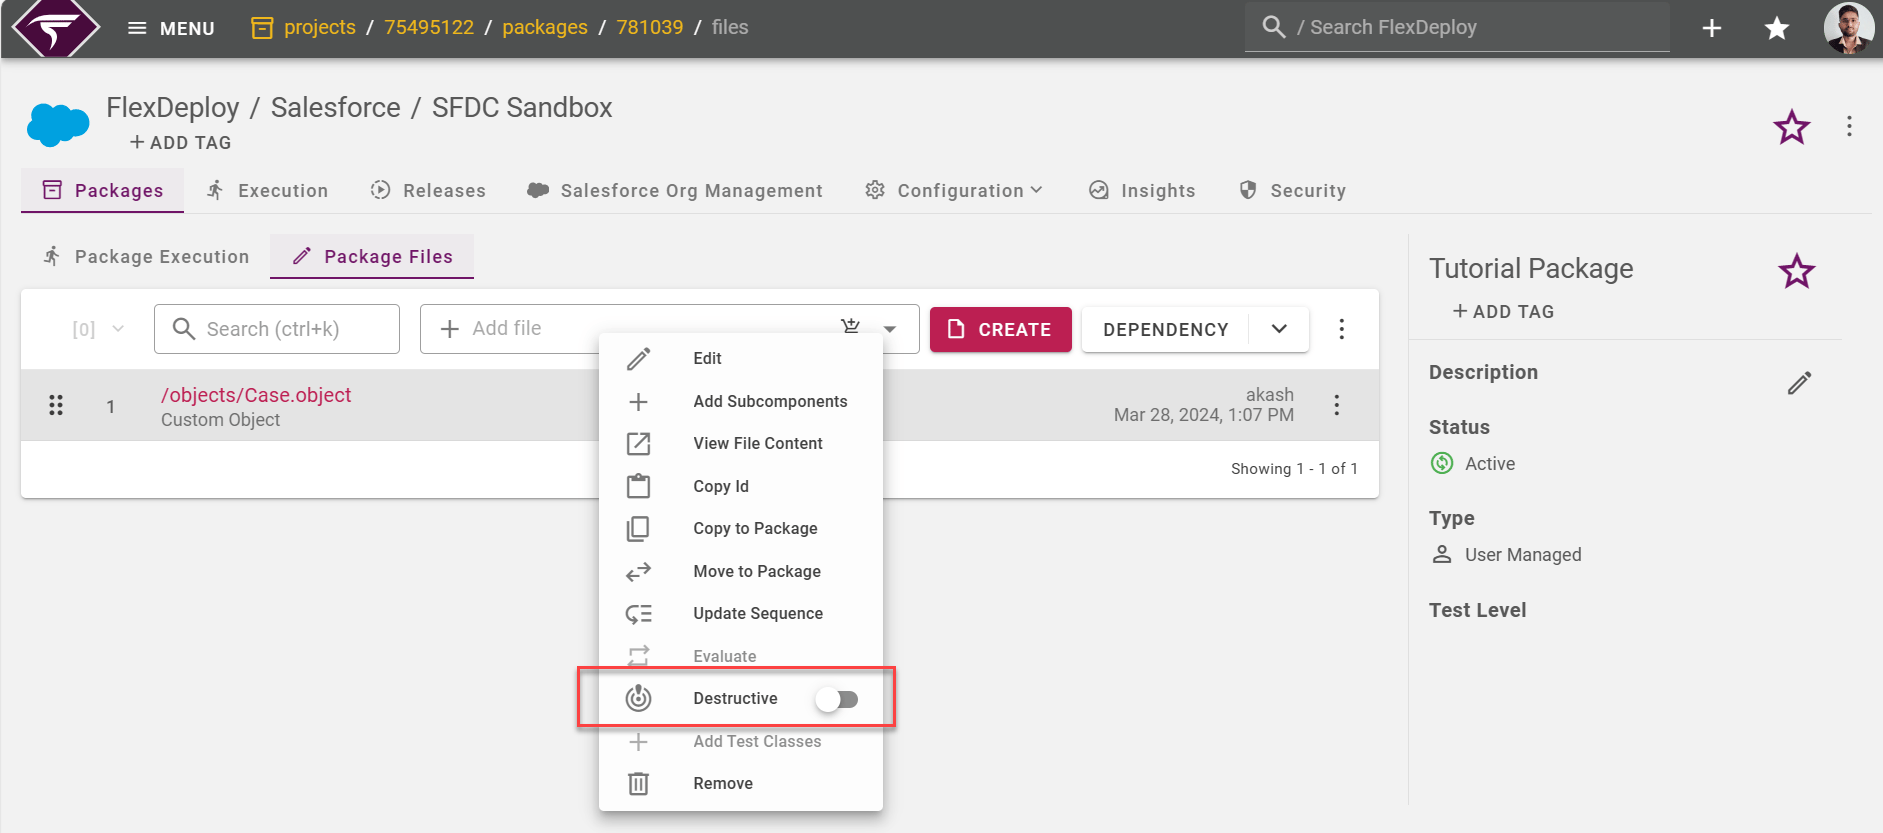
Building Package
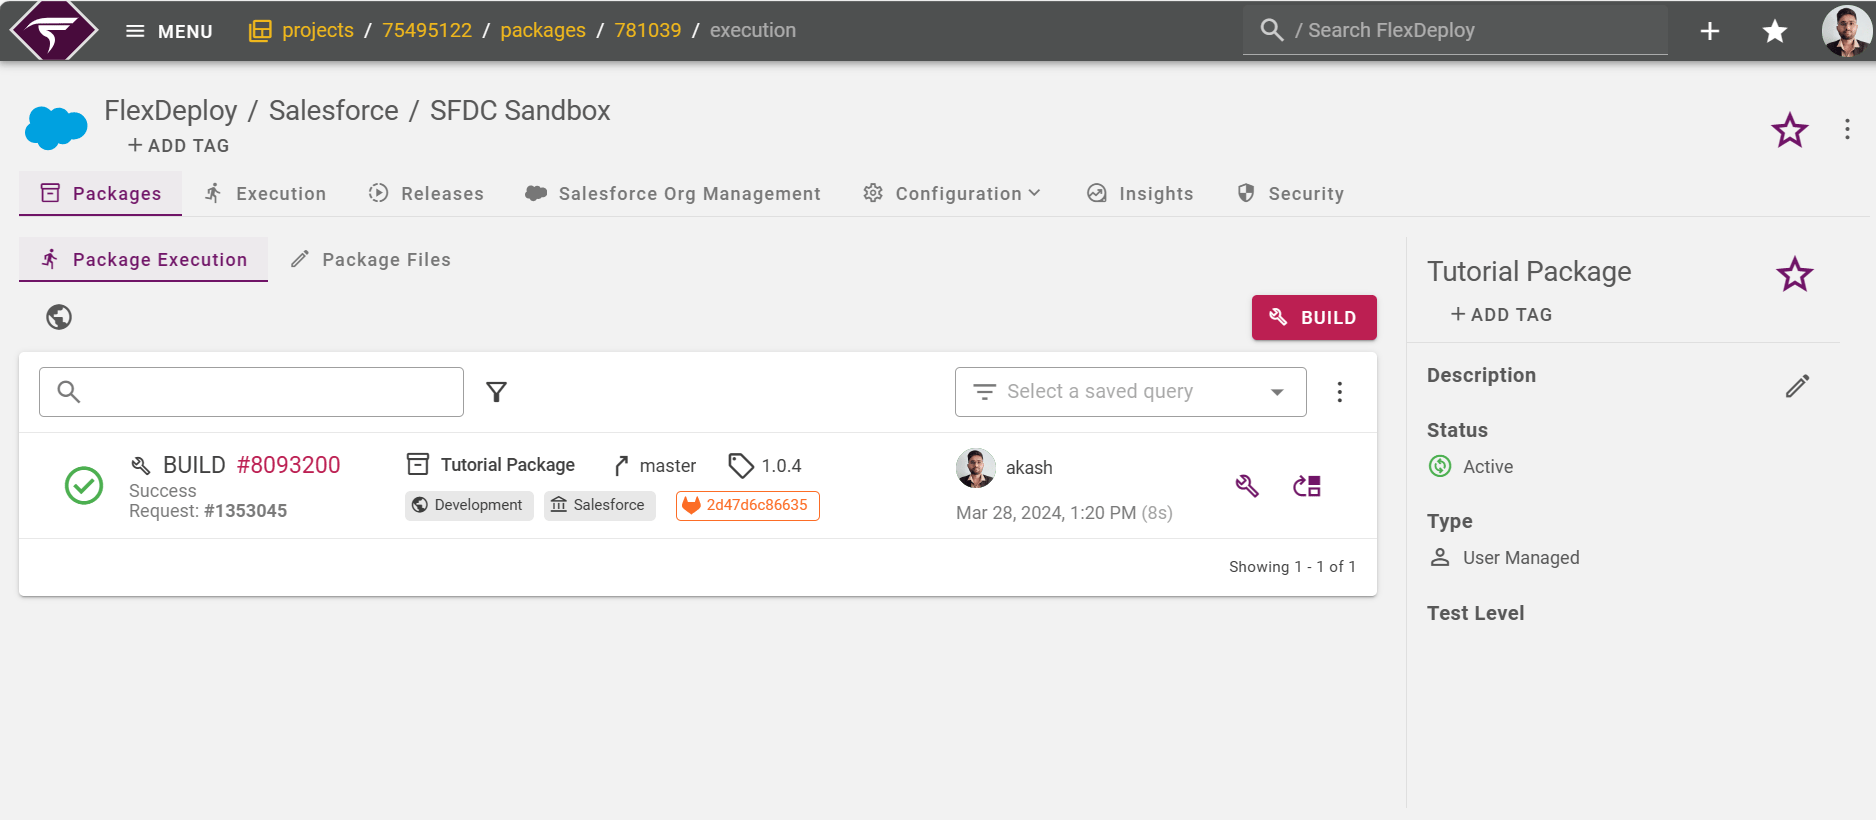
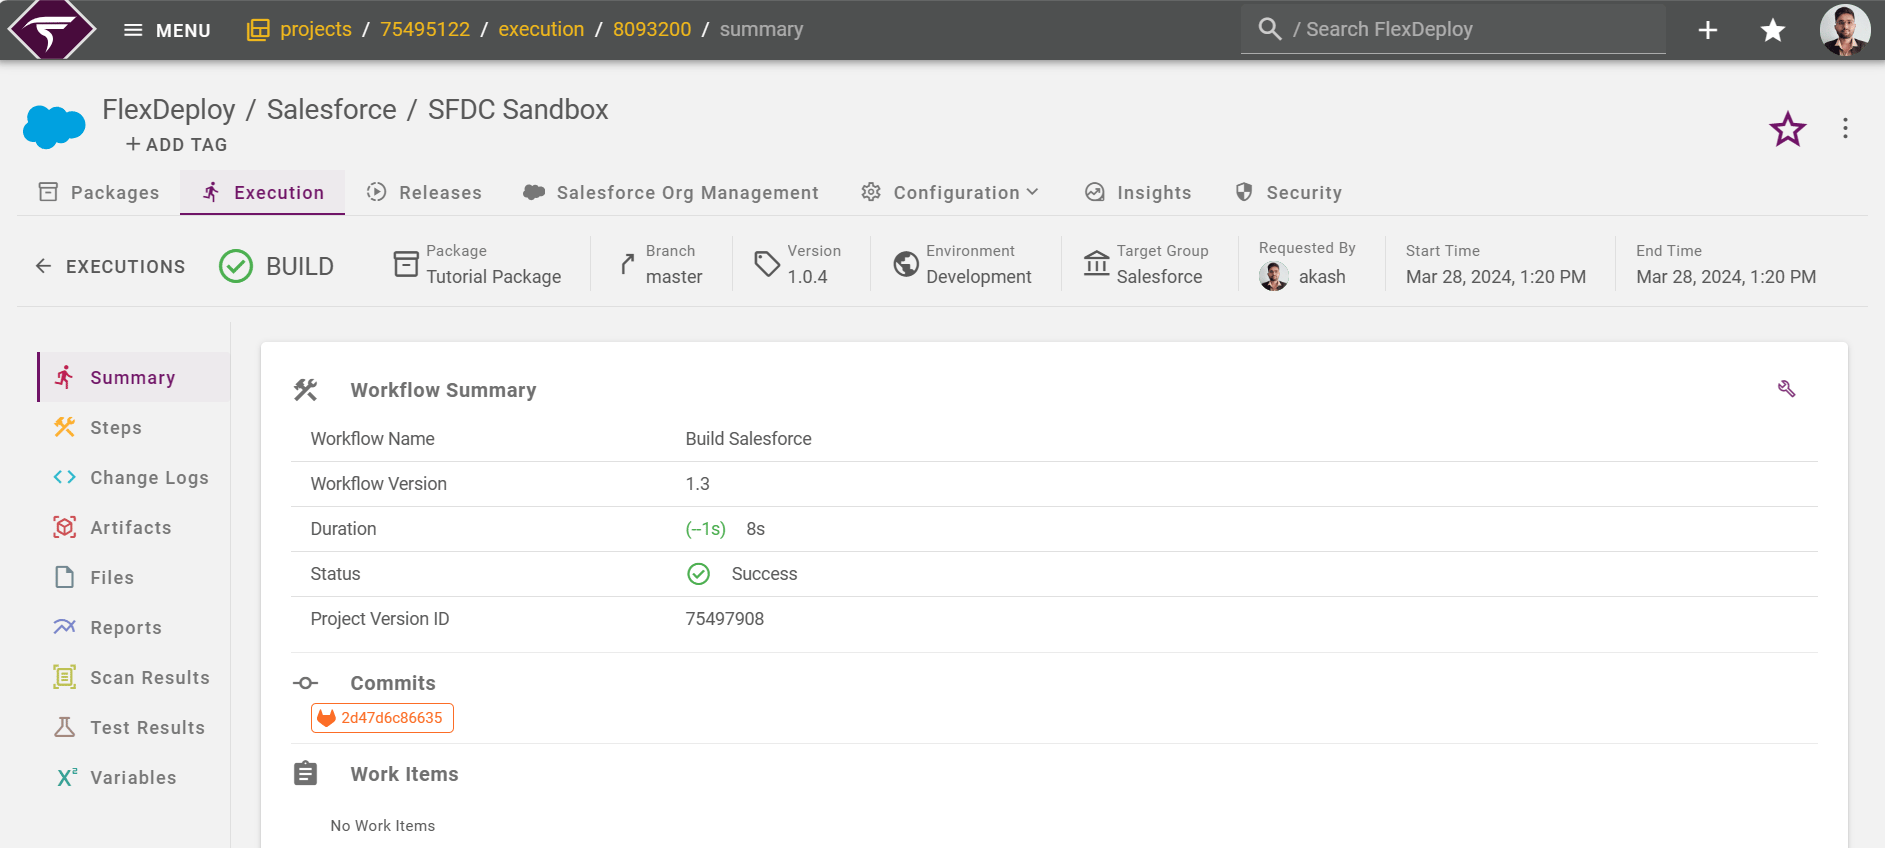
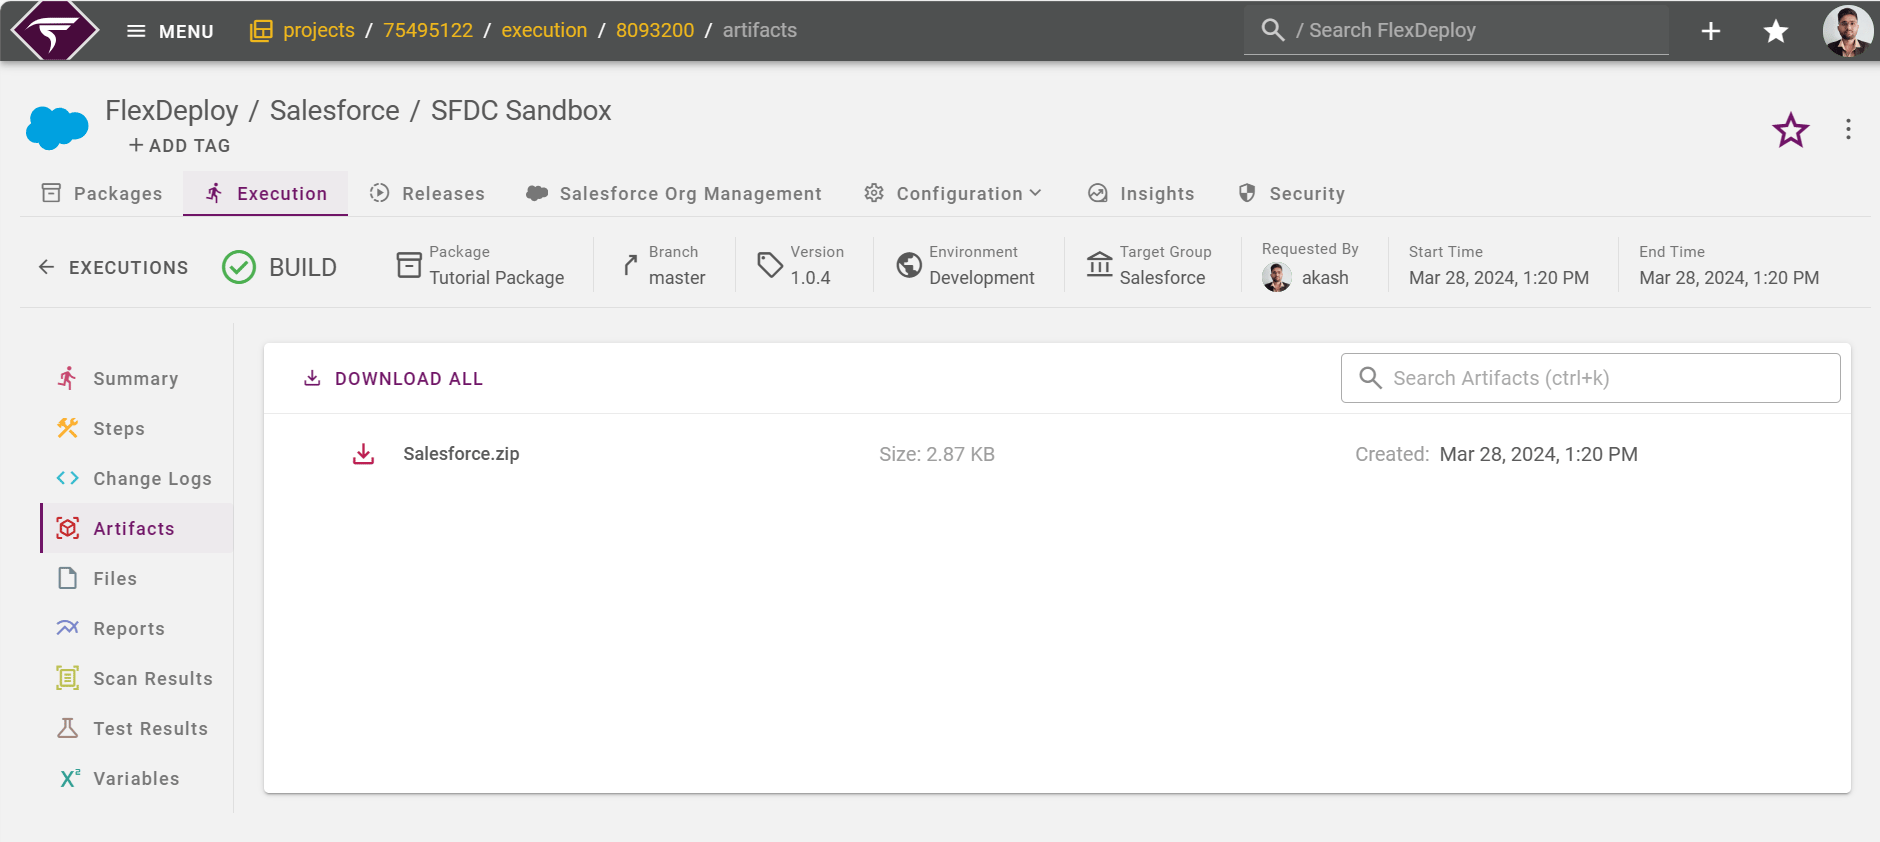
Click on the Execution tab to submit the build request for that package. Click on Build. The Build Request Form is displayed. Click on the “Submit” button for the build to execute.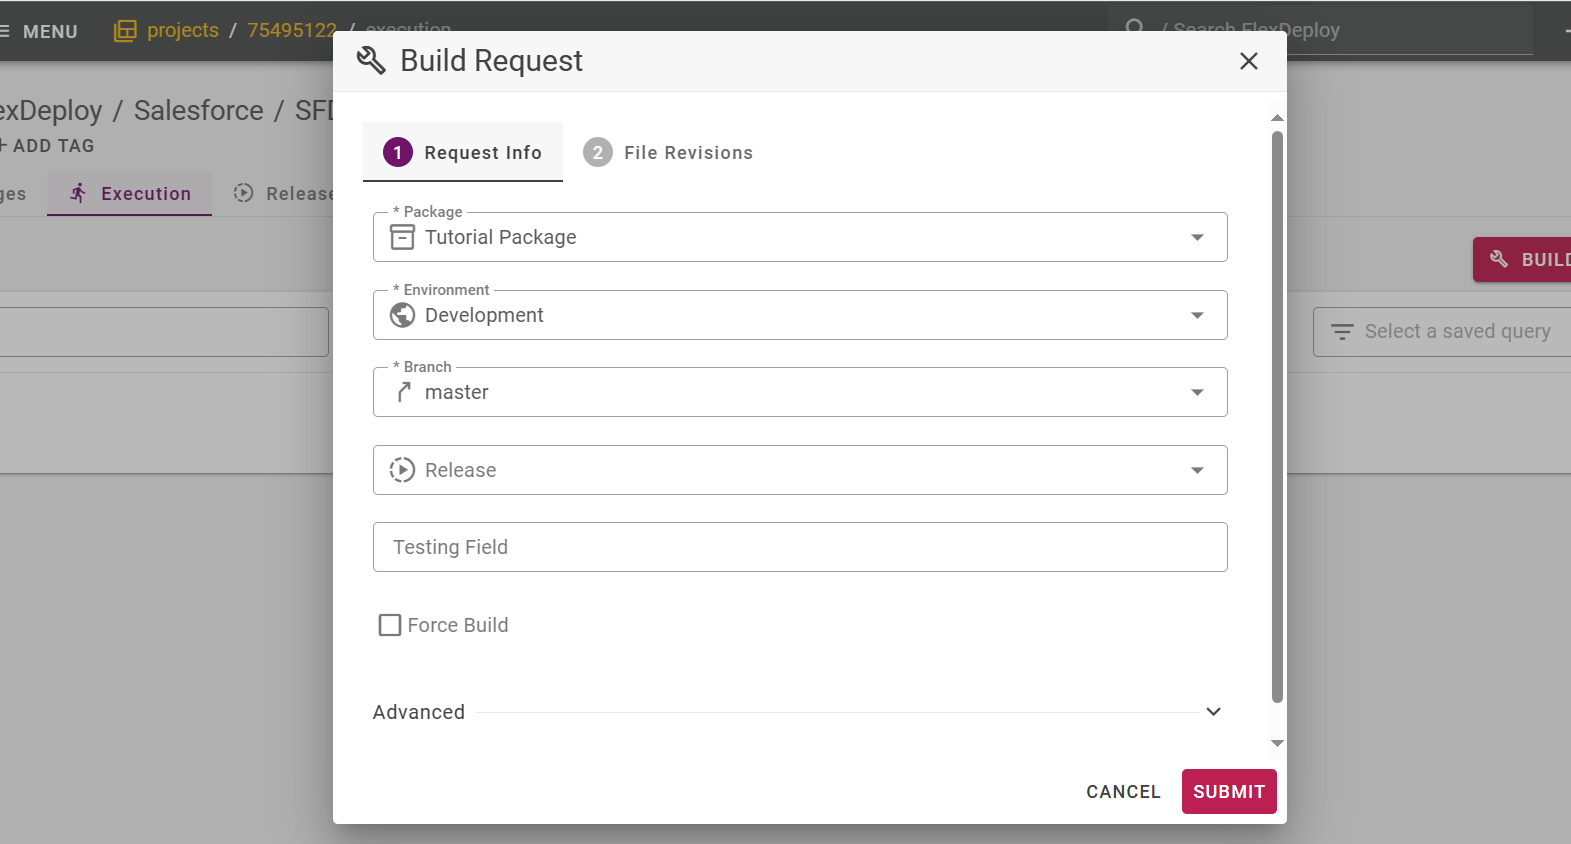
Deploying Packages
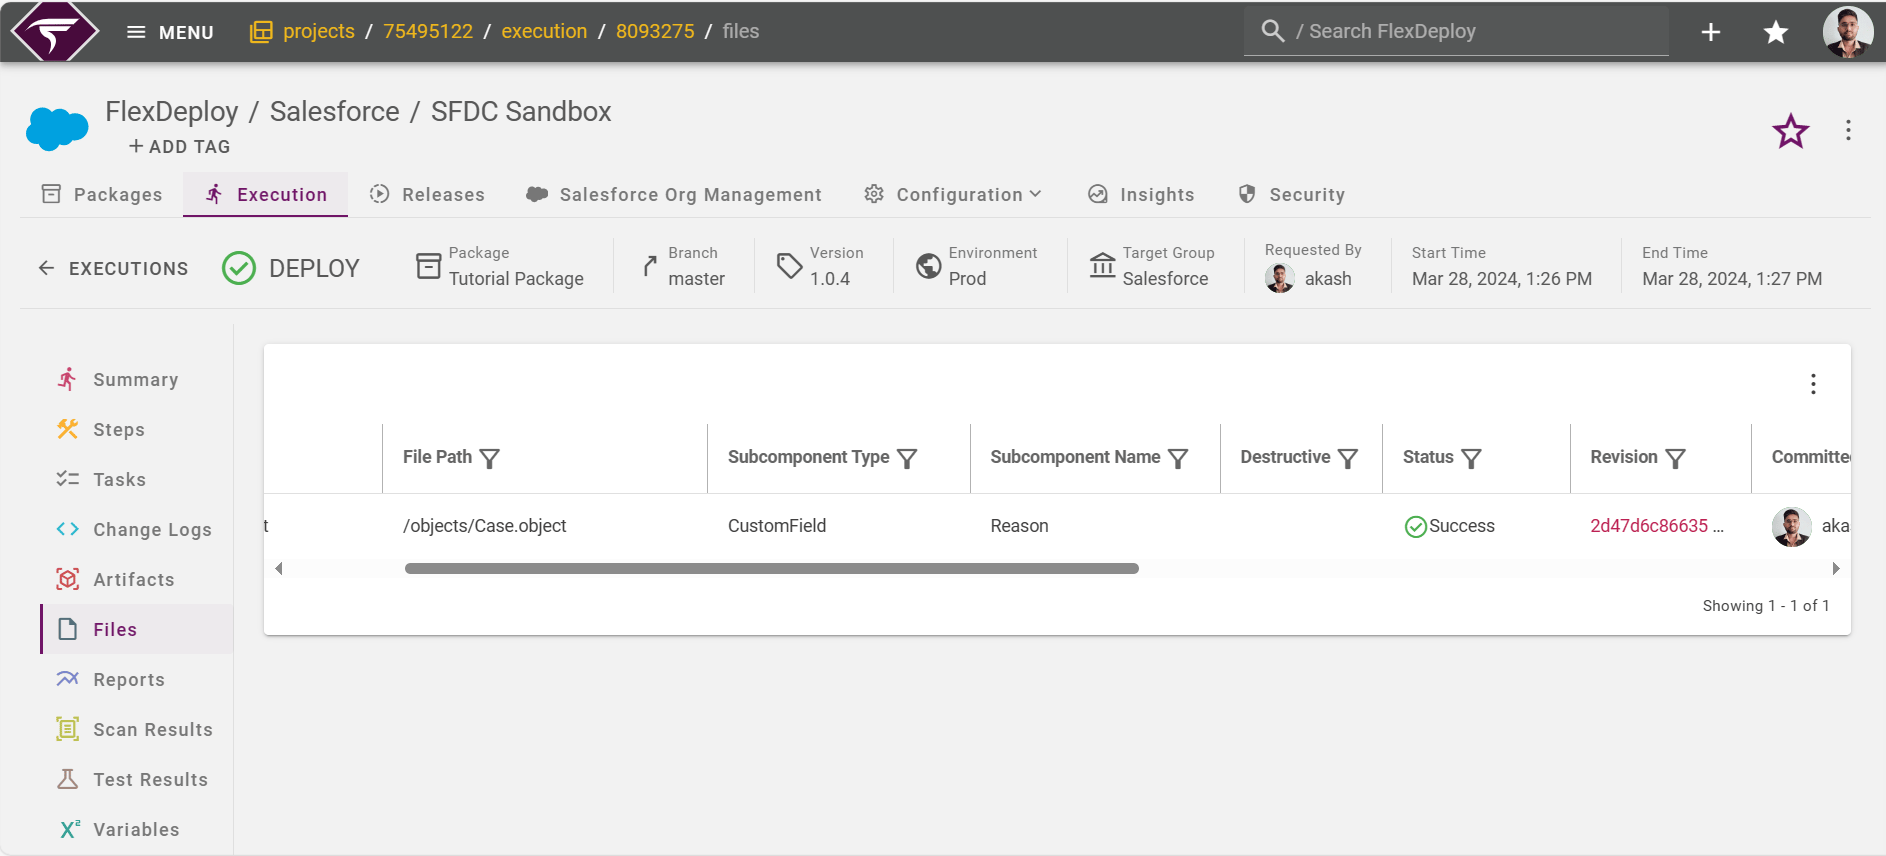
In the previous module, we performed builds of one package. In this module, we will perform deployments of that package into the Development Environment. To submit the deploy request for a package, first, click on the Execution tab of the Tutorial Package Project. Click on the icon as shown in the image below will launch the deploy request form for that project version 1.0.1.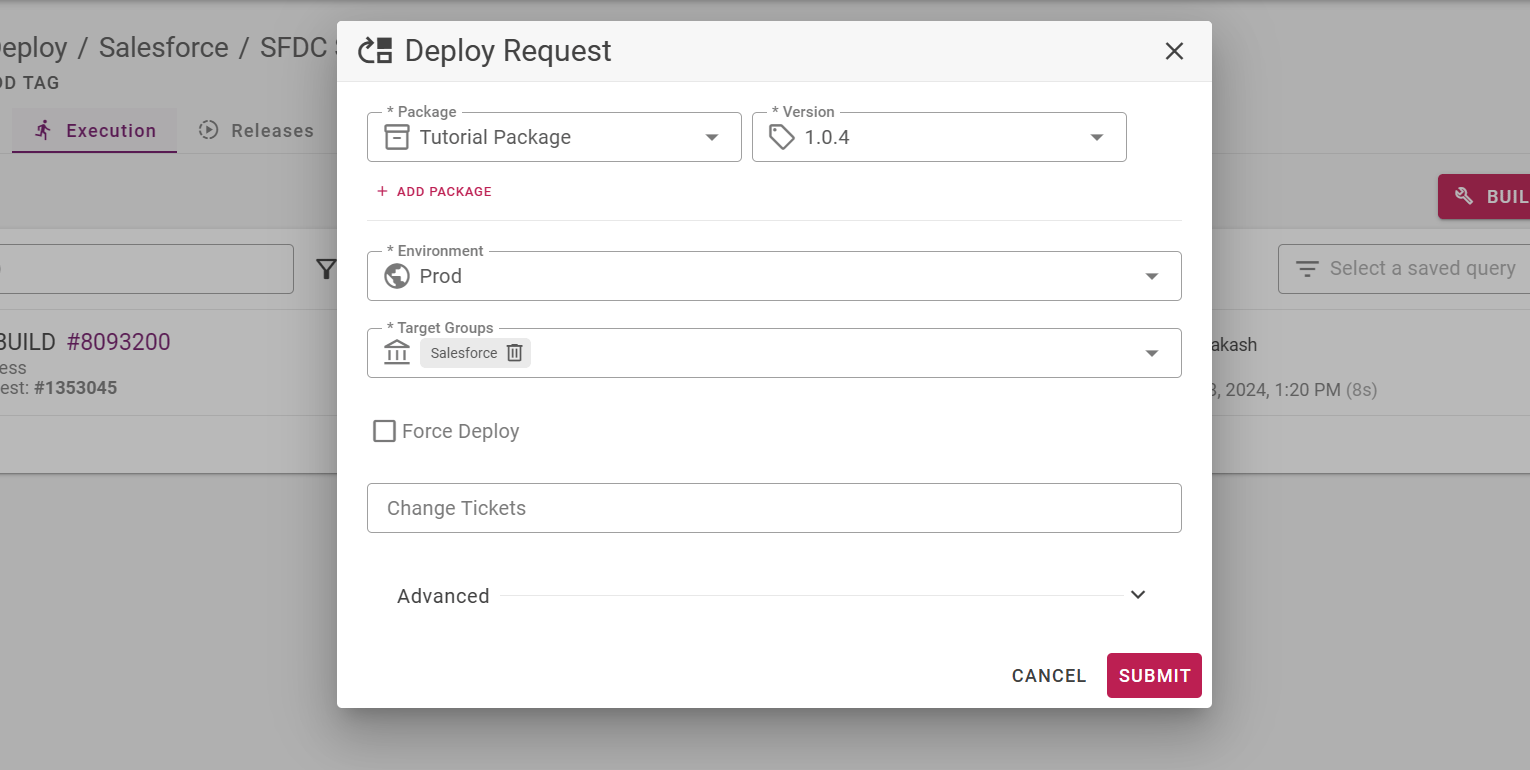
Org to Org Compare
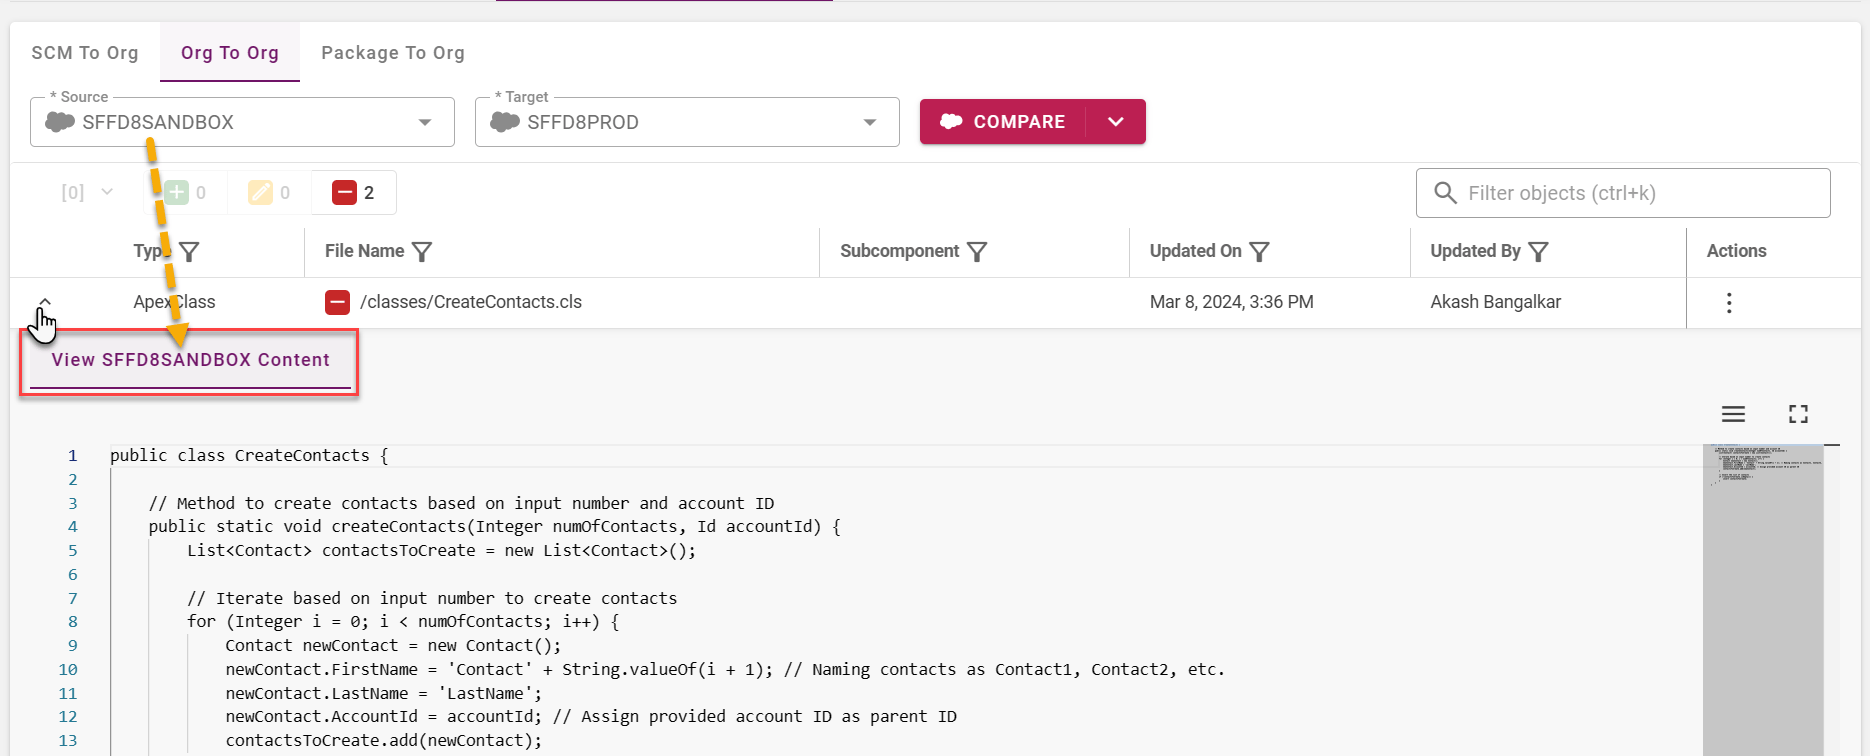
To compare changes between your Source Salesforce Org and any Target Salesforce Org, navigate to the Salesforce Org Management screen and select the Org to Org tab.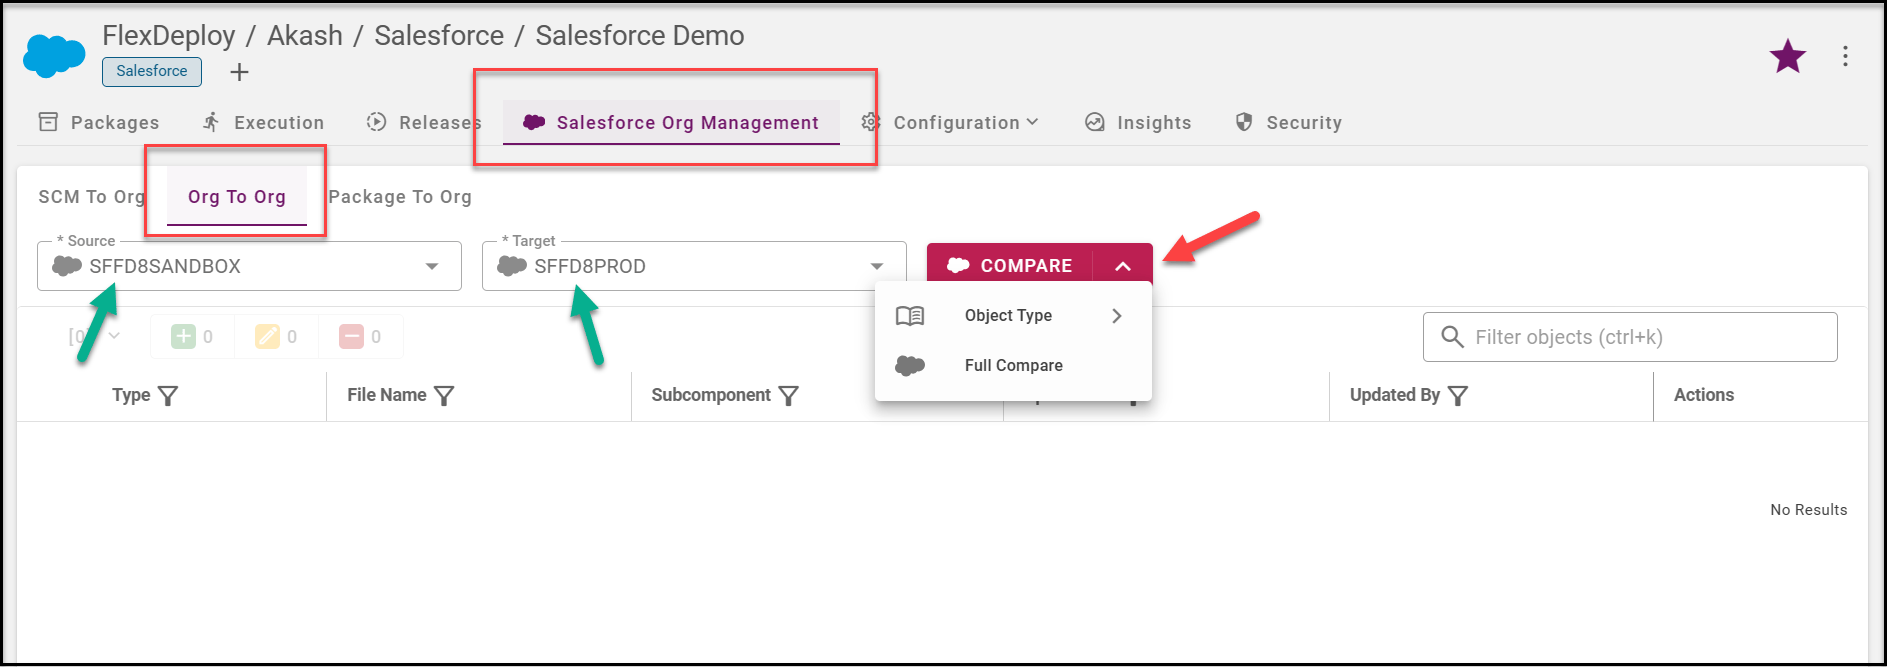
- Compare Button: By clicking on the Compare button, you’ll be presented with a list of files. You can then search and select one or multiple files to compare.
- Object Type: Alternatively, you can click on Object Type to quickly compare based on specific Object types such as Apex Class, Custom Object, etc.
- Full Compare: You can also opt for a full comparison of your Source Org and Target Org by clicking on Full Compare.
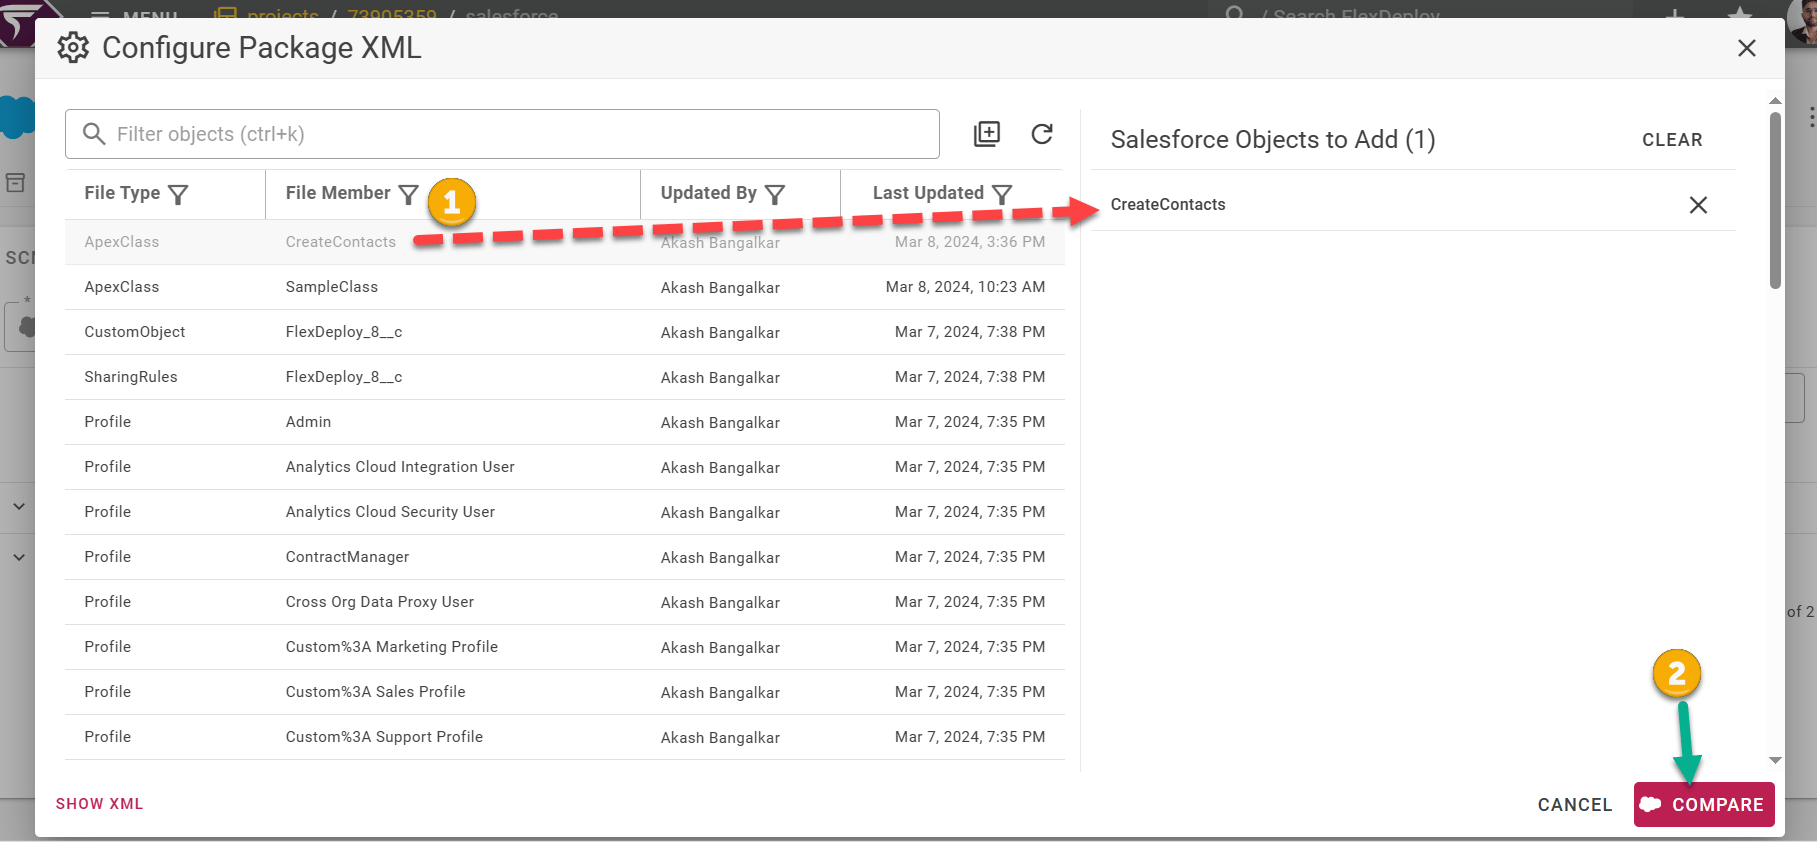
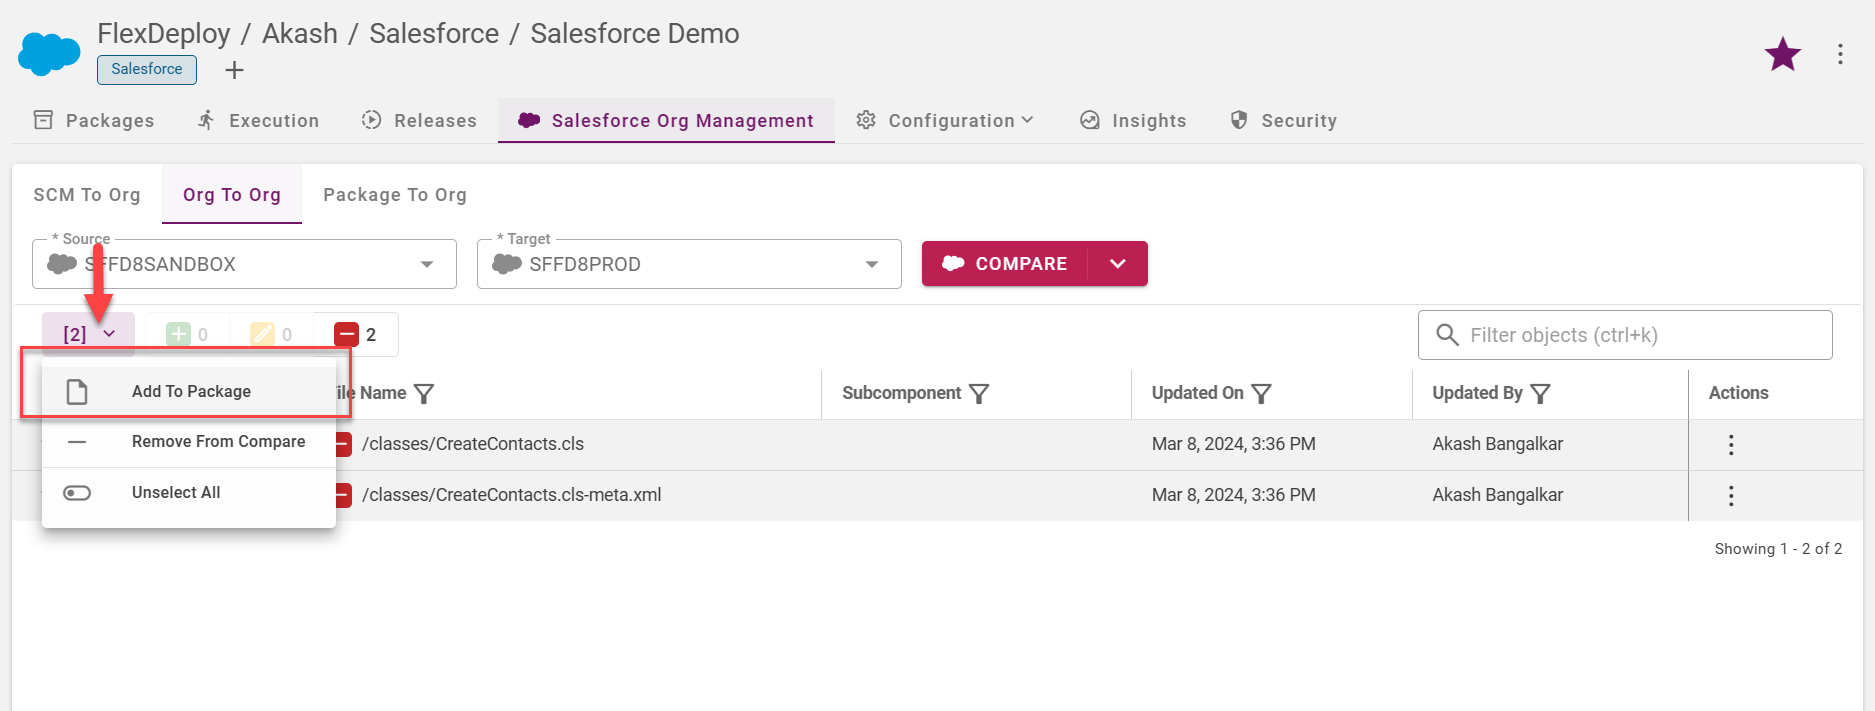
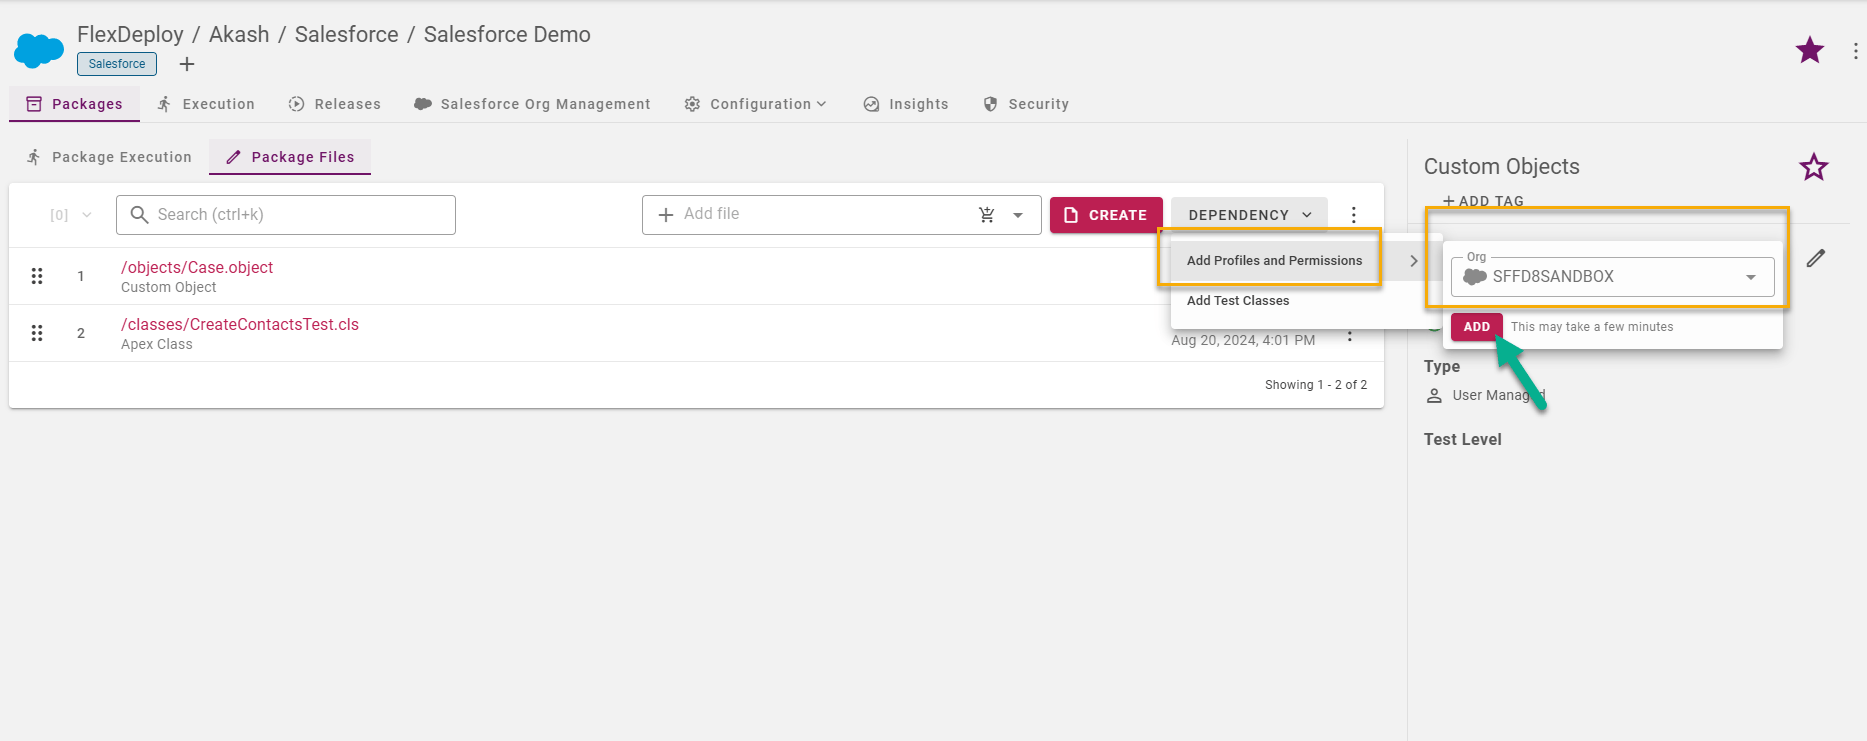
Dependency - Add Profiles and Permissions (Org to Org) If you setting up your project with the Salesforce Org to Org option (without SCM), you’ll notice some differences in the Dependency feature. FlexDeploy simplifies the process of identifying all associated changes in Profiles and Permissions. By clicking on the Dependency >> Add Profiles and Permissions button, you can easily add these changes to your package by selecting the desired Salesforce Org.
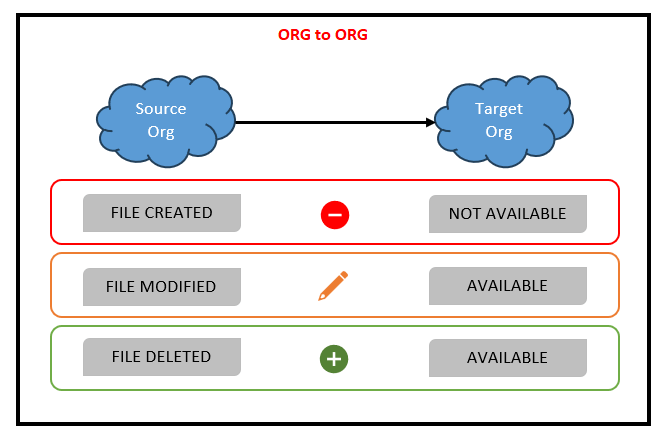
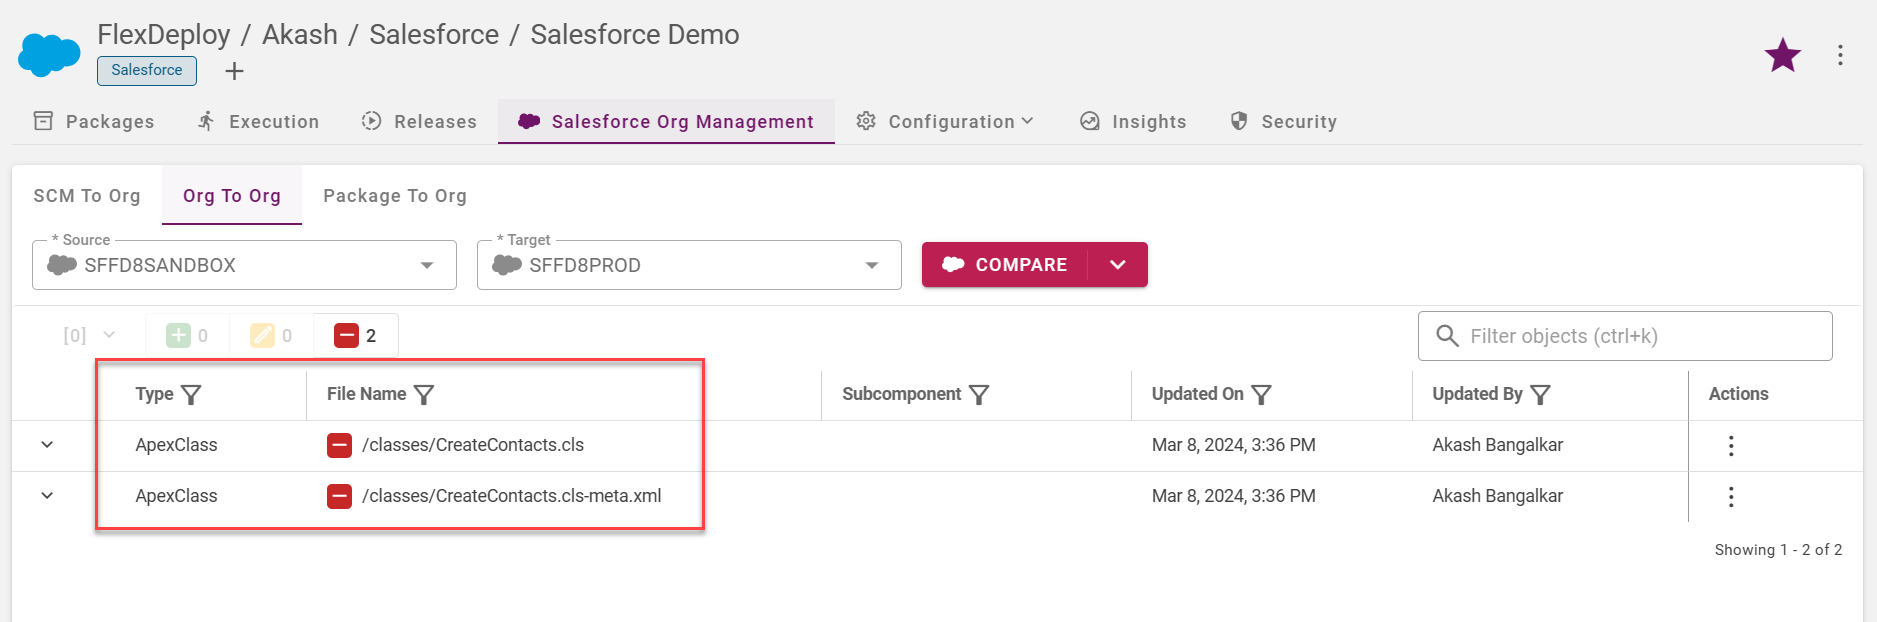
- If you’ve created a file in the Source Org, but it’s not available in the Target Org, you’ll notice a Red Minus icon. This icon signifies that the file has been deleted from Target Org compared to the Source Org, and its status will be marked as DELETED.
- Conversely, if you’ve deleted a file from the Source Org, but it’s still available in the Target Org, you’ll see a Green Plus icon. This icon indicates that the file is new in the Target Org compared to the Source Org, and its status will be marked as NEW.