Objective

We have previously specified how Azure Synapse Artifacts deployment can be achieved using FlexDeploy in this article. In the current article we are going to elaborate more on how to implement package-based deployment for the same.

Design

There are two approaches we follow here:
  • Approach A:
First Phase - Configure a Generic Package based project. This is the build only project. Select the JSON objects (say Linked Services, Pipeline etc.), generate the ARM template based on the selected resources and store it in the Git repository. This repository may contain all the ARM templates corresponding to different packages. If you are using a feature-specific Git branching strategy, the ARM template can be maintained within the corresponding feature branches and leveraged during pull request (PR) reviews. Second Phase - Configure a Generic Package based project. This is the actual build-deploy project. Select the ARM template from the Git repository where it was stored in previous phase. Build and store it as FlexDeploy artifact. Initiate the Synapse Release pipeline to deploy the artifacts to target workspaces.
  • Approach B:
Configure a Generic Package based project. This is the actual build-deploy project. Select the JSON objects (say Linked Services, Pipeline etc.) from Git. Build ARM template and store it as FlexDeploy artifact. Initiate the Synapse Release pipeline to deploy the artifacts to target workspaces. Since all developers’ work is currently being persisted to the same Git branch that is mapped to the Synapse workspace, it is advisable to create individual branches (similar to feature branches) and maintain specific JSON files there. This approach will simplify pull request (PR) handling and improve overall collaboration. Note: To manage dynamic, environment-specific properties, it is advisable to define the replacement properties directly within the JSON files using the $\{\{\}\} syntax. Users can opt for any of the above strategies, based on their specific scenario and overall deployment process.
Microsoft’s Synapse deployment extension does not currently support Workload Identity Federation authentication (at the time of this documentation). Hence, while configuring the Synapse workspace connection type, select the usual secret-based App registration.Ref: https://learn.microsoft.com/en-us/answers/questions/2283645/workload-identity-federation-azure-synapse-release

Flow (Approach A)

Workflow configuration for generating ARM template and upload to Repository

Build Workflow:
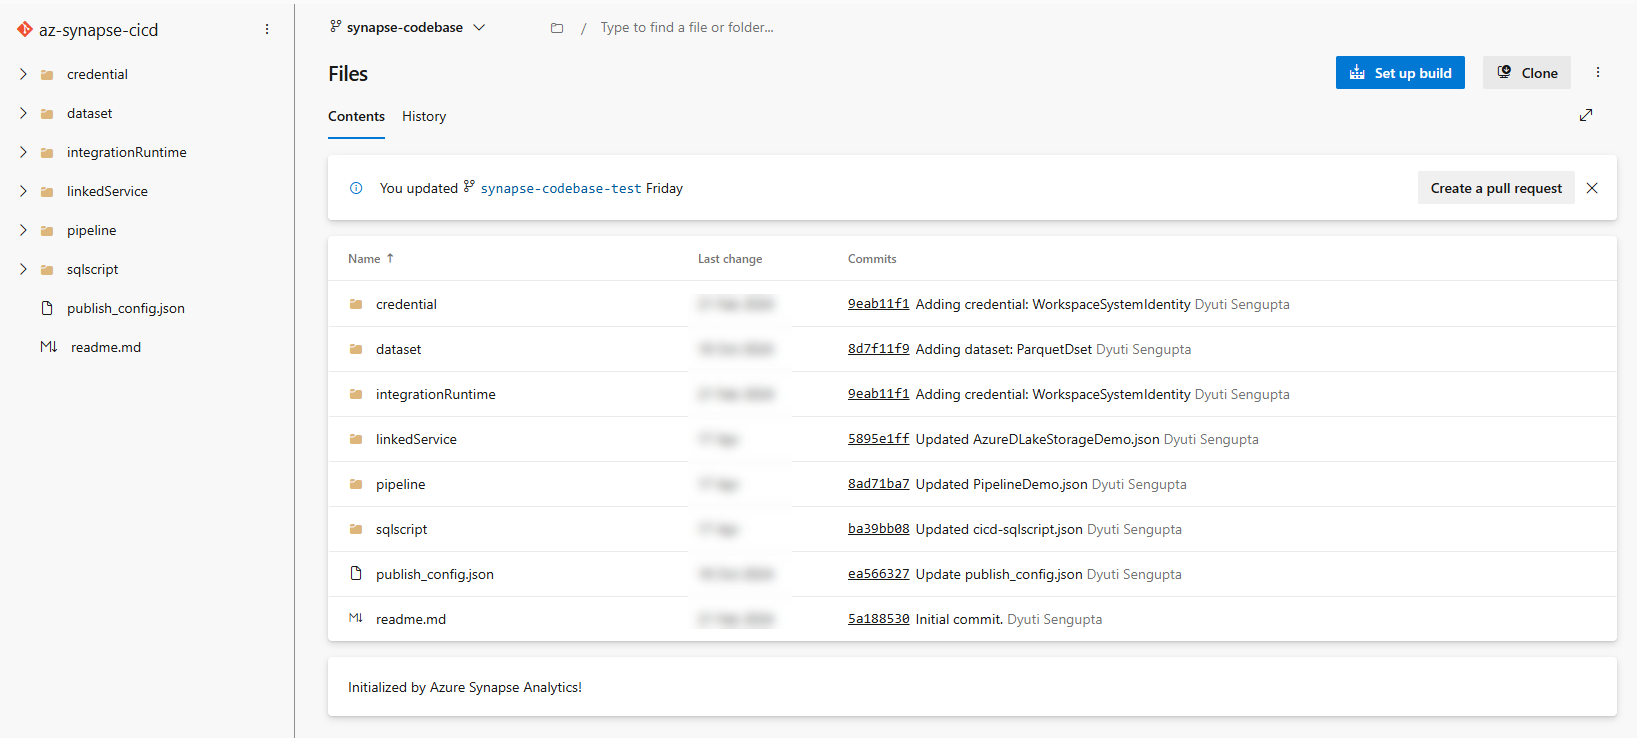
Note: For uploading the ARM template to repository, we have created another DevOps repository as az-synapse-arm and configured it in FlexDeploy-Integration with the code SYNAPSEARM.If you have some other repository present in GITHUB or Azure DevOps anywhere and want to use that, then please create accordingly and use the correct Instance Code in the workflow pasted below.
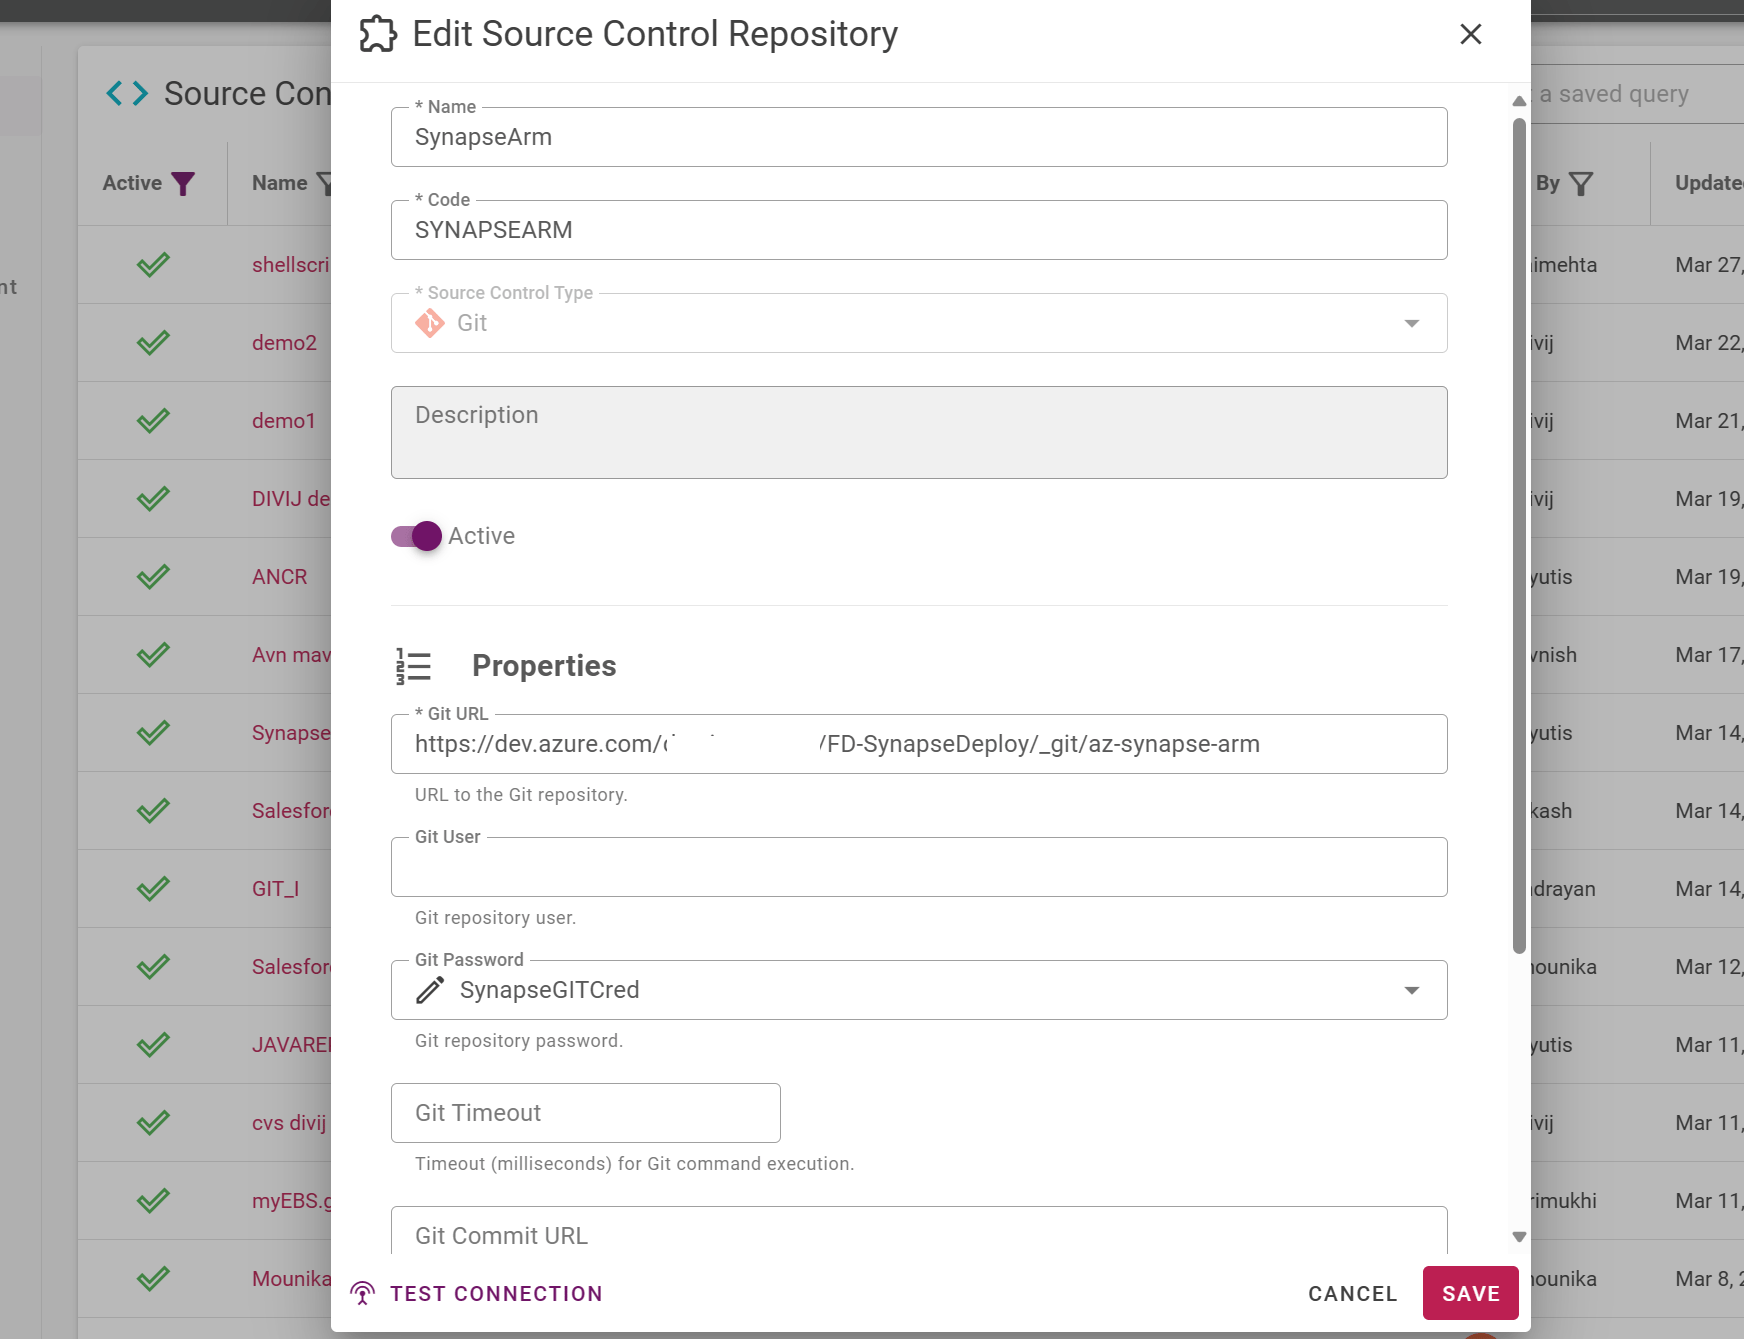
image-20240329-080026.png GenerateARMAndSyncToGIT
image-20241021-160459.png

Project Configuration

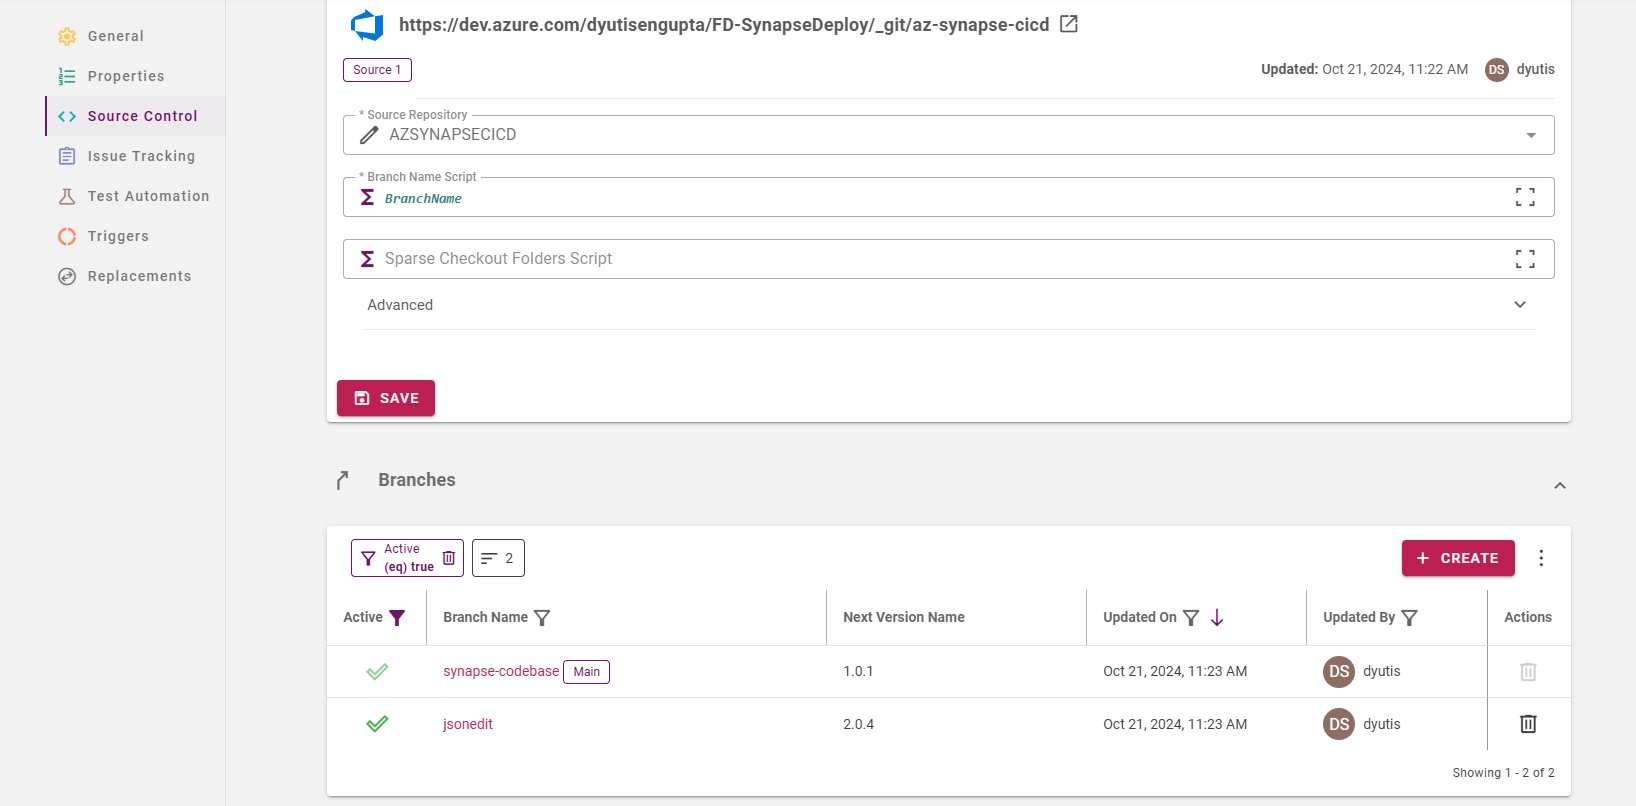
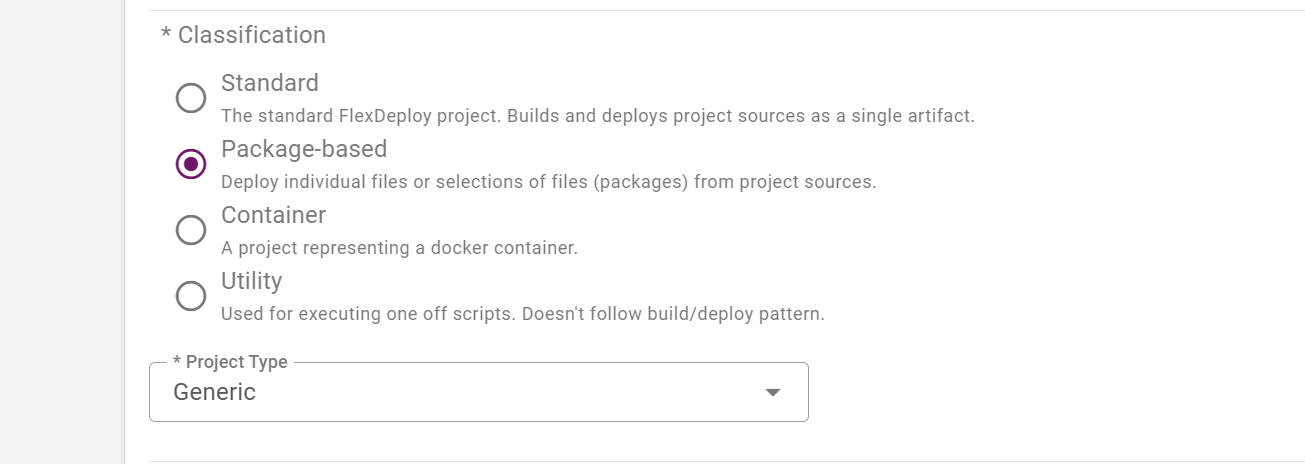
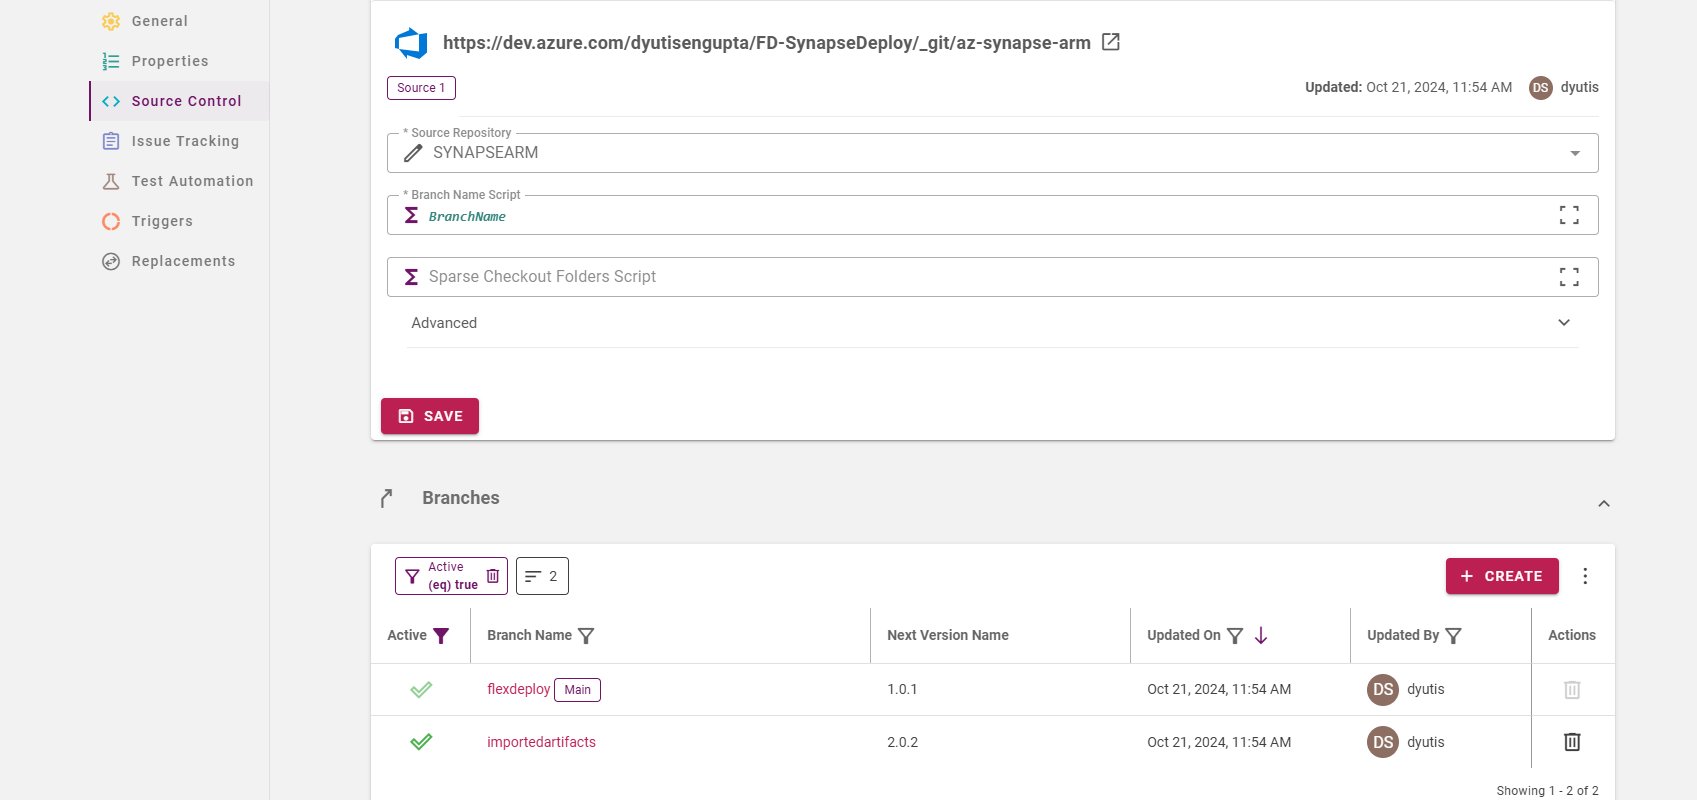
Create a Project by choosing the Classification: Package-based and Project Types as Generic image-20240329-064826.png Once it is created the Source Control needs to be configured, so that we can discover the files from the respective repository. image-20241021-161920.png For example, this is how the source control looks like. Note: In the Advanced tab I haven’t selected ProjectName in the checkout folder script.
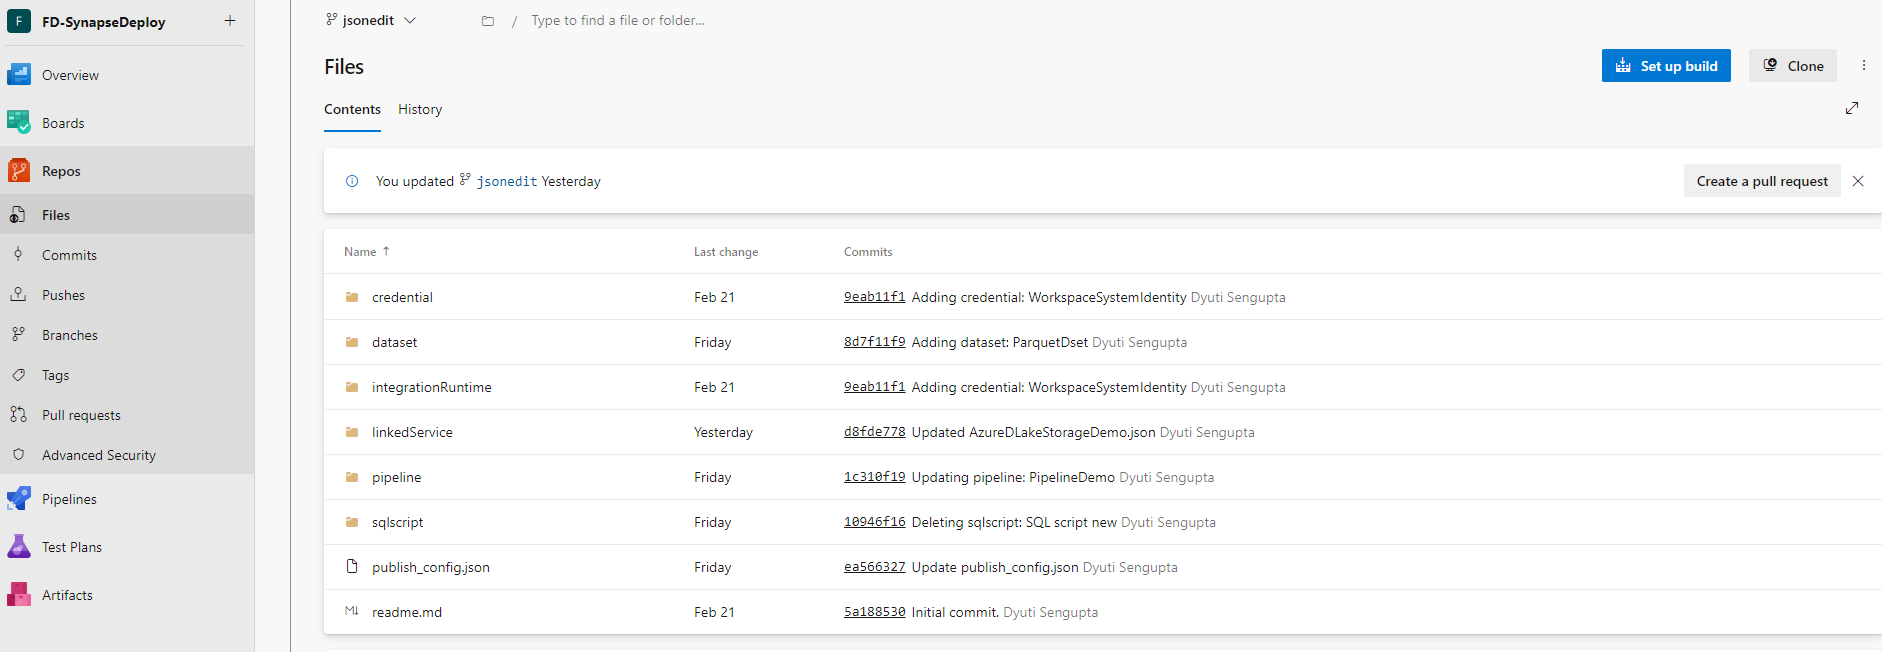
If you want to keep the ProjectName in the checkout folder script, then you would require tweaking the shell scripting accordingly for the first step. 
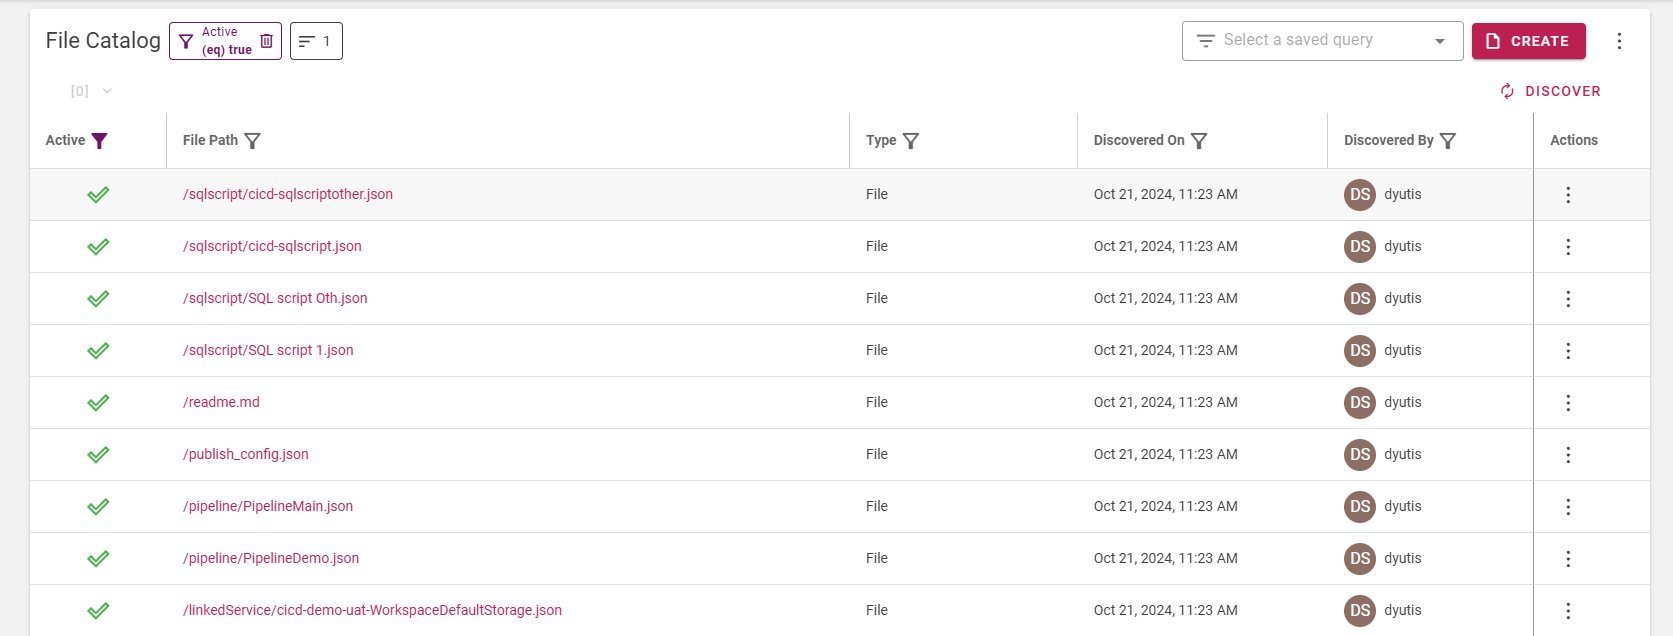
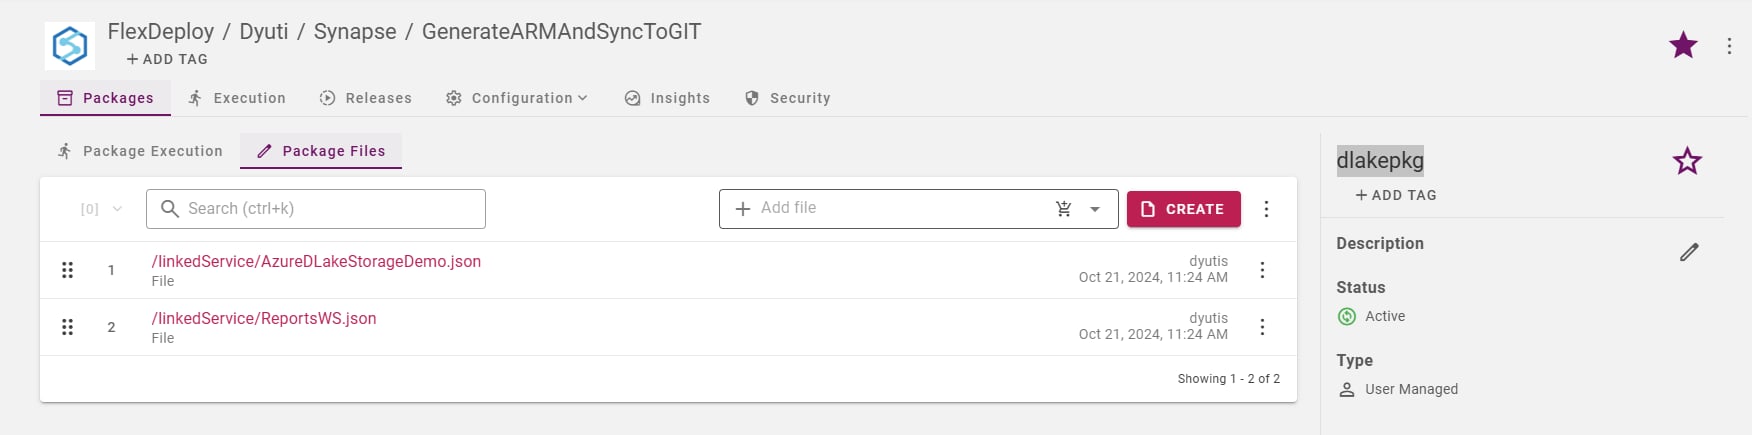
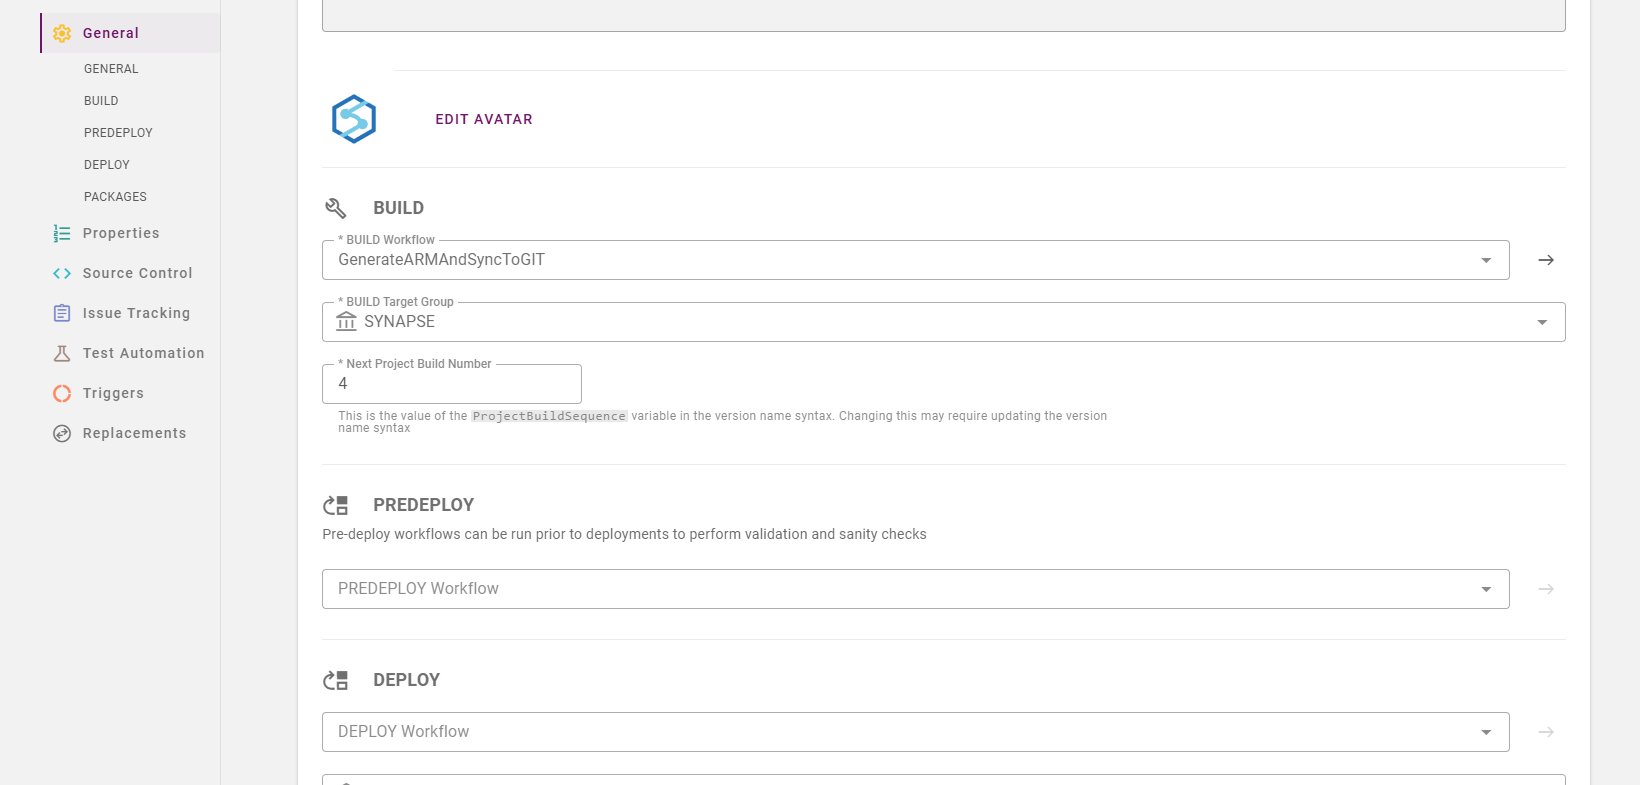
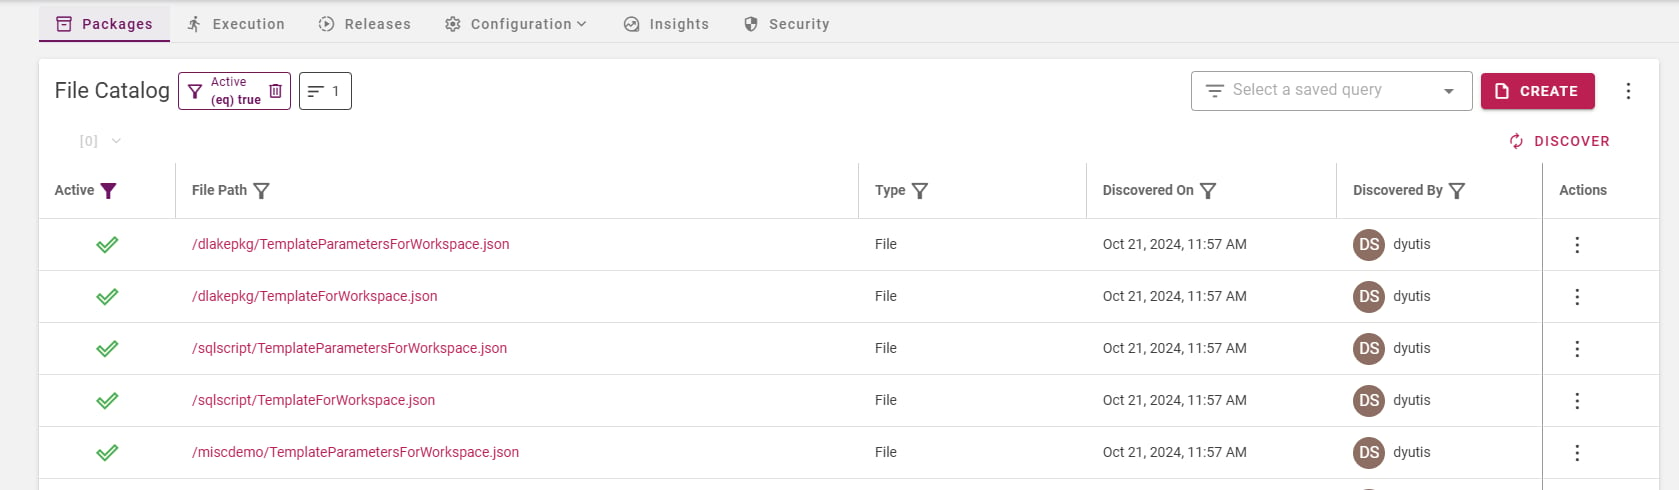
image-20241021-162047.png Discover the files using File Catalog tab image-20241021-162149.png Now we can create Package upon selecting specific JSON files. image-20241021-162322.png Click on the Configuration tab, select General and update the Build workflow with respective Target group. image-20241021-162429.png We are not configuring any Deploy workflow in this Project for the purpose of this Tutorial, as all we need is to generate the ARM template and upload it to GIT.

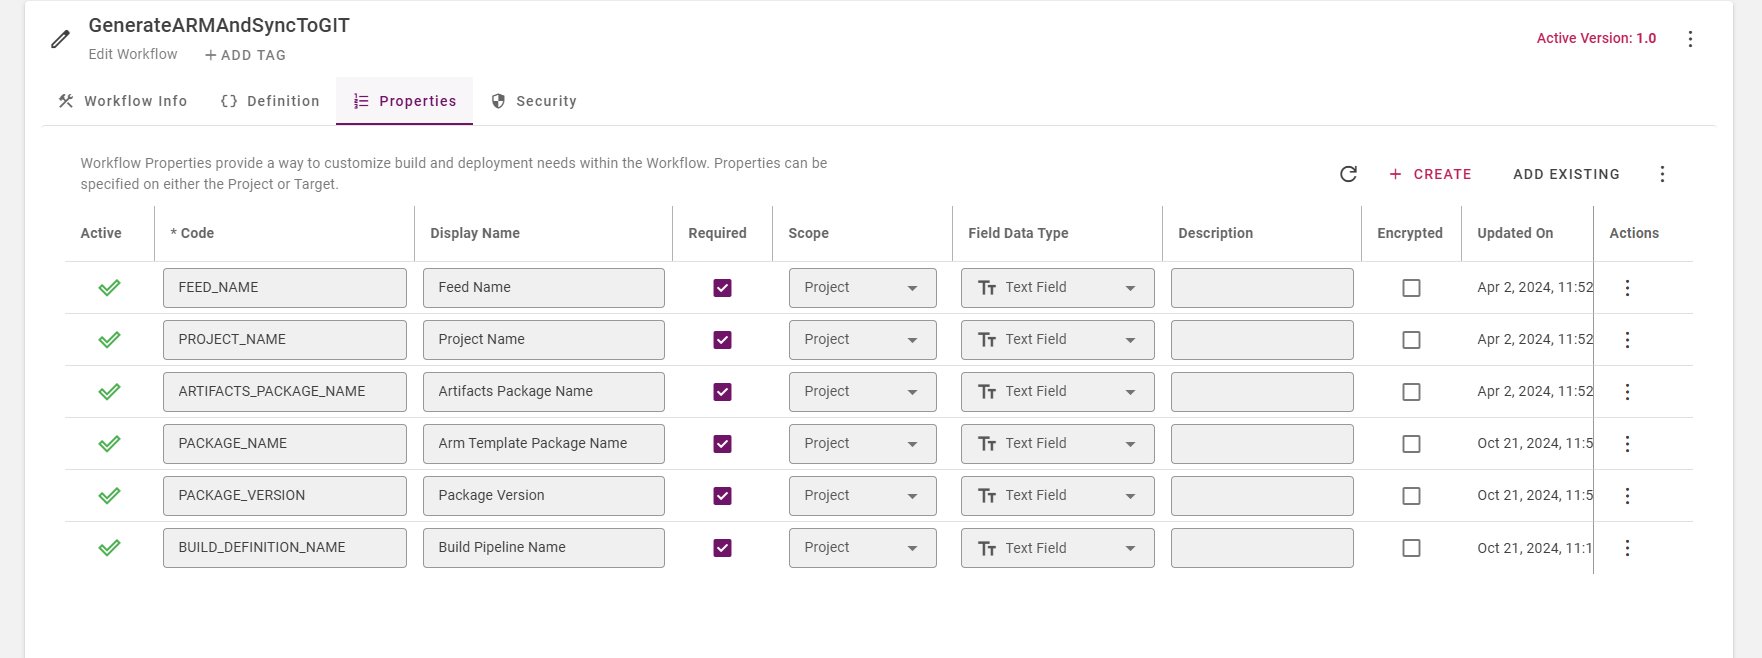
Project properties

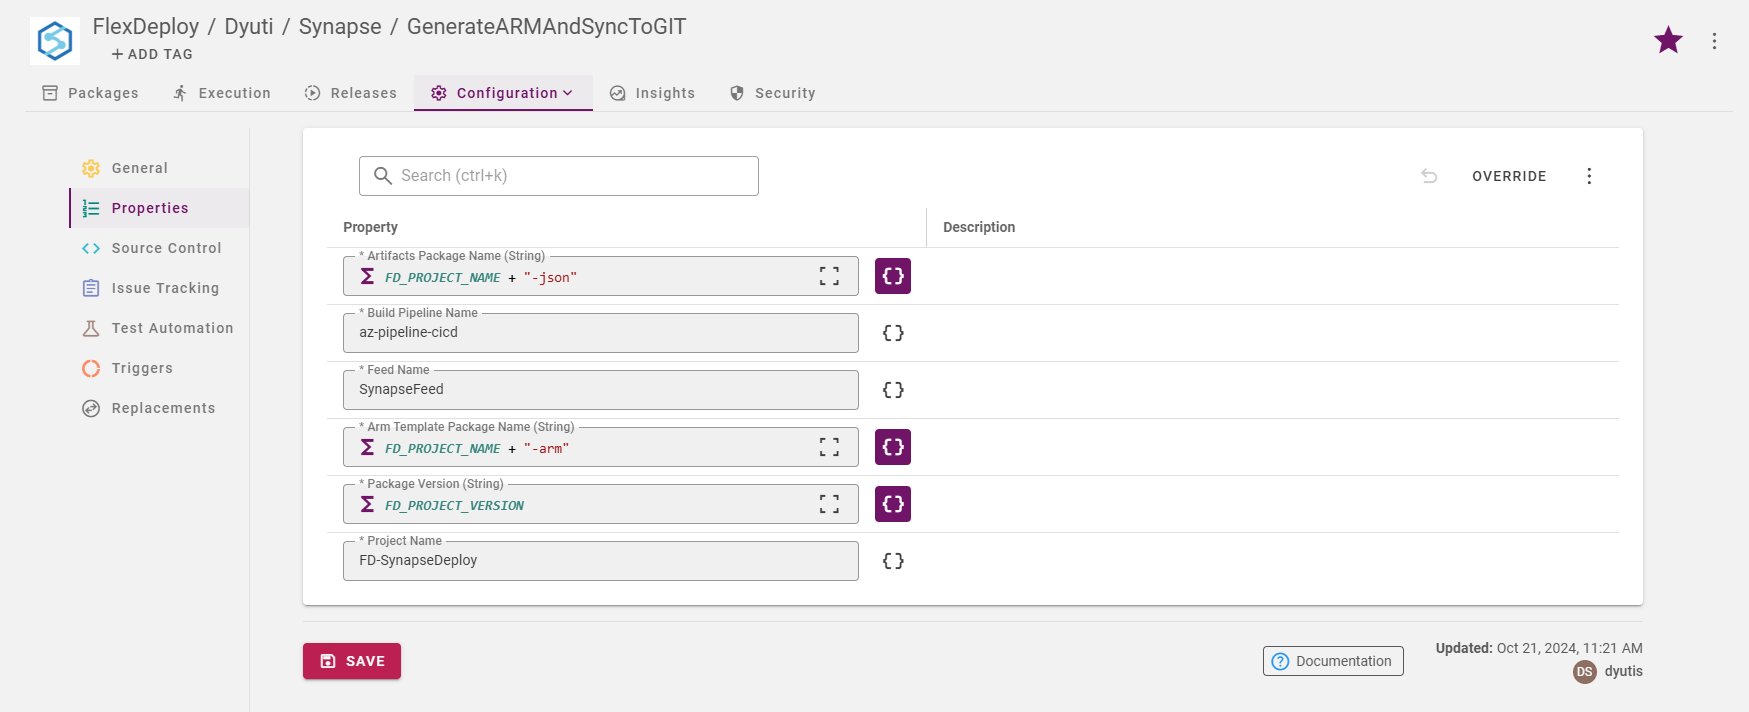
image-20241021-162955.png Follow this link to know about the Azure DevOps Build Pipeline configuration. This must be configured prior to configuring the FlexDeploy workflows and project properties.

Execution

Initiate Build on the selected Package.
Note: The ARM templates are published to Azure DevOps Feed as Artifacts with the package name as a keyword in it. Example: <packagename>-<fdprojectname>-json & <packagename>-<fdprojectname>-arm. Now Microsoft has certain restrictions on the naming of the Azure Artifacts, hence please follow the guide before you name the package that you create in FD or else adjust your workflow to be in compliance. https://learn.microsoft.com/en-us/azure/devops/organizations/settings/naming-restrictions?view=azure-devops
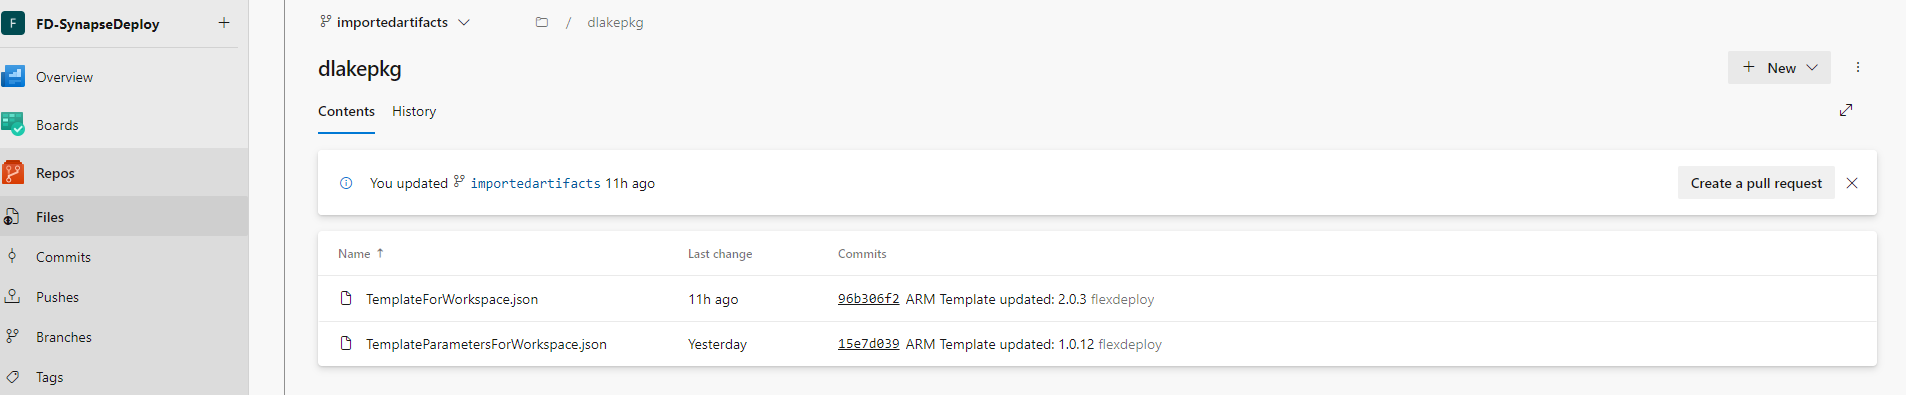
The ARM template is now uploaded to repository image-20241021-163546.png The folder name is following the naming we selected for the package name in FD. If any parameter is to be added/updated or some other manipulation is to be done in the ARM template json in terms of variables or parameters, it can be done. But the integrity of the ARM template should remain intact.

Workflow configuration for fetching the ARM template from the repository and initiate the Synapse Release pipeline

Build Workflow:
SynapsePackageBuildARM
Deploy Workflow:
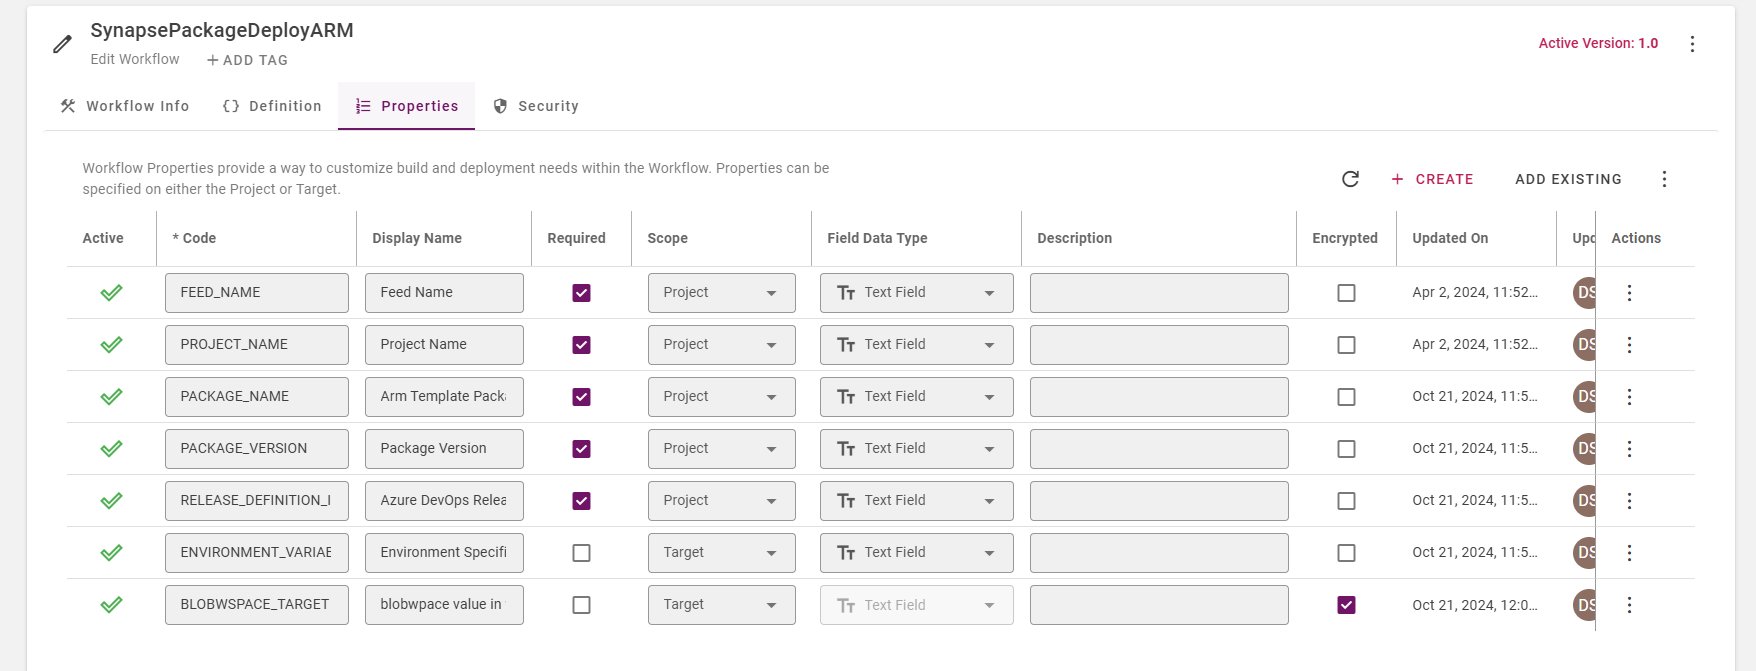
image-20241021-164215.png SynapsePackageDeployARM

Project Configuration

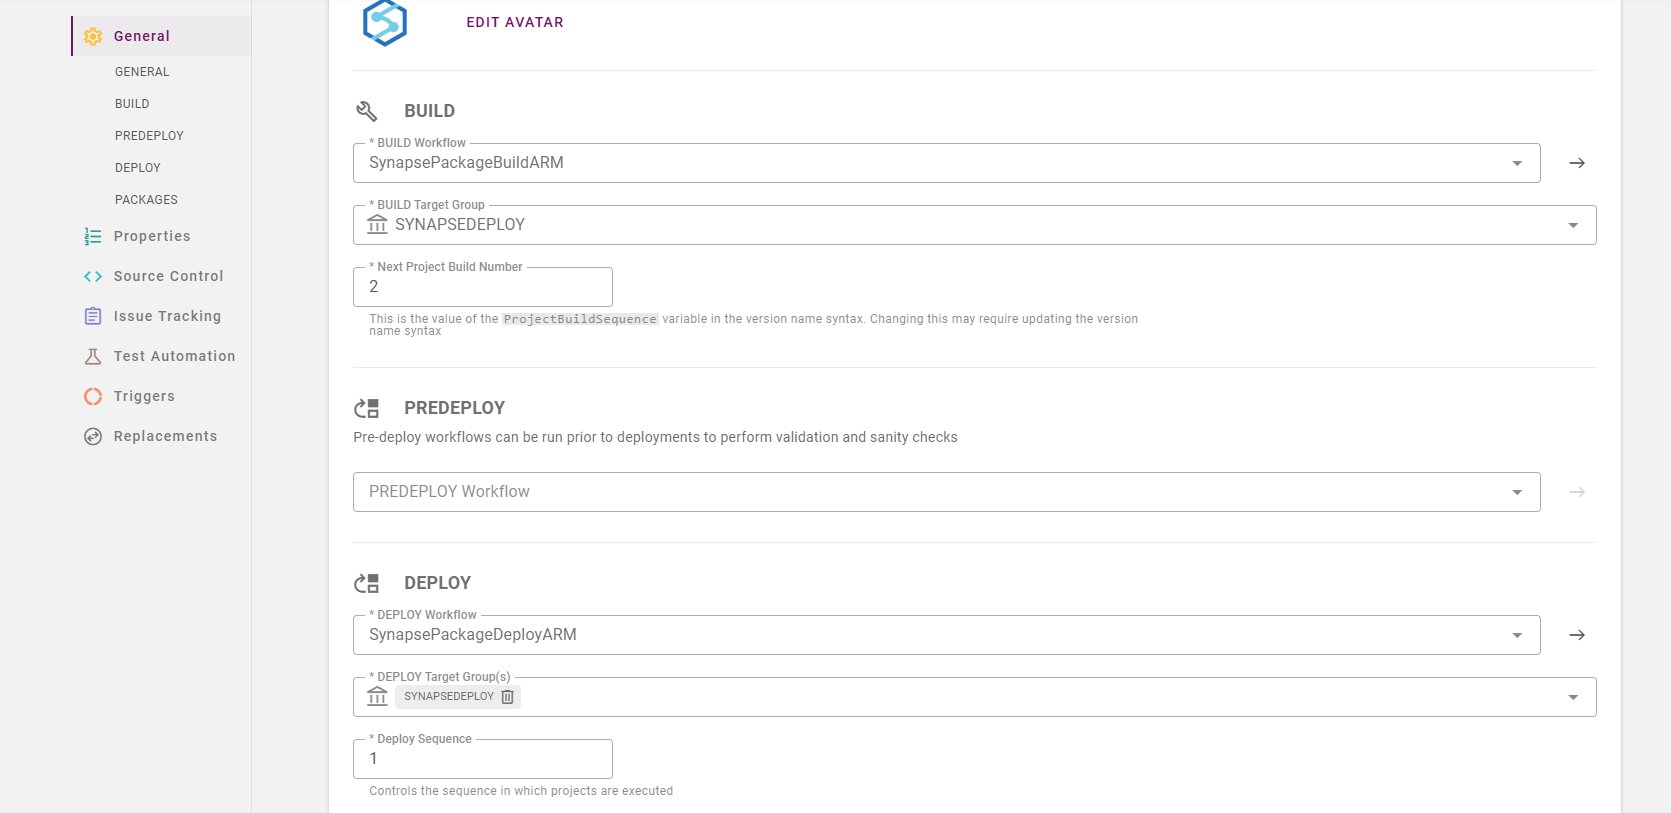
Create a Project by choosing the Classification: Package-based and Project Types as Generic image-20240329-064826.png Once it is created the Source Control needs to be configured, so that we can discover the files from the respective repository. This time the source control is the one where we have uploaded the ARM template. image-20241021-164349.png Discover the files using File Catalog tab image-20241021-164500.png Now we can create Package upon selecting specific ARM template which is to be deployed to the Target Synapse Workspace. image-20241021-164628.png Click on the Configuration tab, select General and update the Build and Deploy workflows with respective Target group. image-20241021-164829.png
Parameterizing the values

There are many ways to do environment specific parameter value customization. 1) Using Replacement configuration of Project 2) Specifying the parameter as ${{}} in the source json file itself or the generated ARM template 3) Edit the generated ARM template to include the parameter as ARM template parameter. We will show option 2 in the following example.
Replacement configuration on Project
Starting 7.0 we have a new feature that allows us to replace a string in any file with another string based on as it is executed to different environment. Ref: Replacements - FlexDeploy 7.0 - Confluence (atlassian.net)
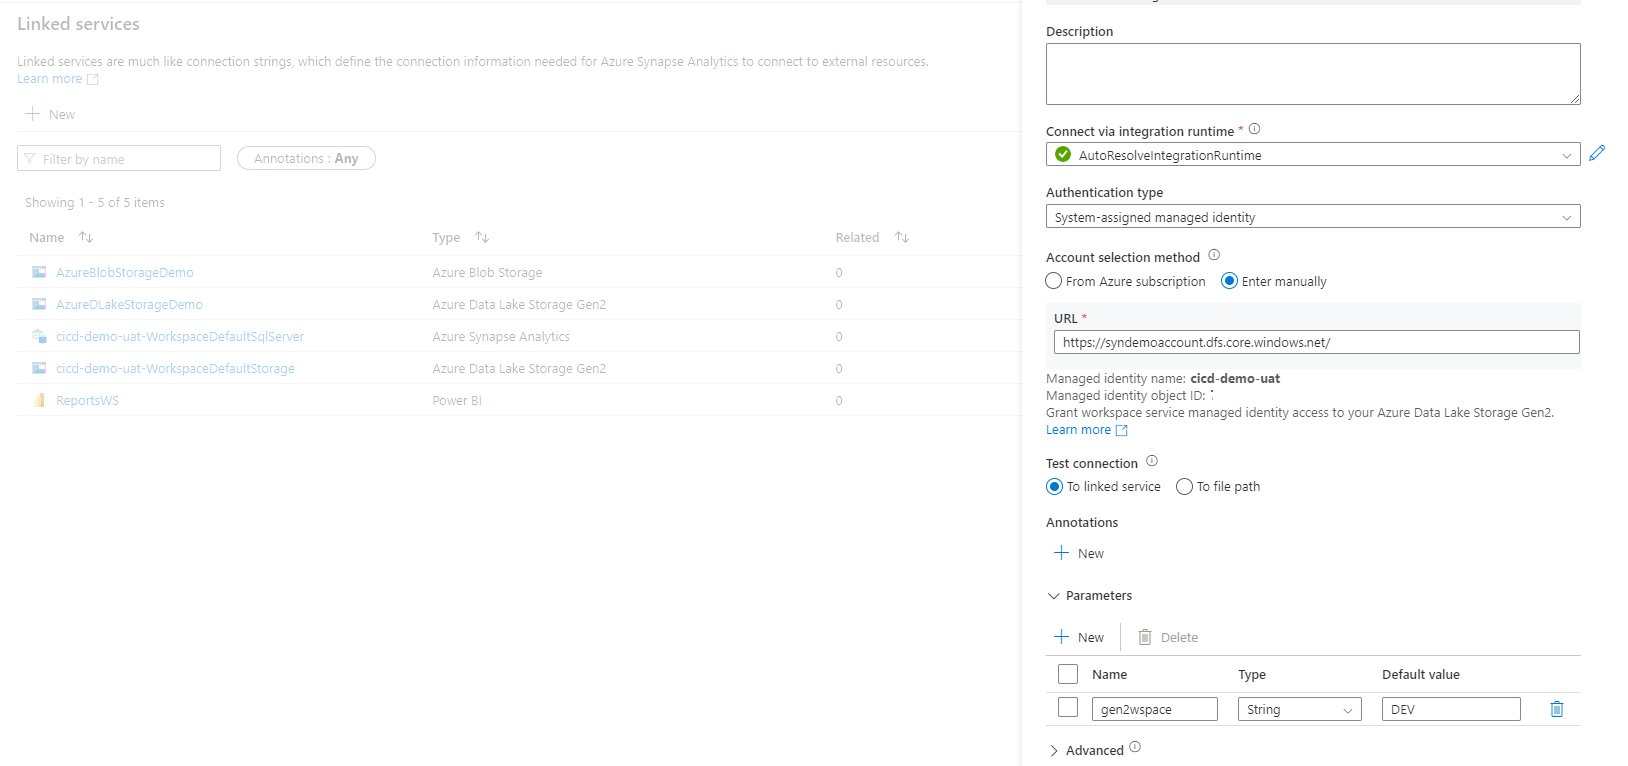
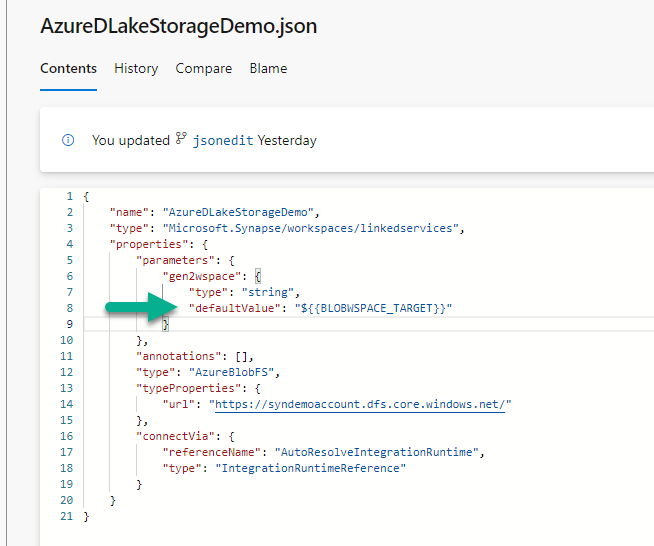
For our use-case a specific parameter as below is created in the Linked Service: image-20241021-165531.png When this source workspace is integrated with GIT, the linked service json file gets auto-synced there. One can edit the parameter manually to hold the target group property as image-20241021-170147.png Once this is done as shown earlier, the target group property will take care of replacing it with right environment specific value during deployment.

Target Group configuration

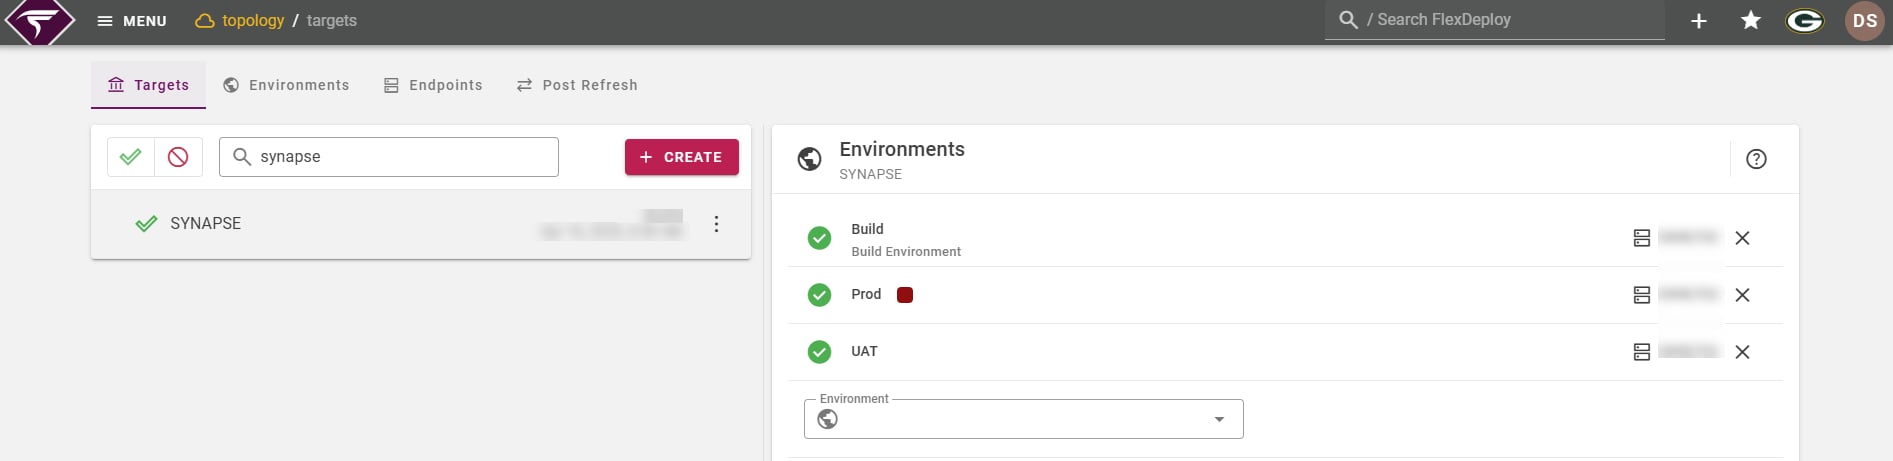
image-20241021-152727.png Build = for build execution; UAT = for deploy execution.

Build

image-20241021-153546.png

UAT

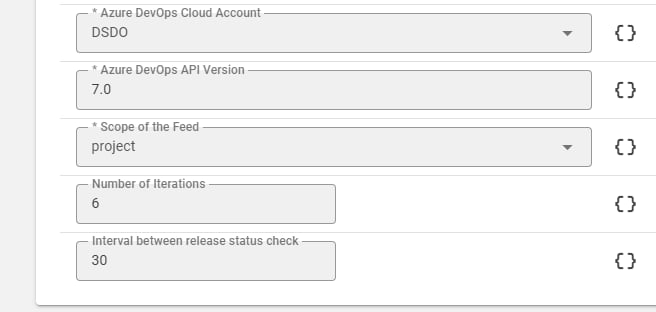
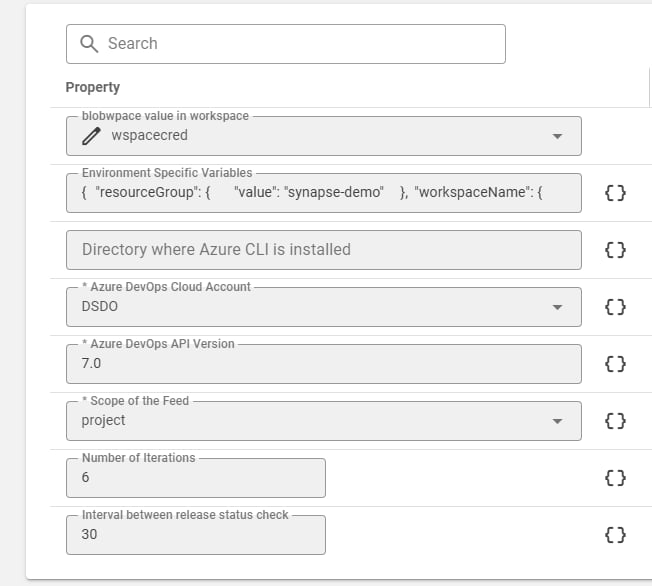
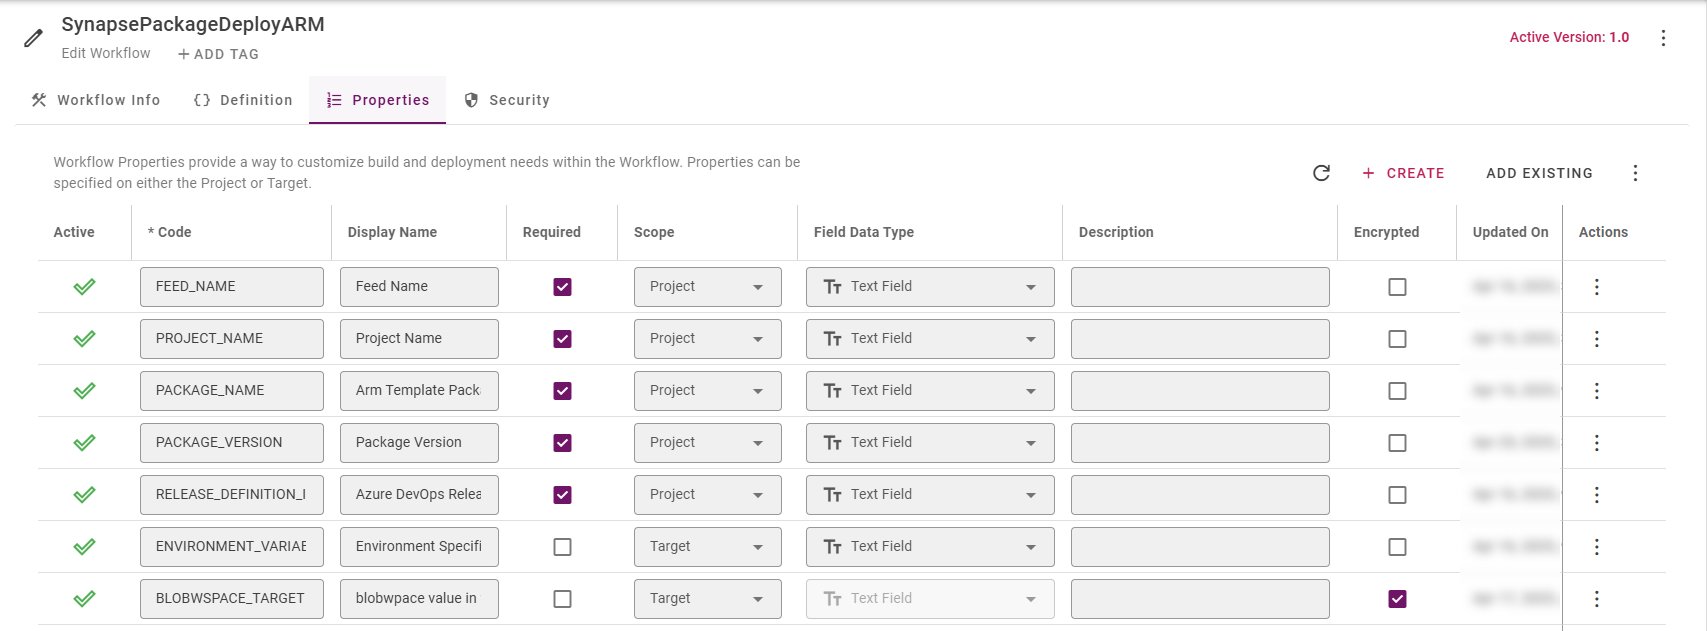
image-20241021-153921.png The Environment Specific Variables field controls the target workspace name and several other environment specific parameters. To know more follow this link. Follow this link to know about the Azure DevOps Release Pipeline configuration. This must be configured prior to configuring the FlexDeploy workflows and project properties.

Execution

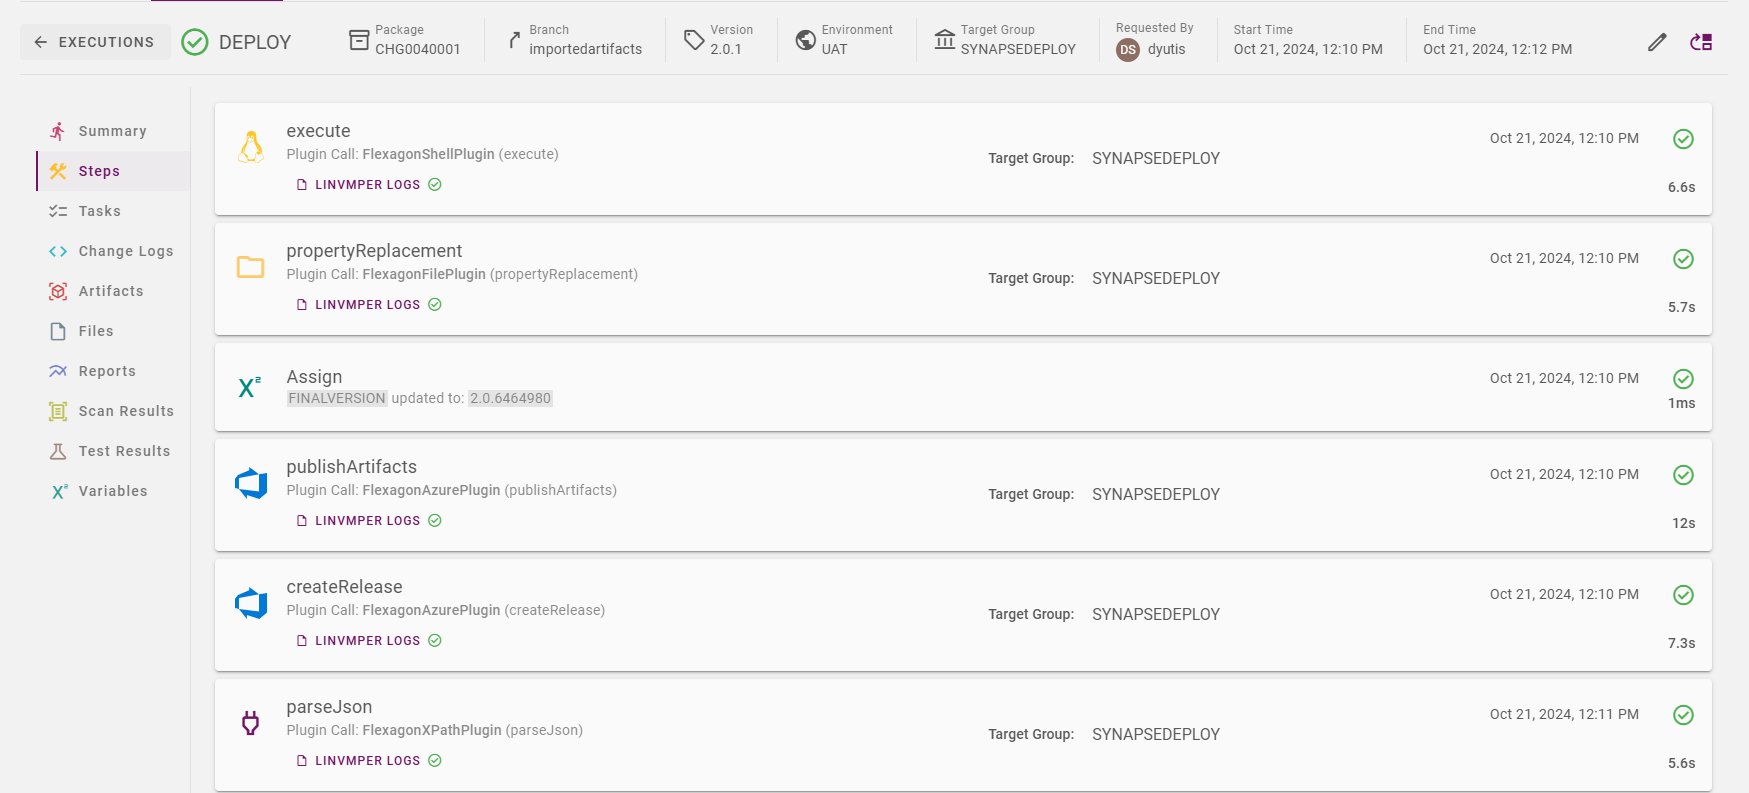
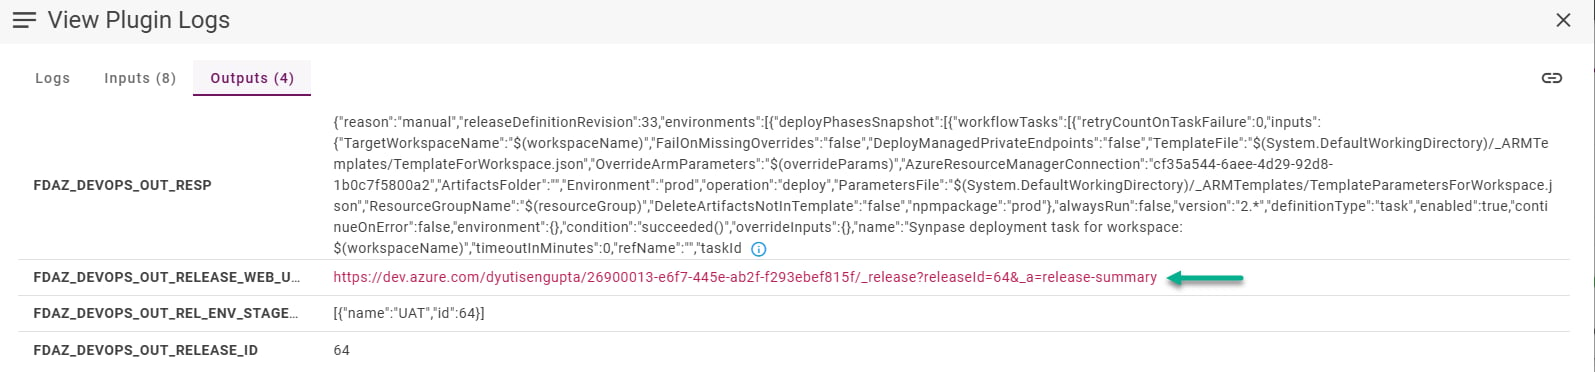
Initiate Build on the selected Package. Once done initiate the Deploy. Build produces the ARM templates as a zip bundle, which Deploy further passes on to the Azure DevOps Release Pipeline to deploy to target workspace. image-20241021-170702.png The Output tab of createRelease step would show the Azue DevOps Release URL to further see the log in more detail: image-20241021-170932.png Post deployment if we verify the Linked Service in UAT workspace, we see the updated values in there.

Flow (Approach B)

Azure Devops pipeline configuration

More information is here

Workflow configuration

Build Workflow:
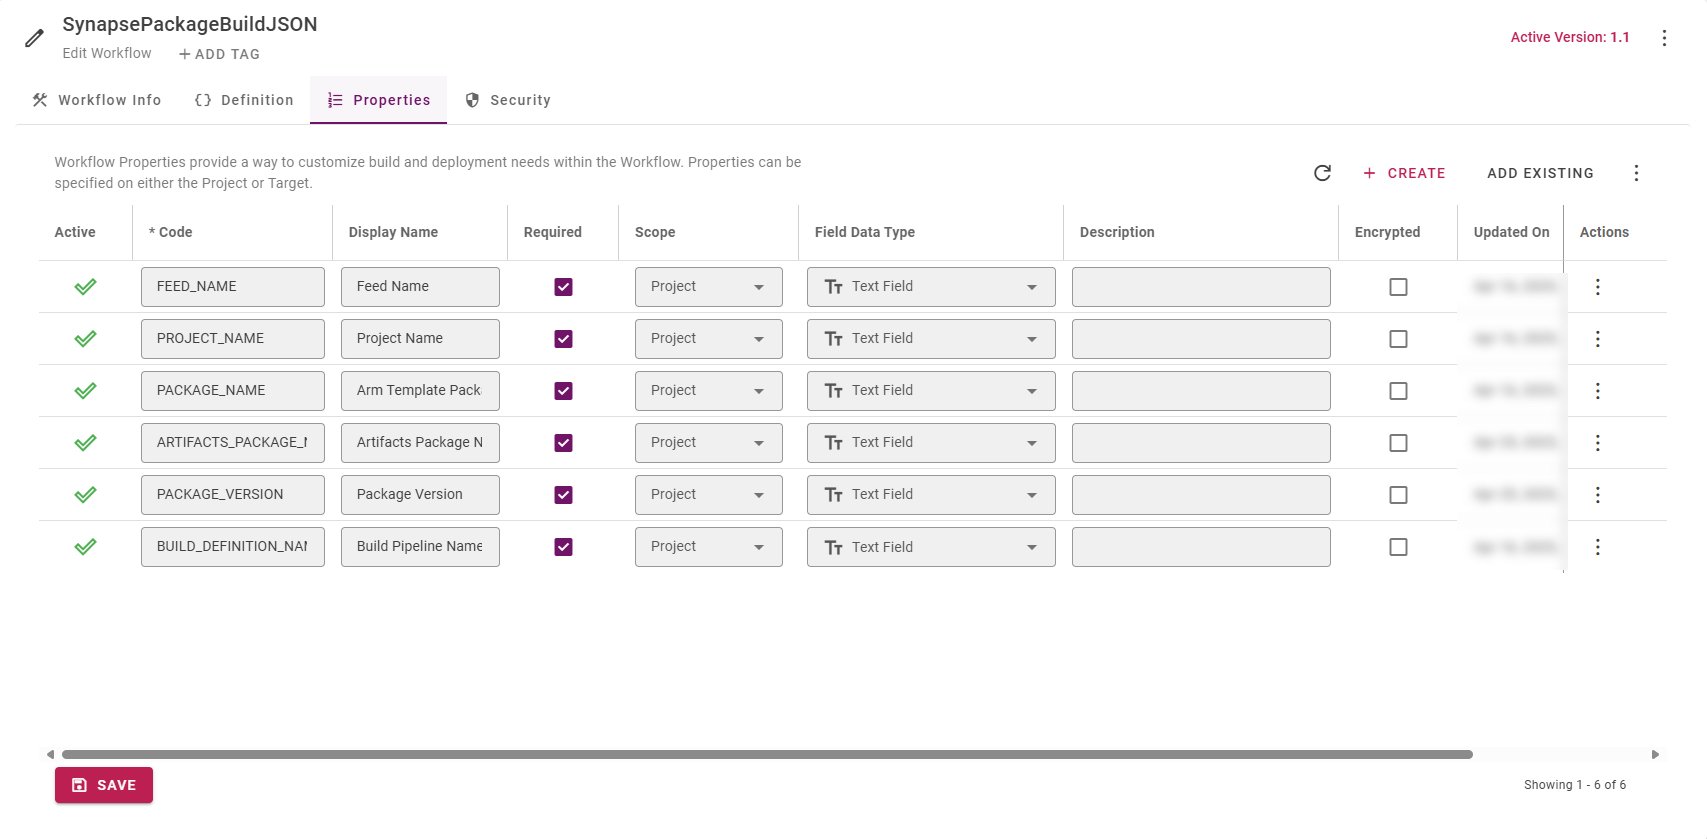
SynapsePackageBuildJSON
image-20250428-074638.png
Deploy Workflow:
image-20250428-074846.png
Note: Here ${{BLOBWSPACE_TARGET}} is configured in the input json, which is why we are configuring it here as Target properties.
SynapsePackageDeployARM

Project Configuration

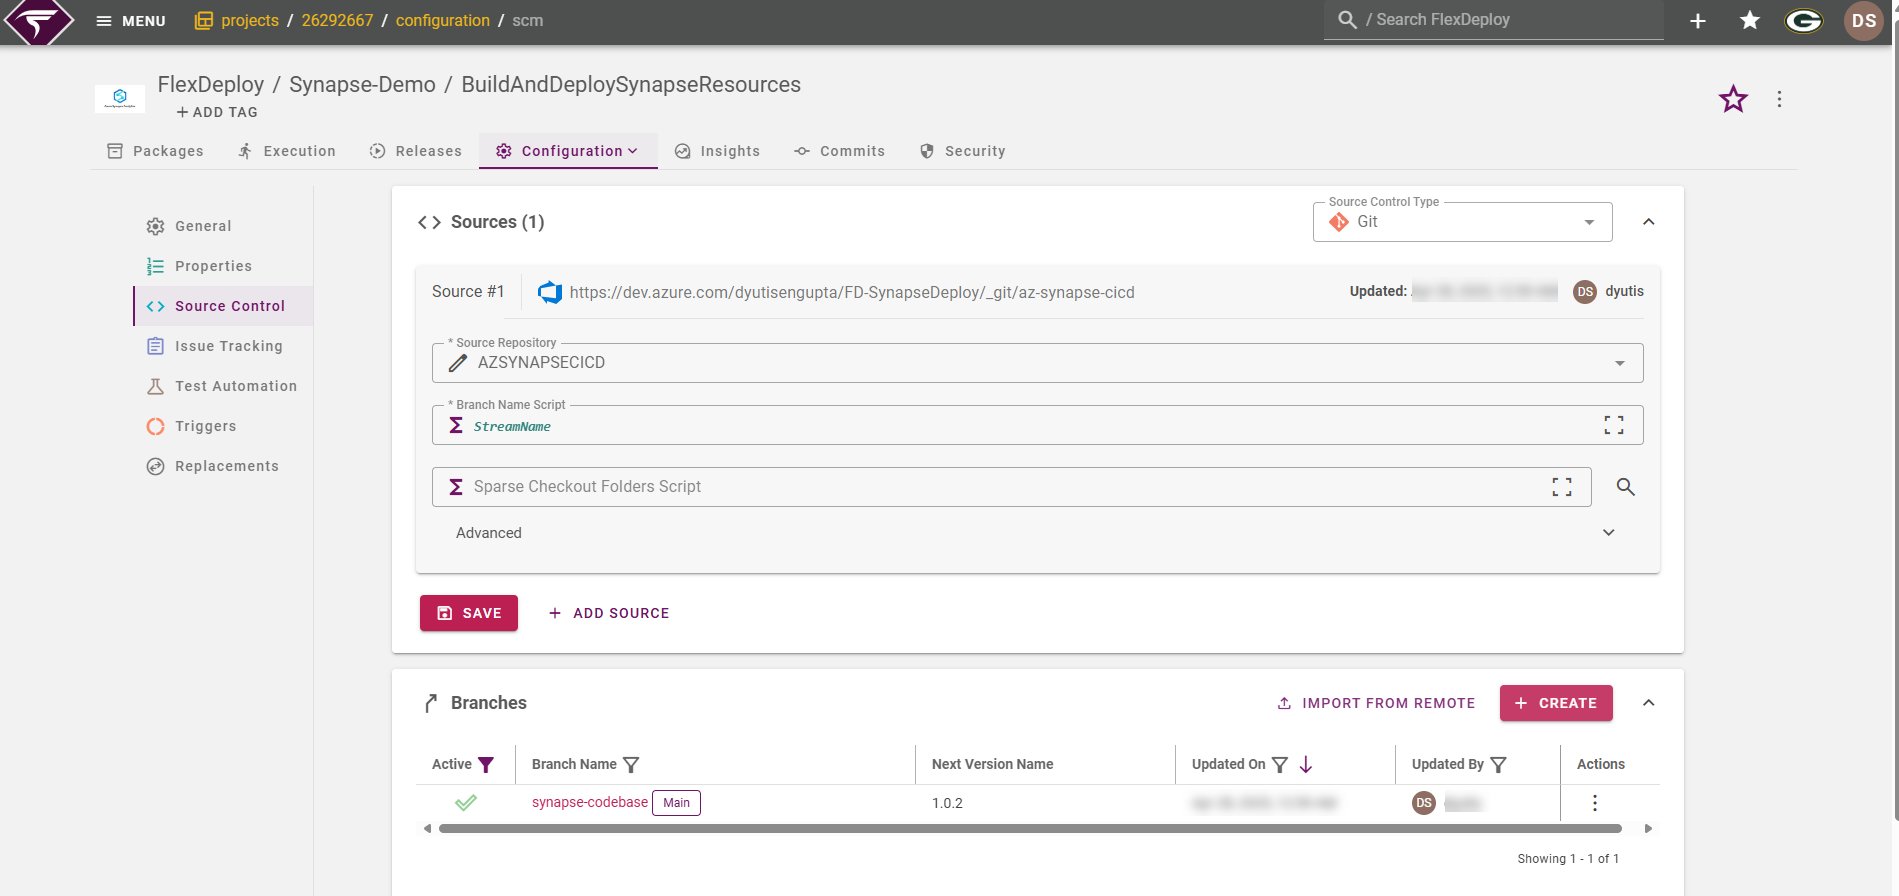
Create a Project say BuildAndDeploySynapseResources, by choosing the Classification: Package-based and Project Types as Generic image-20240329-064826.png Once it is created the Source Control needs to be configured, so that we can discover the files from the respective repository. Note: These files are from the GIT integrated workspace that we use in Synapse for DEV environment. image-20250428-075124.png For example, this is how the source control in Project looks like: image-20250428-075231.png
Project Properties

Note: These are the values from the Azure DevOps Feed, Project Name that you already have configured. We have explained their configuration more here.
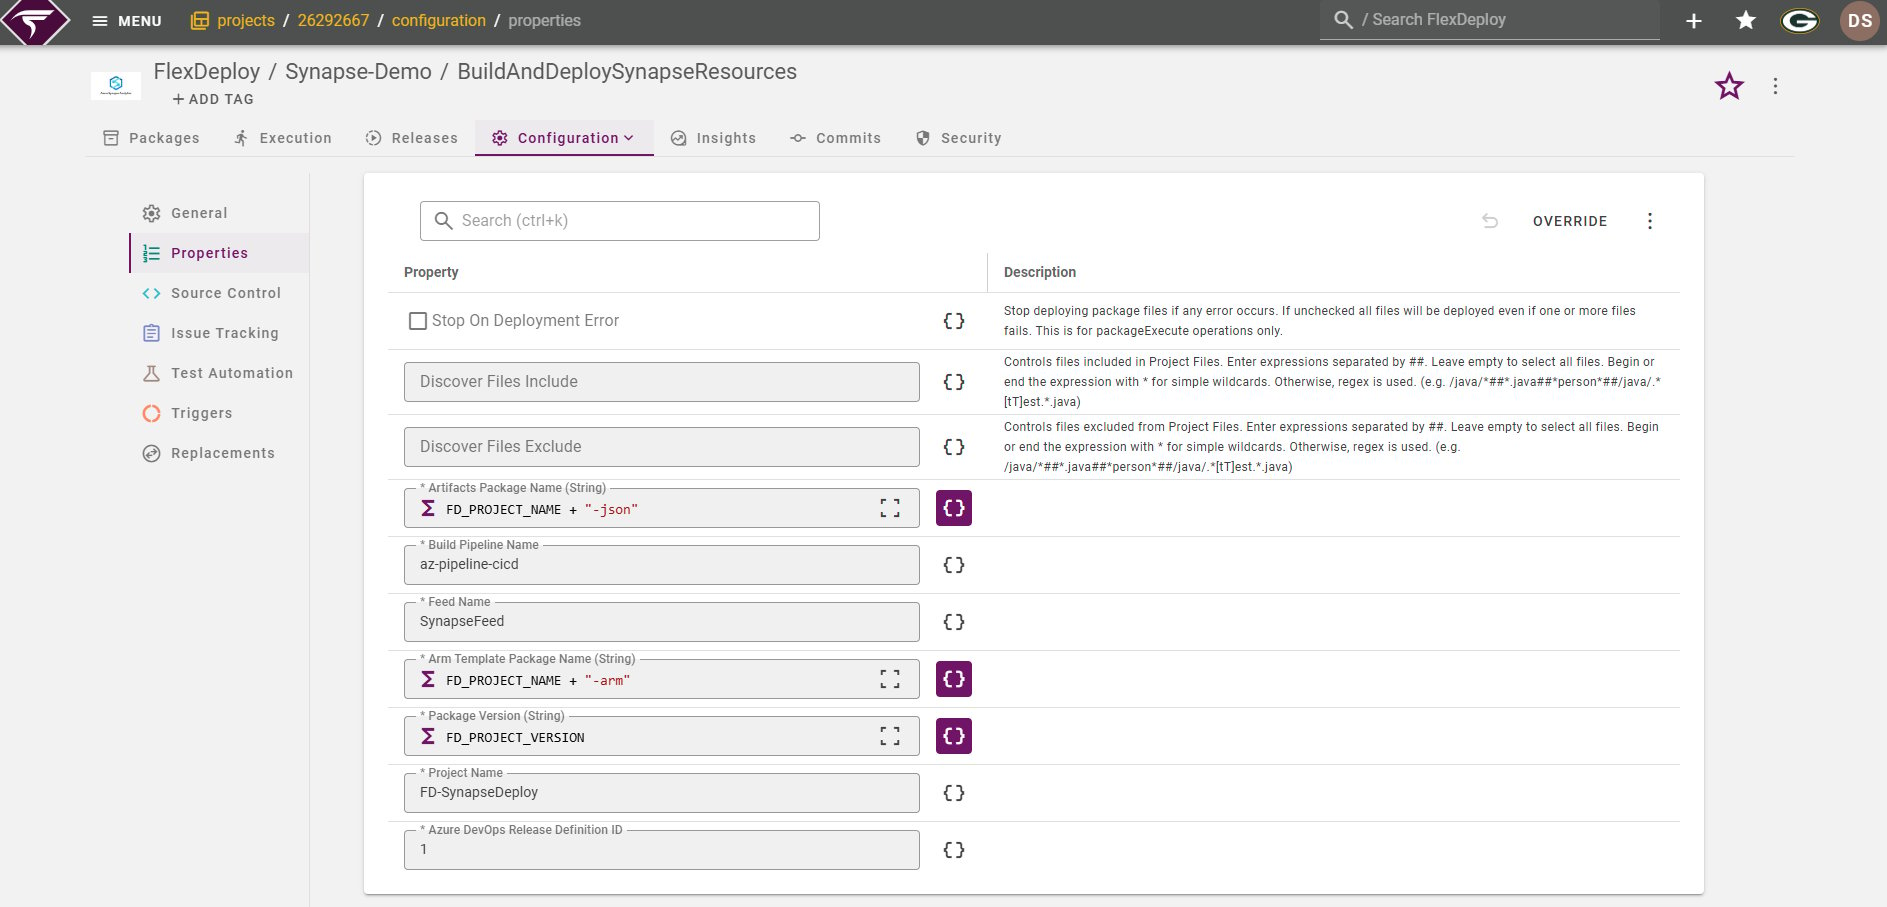
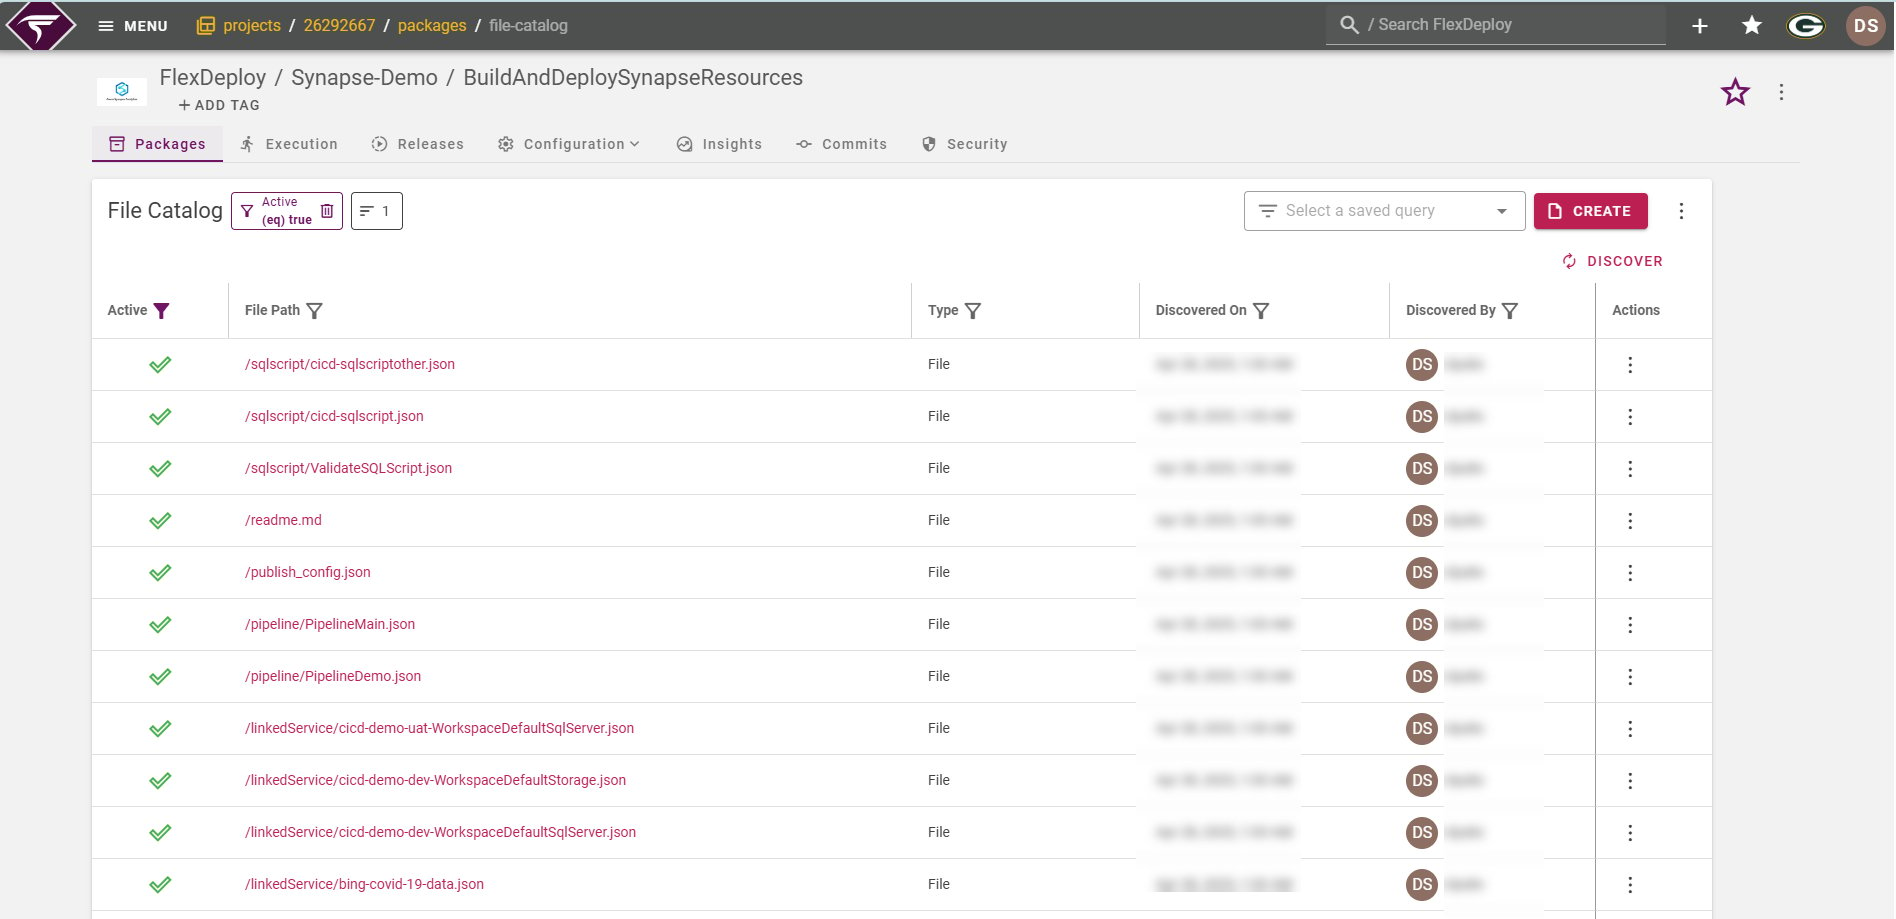
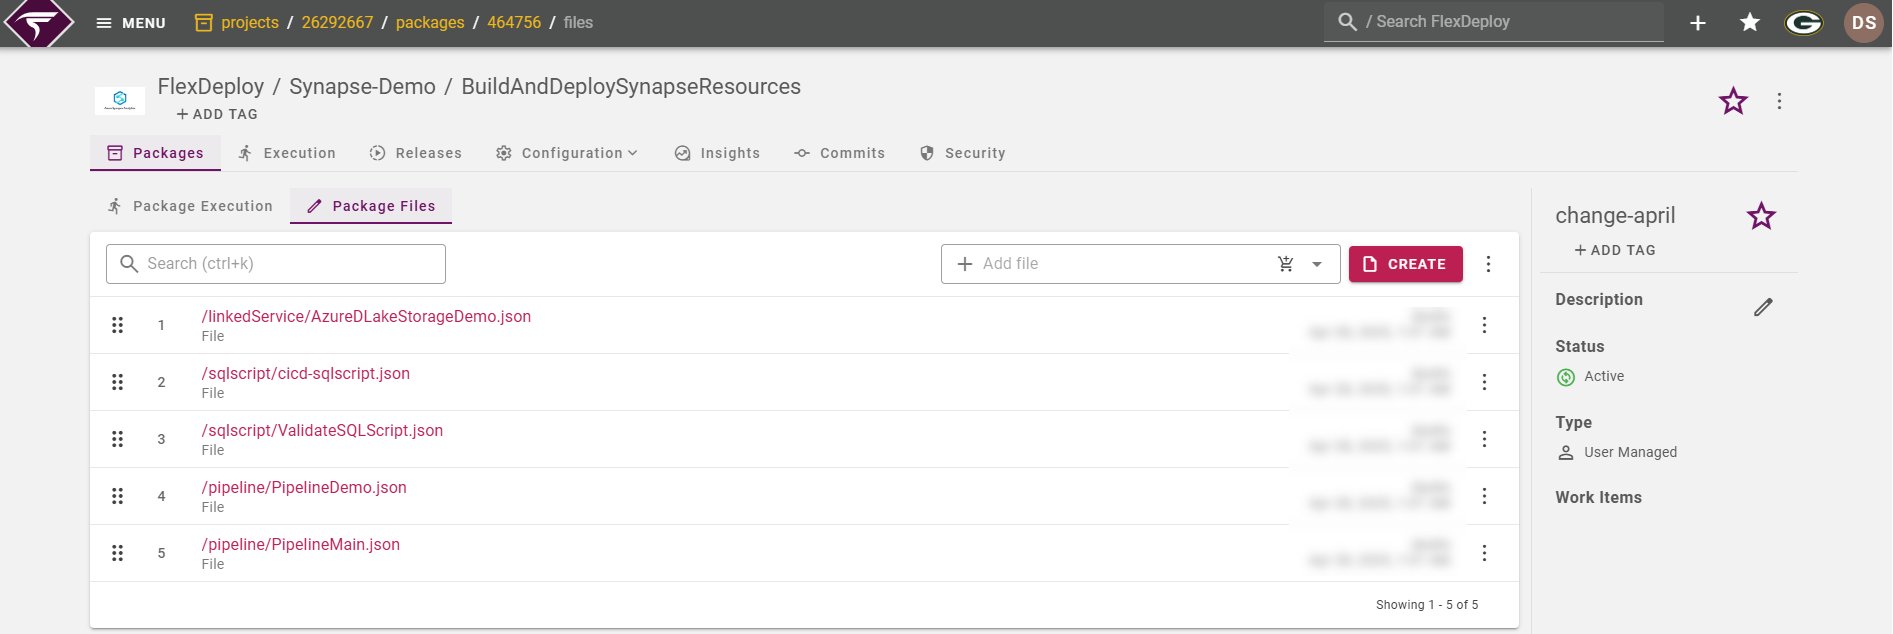
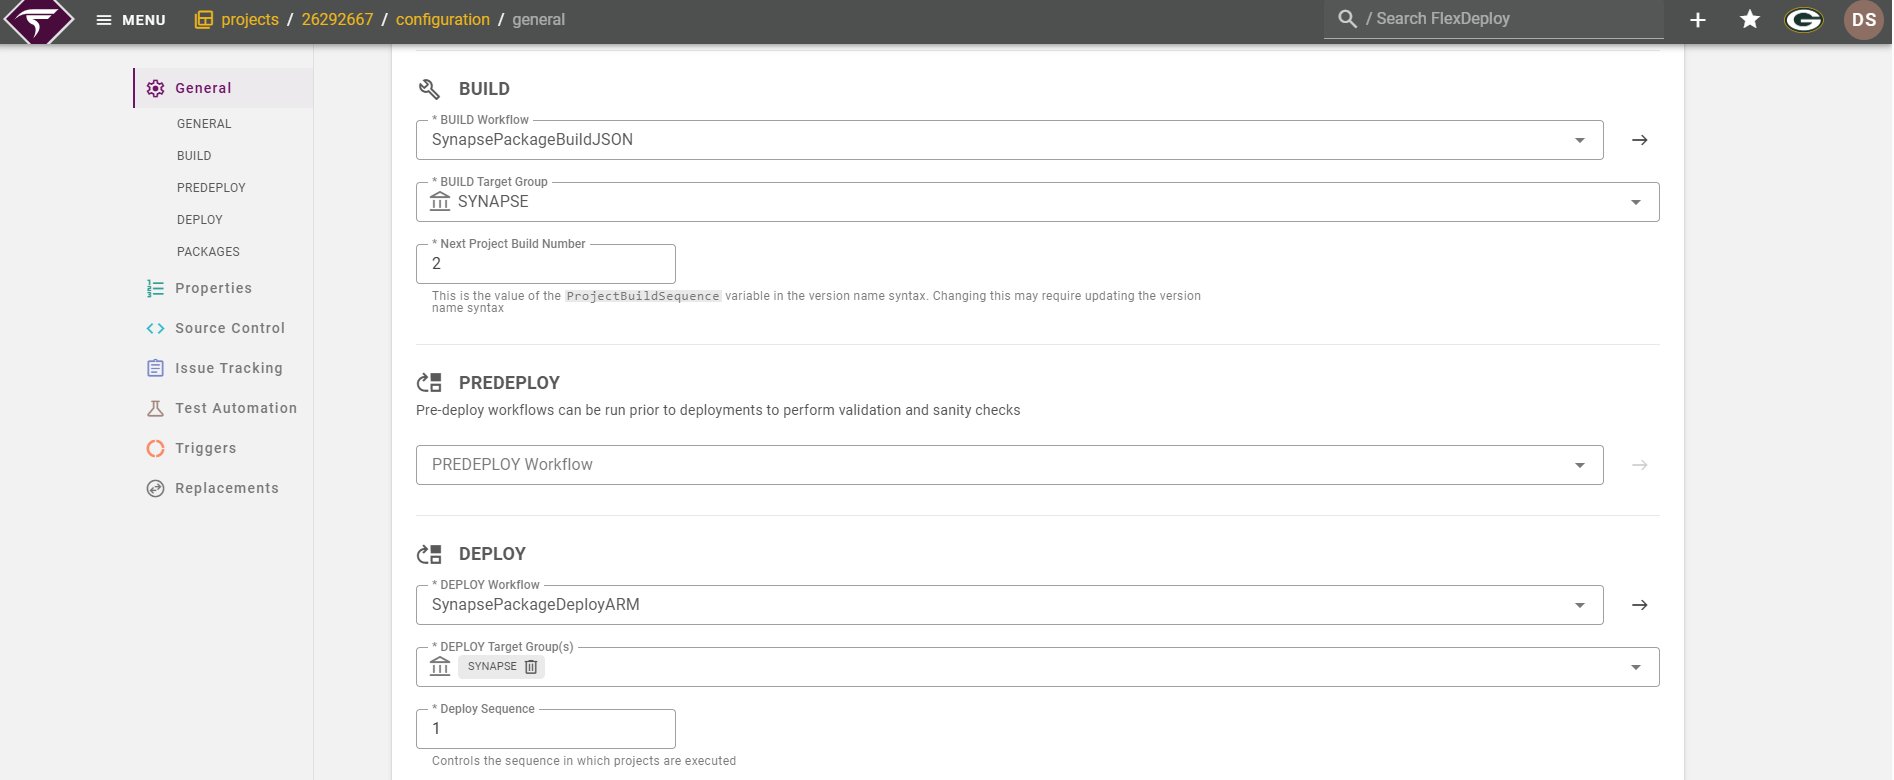
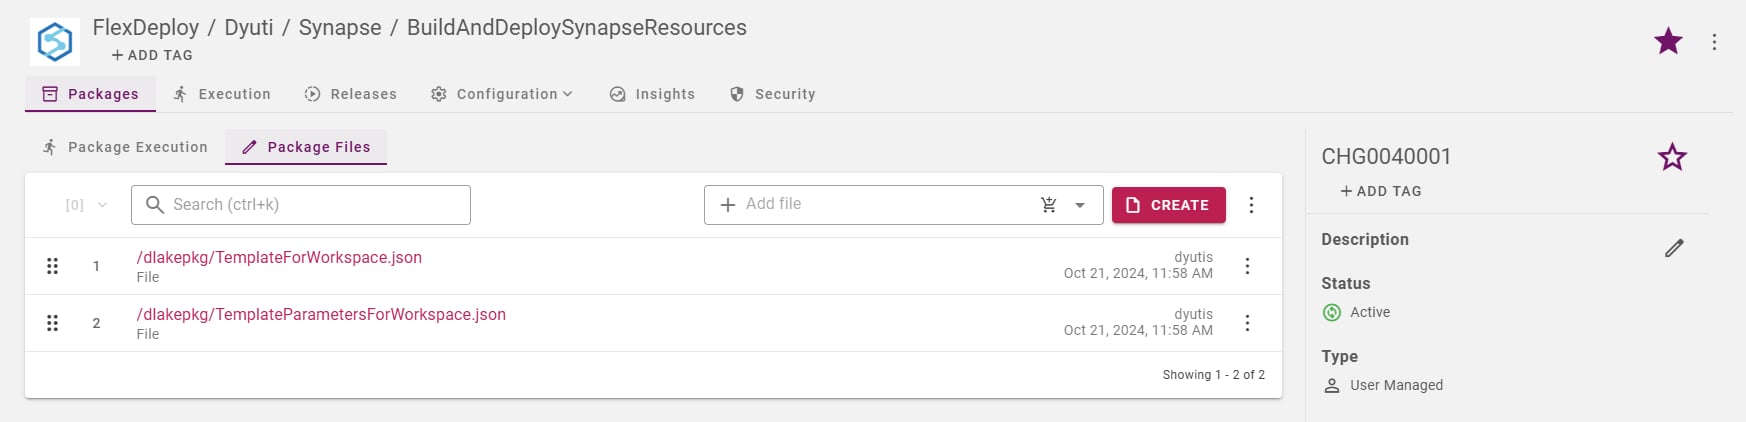
image-20250428-075319.png Discover the files using File Catalog tab image-20250428-075408.png Now we can create Package upon selecting specific files. For example, here we chose few scripts, pipeline and a linked service to form the package called change-april. image-20250428-075521.png Click on the Configuration tab, select General and map the Build and Deploy workflows along with respective Target group. image-20250428-075605.png

Target Group configuration

image-20250428-075736.png Build = for build execution; UAT = for deploy execution.

Build

image-20241021-153546.png

UAT

image-20241021-153921.png The Environment Specific Variables field controls the target workspace name and several other environment specific parameters. To know more follow this link.

Execution

Initiate Build on the selected Package change-april.
**Note: The selected JSON files are published to Azure DevOps Feed as Artifacts with the package name as a keyword in it. Example: <packagename>-<fdprojectname>-json-<environmentcode>. Now Microsoft has certain restrictions on the naming of the Azure Artifacts, hence please follow the guide before you name the package that you create in FD or else adjust your workflow to be in compliance. https://learn.microsoft.com/en-us/azure/devops/organizations/settings/naming-restrictions?view=azure-devops
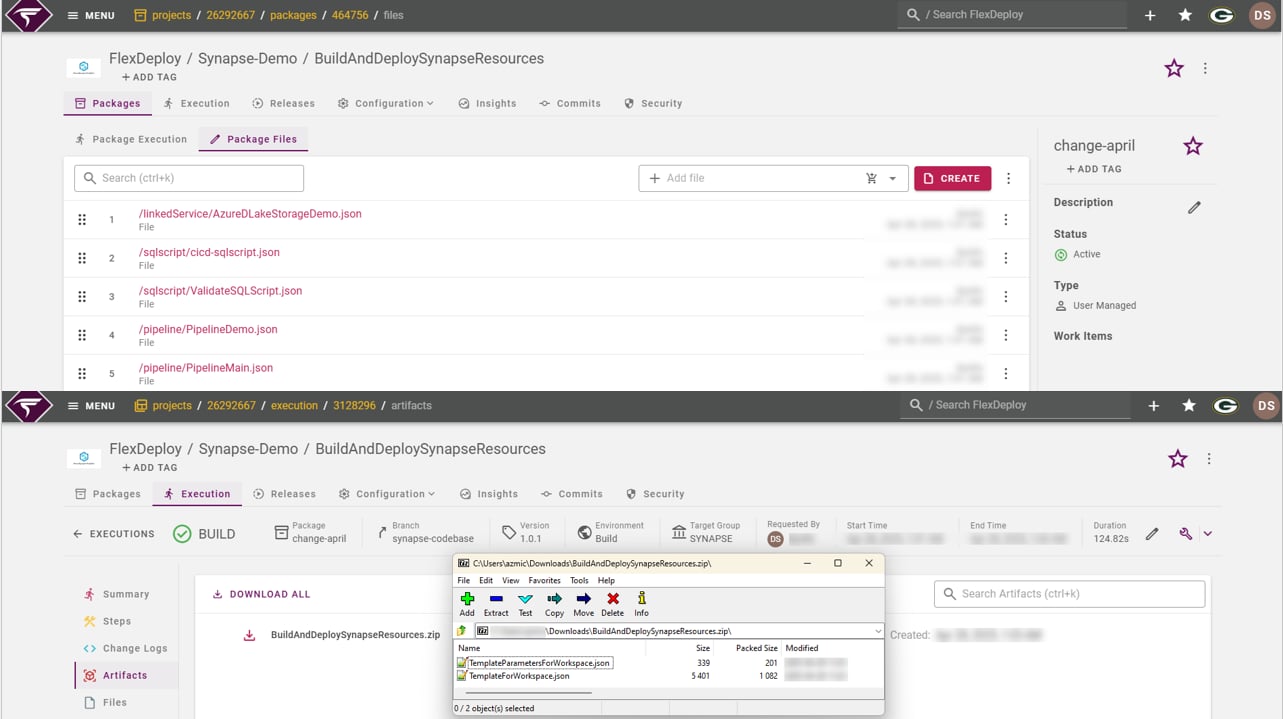
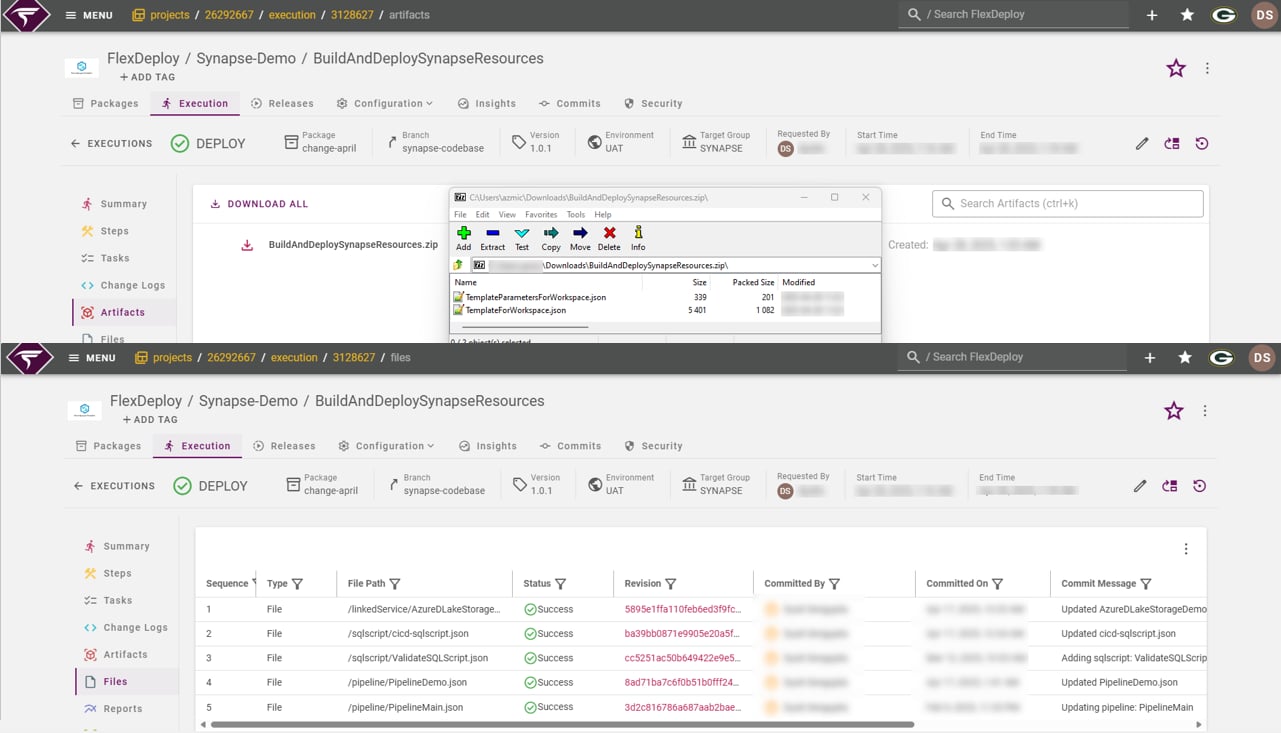
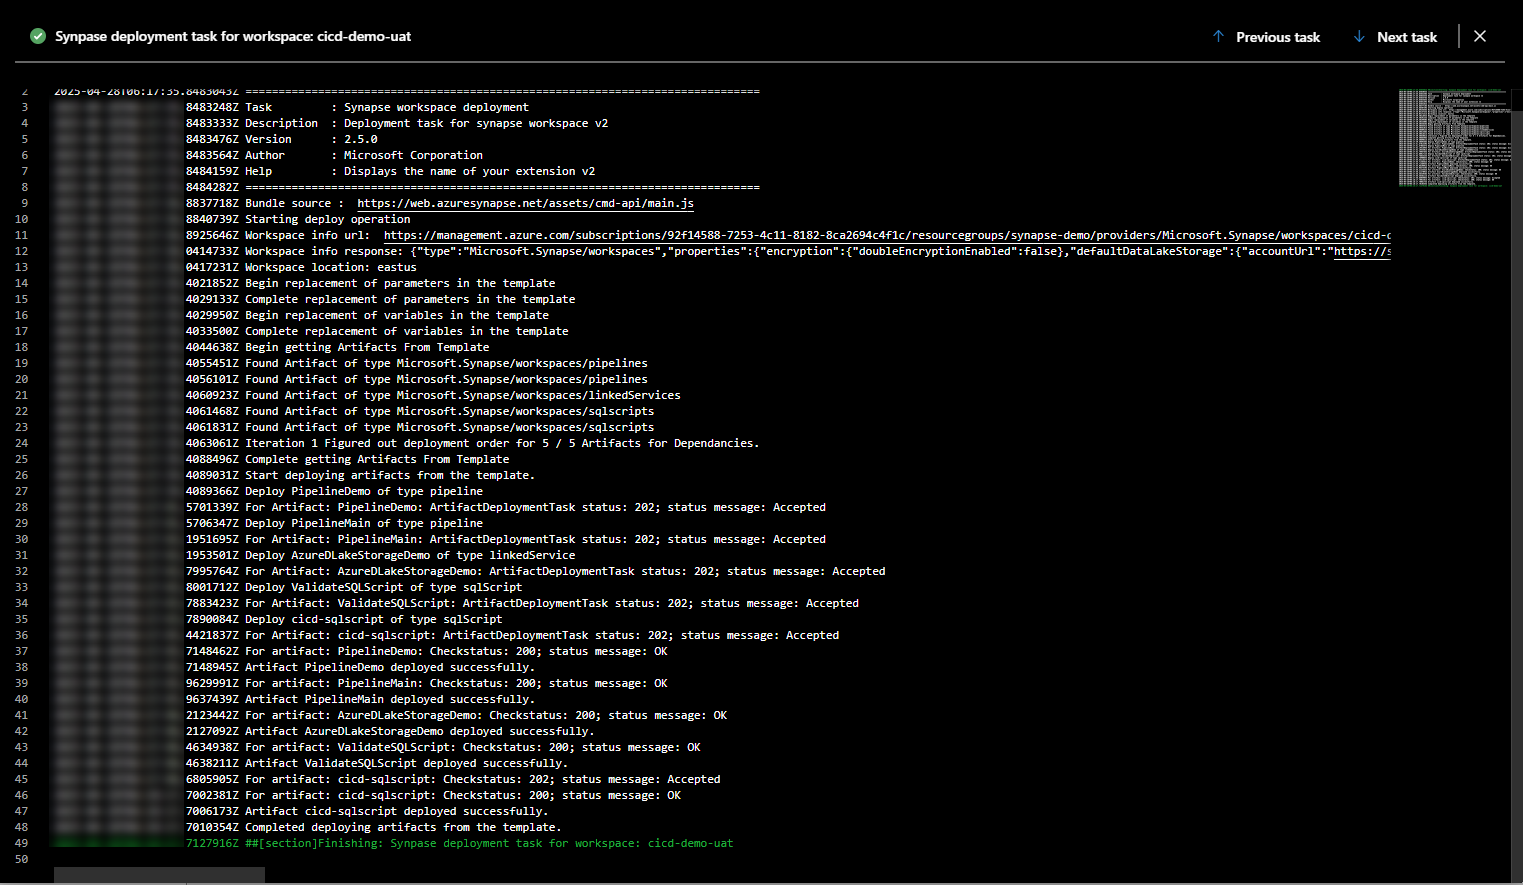
image-20250428-080000.png It creates the FD artifacts with the zip bundle of ARM template. Initiate Deploy on the built version. image-20250428-080042.png Clicking on the createRelease step’s Output tab, you would find the release url of Azure DevOps Release pipeline. Navigating to that shows more log: image-20250428-080216.png