Objective
You have a Java application that is built with Maven and the source code is managed in a GIT repository. The goal of this tutorial is to automate the build and deployment across multiple environments. This automation will include:- Cloning the Java application code from a GIT repository
- Compiling and packaging the application into a WAR file
- Deploying the WAR file to Tomcat servers in multiple environments
Create Java Application For Tomcat using Blueprint
The assumption is that you have FlexDeploy installed and ready for use. When logged into the FlexDeploy, you will see the Home page. Click on the + icon on the top and click “Create Project” to create a new project.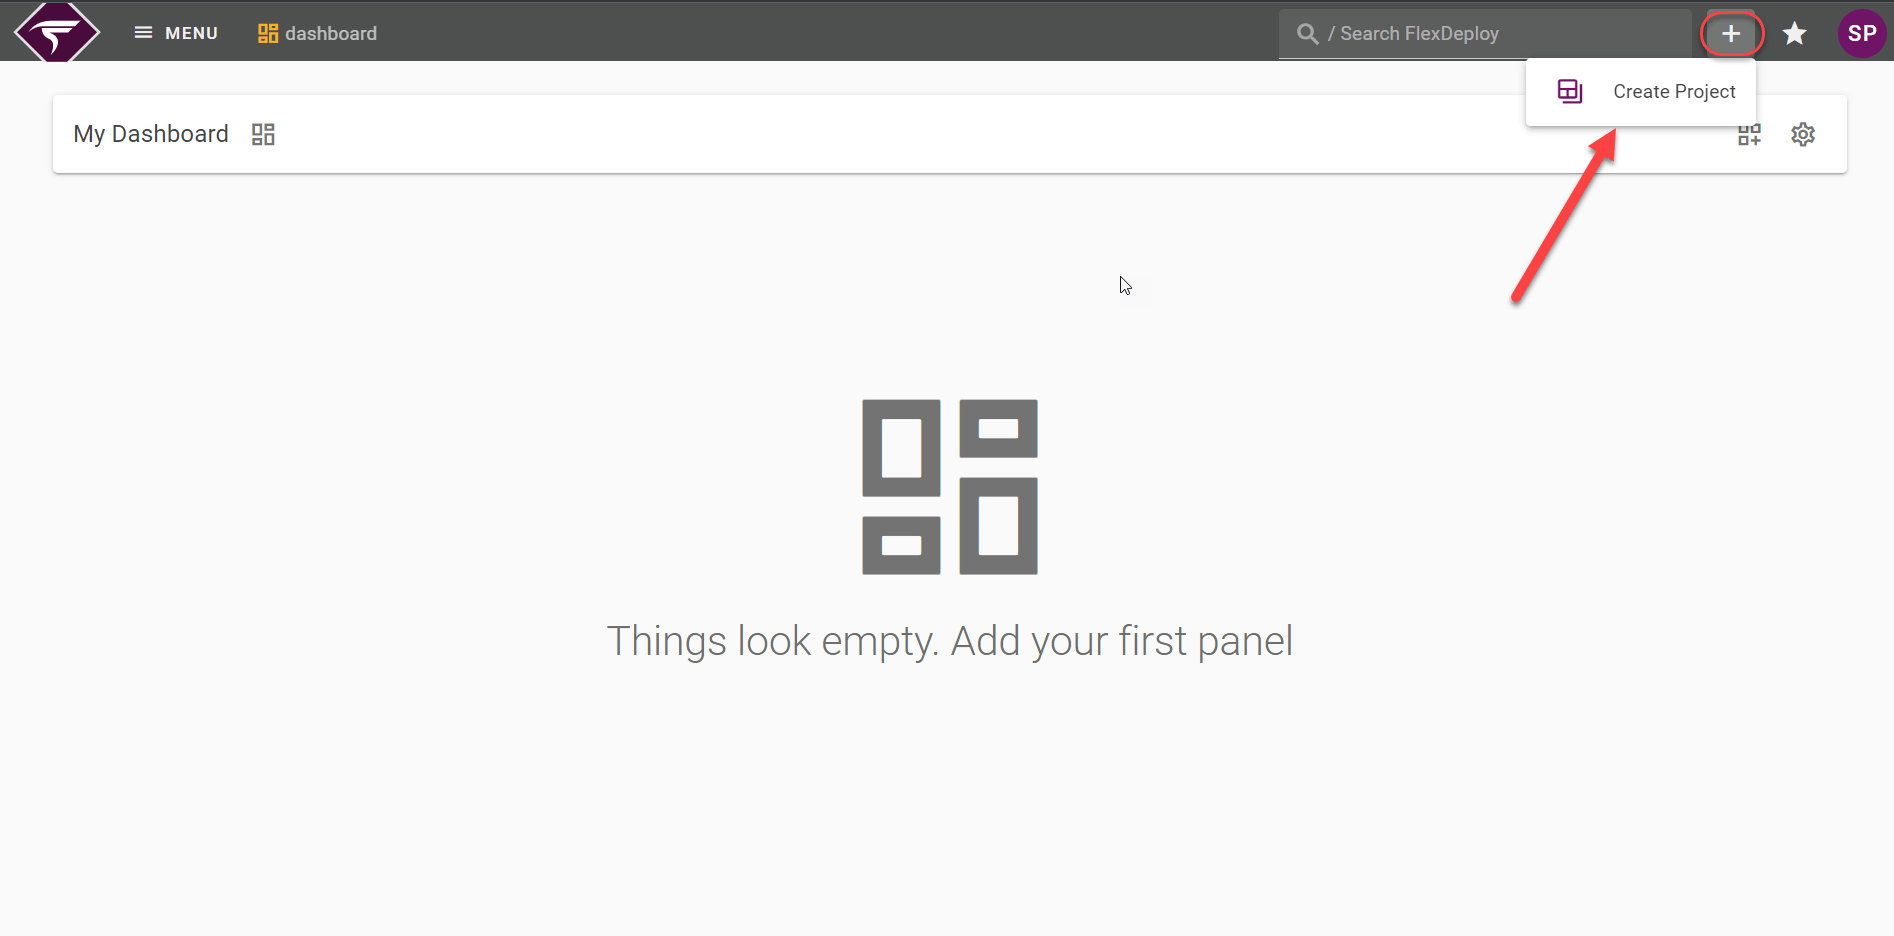
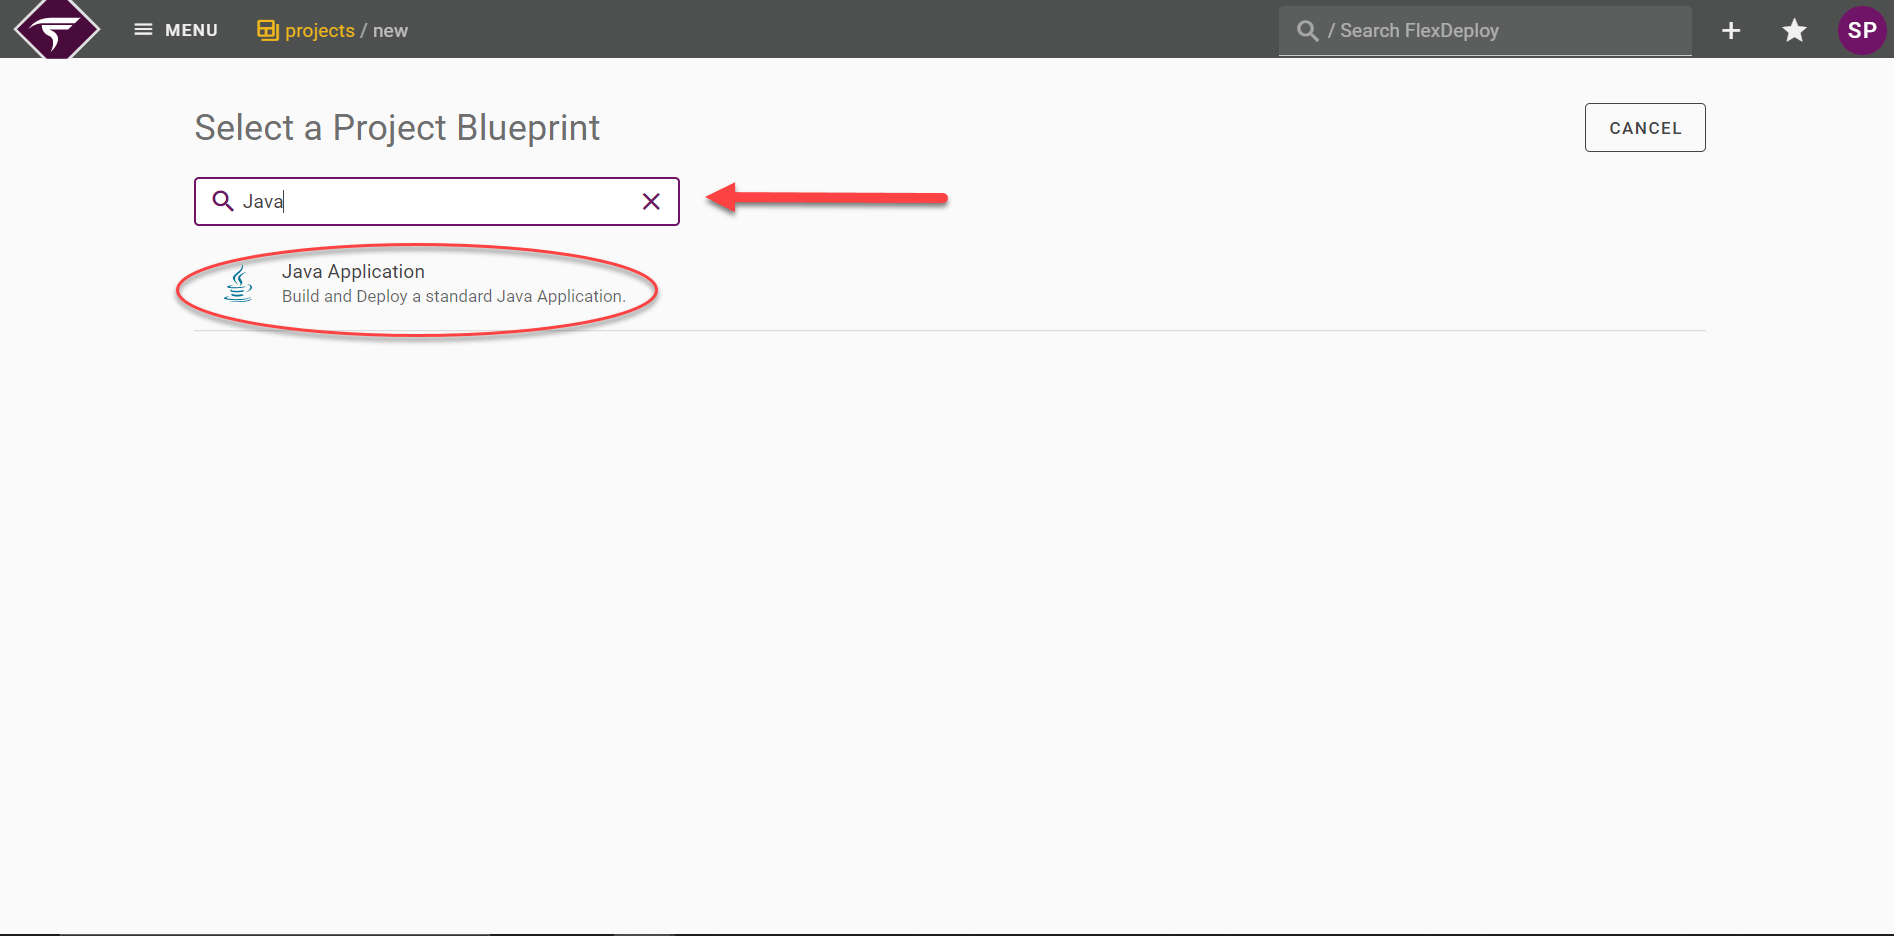
General Configuration
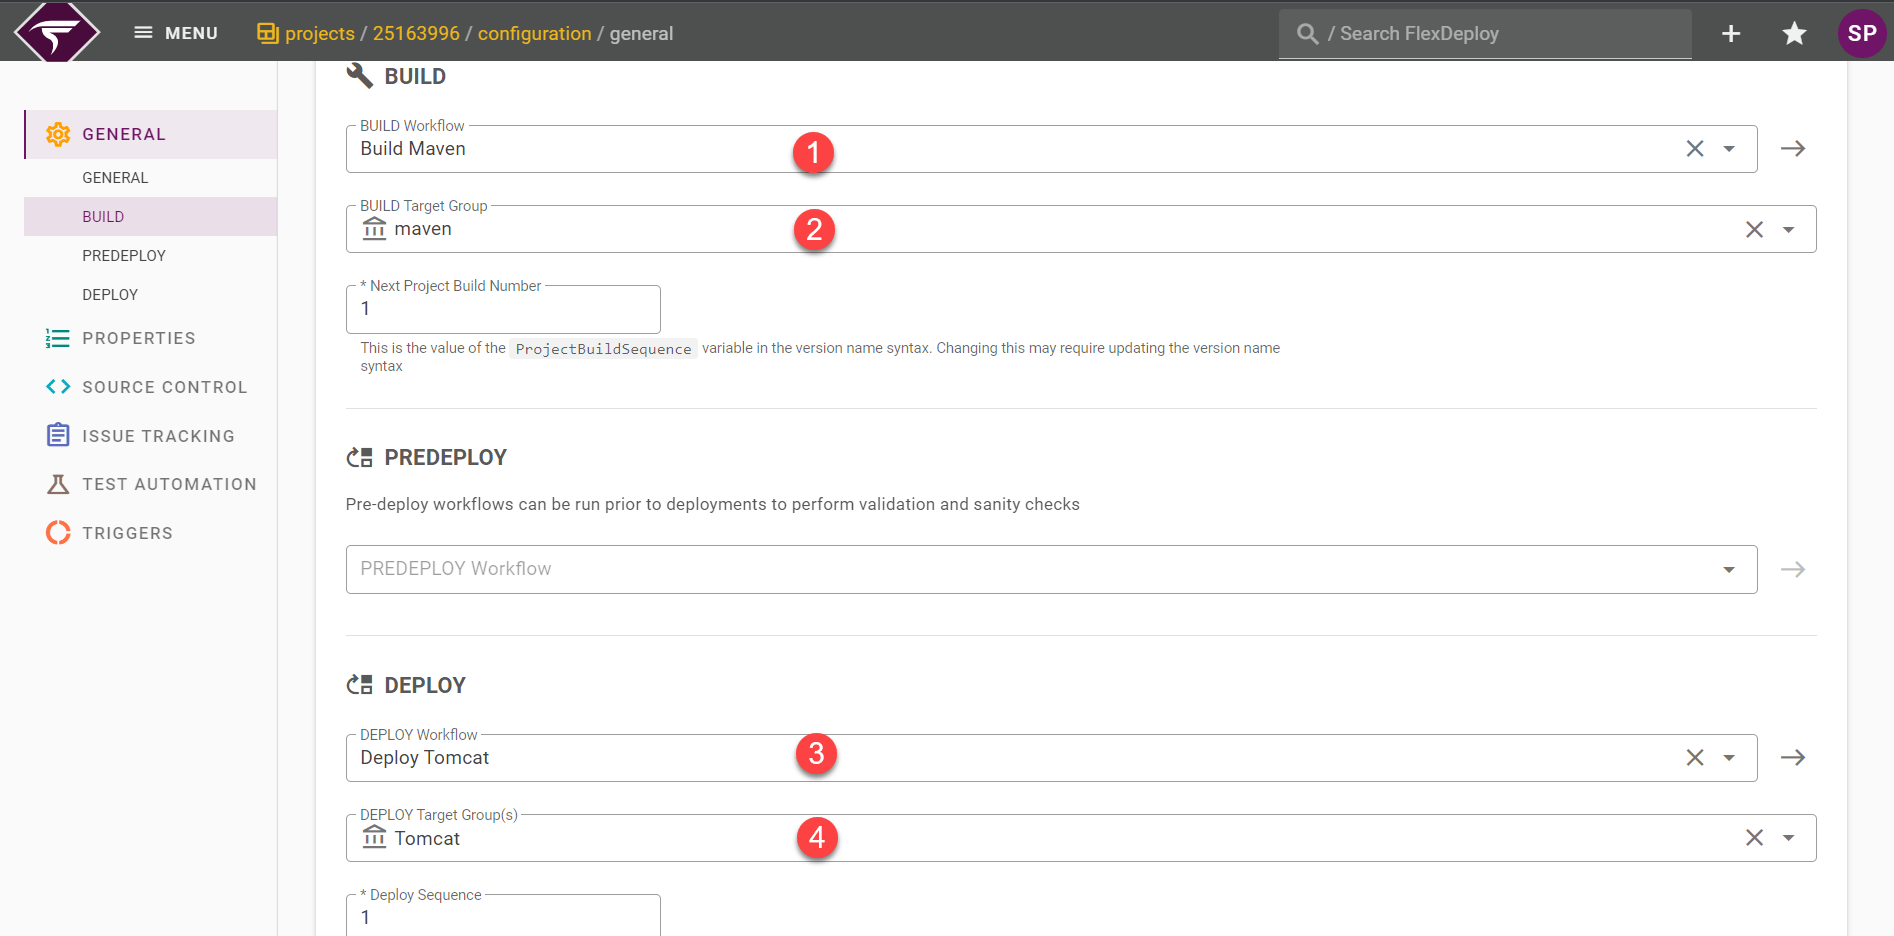
Scroll through this guide to fill in the blueprint properties. Select the Build and Deploy options. In our case, we select Maven as Build Option and Tomcat as Deploy Option.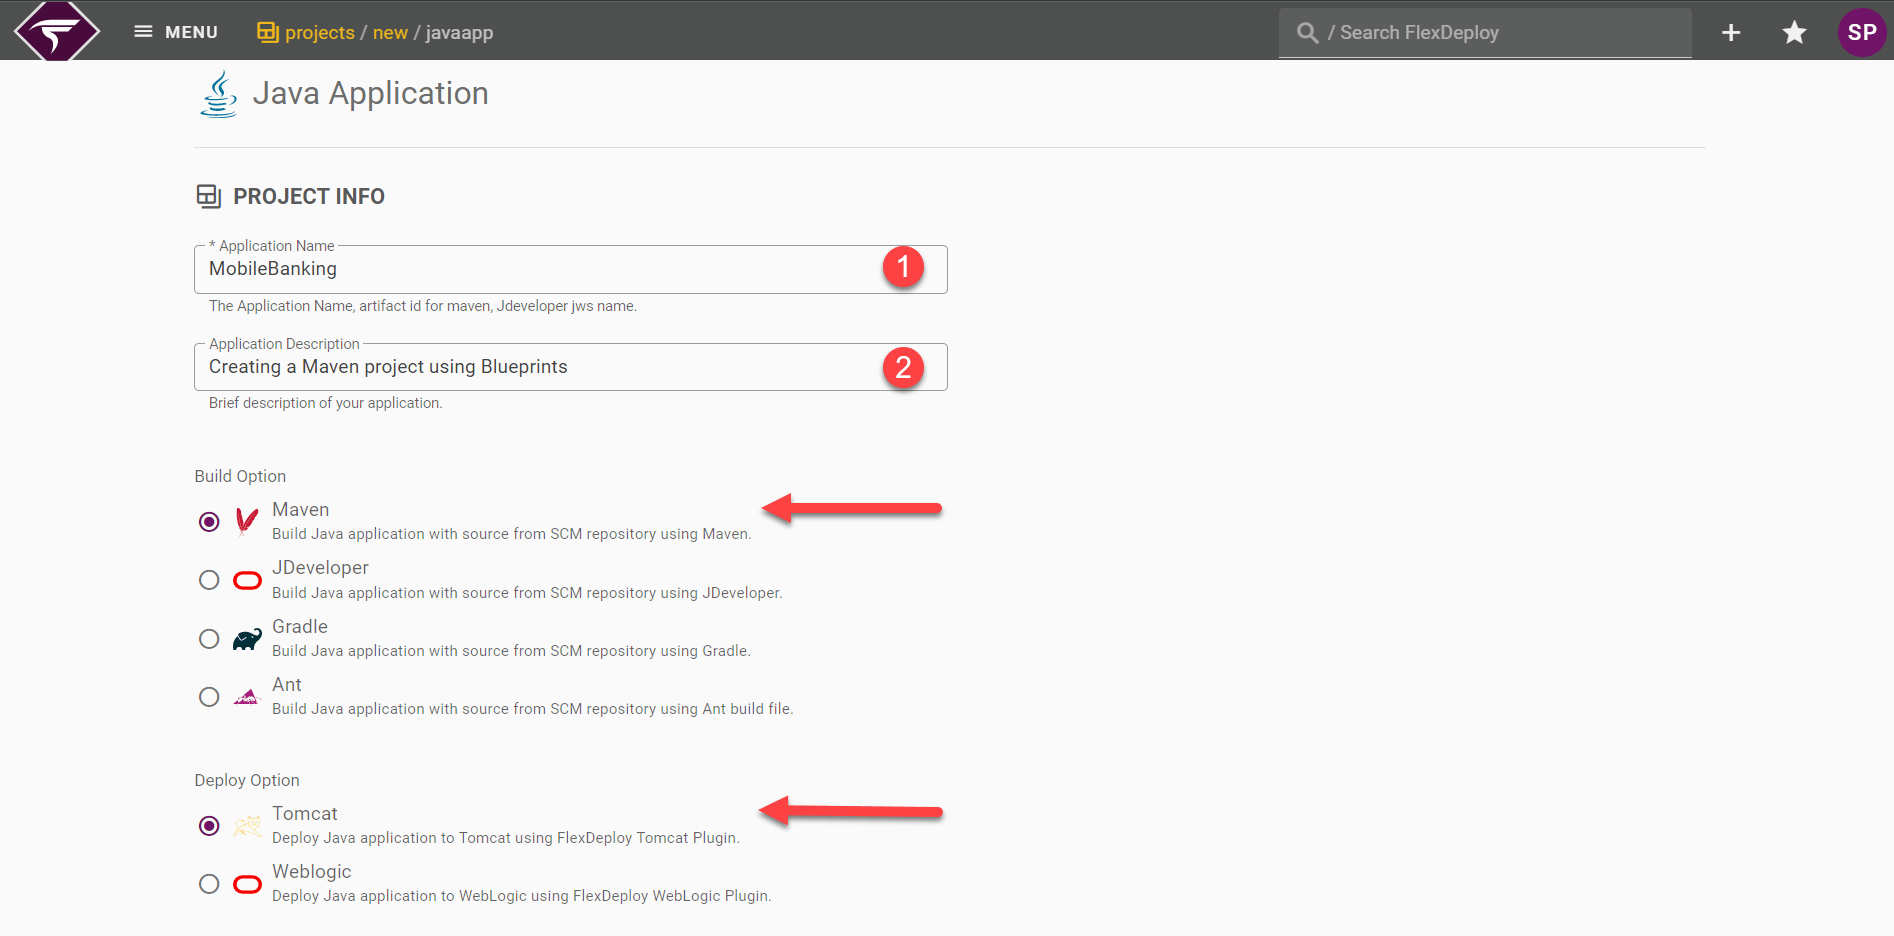
Project Info
Property Name | Value for this tutorial | Description |
|---|---|---|
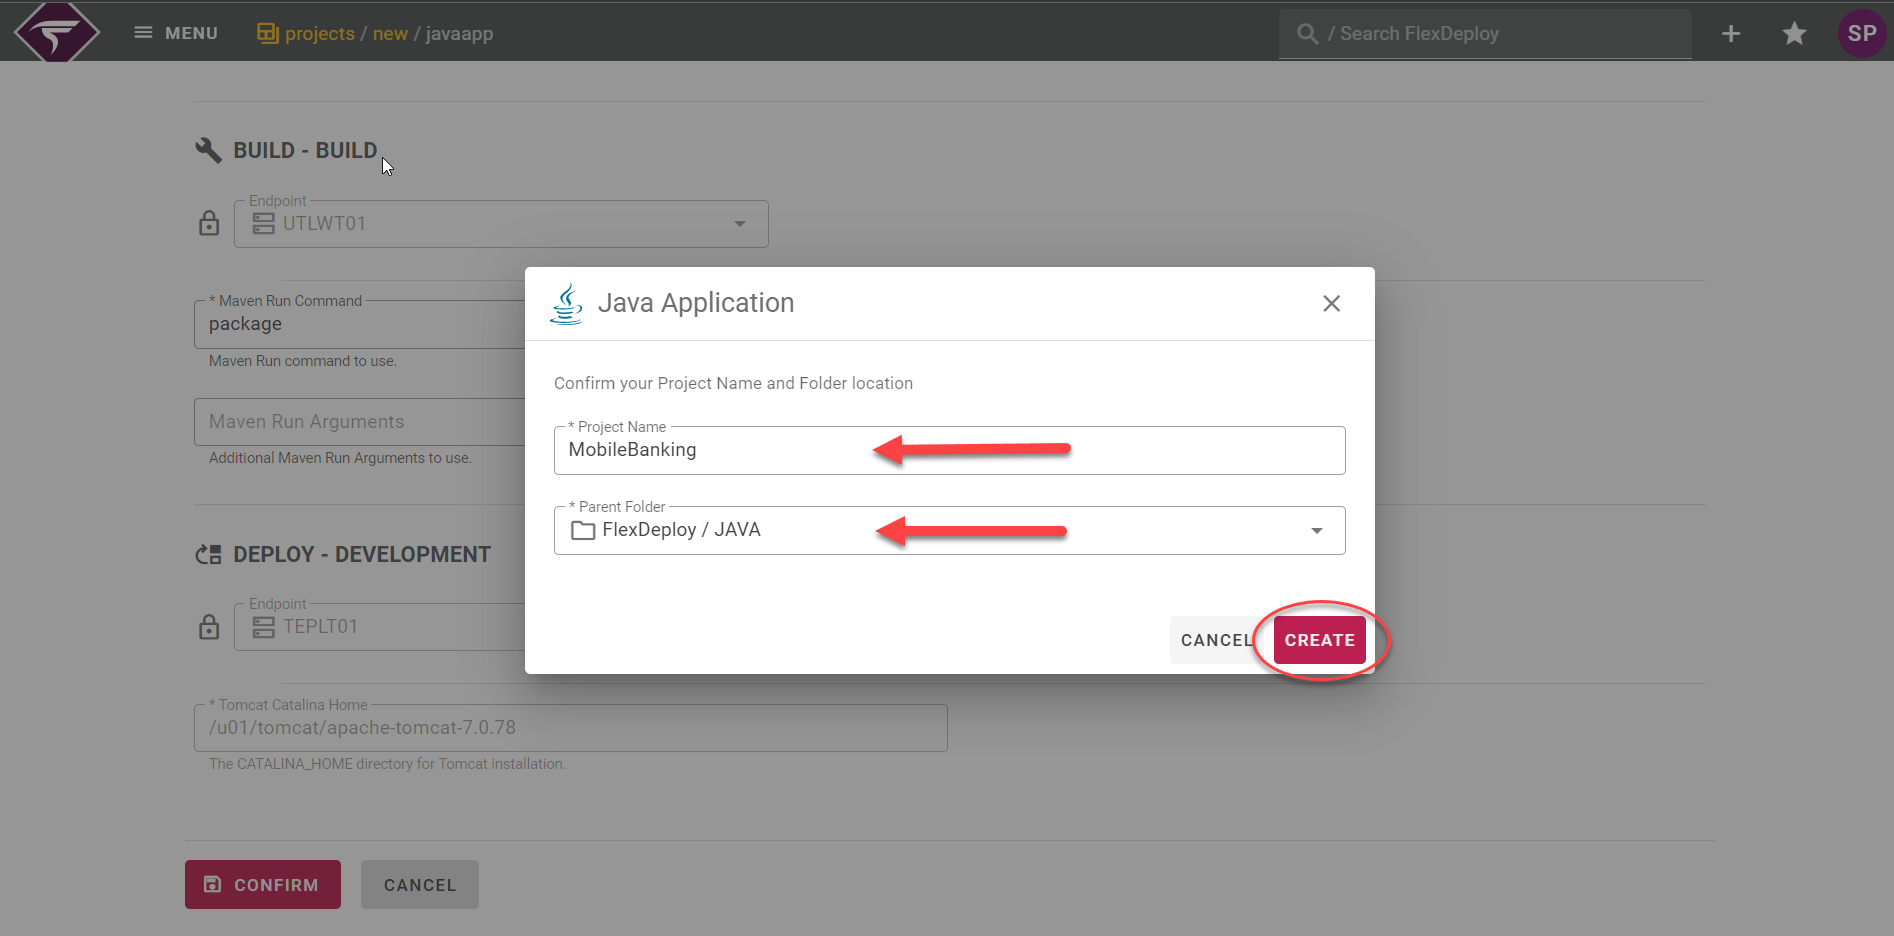
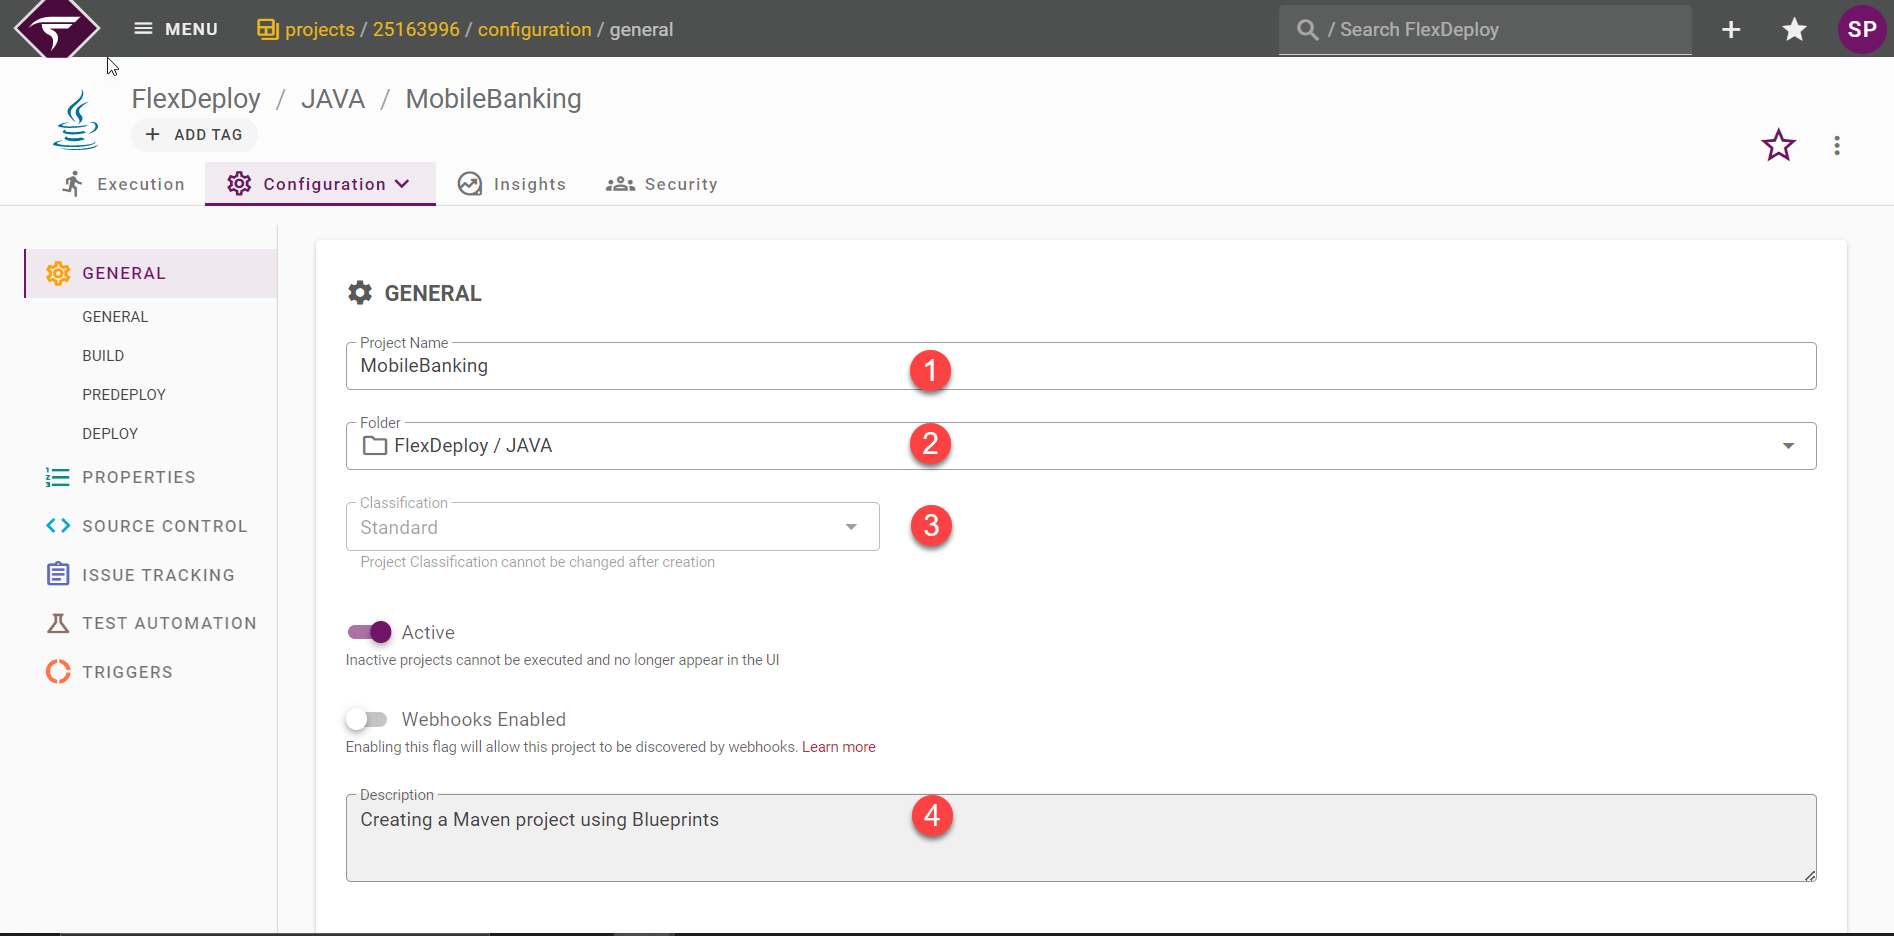
Application Name | MobileBanking | The Application Name, artifact id for maven, JDeveloper jws name. |
Description | Creating SOA project using Blueprints | Brief description of the application. |
Source Control
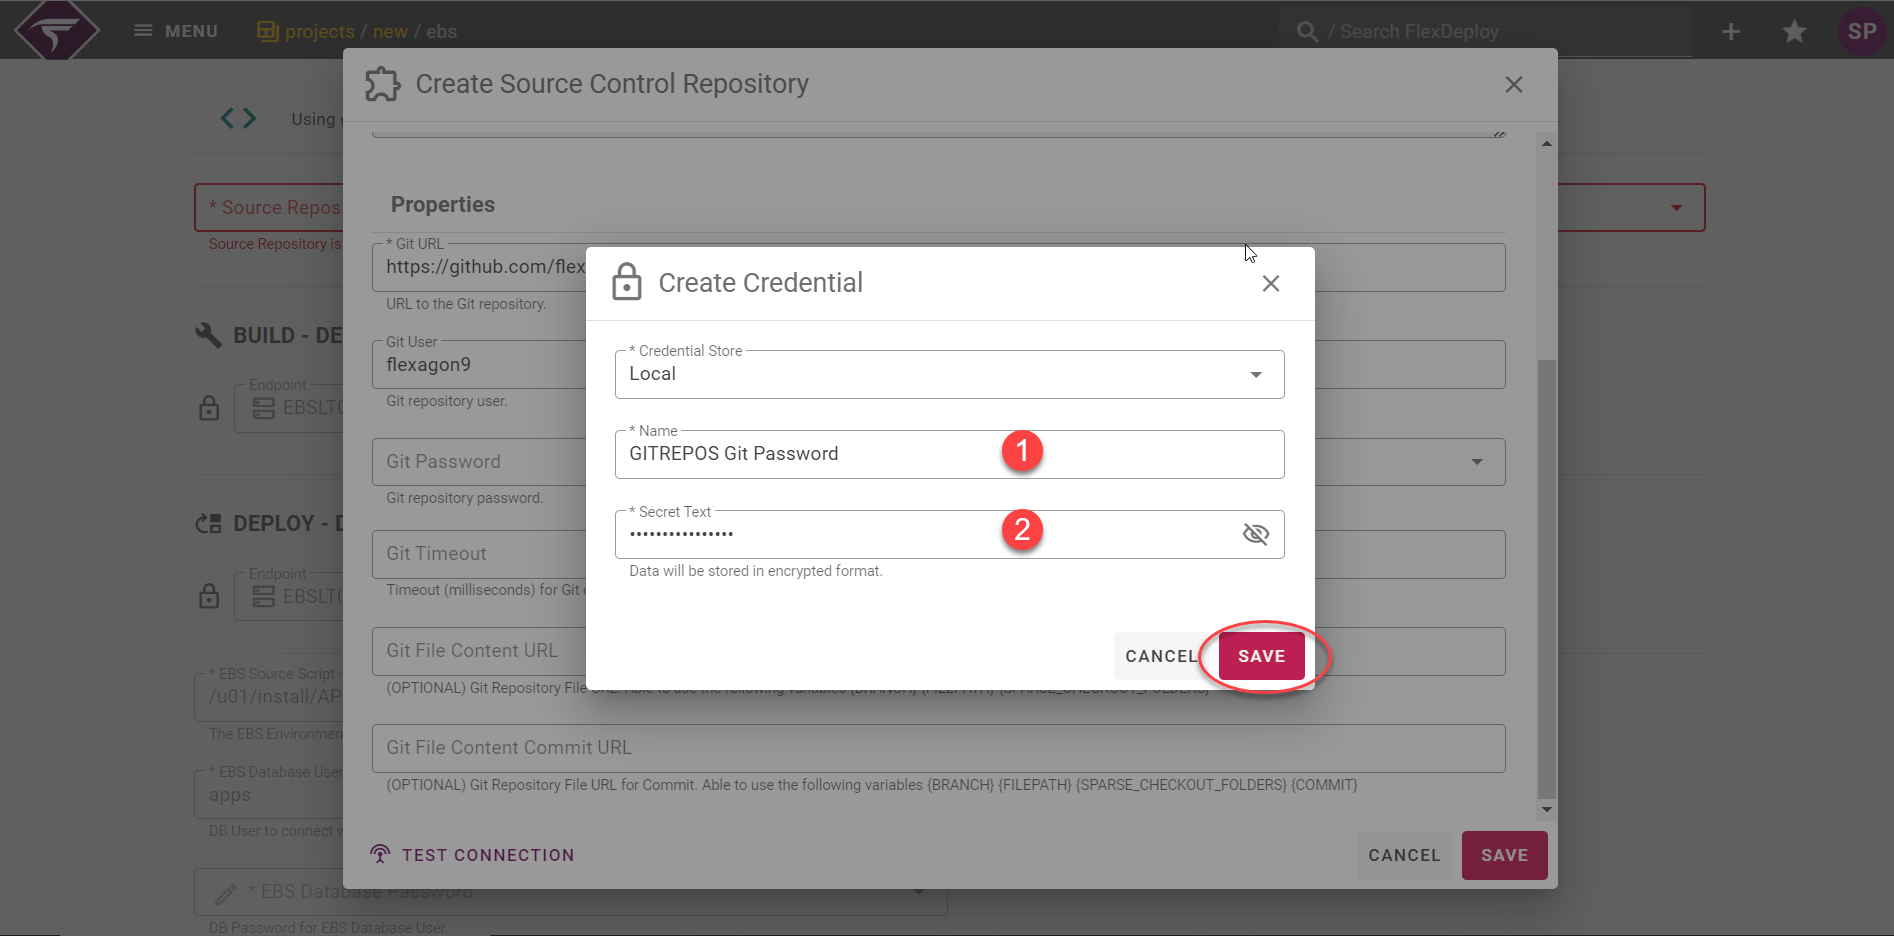
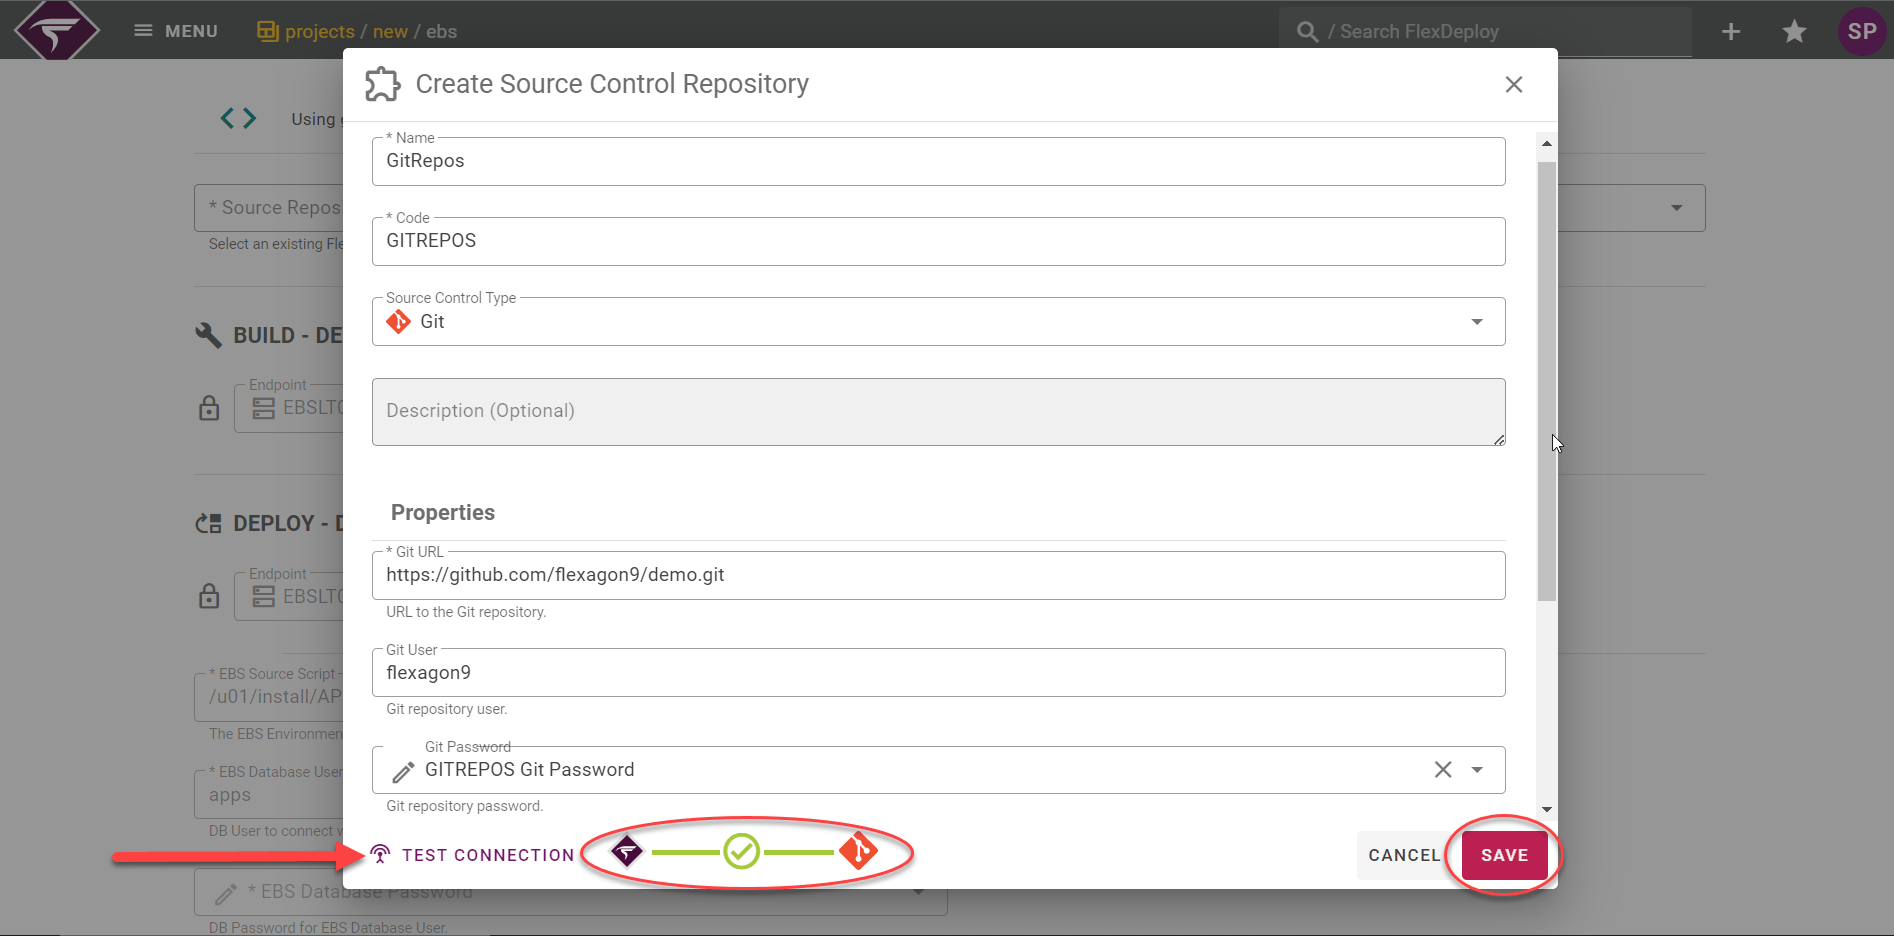
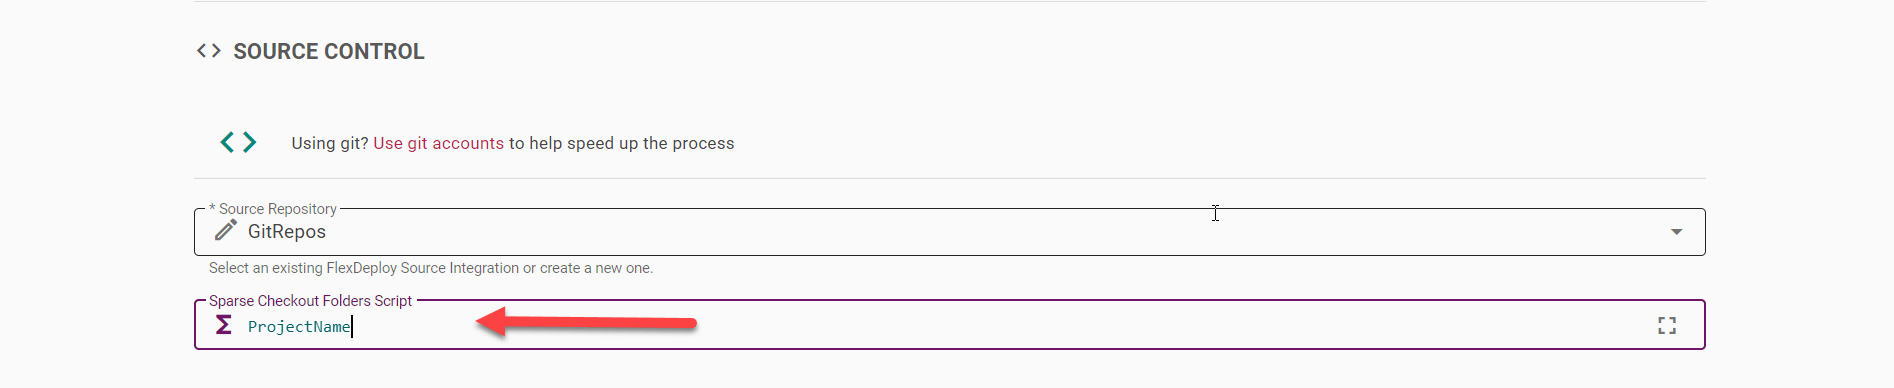
Click on source repository dropdown. If you have already created a connection to your source code repository, select it from the list.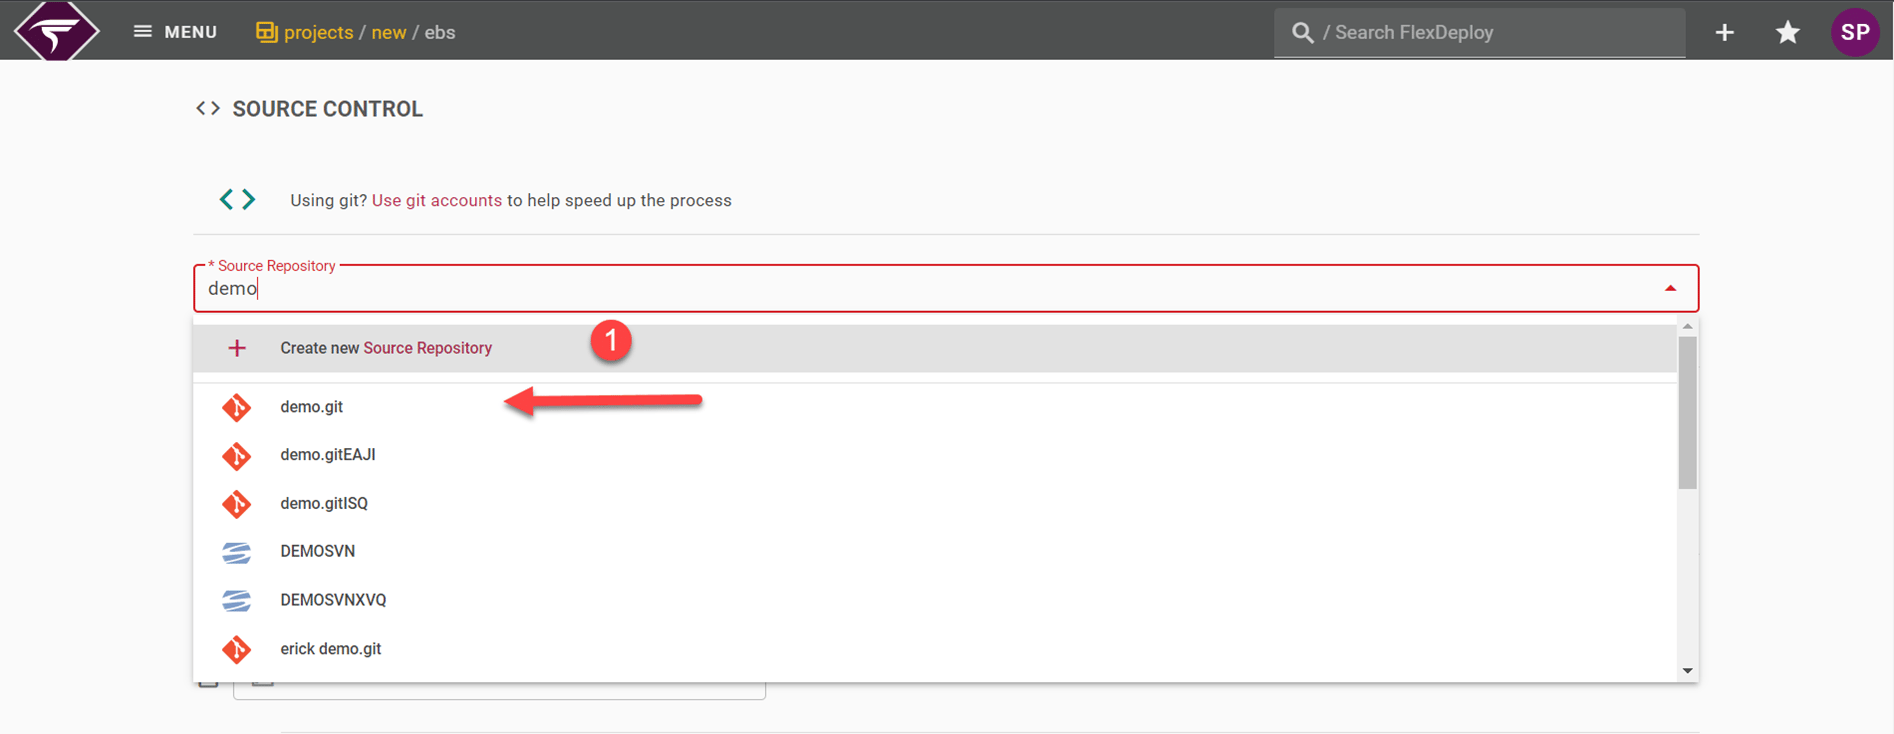
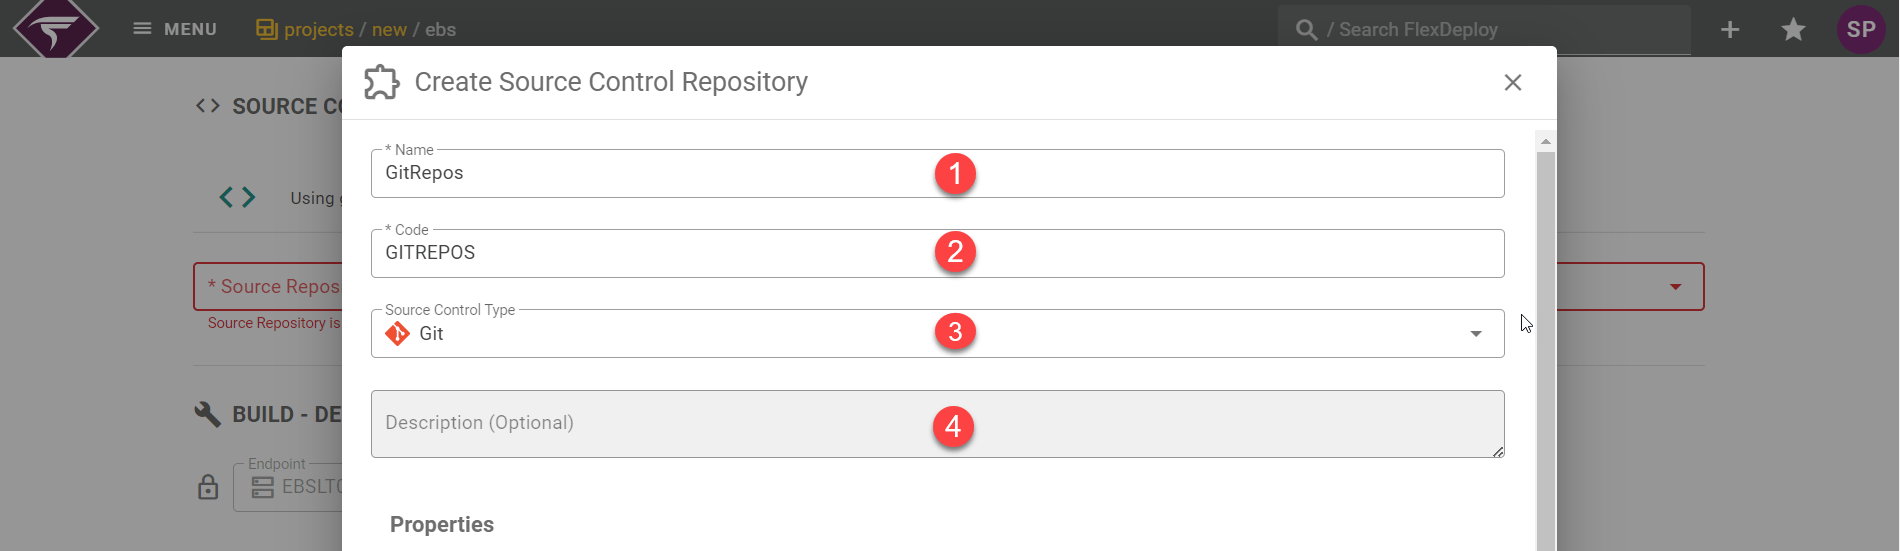
Inputs Info
Field | Required | Description |
|---|---|---|
Name | Yes | A descriptive name for this SCM instance. |
Code | Yes | A technical code for the instance, without any spaces. The codes are available as variables to shell and Groovy scripts, and therefore needs to comply with their limitations. |
Source Control Type | Yes | Type of Source Control Management System. We will use Git for this tutorial. Supported Source Control Management Systems are:
|
Description | No |
|
SCM Properties | Yes | The remaining properties are specific to the selected SCM. For Git:
|
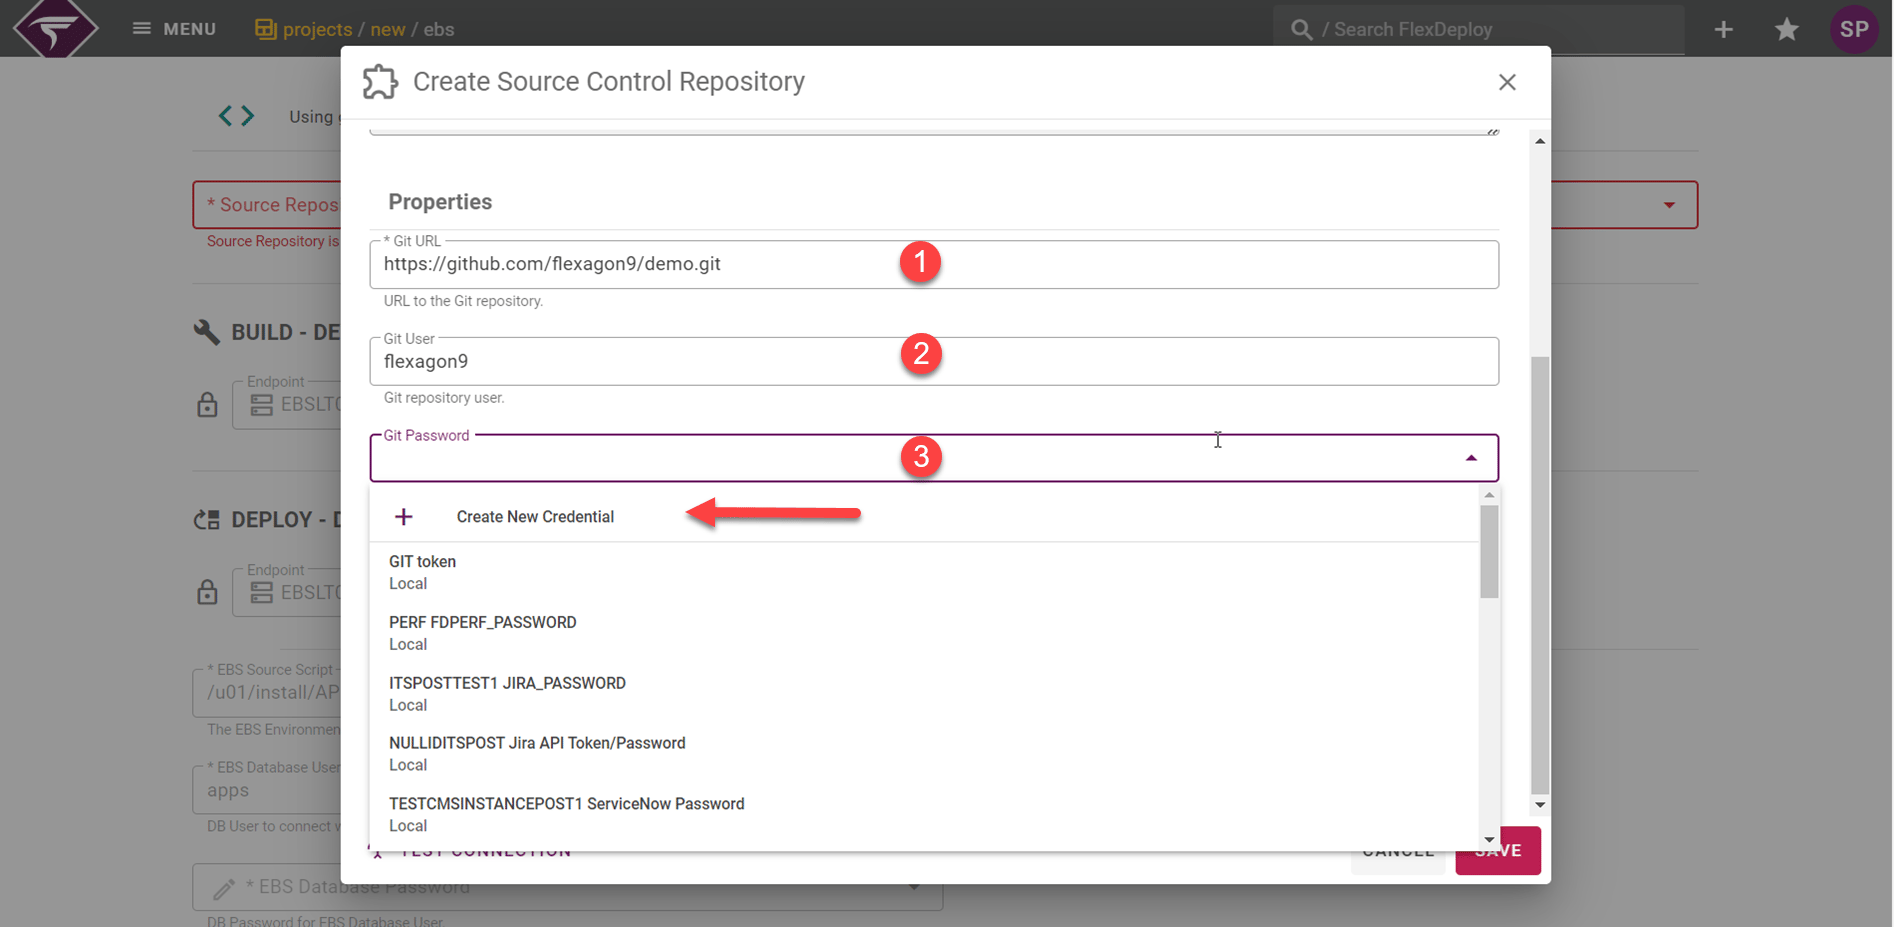
Gather Build and Deployment information
Enter values for any workflow properties which are required for the build and deploy. In the image below, no properties are required for this build. Select the target endpoint that the build and deploy should execute on. Click on “Confirm”.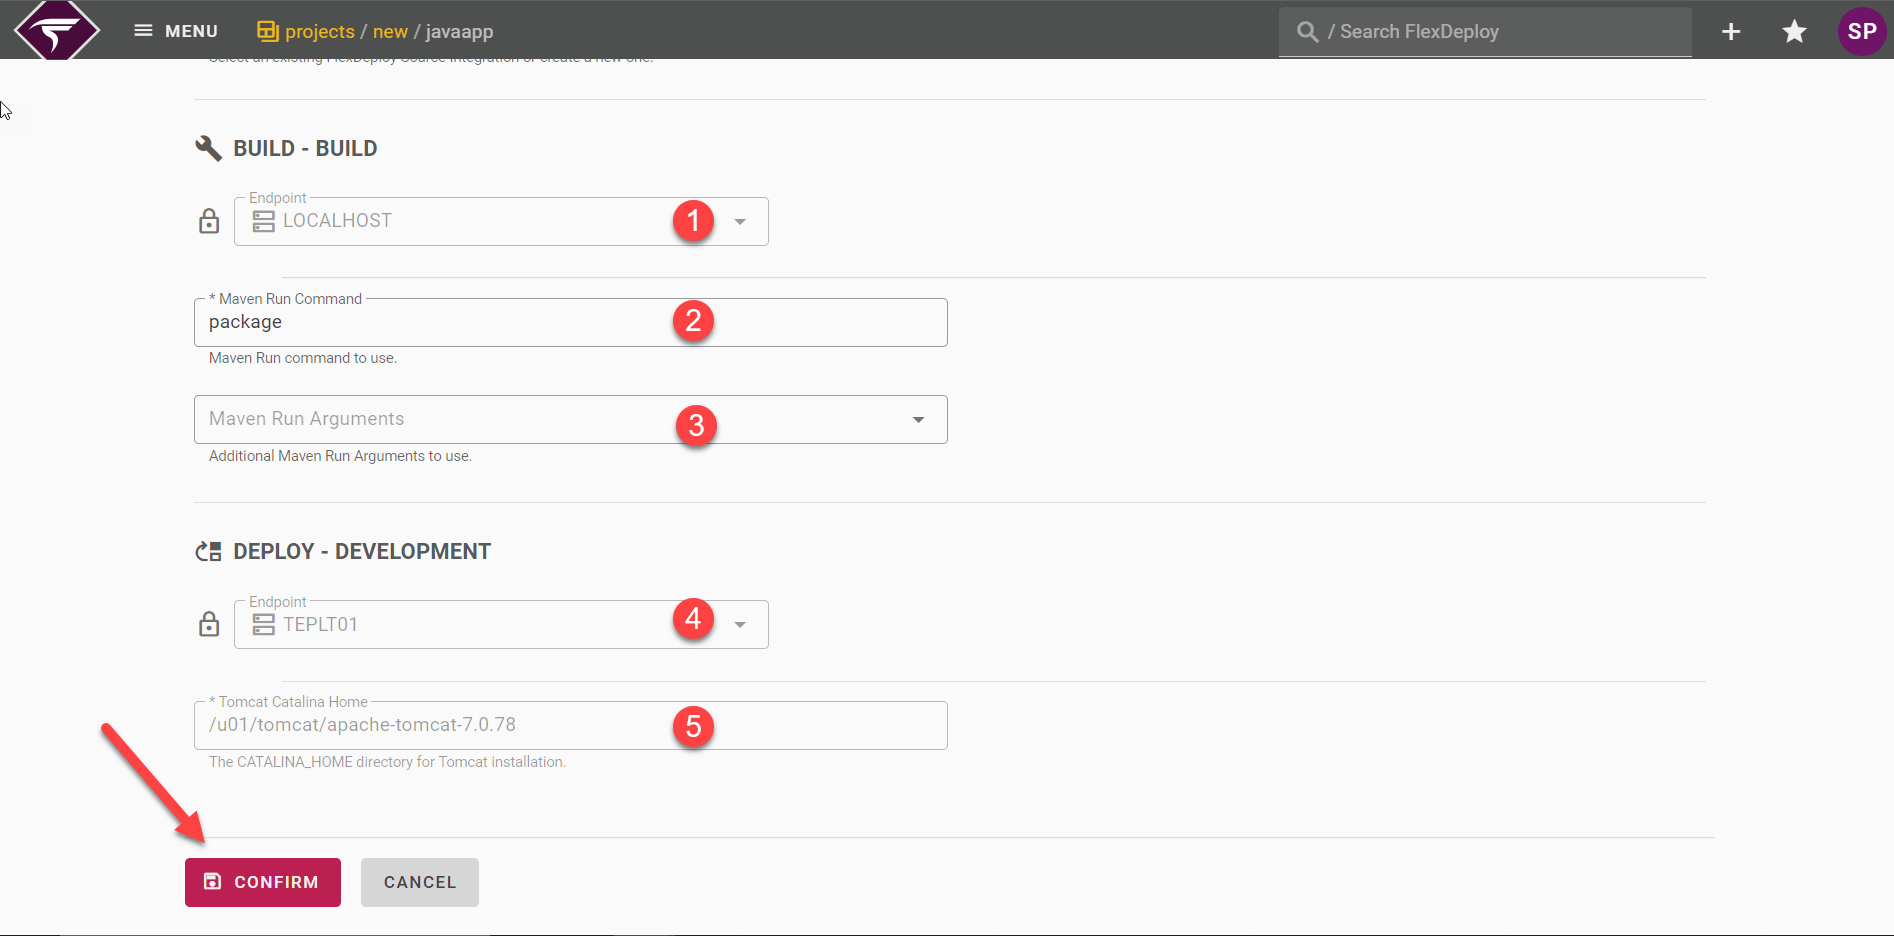
Target Properties
Property Name | Values for this Tutorial | Description |
|---|---|---|
Maven Run Command | package | The Maven Run command to use. |
Maven Run Arguments | Any additional maven run arguments to use. | |
Tomcat Catalina Home | locate this value from your Tomcat server. | The CATALINA_HOME directory for the Tomcat installation. |
Summary
General Configuration
Build and Deploy Workflows
Project Properties
Select the Project Properties tab. These properties are project scoped resources and can be changed per project. The plugin operations that were added to the workflows determine the available project properties that can be configured. Update the Tomcat war and tomcat context root and save the properties.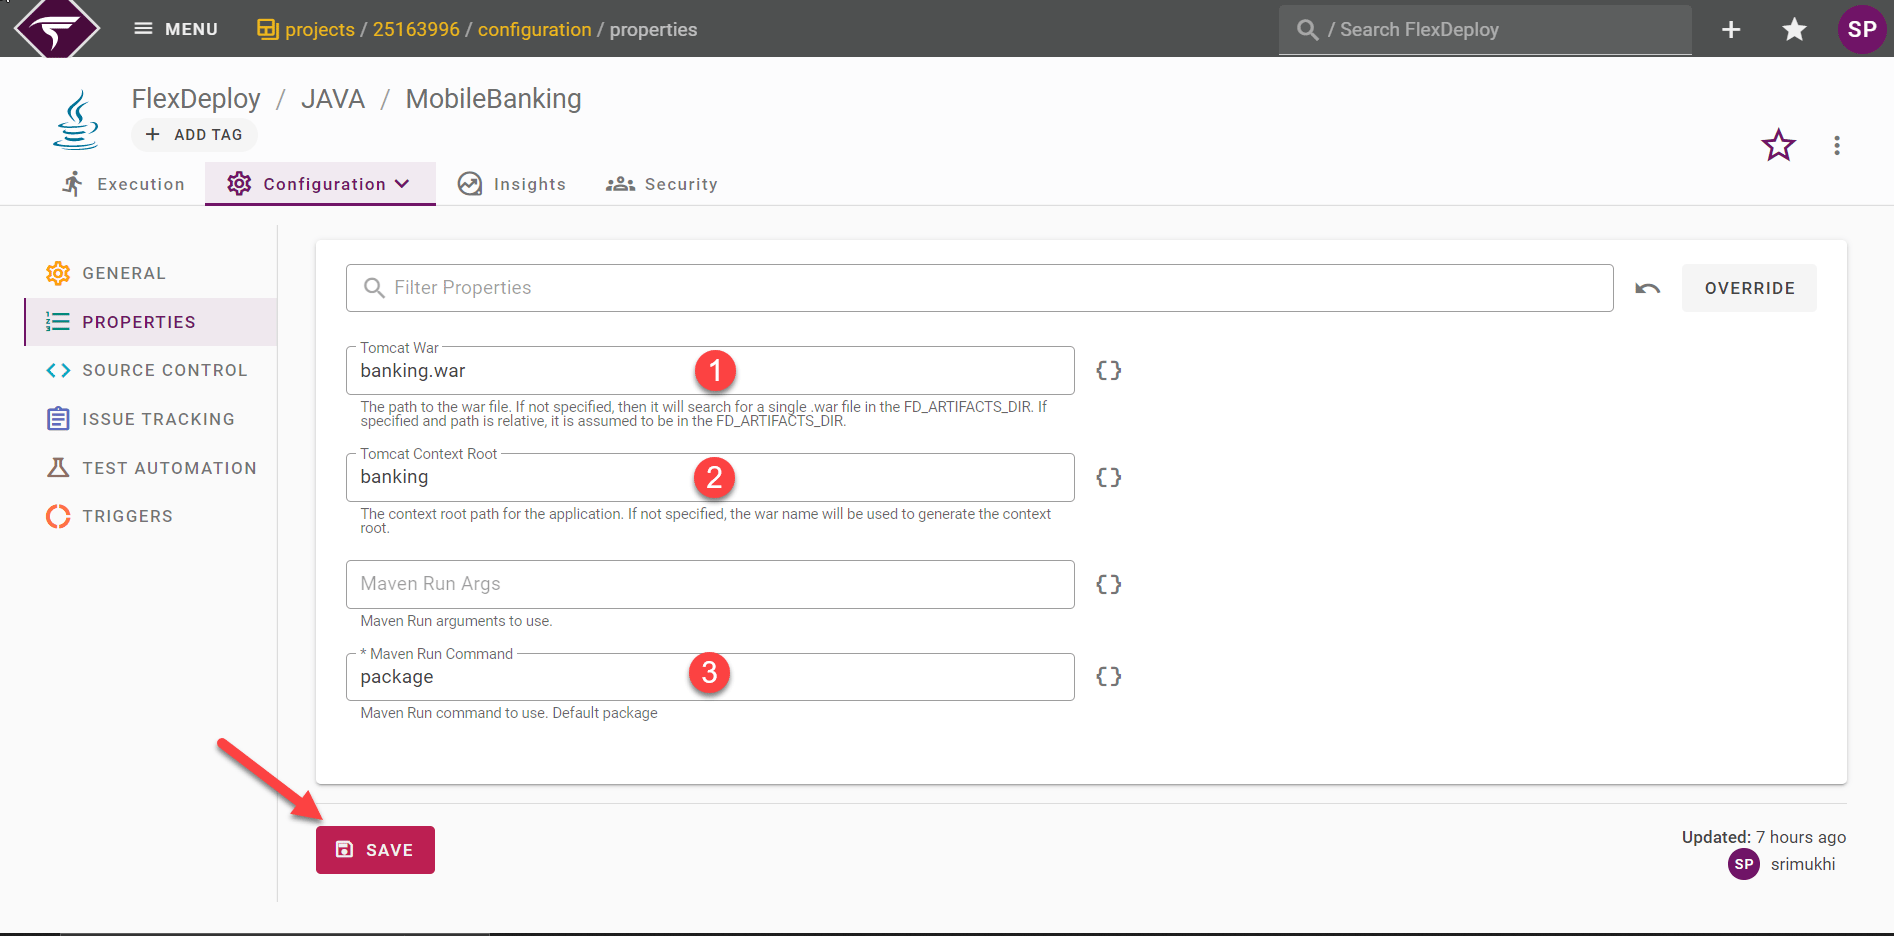
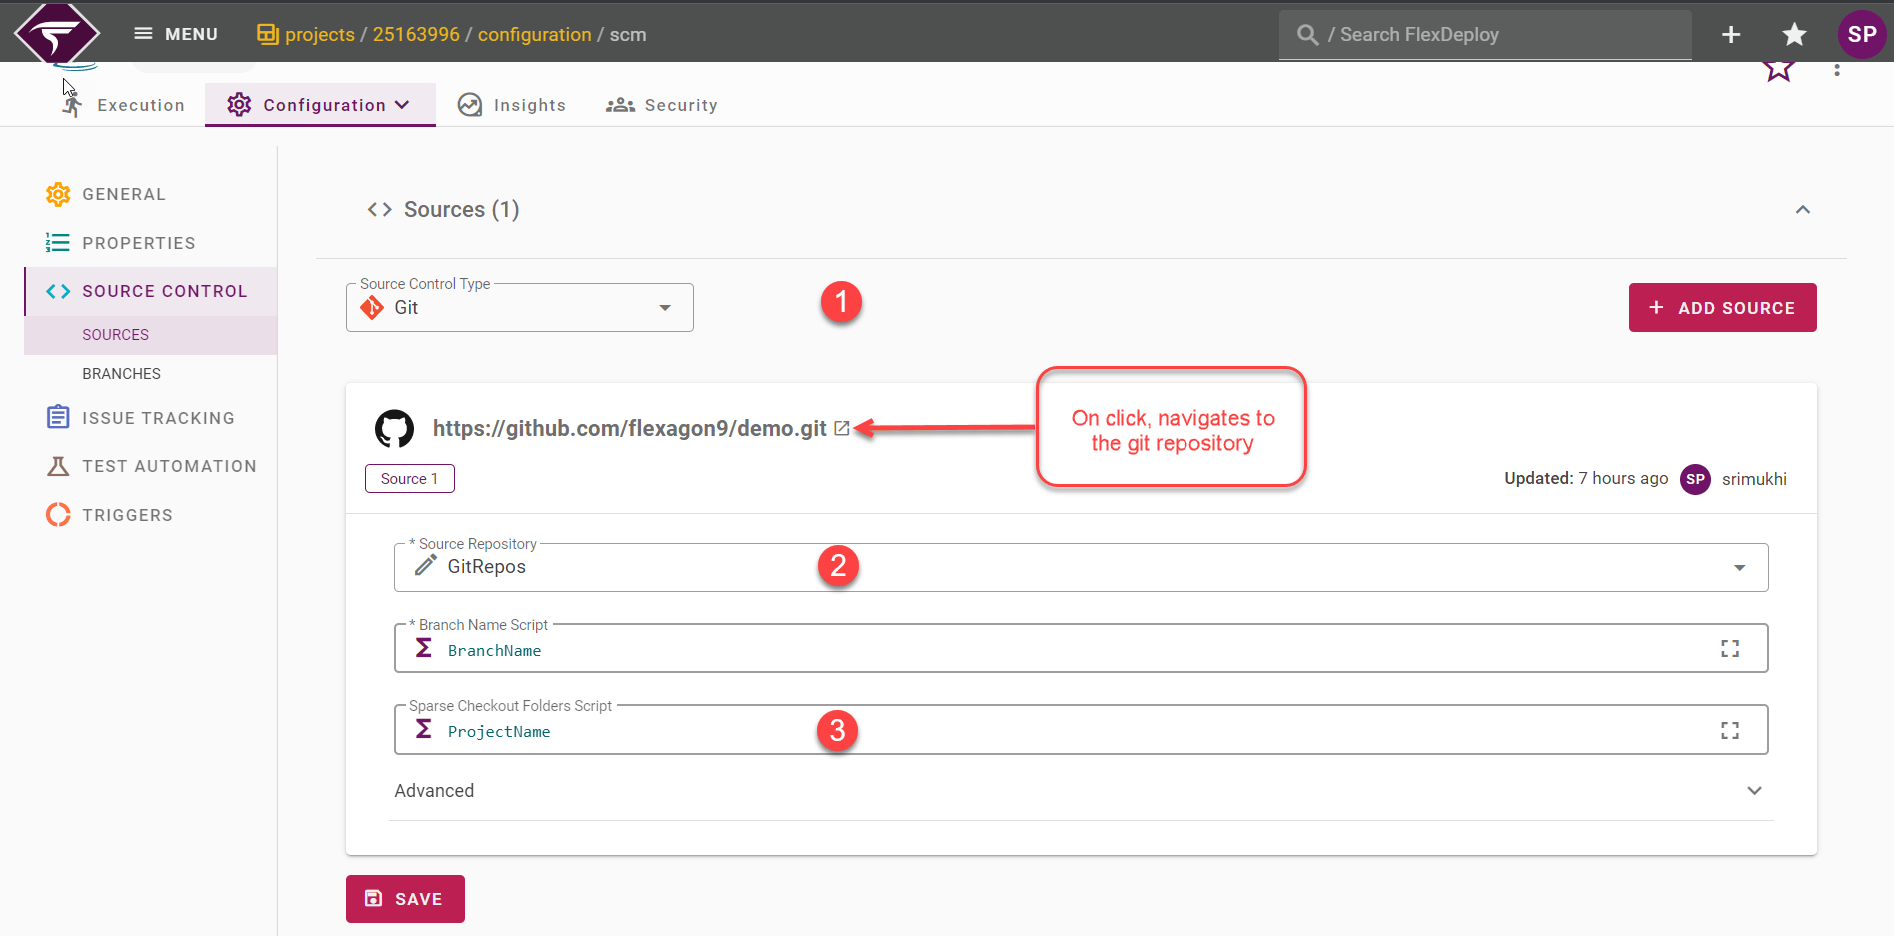
Source Control
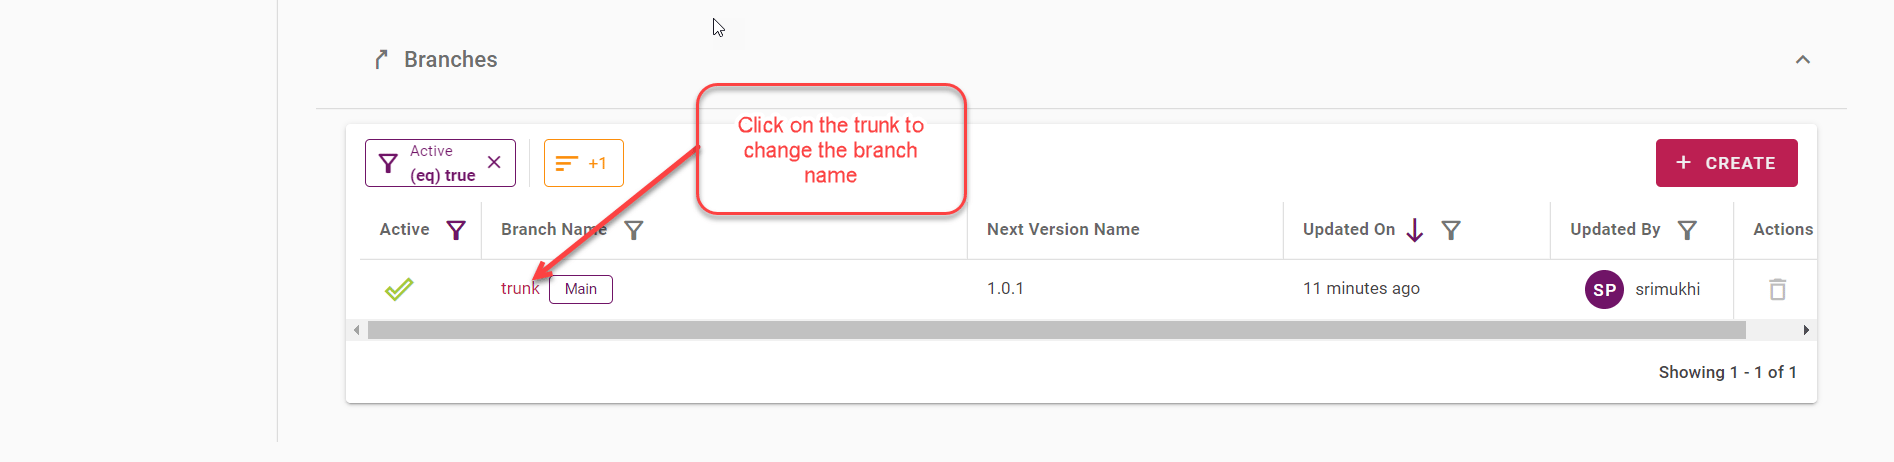
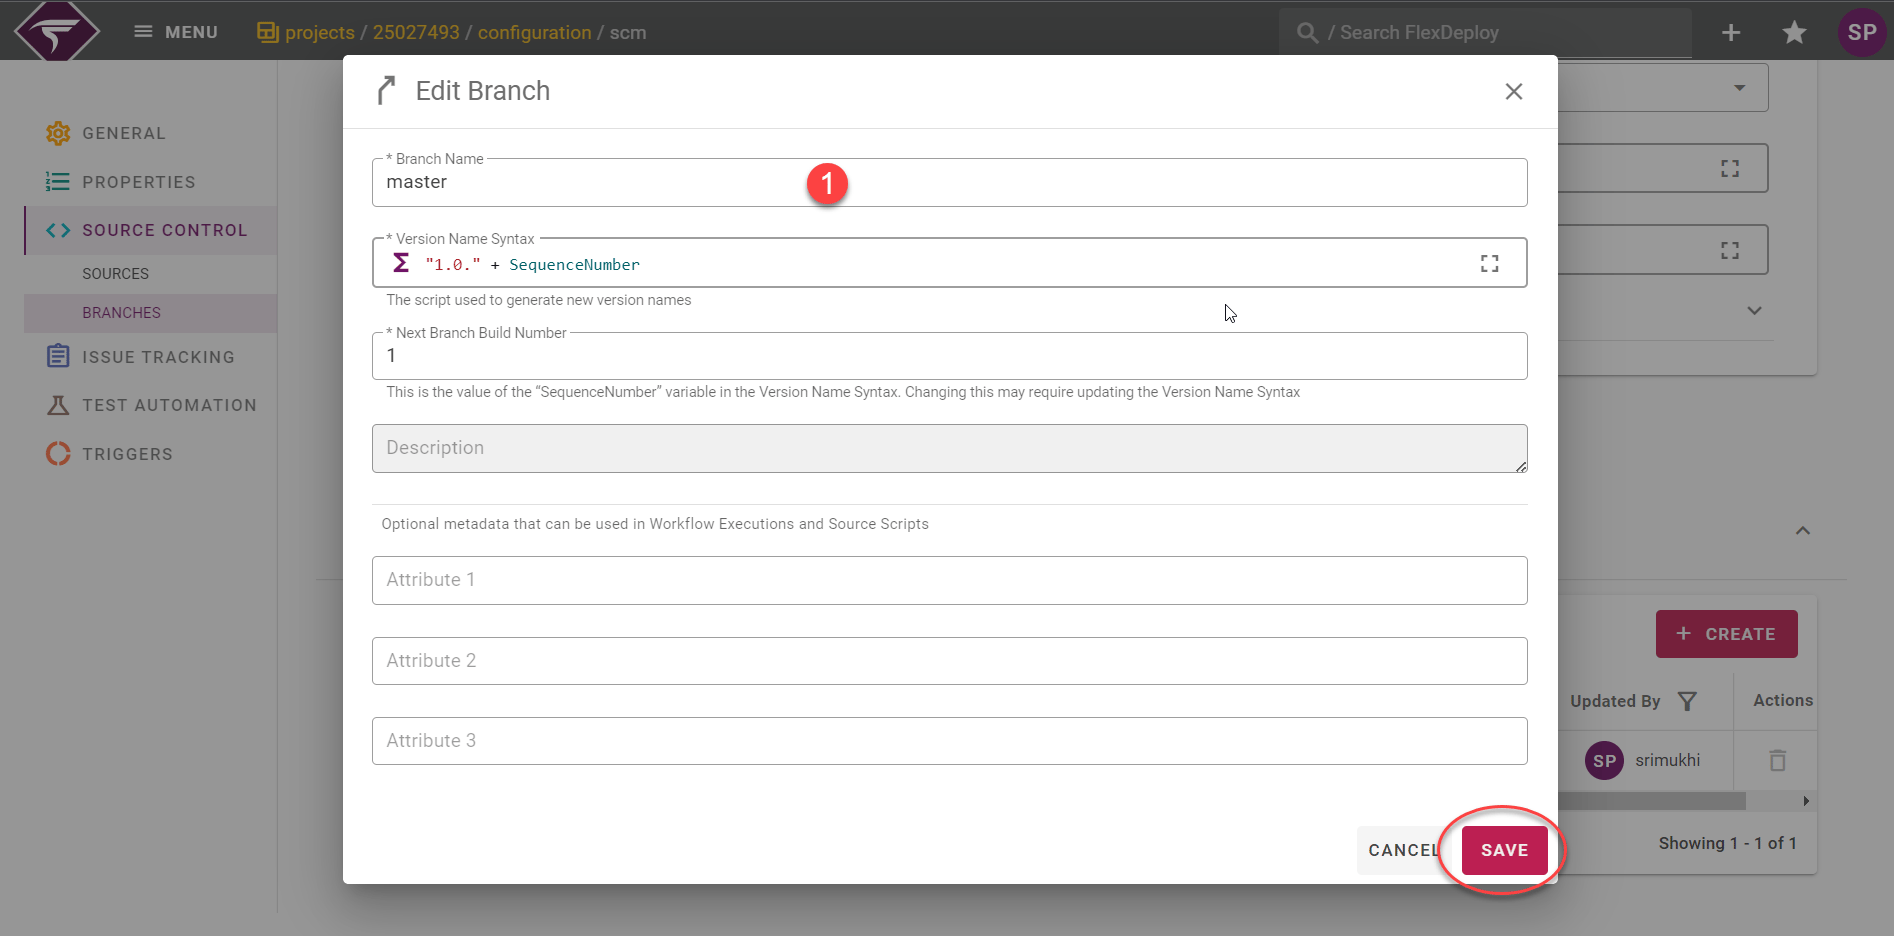
Branch Name
Topology
Navigate to the Topology from the Menu. The Page with the Target Groups, Environments and Endpoints sections will be displayed. Choose a Target Group on the left. You will see a list of Environments on the right with colored circles representing each Target.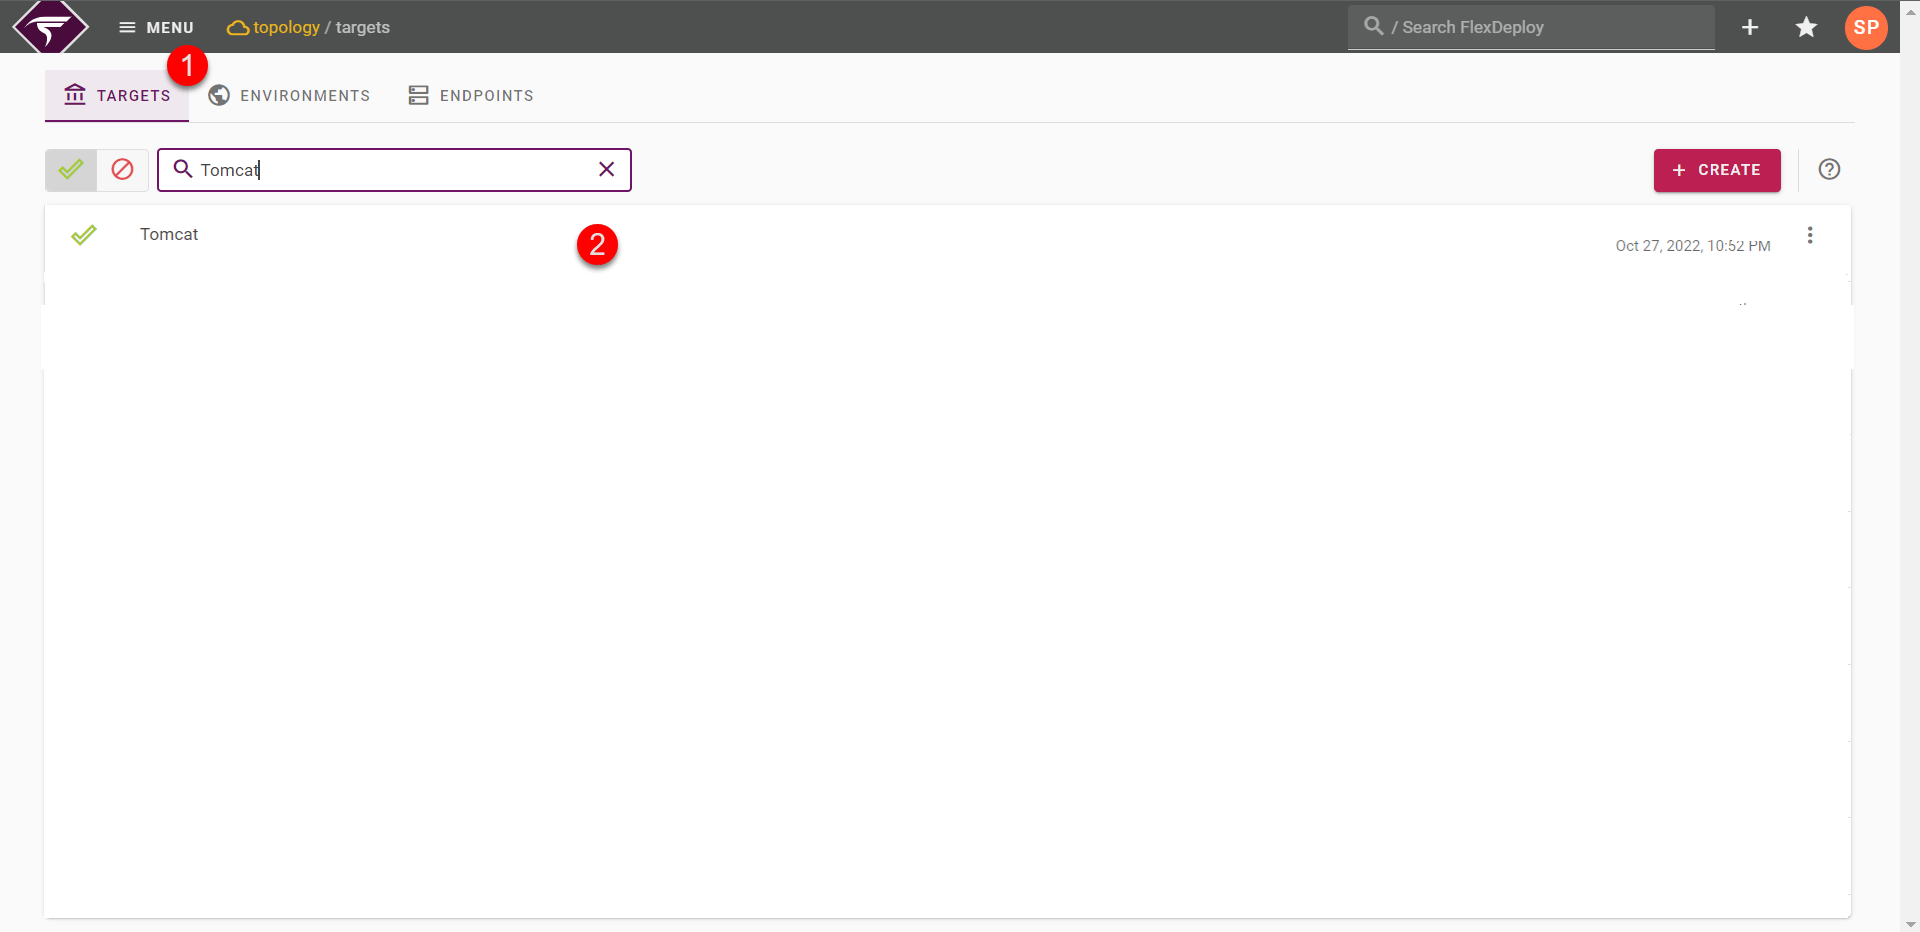
- RED - The Endpoint is not configured
- YELLOW - some of the required properties are not set,
- GREEN - all required properties are set and the Endpoint is configured
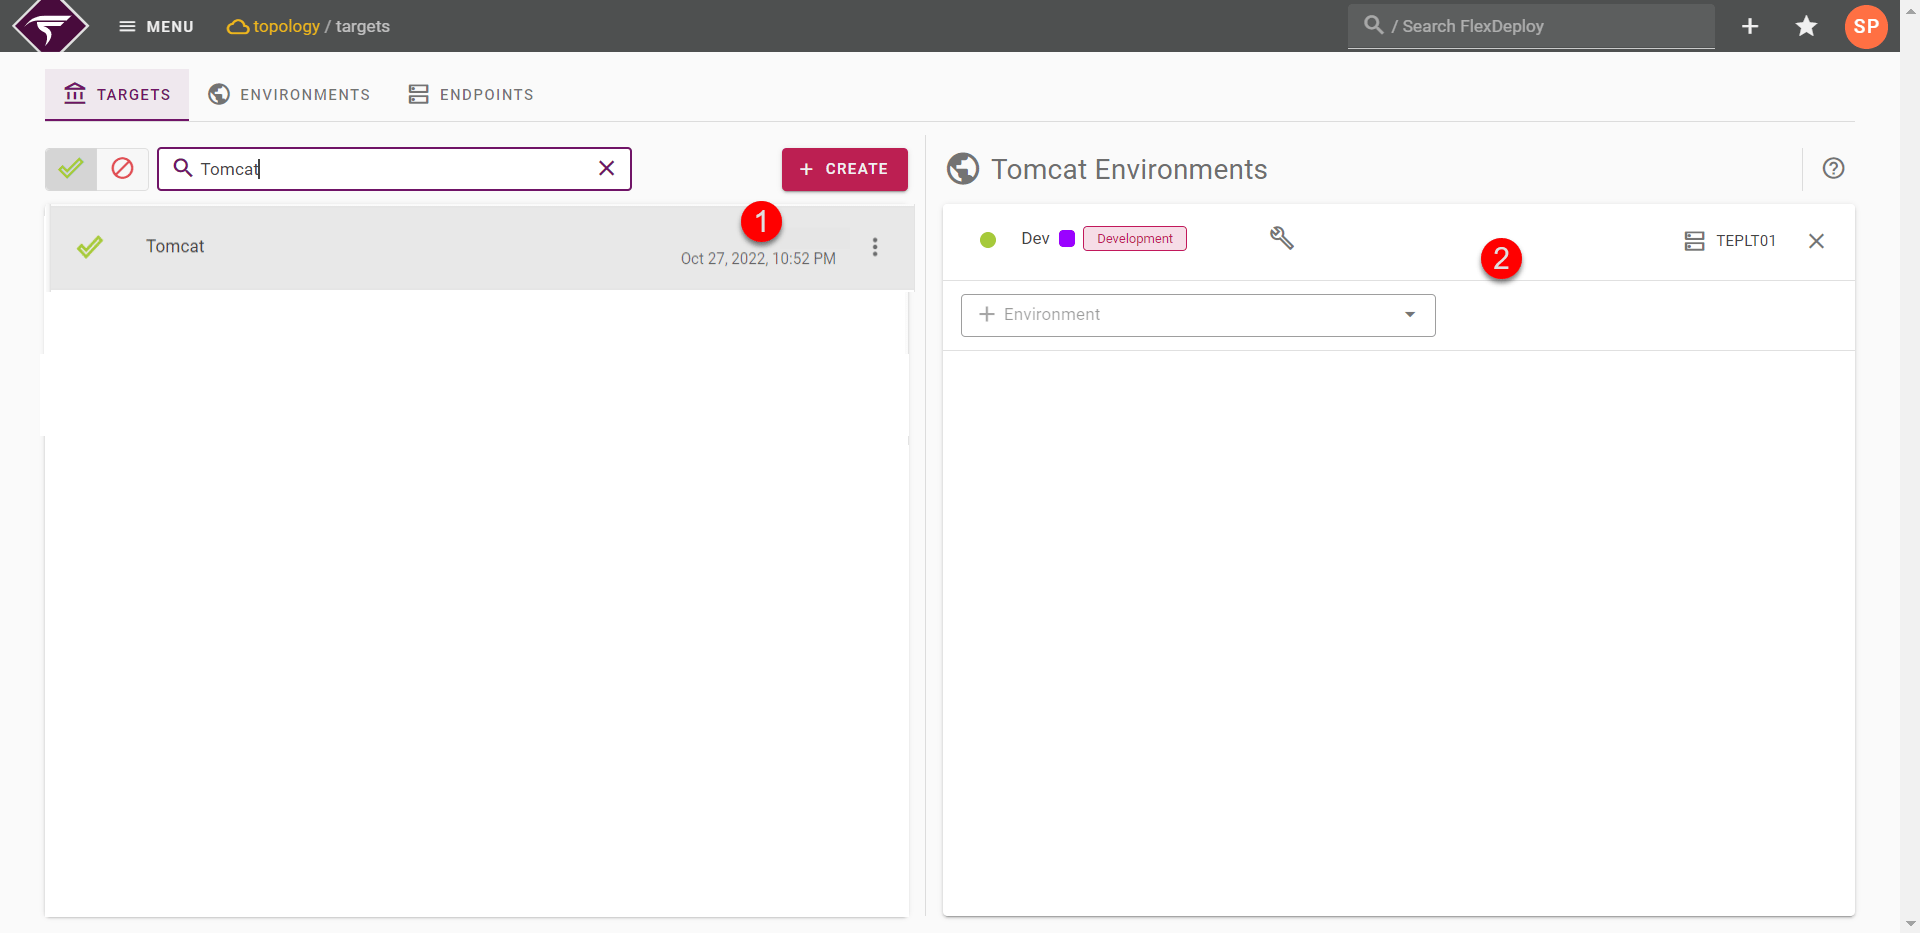
Targets Properties
Clicking the environment row for DEV allows modifying the Endpoint and properties.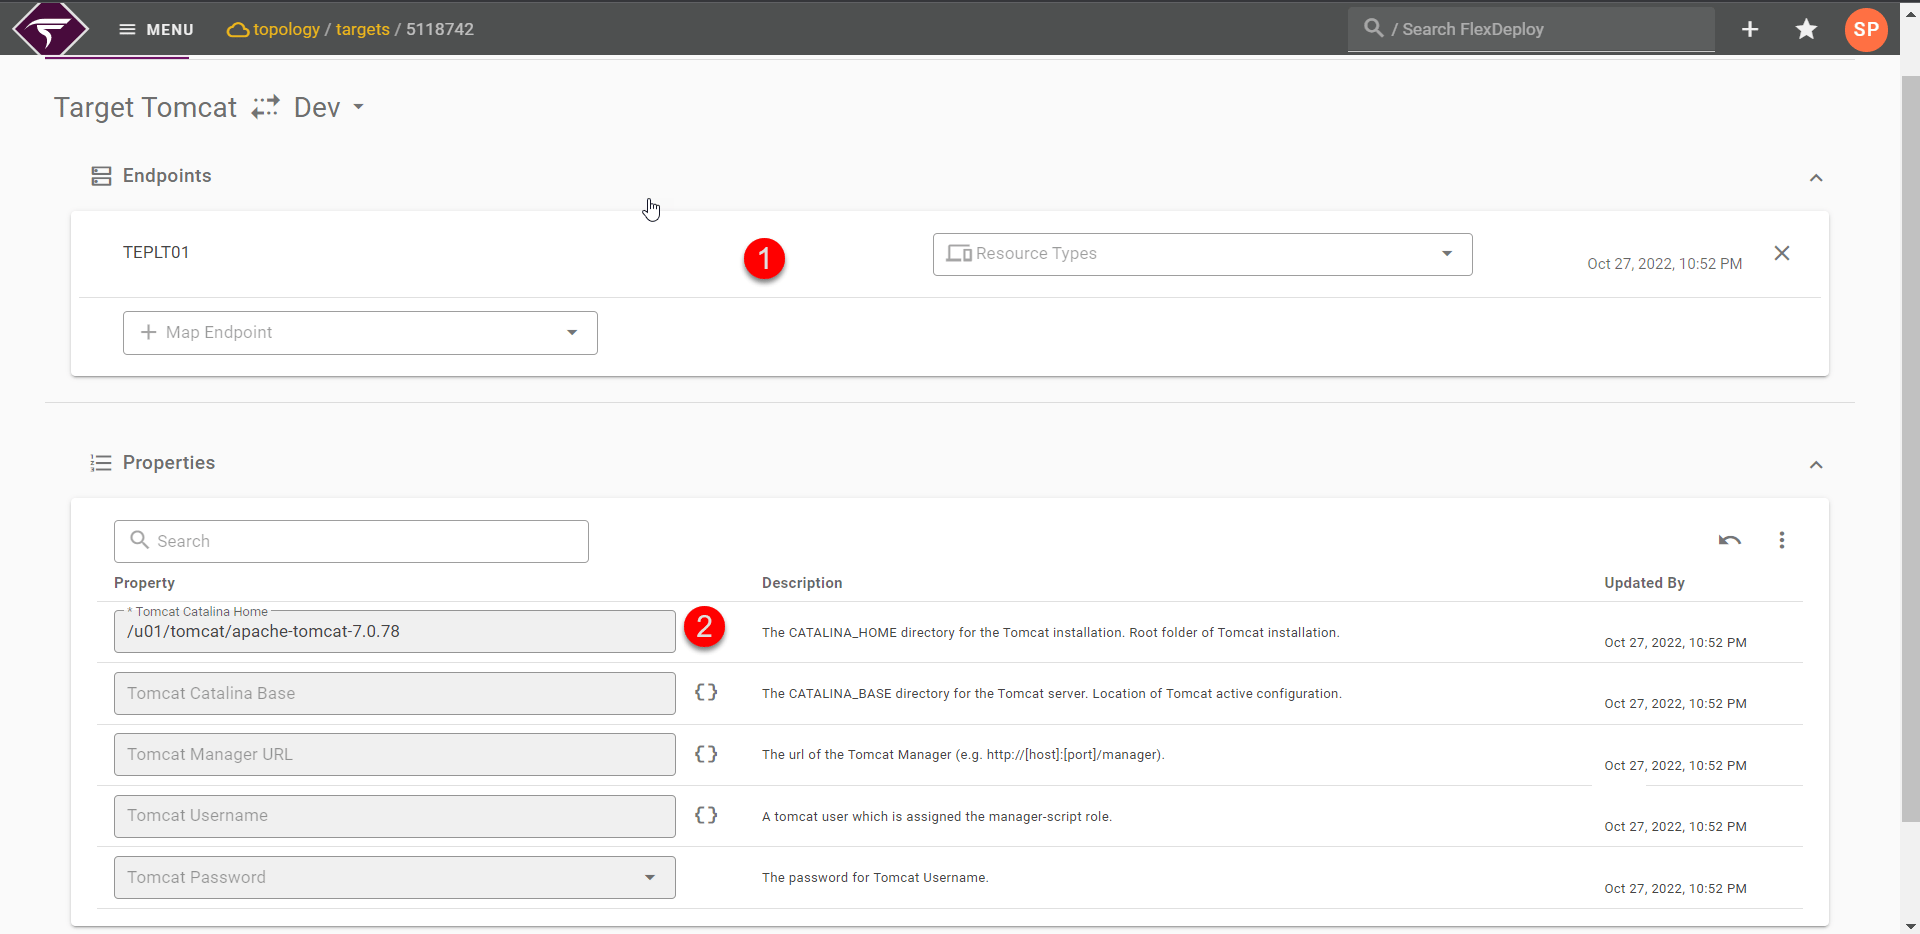
Build Execution
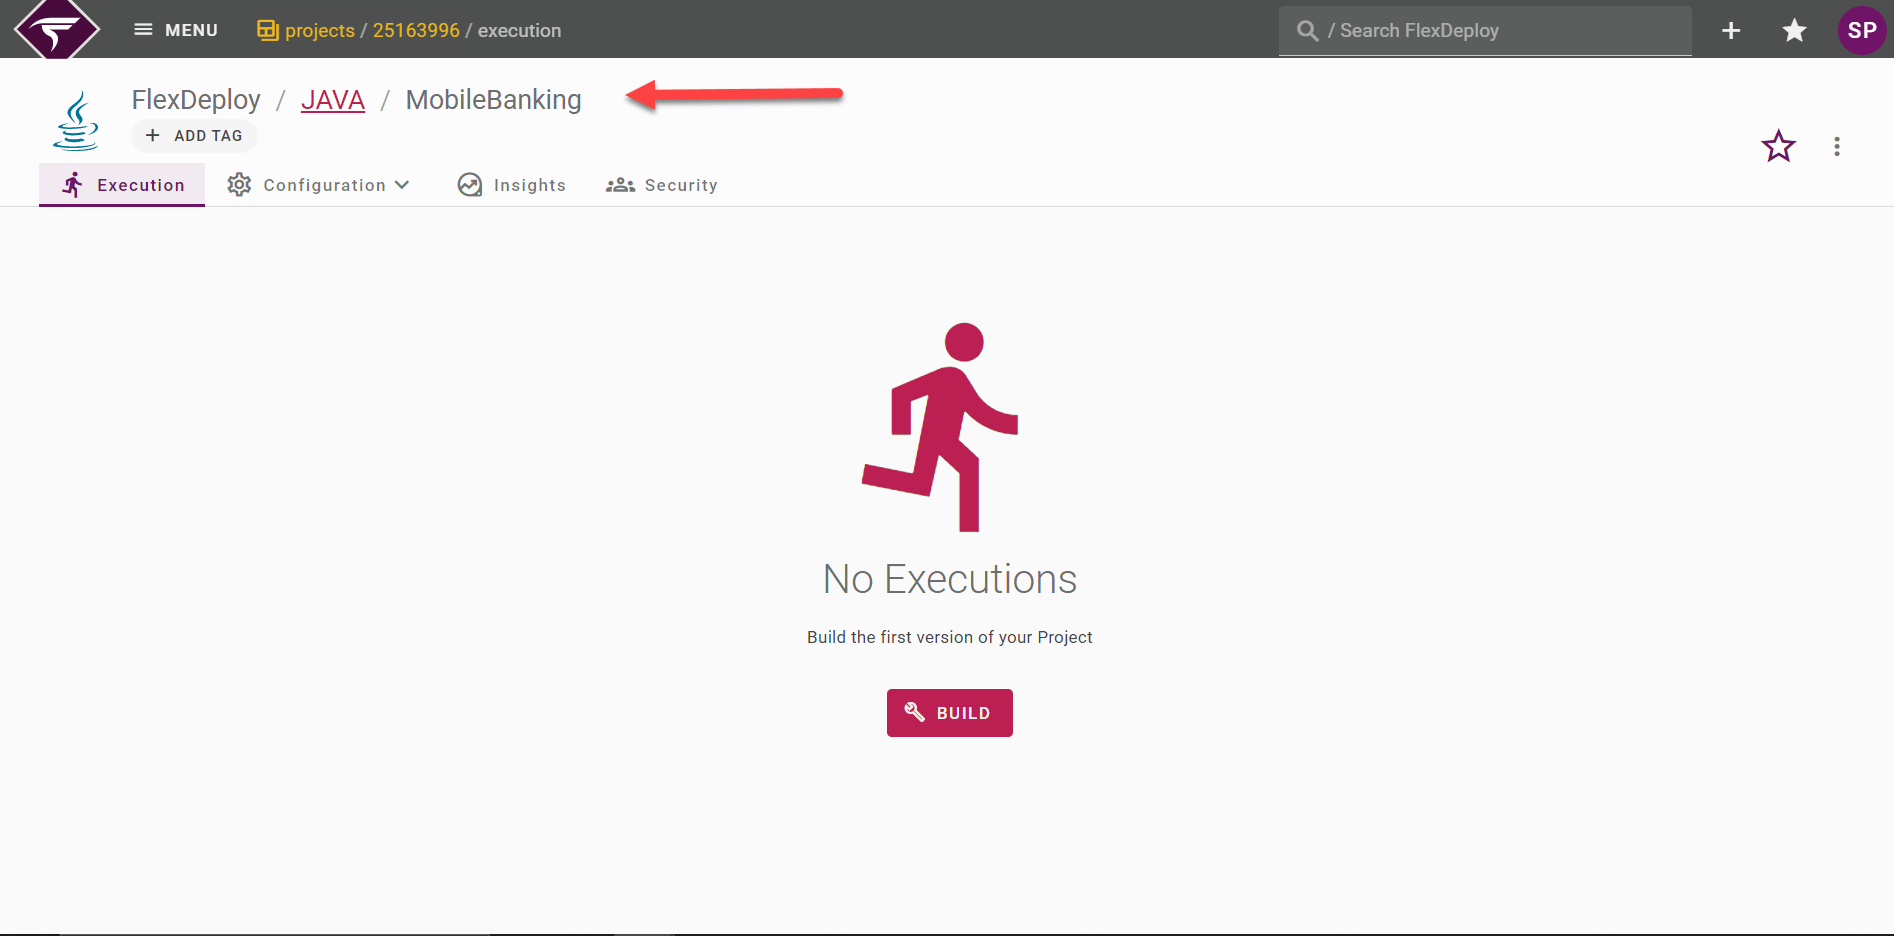
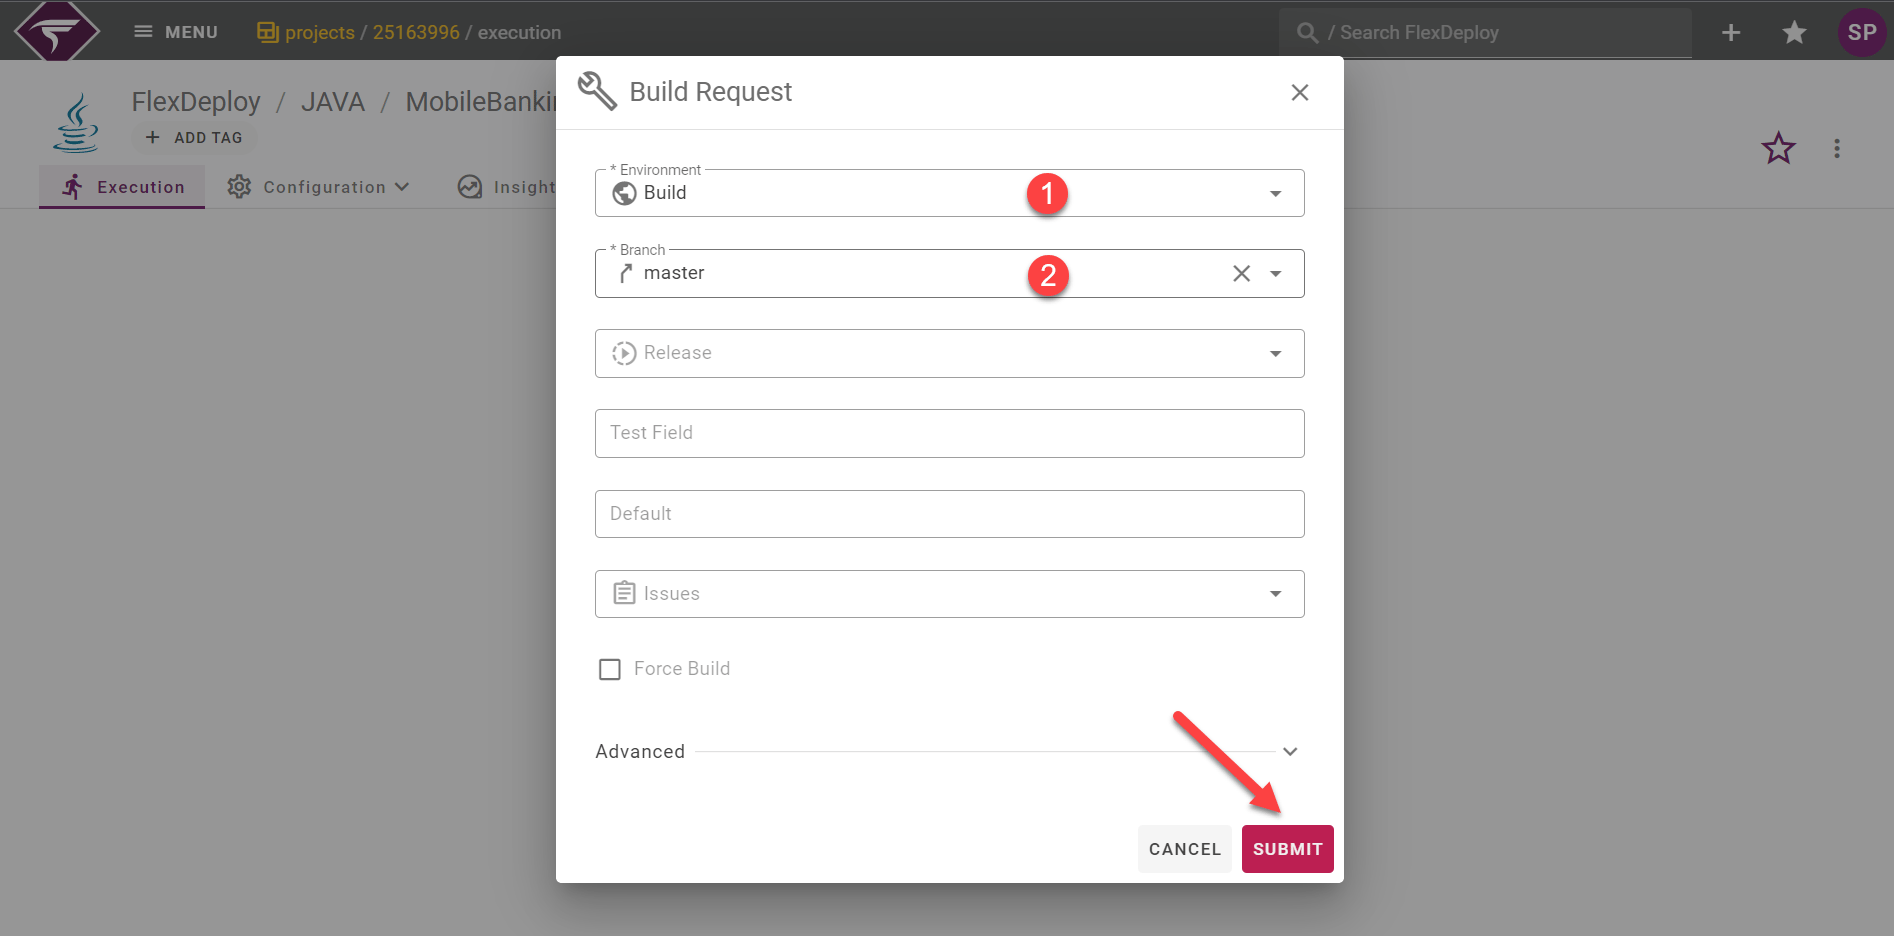
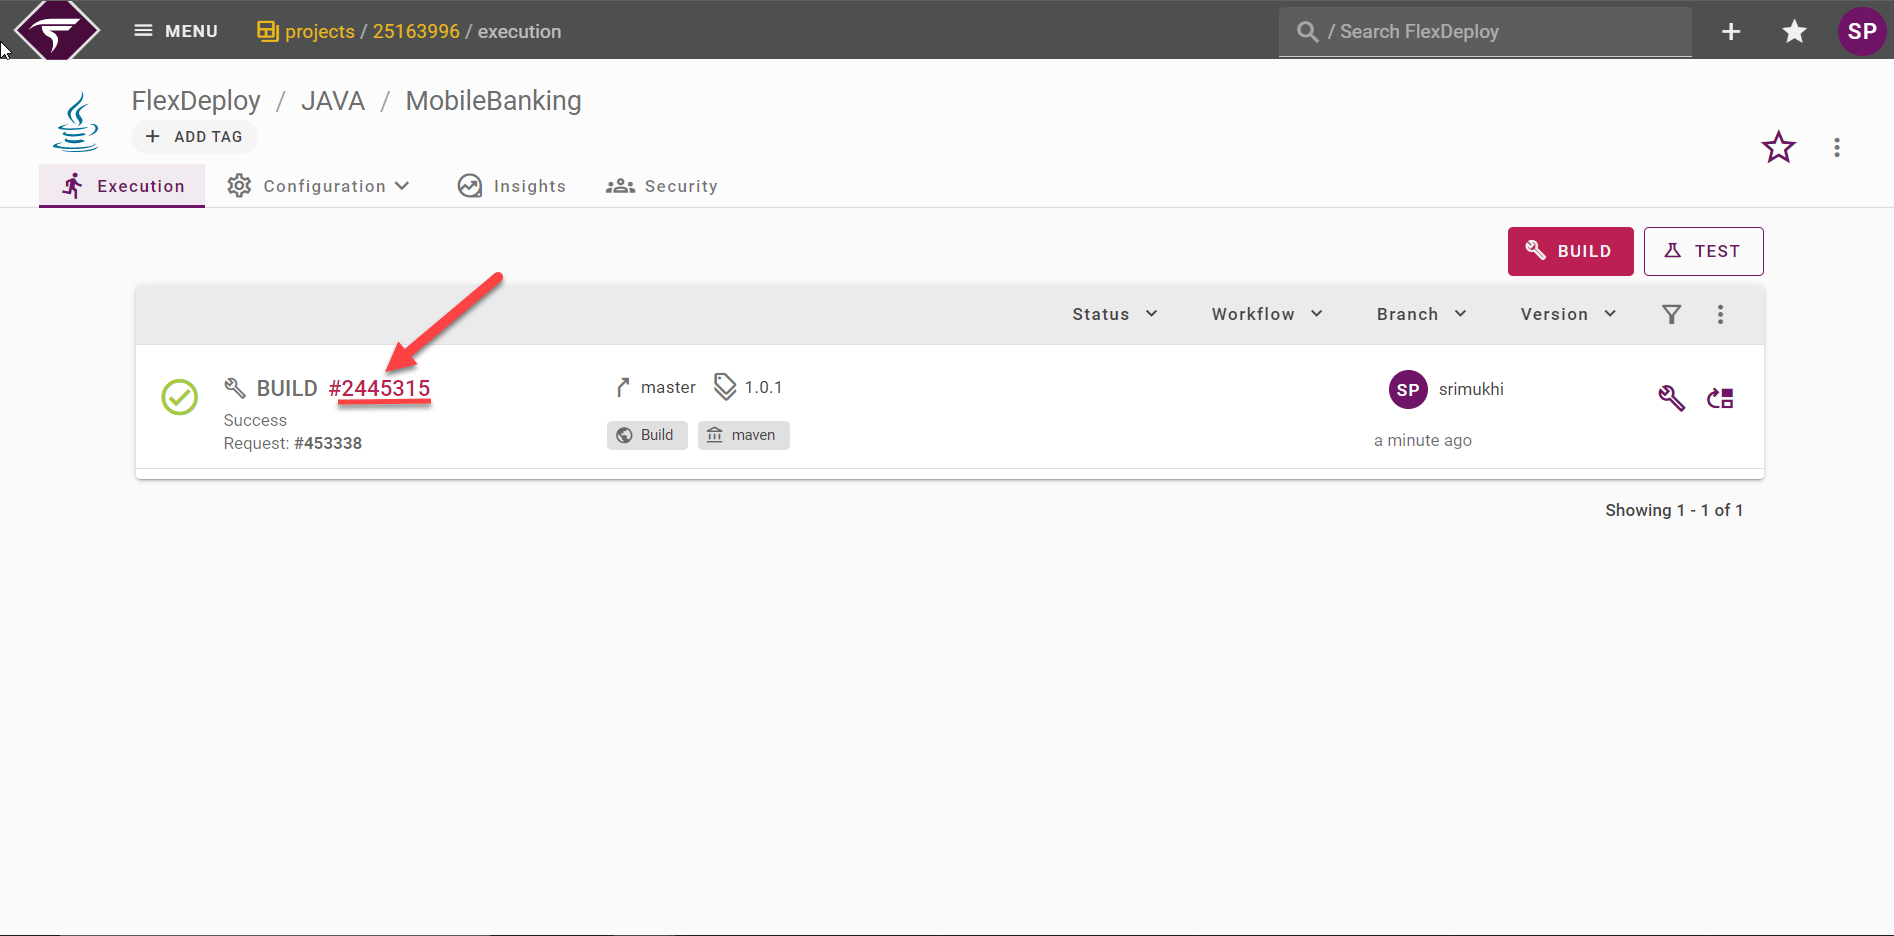
FlexDeploy is configured with everything that is required to execute a build and deploy request for the ADF application, we can execute the first build. On the Project, select the Execution tab and select the Build button.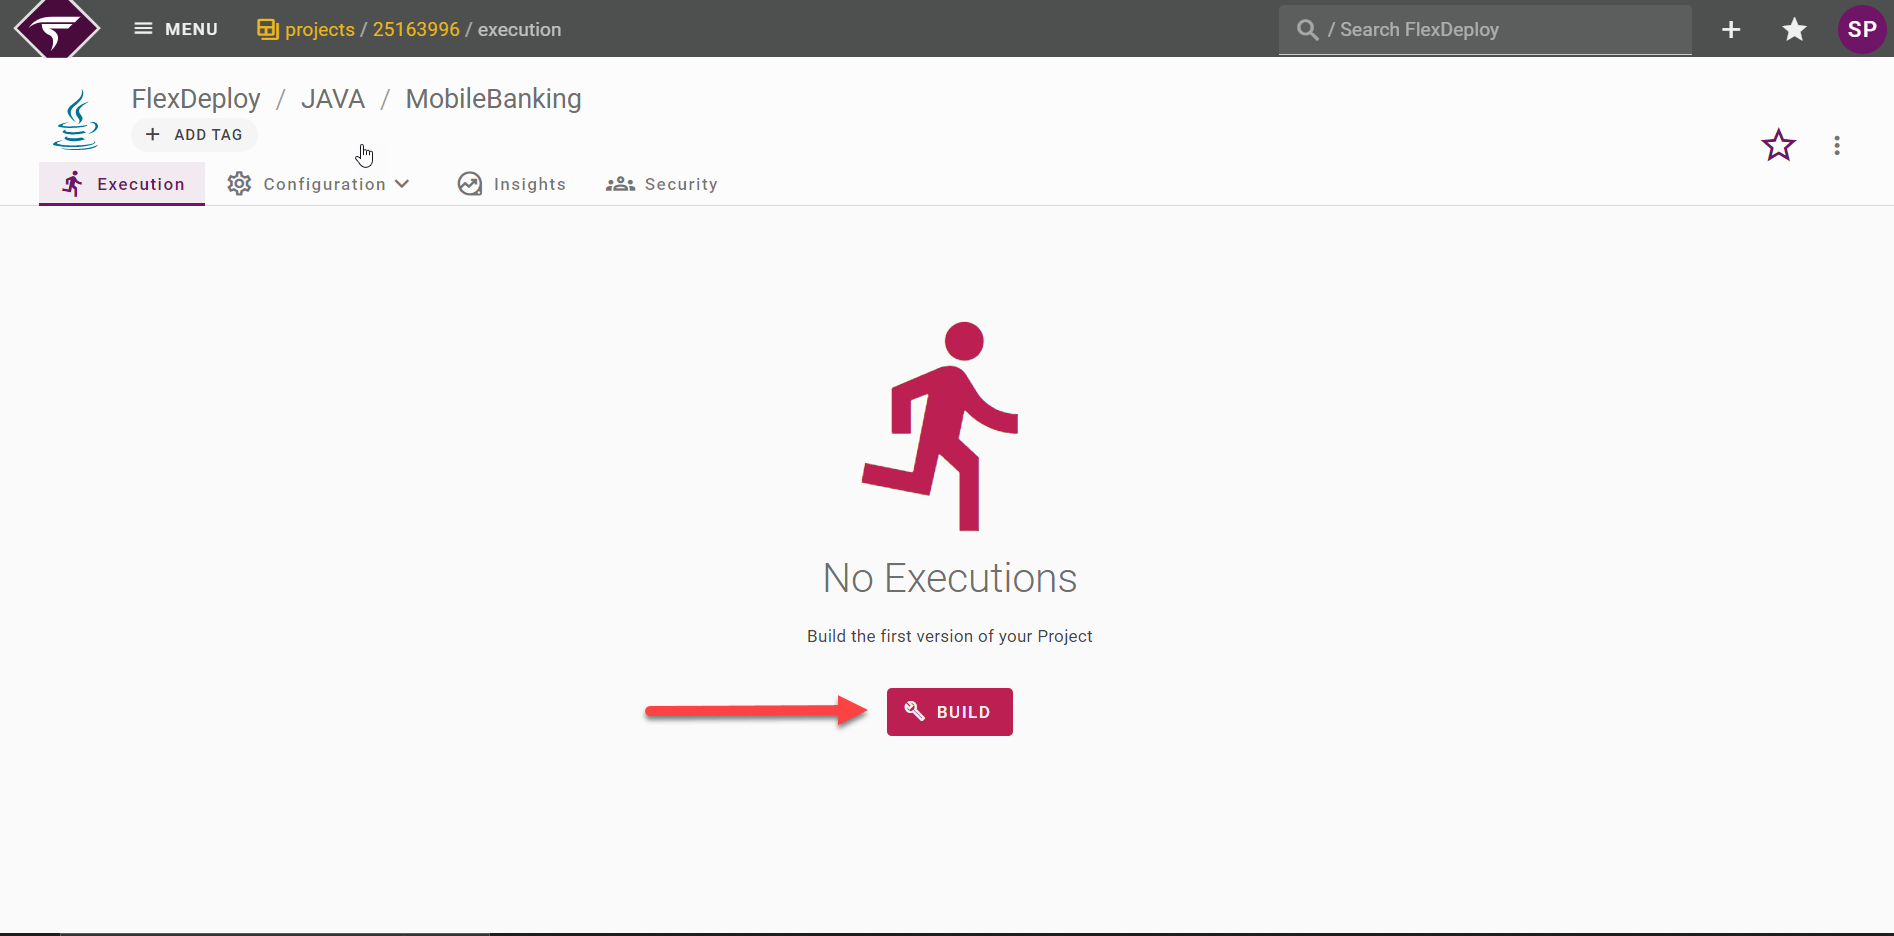
- select the environment we want to build the application in, the environments that had the Build Environment checkbox will appear in the dropdown.
- select the SCM Branch that was configured on the project, this will be pre-populated if there is only one configured Branch.
- submit the request, this will initiate the mavenBuild workflow.
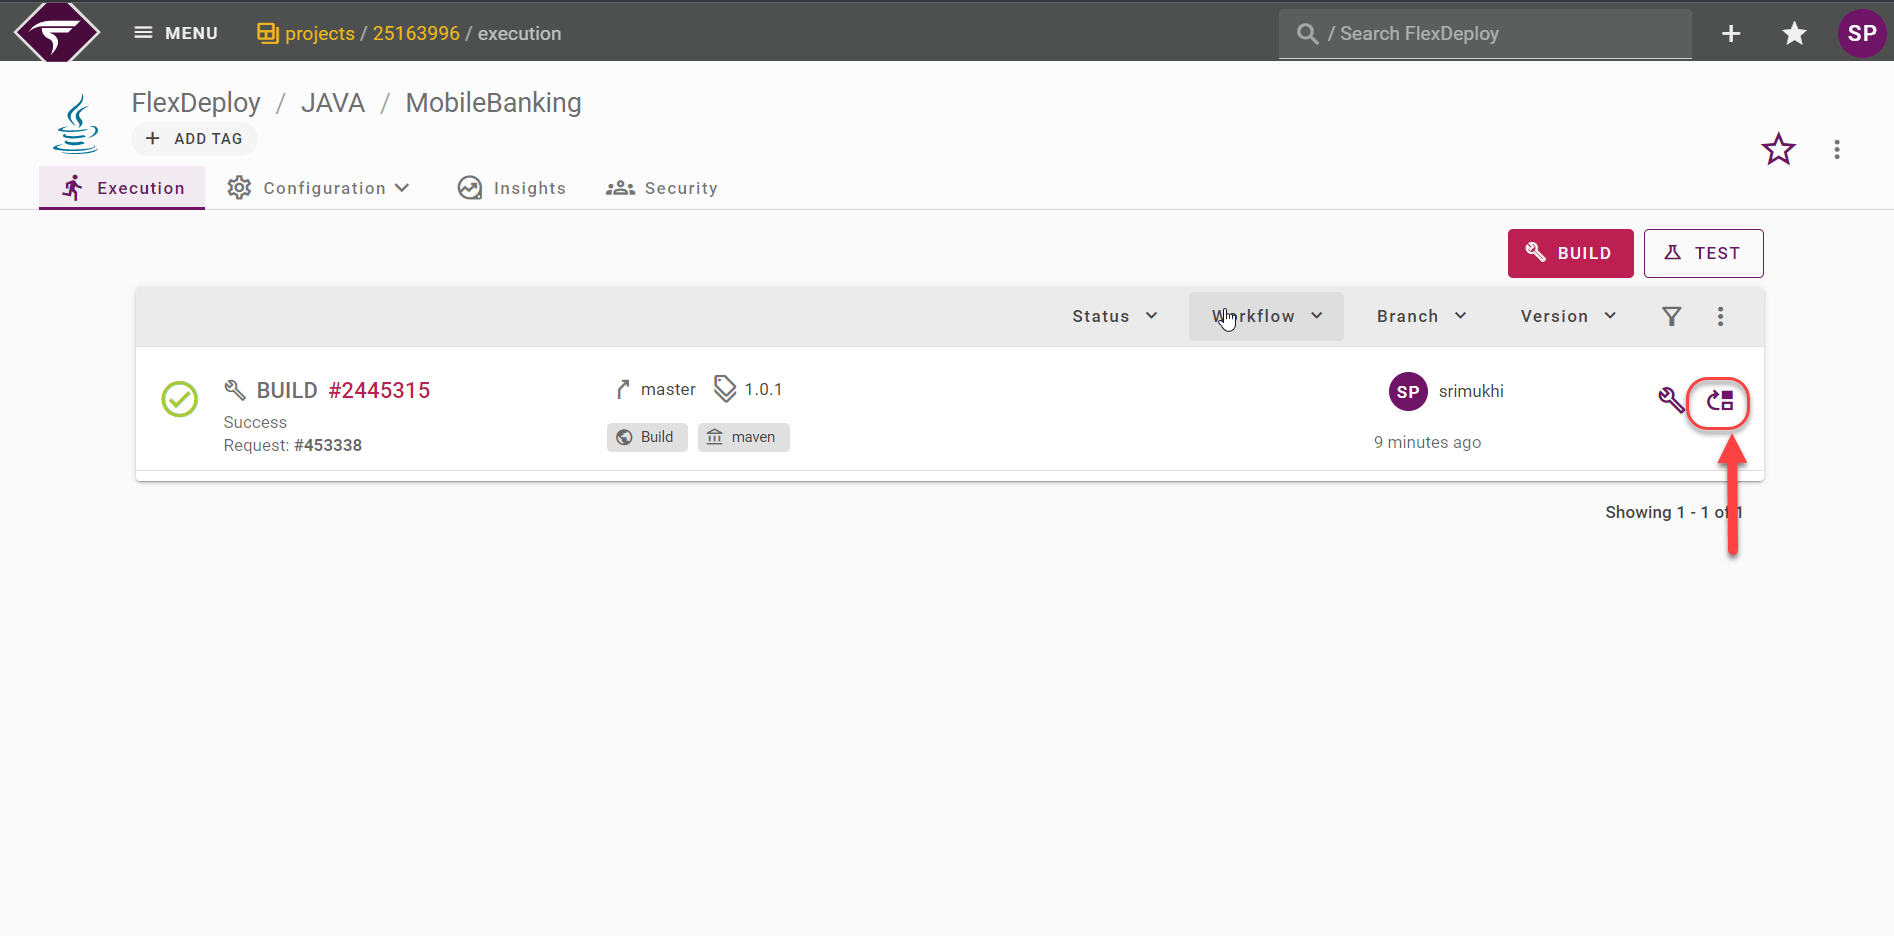
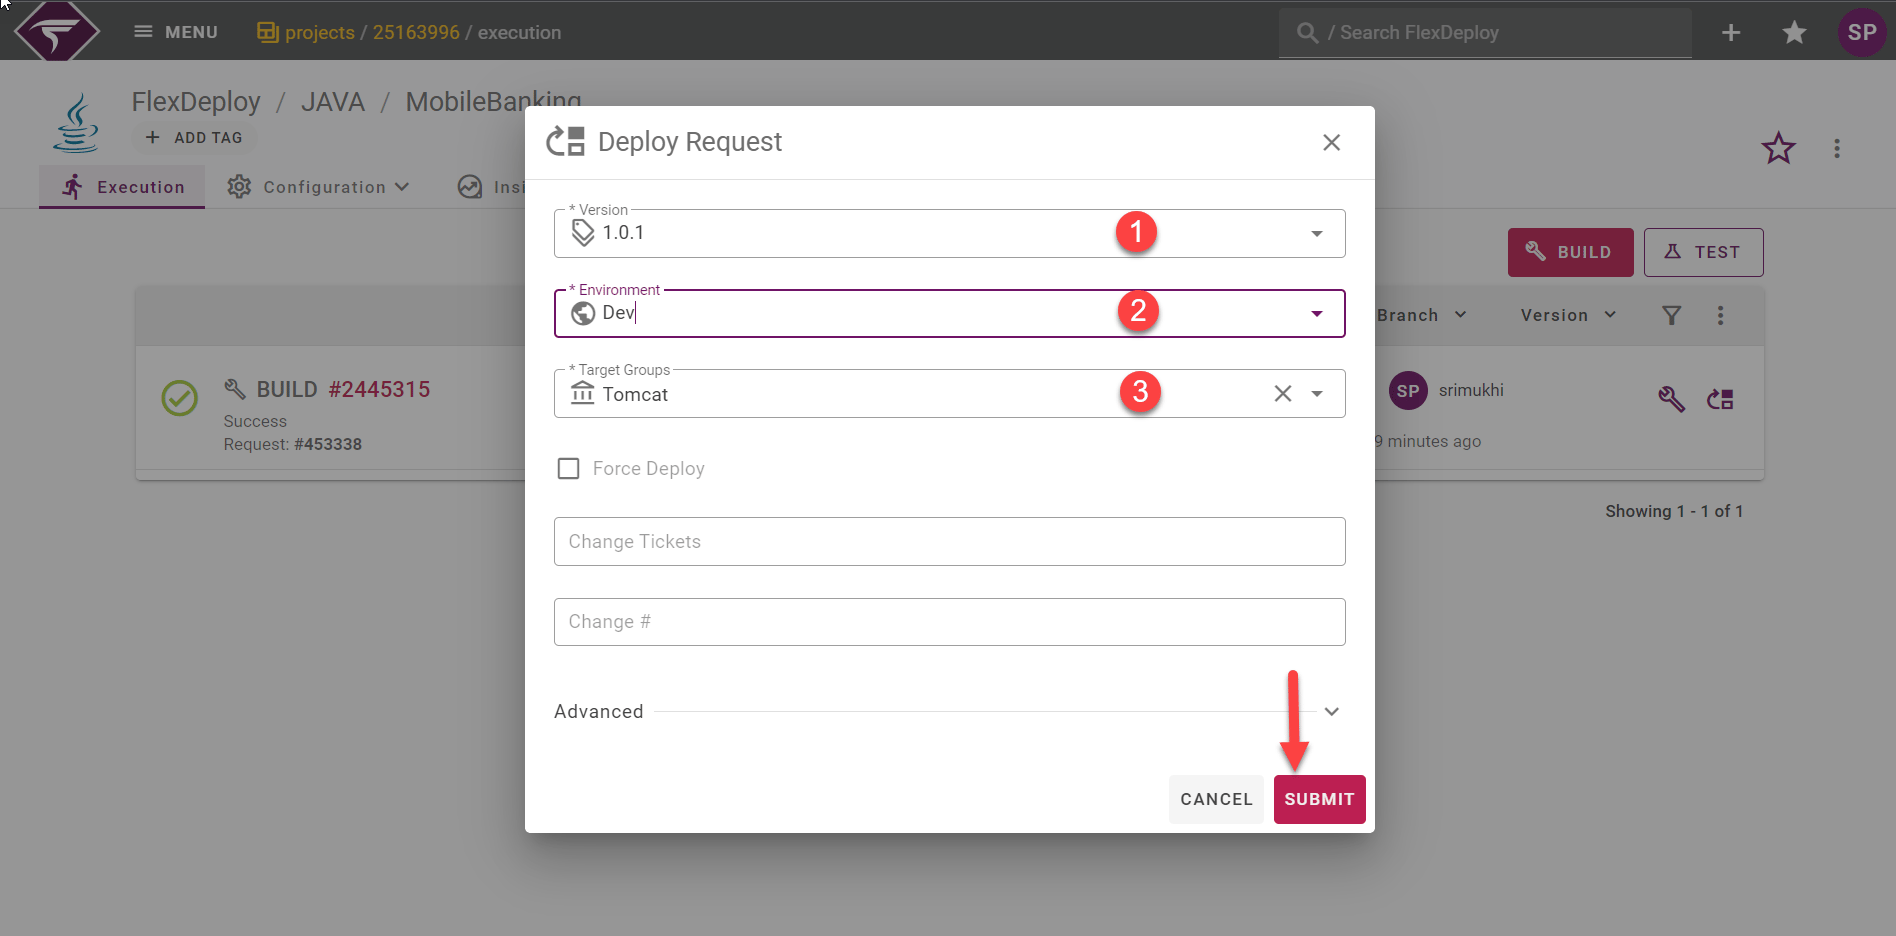
- Select the Project Version. The form will default to the latest Project Version but the dropdown will contain all previously create Project Versions.
- Select the environment that the deployment will be executed in.
- Select the Deploy Target Group, which will be defaulted from the Project configuration. Deployments can happen on multiple instances.
- Submit the request, which will initiate the application Deploy workflow.
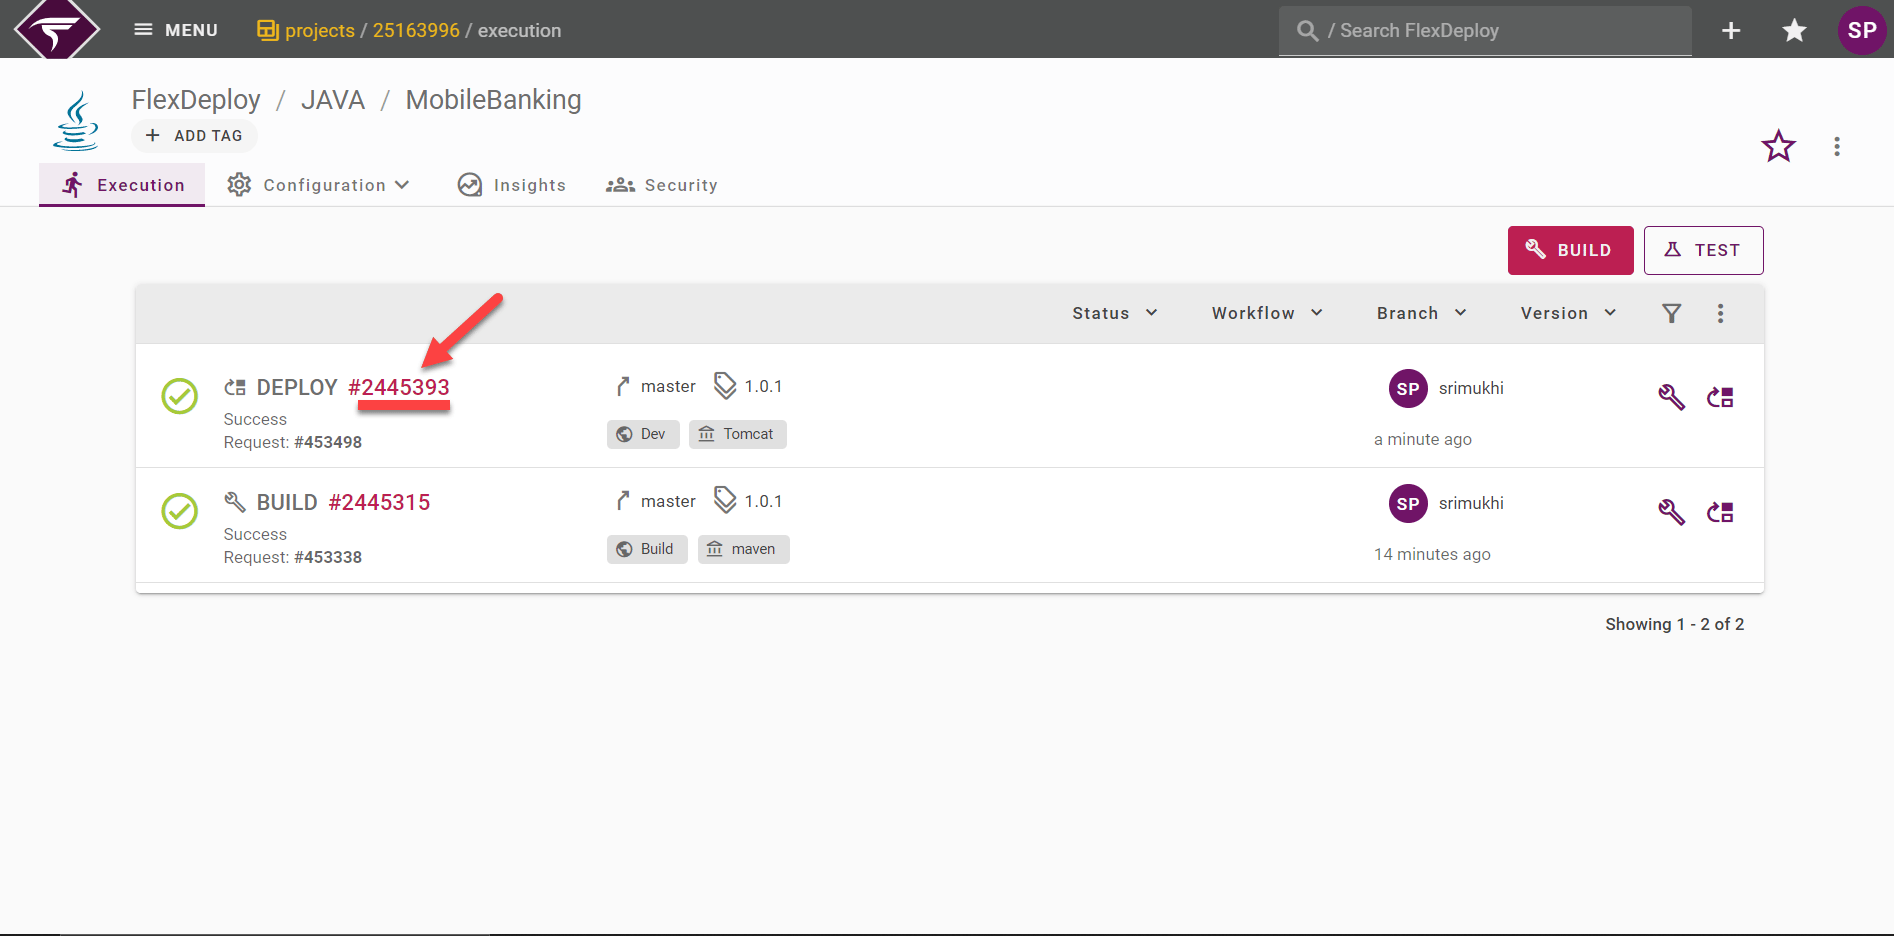
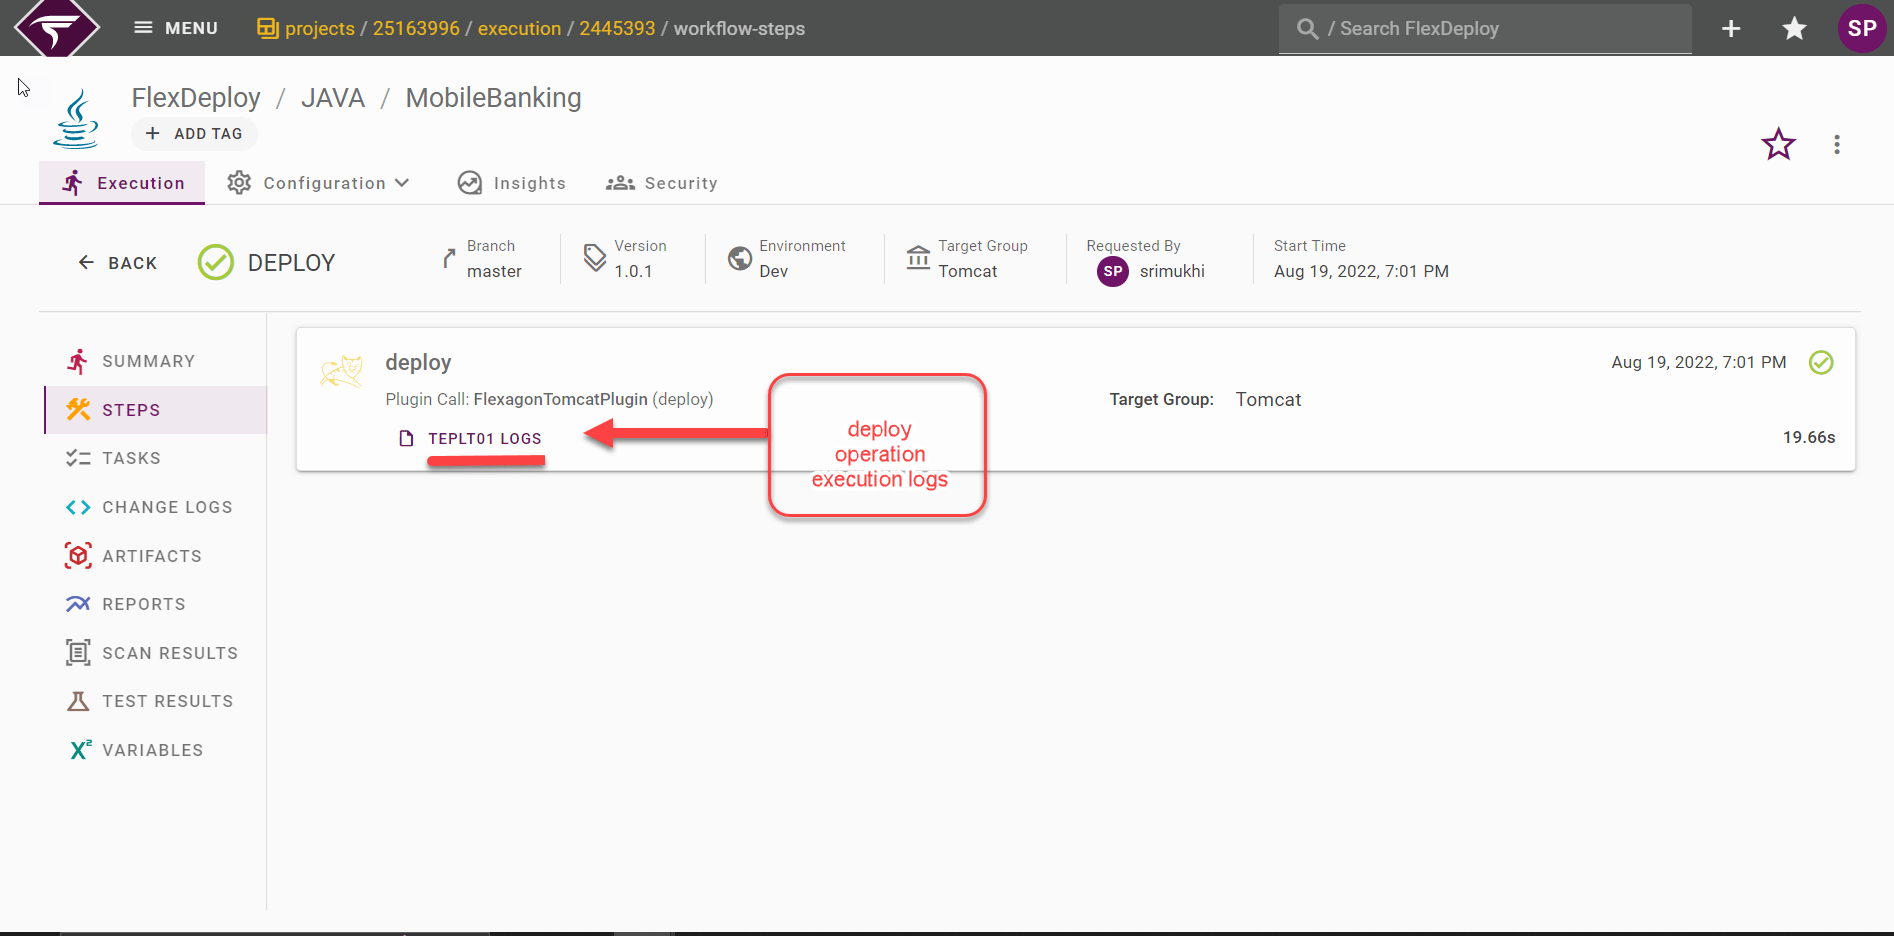
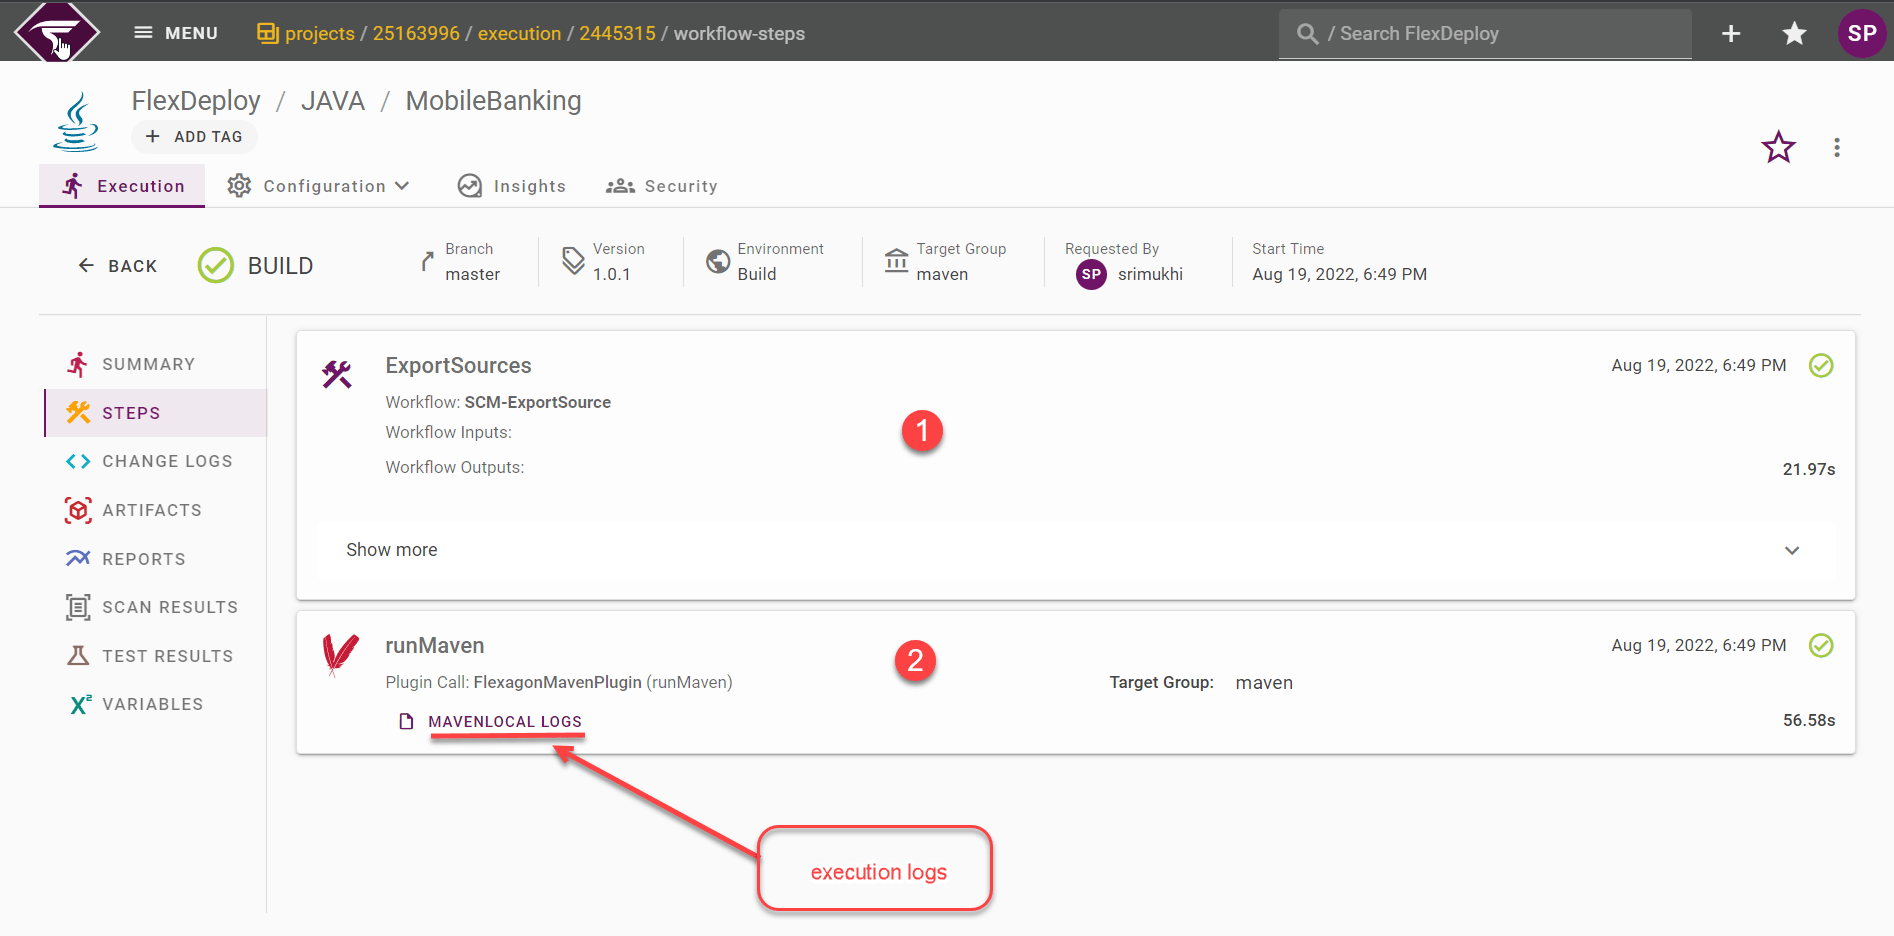
- the workflow execution steps
- the logs for each workflow step, which can be viewed by clicking on the link under the step
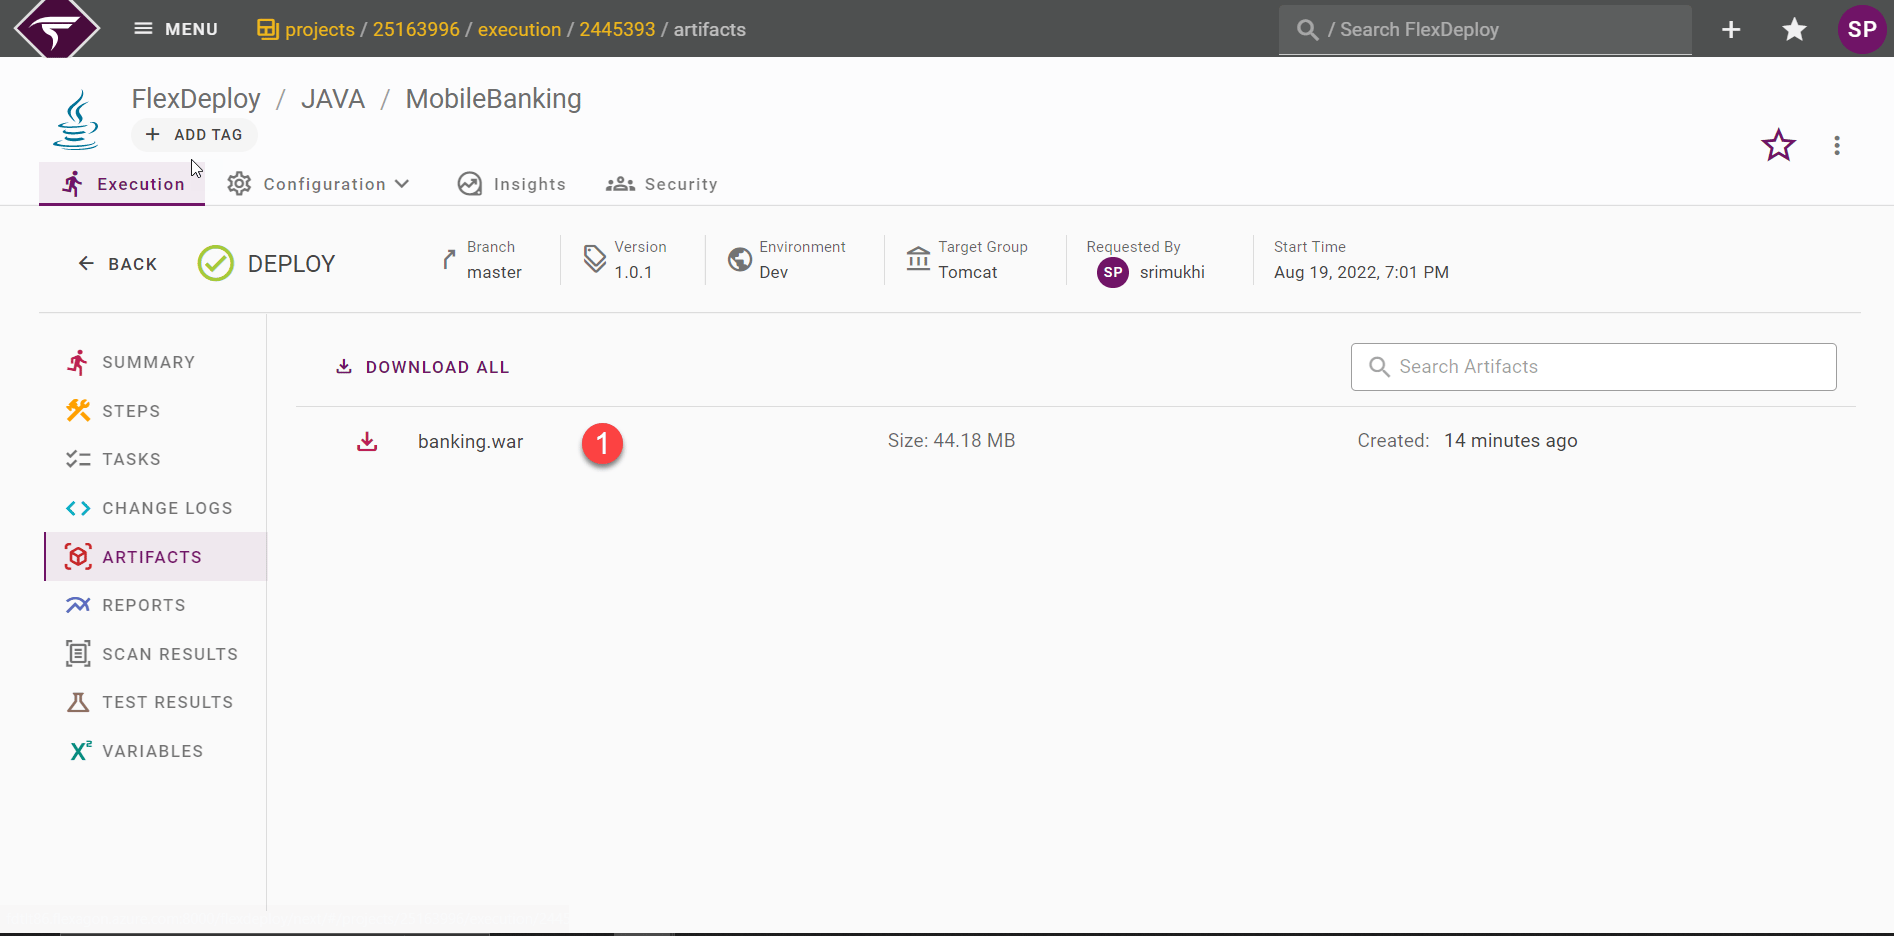
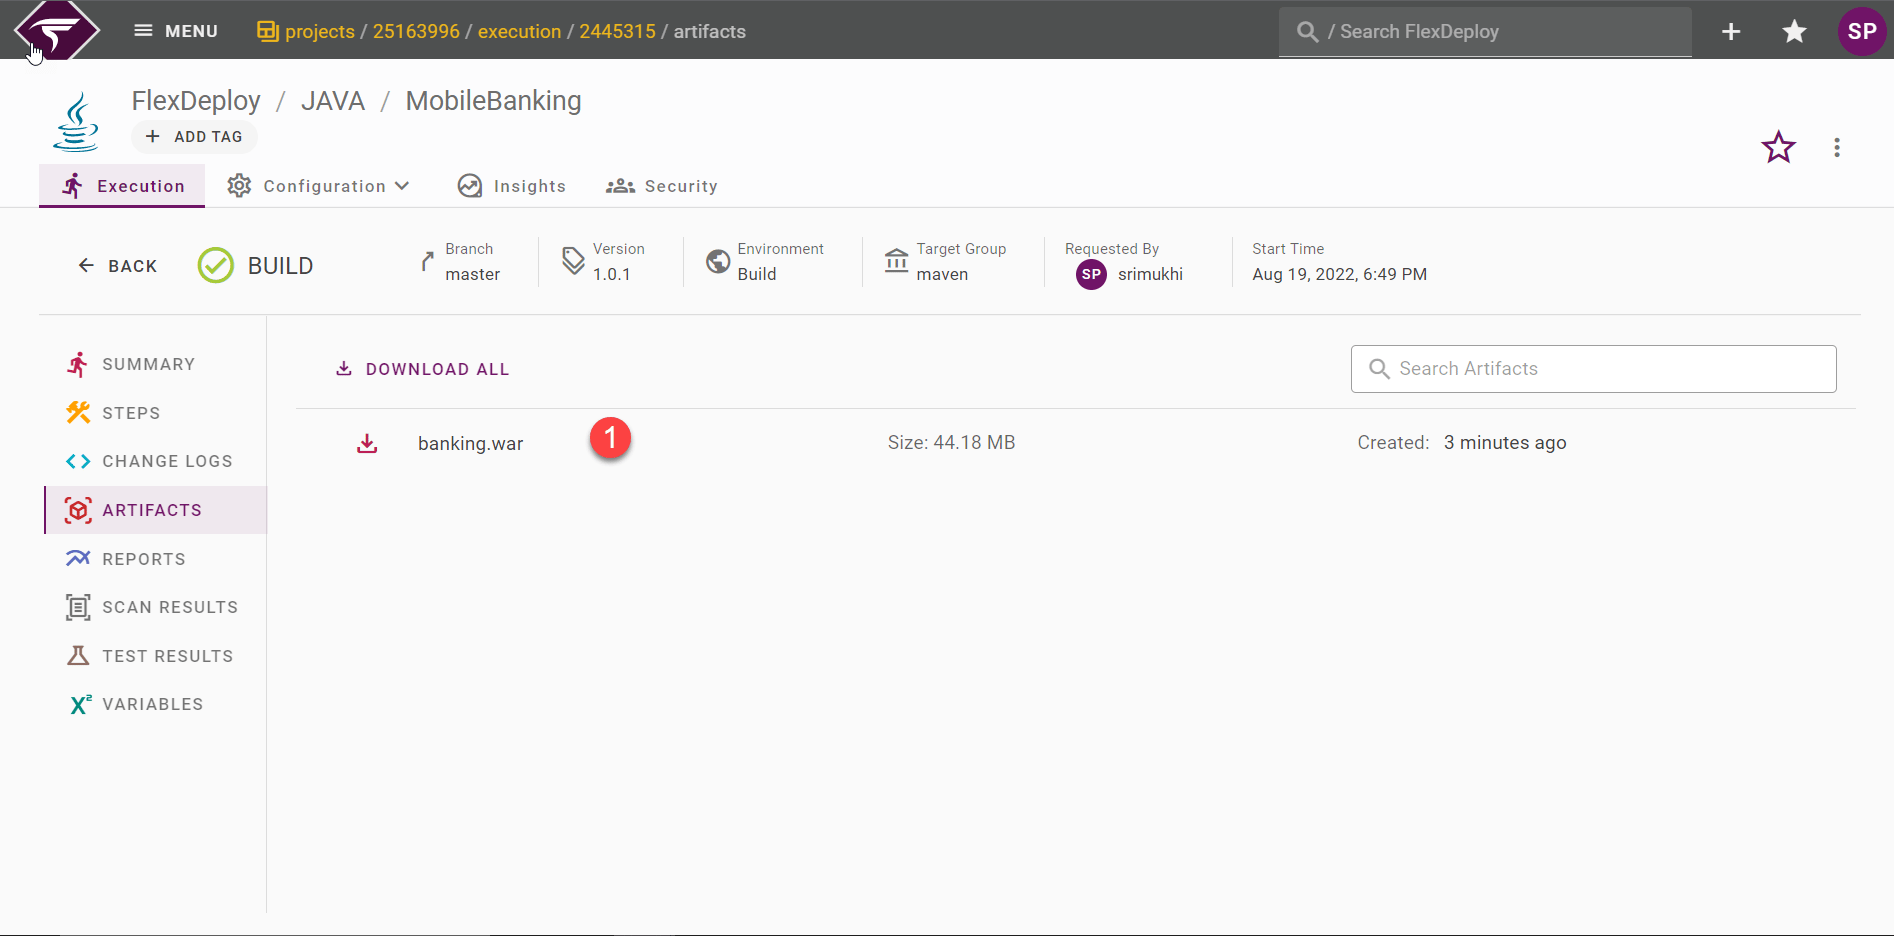
- the artifact, which can be downloaded
- the project and environment instance property values at the time of execution