
Requirements
See FlexDeploy System Requirements for details on software and hardware requirements.Upgrade Instructions
Make sure you have downloaded the latest version of FlexDeploy so it can be accessed during upgrade process.
Step 1. Stop the Tomcat server
LinuxStep 2. Download FlexDeploy software
Make sure that you have downloaded the latest version of FlexDeploy and unzip it into a temporary location (for example, /u01/software), so it can be accessed during the upgrade process. You can get download links from http://support.flexagon.com. Do not unzip the FlexDeploy distribution directly into the FLEXDEPLOY_HOME directory so we can prevent unwanted file(s) or folder(s) from being overwritten. Note that following instructions show unzip being done in separate folder than where you have stored downloaded file. LinuxStep 3. Backup current implementation
Backup the FlexDeploy schemas, Artifact Repository, plugins folder, and apache-tomcat-flexdeploy folder. In case you need to back out this FlexDeploy upgrade, you can use this backup data. It is highly recommended that a backup of the database be taken using standard tools like RMAN for Oracle. Another option would be to export the FD, FD_ADMIN, and FF schemas using data pump. Follow standard procedures for PostgreSQL for database backup.PostgreSQL database backup
Oracle database backup
File System backup
It is recommended that a backup of the artifact repository, plugins, and apache-tomcat-flexdeploy be taken in case a back-out is required. The location of the artifact repository can be identified by looking at value of -Dflexagon.fd.repository.root in setenvoverride.sh/setenv.sh file. This file will be in <FLEXDEPLOY_HOME>/apache-tomcat-flexdeploy/bin. Additionally look for flexagon.fd.application.root to determine server application directory for plugins backup. Standard file backup procedures can be followed. See the following example. Make sure to backup apache-tomcat-flexdeploy folder as that is going to be replaced during next steps. LinuxStep 4. Upgrade the FlexDeploy schemas
See details in Upgrading FlexDeploy Schemas.Step 5. Apply new version
You must have performed backup of apache-tomcat-flexdeploy folder by now as described in Step 3. If you have not done that, please go back to Step 3 for details. Note on additional extension jar files : If you had placed additional libraries inapache-tomcat-flexdeploy/lib folder or in the apache-tomcat-flexdeploy/libext folder, then you will need to copy them from backup folder into the new apache-tomcat-flexdeploy/libext folder. Note that all extension jars should be kept in libext folder. Examples might be JDBC driver (for Oracle drivers there is additional detail in the following step), CyberArk libraries etc. Note that Tomcat jar files should never be kept in libext folder.
- Copy shell/bat scripts from root folder of extracted FlexDeploy download zip
- Copy new Tomcat folder from extracted FlexDeploy download zip
- Copy additional jar files from backup taken in step 3
Step 6. Manage Tomcat context.xml
Copy the context.xml file from the backup folder into <FLEXDEPLOY_HOME>/apache-tomcat-flexdeploy/conf. Linux-
Download the Oracle JDBC 8 driver from https://www.oracle.com/database/technologies/appdev/jdbc-downloads.html. Click on the driver link matching your Oracle database version, and download the driver compatible with JDK8. For example,
ojdbc8-full.tar.gz. - Save new driver jars from downloaded jdbc driver to <FLEXDEPLOY_HOME>/apache-tomcat-flexdeploy/libext. You may have done this already as part of Step 4. Make sure that if you copied the jars for libext of your backup to your new libext, you don’t end up with multiple versions of the Oracle JDBC jars. If migrating from an old version of FlexDeploy, you may want to clean your libext folder and start with a new Oracle Database driver download.
Step 7. Manage Tomcat server.xml
Edit the<FLEXDEPLOY_HOME>/apache-tomcat-flexdeploy/conf/server.xml and modify the HTTP/HTTPS ports to match that of the original file which was backed up in step 3. If you had setup keystore details, copy that as well from backup file. DO NOT simply copy over the backup file as there may be other changes.
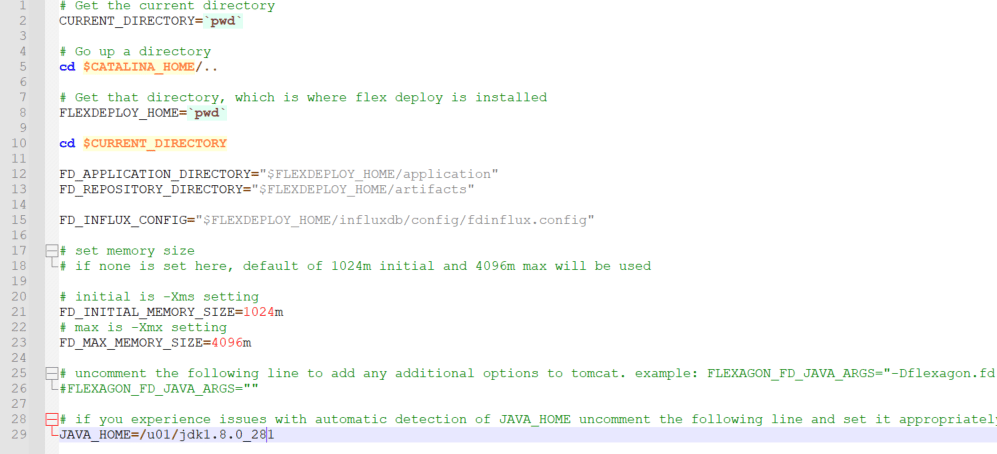
Step 8. Manage setenvoverride file
Changes should not be made in setenv.bat or setenv.sh
Step 9. Update Plugins
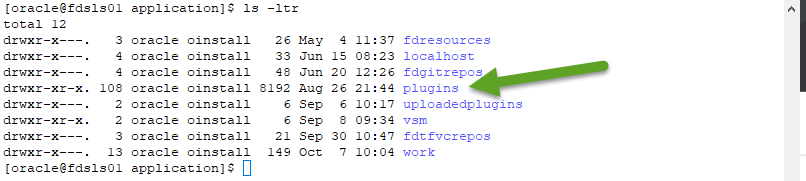
FlexDeploy download zip contains plugin jar files. You just need to copy plugin jars from download zip to plugins folder in your installation (details explained below), and all plugins will be automatically uploaded and activated on server startup.- Plugin files to copy are in /u01/software/upgradetempdir/application/plugins in the unzipped Tomcat Complete file.
-
Let’s determine where to copy files in your installation now. Locate flexagon.fd.install.root folder for your FlexDeploy installation, which is FlexDeploy application directory. This is specified on the Java command line. For example, -Dflexagon.fd.install.root=/u01/flexdeploy/application.
- You can look for this information in setenvoverride.bat or setenvoverride.sh file depending whether using Windows or Unix.
- Create plugins folder if it does not exist under flexagon.fd.install.root folder. Copy files from download zip (#1 above) to this plugins folder.
Step 10. Configure Influx Database
This is a required step that must be executed if this is the first time you are upgrading to a FlexDeploy 6.0 or higher version. Once upgraded, this step shouldn’t be executed again.
Linux:
https://dl.influxdata.com/influxdb/releases/v2.7.12/influxdb2-2.7.12_linux_amd64.tar.gz and https://dl.influxdata.com/influxdb/releases/influxdb2-client-2.7.5-linux-amd64.tar.gzWindows
https://dl.influxdata.com/influxdb/releases/v2.7.12/influxdb2-2.7.12-windows.zip and https://dl.influxdata.com/influxdb/releases/influxdb2-client-2.7.5-windows-amd64.zip Unzip / Untar the influx database software and client to the desired location. LinuxLinux
- bolt-path: from <FLEXDEPLOY_HOME>/influxdb/data/influxd.bolt to <FLEXDEPLOY_HOME>/application/vsm/data/influxd.bolt
- engine-path: from <FLEXDEPLOY_HOME>/influxdb/data/engine to <FLEXDEPLOY_HOME>/application/vsm/data/engine
- sqlite-path: <FLEXDEPLOY_HOME>/influxdb/data/influxd.sqlite to <FLEXDEPLOY_HOME>/application/vsm/data/influxd.sqlit
If running FlexDeploy 6.0 or higher, do not use startup.sh as this will not start the influx database. User StartFlexDeploy.sh or StartFlexDeploy.bat.
This setup is only executed the first time upgrading to FlexDeploy 6.0 or higher

Setup the config file for FlexDeploy to connect to influxdb.
Create the file <FLEXDEPLOY_HOME>/influxdb/config/fdinflux.config with the following contents, modifed appropriately for your install.Step 11. Verify Ulimit and adjust if needed (Linux only)
Check your open file limits. Influx opens a large number of files to complete its work.ulimit -Hn
will show the open file limit for the current user. Make sure you run it as the user who will be executing FlexDeploy and Influx.
If it is less that 65536, raise it or your influxdb log will likely grow very quickly and potentially run you out of disk space.
sudo vi /etc/security/limits.conf
where oracle is the user logged into the box to run FlexDeploy:
oracle soft nofile 16384
oracle hard nofile 65536
Step 12. Start tomcat
If running FlexDeploy 6.0 or higher, do not use startup.sh as this will not start the influx database. User StartFlexDeploy.sh or StartFlexDeploy.bat.